Film cameras
Contax Aria User manual
User manual for Contax Aria. 53 pages in English. Read the original PDF, download or print a copy without registration.
53 pagesEnglish2.5 MB PDF
Loading your manual…Open PDF directly
Document details
- Brand
- Contax
- Model / document
- Contax Aria
- Document type
- User manual
- Language
- English
- Pages
- 53
- File size
- 2.5 MB
- Category
- Film cameras
- Document date
- Not specified in catalog
Search available document text
Find a term, then jump to its page in the original PDF. Image-only pages may not be searchable; check the PDF for exact wording and diagrams.
Page 2 · Read text
- - To Section Two  To Section Three To Section Four - -

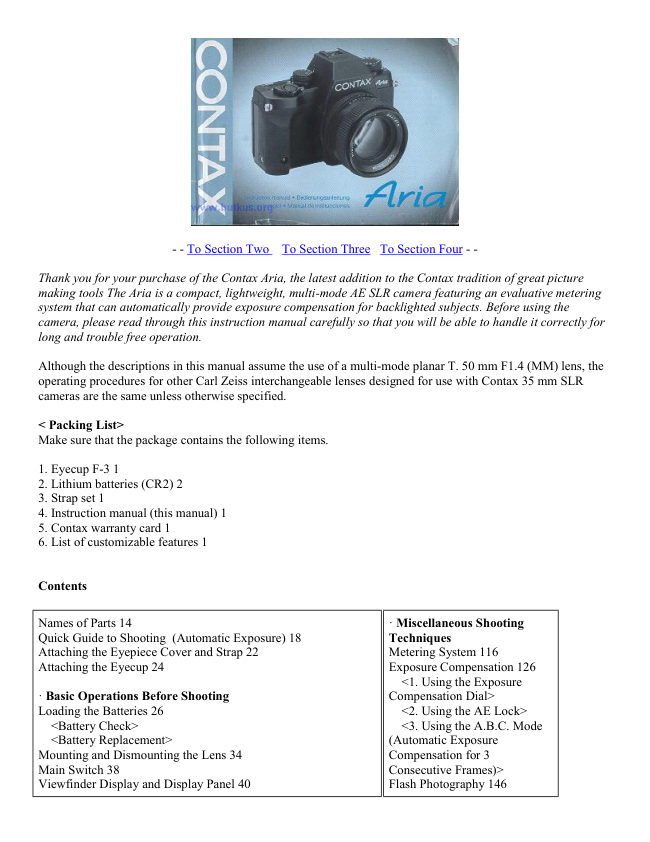
Thank you for your purchase of the Contax Aria, the latest addition to the Contax tradition of great picture
making tools The Aria is a compact, lightweight, multi-mode AE SLR camera featuring an evaluative metering
system that can automatically provide exposure compensation for backlighted subjects. Before using the
camera, please read through this instruction manual carefully so that you will be able to handle it correctly for
long and trouble free operation.

Although the descriptions in this manual assume the use of a multi-mode planar T. 50 mm F1.4 (MM) lens, the
operating procedures for other Carl Zeiss interchangeable lenses designed for use with Contax 35 mm SLR
cameras are the same unless otherwise specified.

< Packing List>
Make sure that the package contains the following items.

1. Eyecup F-3 1
2. Lithium batteries (CR2) 2
3. Strap set 1
4. Instruction manual (this manual) 1
5. Contax warranty card 1
6. List of customizable features 1


Contents


Names of Parts 14                                                             · Miscellaneous Shooting
Quick Guide to Shooting (Automatic Exposure) 18              Techniques
Attaching the Eyepiece Cover and Strap 22                      Metering System 116
Attaching the Eyecup 24                                     Exposure Compensation 126
                                                                 <1. Using the Exposure
· Basic Operations Before Shooting                          Compensation Dial>
Loading the Batteries 26                                           <2. Using the AE Lock>
  <Battery Check>                                               <3. Using the A.B.C. Mode
  <Battery Replacement>                                     (Automatic Exposure
Mounting and Dismounting the Lens 34                        Compensation for 3
Main Switch 38                                               Consecutive Frames)>
Viewfinder Display and Display Panel 40                         Flash Photography 146
View original page 2Page 4 · Read text
Names of Parts


(1) Exposure Compensation Dial (P. 126)

(2) A.B.C. Lever (P. 140)                          (11) Aperture Stop-down Button (P. 1 90)

(3) Display Panel (P. 50)                          (12) Accessory Shoe (P. 146)

(4) ISO Button/"UP" Button (P. 64)                (13) Dedicated Flash Contact

(5) Drive Mode Button/'DOWN" Button (P. 70)    (14) Direct X-contact

(6) Main Switch (P. 38)                           (15) Shutter Speed Dial (P. 76)

(7) Shutter Release                                (16) Exposure Mode Selector Lever

(8) Lens Release Button (P. 36)                    (17) Strap Lug (Attaching the Strap, P. 22)

(9) Release Socket (P. 186)                        (18) Lens Index (P. 34)
                                                  (19) Screen Release Claw (P. 230)
(10) Self-timer LED (P. 170)                      (20) Mount
View original page 4Page 5 · Read text
(21) Exposure Mode Lock Release Button         (30) Tripod Socket Battery Compartment,
 (P. 68)                                          Battery Compartment Cover (P. 26)

(22) Sync Terminal Camera Back Opening         (32) Shutter Curtain (P. 54)
Lever (P. 54)
                                                  (33) Film Mounting Spindle
(24) Camera Back Lock Release Button (P. 54)
                                                  (34) DX Contact
(25) Manual Rewind Button (P. 86)
                                                  (35) Film Chamber
(26) Film Check Window
                                                  (36) Data Back Contacts
(27) Eyecup (P 24)
                                                  (37) Spool
(28) Metering Mode Selector Lever (P 78)
                                                  (38) Camera Back Release Pin (P. 1 88)
(29) Viewfinder Eyepiece (P. 40)                 (39)Film Leader Mark (P. 56)
                                                  (40) Camera Back
View original page 5Page 6 · Read text
QUICK GUIDE


                           (Av) Aperture-priority auto exposure (P.
                             98)

                             (Tv) Shutter-speed-priority auto exposure
                                 (P. 98) (only when MM lens is used)

                               (P) Programmed auto exposure (P. 104)
                              (only when MM lens is used)


Set the exposure mode selector lever to "Av"


Set the exposure mode selector lever to "Tv" and set minimum lens
aperture (green)


Set the exposure mode selector lever to "P" and set minimum lens
aperture (green)
View original page 6Page 7 · Read text
Set the aperture


                             Set the shutter speed .


                            Focus, compose the picture and shoot.


Attaching the Eyepiece Cover and Strap:


First thread the strap through the eyepiece cover. Then attach the strap as shown in the illustration below. When
it is not possible to keep your eye at the viewfinder such as when using the self-timer or Cable Switch L, attach
the eyepiece cover to prevent stray light from entering through the eyepiece and adversely affecting exposure.
View original page 7Page 8 · Read text
Attaching the Eyecup

                                Attach the eyecup to the eyepiece as shown in the
                                        illustration.


                    BASIC OPERATIONS BEFORE SHOOTING

Loading the Batteries


Turn the main switch OFF before loading the batteries.

1 Open the battery compartment cover.

Use a coin or the like to turn the battery compartment cover in the direction of the arrow and open it.

2 Insert two 3 V lithium batteries (CR2) in the 2 battery compartment making sure that they are correctly
oriented.

· Note that not only does the camera not function it may also be damaged when the batteries are inserted
incorrectly.

3 Close the cover.


                               < Battery Replacement> You should replace the
                                               batteries when "       " appears on the display panel.
                                     Turn the main switch off, open the battery compartment
                                        cover and replace the batteries with new ones.


                                                     · Although you can take pictures even after "       "
                                           appears, you should replace the batteries as soon as
View original page 8Page 9 · Read text
< Battery Check> After the batteries are   possible. If the battery capacity drops below the
loaded, turn on the camera. The battery     effective limit, " battery* " on the display panel blinks
voltage is normal if " battery* " (battery    or goes out and the camera will no longer operate.
warning mark) does not appear in the
display panel.


· The voltage of some batteries may temporarily decrease causing "       " to appear when they are loaded in
the camera. If "       " appears soon after new batteries are loaded, turn the main switch off and then back on
again. If "       " does not appear again, you can use the batteries.

< Battery Precautions >

· Always replace the batteries with new ones of the same type. Do not mix different kinds of batteries or new
and old batteries. Always use two new batteries of the same type and brand.
· Generally, battery performance is reduced by cold temperatures. If you are shooting in cold weather, it is
advisable to keep the camera warm in a bag or an outfit for protection against cold. The battery reduced by low
temperatures will return to normal when you take pictures at an ordinary temperature.
· Before loading the batteries wipe both poles clean with a dry cloth because poor contact may result if they are
soiled with sweat or grease.
· If you are going on a long trip, bring new spare batteries with you.
· Do not throw used batteries into fire or try to change or disassemble them because it is dangerous.
· The 3V lithium battery (CR2) cannot be charged by any means.
· Battery should be kept away from children.


Mounting and Dismounting the Lens


                                      <Mounting the Lens> First, remove the camera
                                        body cap and the tens rear cap by fuming them
                                               counterclockwise. Then, align the red dot on the
                                                  lens with lens index on the camera, fit it in and
                                                  turn it clockwise until it locks with a click.

                                                             · If the lens is fitted on the camera body without
                                                 aligning it with the red dot, levers and other
                                         mechanisms will be exposed to excess force
                                                leading to damage or failure.
View original page 9Page 10 · Read text
<Dismounting the Lens >
                                                 While pressing the lens release button,
                                                            turn the lens counterclockwise as far as
                                                                                       it will go and pull it outward toward
                                                        you. After dismounting the lens from
                                                           the camera, protect the lens with the
                                                               rear cap and the camera with the body
                                                           cap.


· Do not touch the lens surface or inside the camera when attaching and detaching the lens.
· Avoid direct sunlight when changing the lens with film loaded in the camera.

Main Switch


The main switch turns the camera on or off and sets or releases the AE lock.

· The main switch should be locked at a click position when shooting to prevent it from being shifted by
mistake.

OFF: Red mark not visible When the red mark is not visible, the main switch is off, turning off the camera. If
you are not using the camera, turn off the main switch to prevent the shutter from being inadvertently set to on.

"ON" mark The camera is turned on.

"AEL" mark The AE lock is useful for shooting with backlighting or continuous shooting of a moving subject
at a fixed exposure.

· For details on the AE lock, see page 132.
View original page 10Page 11 · Read text
Viewfinder Display and Display
< Viewfinder Display> (For purposes of explanation, the viewfinder display is shown here with all information
displayed; not all items are displayed simultaneously under actual conditions of use.)


The display in the viewfinder will turn on in the following cases, then turn off automatically after 1 6 seconds.

(1)When the main switch is turned on.
(2) When the shutter release is depressed halfway while the main switch is on. If you switch a button, dial, etc.
while the display is on, it will remain on for another 16 seconds.

< Viewfinder Display> The viewfinder display is an information intensive finder which displays exposure
indicators such as aperture, shutter speed, exposure meter, exposure counter, etc.

(1) Flash Mark When using the TLA flash system

for taking flash pictures, the flash mark "    " will
appear as soon as the flash is fully charged. If your
subject is correctly exposed, it will blink two seconds
after the flash has fired (see pages 146 and 147).

(2) Shutter Speed The camera displays the shutter
speeds from 1/4000 sec. to 16 sec. "4000" means
1/4000 sec. and "125" means 1/125 sec., and "16"
means 16 sec. (see page 90).
View original page 11
Page 12 · Read text
(3) Aperture Value In the aperture-priority auto        (4) Metering Mark This mark indicates the
exposure (Av) and manual exposure (M) modes, the    metering mode and AE lock. Evaluative
aperture you have selected is displayed in the          metering mode:
viewfinder. In the shutter speed-priority (Tv) and
programmed auto exposure (P) modes, the displayed
aperture is the aperture selected by the camera in
accordance with the shutter speed you have selected
(see page 90).


(5) "M" Mark
This mark indicates that the exposure mode has been set to "M" or "X" (see pages 112 and 1 62).

(6) Exposure Compensation Mark
When the exposure compensation dial is set anywhere other than to "0", the "+" or "-" mark will blink (see page
126).

(7) Exposure Warning Mark "   " "   "
 In the auto exposure mode ("Av", "TV", or "P") the over   or   mark indicating deviation from the exposure
control range will blink.

(8) Exposure Meter
This meter indicates the following depending on exposure mode.
(1) Auto exposure modes ("TV", "Av", "P" modes)
Only displayed during evaluative metering when it shows how it differs from the center weighted average light
metering (see page 108).
(2) Manual exposure "M" or flash exposure "X"
Displays the difference between set exposure value and correct exposure (in selected exposure mode) (see page
112). (3) Bulb exposure Not displayed

(9) Exposure Counter The exposure counter shows the number of frames in position for exposure (a number
between 00 to 39 or E for any number of 40 and above). It also provides the following functions:

· Displays the remaining time while the self timer is operating (10 sec. to 00)
· Displays the operation order in the "A.B.C." mode (automatic exposure compensation for three consecutive
frames).
· Displays the end of the film.
View original page 12Page 13 · Read text
< Display Panel >


                                          (1) Exposure Counter/Film Speed
                                The exposure counter shows the number of frames in
                                         position for exposure. When the ISO button is pressed, it
                                 shows the film speed. When DX film is loaded in the
                                  camera and the film speed is set to DX, the DX value is
                                        displayed. It also has the following functions:


· Displays the remaining time while the self-timer is operating.
· Displays the time that has elapsed on bulb exposure.
· Displays the operation order in the A. B. C. mode.
· Displays set condition for custom functions.
· Displays the end of the film.

(2) ·ISO Indicator
This indicator will be displayed when the film speed setting is set or viewed.

(3) ·DX Mark
"DX" is always displayed for automatic DX code setting.
(4) Battery Warning Mark "       " Indicates the time to replace the batteries.

(5) Mode Mark Self-timer mode: "      " Single-frame shooting mode: "S" Continuous-frame shooting mode:

"C" Multiple-exposure mode: "

Loading the film

1. While pressing the lock release button, slide down the camera back opening lever and open the camera
back.


· When loading a film, never forget to remove the protective sheet inside the camera.
View original page 13Page 14 · Read text
· Take care not to touch or contaminate the DX contacts and data back contacts.

· Always load and unload films in subdued light.

2. Insert the film slant-wise into the film 2 chamber with its protruding end downwards.

Note on the shutter curtain: The shutter curtain is a precision part. Never touch it with your finger or strike
Ike it with film leader. When the film leader lies on the shutter curtain, in particular, never trip the shutter.


3. Pull out the film leader as far as the orange "l" mark and place it on the spool. Make sure that the film is
in contact with the shutter and does not curl outwards (see illustrations below).
· When too much of the film has been pulled out, rewind excess film back into the cassette.

4. Make sure the camera back is properly closed. When the camera back is closed, the film is automatically
advanced into position for the first shot and the exposure counter will show "01."
· When the exposure counter in the display blinks and does not move from "00" the film is not advancing
properly. Open the camera back and reload the film properly again


Setting the Film Speed


                                 The film speed can be set in two ways: automatic setting
                                       with DX-codes and manual setting.

                                 The film speed is automatically set when the main switch
                                                    is on and "DX" is displayed on the display panel. When
                                        using DX-coding film no adjustment is required. Be sure
                                          to set the film speed manually when "DX" is not
                                shown on the display.


· When set to "DX" (automatic speed setting mode)
View original page 14Page 16 · Read text
2. Press the "UP" button (ISO button) or 2 "DOWN"
                                                 button (Drive Mode button) so that "DX" or the
                                                     desired film speed setting appears on the display
                                                       panel.


                                        The film speed changes in 1/3 steps each time
                                                    the buttons are pressed.


DX - 6 - 8 - 10 - - 5000 - 6400 - (The The film speed changes continuously when the buttons are held down.)


3. Now turn main switch off to complete film speed setting.

· The film speed setting can also be completed by depressing the shutter release halfway or by leaving the
camera idle for 16 seconds.
· When the film speed setting is made, the exposure counter reading replaces the film speed value.
· The set film speed is stored until it is reset.

< Checking the Film Speed > Turn the main switch on and press the ISO button to display the film speed
setting on the display panel for about 16 seconds. "DX" and the film speed is displayed in DX mode.


                                                 Use this lever to change exposure modes.
                                                          Press in the exposure mode lock release
                                                      button and turn the exposure mode selector
                                                              lever to set the exposure mode index to
                                                          desired position.
View original page 16Page 17 · Read text
Drive Mode Button


The drive mode button allows you to select one of the following four modes: "S" single-frame shooting,

"C" continuous shooting mode, "      " self-timer shooting and "      " multiple exposure modes.

1. Turn the main switch on and hold down the drive mode button until the drive mode setting starts to blink
(about 2 seconds).
Take your finger off the button when the blinking starts.


2. Press the drive mode button (DOWN button) or the ISO button (UP button) to set the desired drive mode.

3. Press the shutter release halfway to light 3 the drive mode indication. This action completes the drive mode
setting.

· The drive mode can also be set by operating the main switch, changing exposure mode or waiting 8 seconds
until the blinking is replaced by steady lighting.


· In self timer mode      " or multiple exposure mode "        ", the respective indication blinks.


· When the main switch is set to OFF while "      " or "      " mode has been set, the mode is canceled. When
the main switch is turned on later, the camera starts in "S" drive mode.

"S" Single-frame shooting mode Each time the shutter release is depressed, one frame is exposed and the film is
advanced for the next shot, then stops.

"C" Continuous shooting mode While the shutter release is depressed, the camera continues to take pictures at a
maximum speed of about 3 frames a second. (The shooting speed differs with the shutter speed, film speed,
View original page 17
Page 18 · Read text
whether or not dates are imprinted between frames, battery condition, etc.)


"      " Self-timer shooting mode Use this mode for self-timer shooting. For details, see page 170.


"      " Multiple exposure shooting Use this mode for multiple exposure shooting. For details see page 164.


                                  Use the shutter speed dial to adjust the shutter speed. It can be
                                    used in the shutter-speed priority auto exposure ("TV") and
                                  manual exposure ("M") modes. Shutter speeds can be set in 1
                                        step increments from 4s (4 sec.) to 4000 (1/4000 sec.).

                                                                     · The shutter speed must be fixed at a click position when
                                          shooting.


                                       This camera provides three metering methods: "    " evaluative

                                    metering, "    " center weighted average light metering and "
                                    "spot metering. For information on the different metering methods,
                                  see page 116.


                                                             The FU-4 focusing screen
                                                                           (horizontal split-image
                                                                   spot/microprism type) comes
                                                                   with the camera as standard
                                                                 equipment. The subject is
                                                                  focused using the horizontal
                                                                          split-image spot in the center, on
                                                                   the microprism around it, and on
                                                                   the surrounding matte area.


< Horizontal Split Image Spots > While looking through the viewfinder, turn the distance ring until the upper
and lower segments of the image coincide. When the subject is not focused, the two segments will not coincide.
View original page 18Page 19 · Read text
< Microprism Collar and Matte Screen>
Turn the distance ring until the image on the microprism collar or matte screen appears sharp. If the subject is
not in sharp focus, the image on the microprism collar will appear grainy and that on the matte screen blurred.

· When using a slow lens or taking close-ups with a high magnification, focusing may be difficult. In such
cases, use the matte screen to focus.

· If you are nearsighted or farsighted and find focusing difficult, acquire an optional FL diopter lens. Eight types
are available from -5D to +3D that can be attached to the viewfinder eyepiece (see page 234).


Holding the Camera


                                     To take sharp pictures, the camera must be held steady.
                                            Blurred pictures are most often caused by camera shake.

                                      The camera can be held not only in the horizontal position,
                                         but also in the vertical position depending on the subject. In
                                       any case, find the camera holding techniques that suit you
                                               best. You can also use buildings and trees for support.


Rewinding the Film


After the last frame is exposed, the camera will automatically rewind the film. While the film is rewinding, the
counter reading decreases continuously. When rewinding completes, the motor will stop and "00" will blink on
the exposure counter. Check that the motor has stopped and that "00" blinks on the exposure counter before
opening the camera back and removing the film.

Use the manual rewind button to remove a film in mid-roll. Press the button using the front end of the supplied
strap stopper. (Do not use a needle or other pointed object)

· Remove the film in subdued lighting.
View original page 19Page 20 · Read text
· Be sure to unload the film after it has been rewound. After the film has been rewound, the camera will not
operate unless the camera back is once opened.

· Films that have been exposed should be developed as soon as possible.

· When more frames than the number normally provided by the film is shot, the last frame the film is shot, the
last frame may be cut in processing.


Shutter Speed and Aperture Indicators


                                       The shutter speed and the aperture are in the
                                               following manner.

                                                             · The shutter speed is indicated in the range of
                                         4000 (1/4000 sec.) to 16 (16 sec.). When the
                                             exposure mode is "Av" or "P", the shutter speed
                                             coupled with the aperture is shown in 1/2 steps.
                                                  In "TV" or "M" modes, the set value is displayed.
                                  When set to "X", the shutter speed of "125" is
                                                  displayed. When set to "B", the shutter speed is
                                                displayed as "blb."

                                                             · The aperture is indicated in 1/2 steps in the
                                                  aperture range of the used lens. However, when
                                                  the aperture is operated in less than 1/2 steps, an
                                             approximate value will be displayed. For
                                             example, an aperture of F3.3 is indicated as
                                                     "3.5".


Taking Pictures ~ Selecting the Exposure Mode

You can choose the following exposure modes depending on your shooting object and application.

Av: Aperture-priority Auto Exposure When choosing your desired aperture, the camera will automatically
select the shutter speed suited for it to provide correct exposure. This mode is useful for taking pictures by
utilizing the lens depth of field.

Tv: Shutter-speed-priority Auto Exposure (with MM type lenses only) When choosing your desired shutter
speed, the camera will automatically select the aperture suited for it to provide correct exposure. This mode is
useful for taking fast moving objects.
View original page 20Page 21 · Read text
P: Programmed Auto Exposure (with MM type lenses only) In this mode, the camera will automatically
select the optimum combination of aperture and shutter speed on a preset program in accordance with the
brightness of the object. Because it is not necessary to set exposure, you can concentrate on composing your
picture and choosing the best shooting moment.

M: Manual Exposure In this mode, you can choose the aperture and shutter speed as desired. Intentional over-
or underexposure is also easy.

X: Flash Photography This mode is for use with an ordinary flash unit having only an X-contact but no
dedicated flash linked contact. A shutter speed of 1/125 is used. For details, see "Taking Pictures Using X-
contact Flash Units Other than TLA Flash Unit" on page 162.

B: Bulb Exposure This mode can be used for taking night scenes or pictures of the sky at night which require
long exposure.

· If an AE lens is mounted on the camera, you cannot take pictures in the "Tv" or "P" mode. Even if it is been
set to the "Tv" or "P" mode, it will nevertheless operate in the "Av" mode.

· If no lens is mounted on the camera, the exposure mode will automatically switch to the "Av" mode even if it
has been set to the "Tv" or "P" mode.

Aperture-priority Auto Exposure [Av]


                                                   1. Set the exposure mode selector lever to 1 "Av."

                                                   2. Set the aperture and shoot.

                                When setting the aperture with the lens aperture ring,
                                               the camera will automatically set a suitable shutter
                                             speed. The set aperture and the automatically set
                                                 shutter speed light in the viewfinder. It does not
                                             matter where the shutter speed dial is set.


                                           Example 1: When a large aperture is used the depth of
                                                           field is small.

                                      Example 2: When a small aperture is used the
                                            depth of field is large.
View original page 21Page 22 · Read text
Shutter-speed-priority Auto Exposure [Tv] (with MM type lenses only)


                                                    1. Set the lens aperture to the minimum 1
                                          aperture (green) and set the exposure mode
                                                selector lever to "Tv."

                                      The minimum aperture on the aperture ring of MM
                                             type lenses is marked in green to show that you
                                            should set the lens to it in the programmed auto
                                           exposure and shutter speed- priority auto exposure
                                         modes.

                                                    2. Set the shutter speed and shoot When the
                                                  shutter speed is set by turning the shutter speed dial,
                                                the camera will automatically set the aperture suited
                                                  for it.


                                      Example 1: Fast shutter speed


                                      Example 2. Slow shutter speed


< Shutter Speed Shift and Warning in the Shutter-Speed-Priority Auto Exposure Mode >
View original page 22Page 23 · Read text
In the "Tv" m mode , the shutter speed you have selected cannot provide correct exposure because the aperture
suited for it is beyond the lens aperture range, the camera will then automatically shift the shutter speed to
always provide correct exposure. The shifted shutter speed is displayed. The controllable range of shutter
speeds on automatic setting is from 16 to 1/4000 seconds.

· When the correct shutter speed is faster than that you have set, the aperture will blink. Make sure the lens is set
at minimum aperture.
· When an MM type lens is set to an aperture that is not its minimum aperture, the camera will automatically
choose an appropriate aperture between the maximum aperture and the aperture being set.


Programmed [P] (with MM type lenses only)


                                                    1. Set the lens to its minimum aperture (in 1 green)
                                        and set the exposure mode selector lever to "P."

                                                    2. Compose your picture and shoot.
                                      The camera will automatically select the optimum
                                           combination of aperture and shutter speed to suit
                                           your subject, and the selected aperture and shutter
                                           speed will be displayed in the viewfinder.


< Programmed Auto Control Diagram> (with F1.4 lens, using F16 and ISO 100)

The combinations of aperture and shutter speed which can be set in the programmed auto exposure mode are
shown in the diagram.

· An aperture value between the set aperture and full opening is automatically set if the MM lens is not set to its
minimum aperture.


Precautions on Auto Exposure (Av, Tv, P)
View original page 23Related documents and language editions
From the M. Butkus Camera Manual Library. Original publisher and archive notices are retained.
Check the model and edition against your equipment.
PDF verified 2026-10-10.