Camera accessories
CONTAX Auto Bellows System User manual
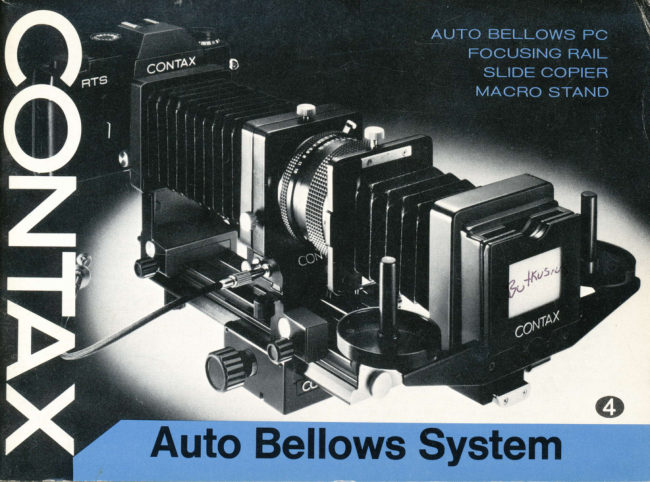
User manual for CONTAX Auto Bellows System. 55 pages in English. Read the original PDF, download or print a copy without registration.
55 pagesEnglish4.2 MB PDF

Loading your manual…Open PDF directly
Document details
- Brand
- Contax
- Model / document
- CONTAX Auto Bellows System
- Document type
- User manual
- Language
- English
- Pages
- 55
- File size
- 4.2 MB
- Category
- Camera accessories
- Document date
- Not specified in catalog
Search available document text
Find a term, then jump to its page in the original PDF. Image-only pages may not be searchable; check the PDF for exact wording and diagrams.
Page 3 · Read text
I                                          www.butkus.us


       The Auto Bellows System opens a completely new and        Besides the extension bellows, this Auto Bellows System
         fascinating world of close-up and macrophotography.  lt        includ'es such accessories as the Focusing Rail, Slide
         offers unlimited possibility in discovery of wonders  all       Copier and Macro Stand, all designed to extend the
       around you throuqh close-ups and/or larger-than-l  ife-       scope of close-up photography, macrophotography and
         size reproduction of objects, such as flowers, insects,       copying work. The use of the Focusing Rail in com-
        stamps and coins.                                            bination with the Auto Extension Bellows affords most
      The Auto Extension Bellows attachment has provision       convenient focusing. This focusing rail is indispensable
         for mounting the camera body on one end and the lens       in lateral tracking, when taking full advantage of the
     on the other and can be extended or retracted as        horizontal swing and shift provision of the bellows and
        required to obtain the desired object magnification.      when photographing with the aid of the Macro Stand.
      The Contax Auto Extension Bellows incorporates a       In addition to these accessories, the use of the Real
       number of unique features. Through use of the Shutter      Time Winder will certainly assure greater versatility  in
       Connector Cord and the cable release supplied as        close-up work. The automatic film drive wi ll eliminate
        standard accessories, the photographer can take full          all possiblity of shift in focus due to camera movement
       advantage of the camera's electromagnetic release       in the course of manual film wind, thus permitting
        system and automatic diaphragm action. In short, when       sequence shooting and assuring all the advantagep of
        the bellows attachment  is in use, light reading is taken       Real Time Photography.
        the moment the lens diaphragm stops down to the pre-
         selected aperture immediately prior to exposure. The
        photographer can therefore secure focus and compose
        the picture always at full aperture regardless of whether
         the bellows is extended or retracted.
       The Contax Auto Extension Bellows moreover features
        provision for horizontal swing and shift of the lens
       board. When the swing lock lever is released, the lens
        board can be tu:'ned through 360 degrees on its pivot,
        thus enabling the photographer to set the lens in reverse
         position without removing the lens board from the tradk
         or the lens from its mount.
       Another major advantage of this bellows attachment
          lies in the fact that the camera body can be rotated
       merely by loosening the camera mount thumbscrew,
         permitting one to position the camera for horizontal or
           vertical format shooting most readily.
View original page 3Page 4 · Read text
The Contax Auto Bellows System enfolds a wide variety    Zum automatischen Balgengerdtesystem von Contax
of accessories. Depending on the specific require.rnent,       gehort das verschiedenartigste Zubehor. Je nach be-the use of other Contax system accessories wi ll ensure      sonderem Erfordernis gewiihrleistet die Verwendung
greater versatility in close-up work. These accessories       anderer Contax-Systemzubehorteile eine gr<iBere Viel-
include the Real Time Winder affording automatic film         seitigkeit bei Nahaufnahmen.
drive, Interval Timer permitting automatic shutter      Zu diesem Zubehor gehort der Real Time Winder, der
tripping at preset interval, and Data Back for automatic      einen automatischen Filmtransport ermoglicht, der
recording of data within the picture area.                        Interva!lgeber, der ei ne automatische Auslosung des
This manual outlines the basic method of using the        Verschlusses nach einen vorgewiihlten Intervall erlaubt,
Auto Extension Bellows in combination with the Auto       und die Datenriickwand fi.ir automatische Aufzeichnung
Bellows System accessories. Refer to the illustrations      von Daten innerhalb der Bildfldche. Diese Bedienungs-
for selection of the accessories best suited to your       anleitung beschreibt die grundsiitzliche Verwendungs-
requirement.                                             weise des automatischen Balgengerdtes zusammen mit
                                            dem Zubehor fiir das automatische Balgengeriitesystem'
                                                         Wiihlen Sie das am besten lhren Anforderungen ent-
                                                          sprechende Zubehor anhand der Abbildungen.
View original page 4Page 6 · Read text
Auto Bellows + Focusing Rail              Auto Bellows * Focusing Rail
      + Slide Copier                             * Macro Stand
   ffi*              ffi   reory
 M  JL%    W
  l* ryi
View original page 6Page 7 · Read text
www.butkus.us

             Auto Bellows
                   1. Lens Front Retainer Thumbscrew
                  2. Lens Release Levdr
                  3. Lens Mount
                  4. Lens Board
                  5. Swing Lock Lever
                  6. Slide Copier Mount
                  7. Scale
                  8. Bellows
                  9. Shift Lock Knob
                10. Camera Board Control Knob
                11. Lens Board Control Knob
View original page 7Page 9 · Read text
www.butkus.us


Slide Copier                   Macro Stand
26. Mounted Slide Slot                36. Stage Glass Frame
27. Filmstrip Pressure Plate             37. Clamp28. Diffusion Plate                   38. MountingThumbscrew
29. Slide Copier Rail                  39. Stage Frame Setscrew
30. Lens Front Retainer Thumbscrew      40. Stage
31. Lens Front Retainer Plate
32. Filmstrip Tray
33. MountingThumbscrew
U.  Lock Knob
35. Scale


                                                        32

                                                        33
View original page 9Page 10 · Read text
l.T] After removing the lens, install the camera body on
    the Camera Mount by matching the red index dots on
    the mounts and giving the bocly a right turn until it locks
     into place.
  E tn case the camera body is not properly aligned or
   when it is to be set for vertical format shots, loosen the
    Camera Mount Thumbscrew and adjust the camera body
     accordingly.
  B to mount the lens, set the lens in the Lens Mount of
    the Auto BelloWs by matching its red index with that on
    the Lens Mount and give it a right turn until it locks
     into place.


16
View original page 10Page 11 · Read text
www.butkus.us


   How to Mount the Shutter Connector Cord
    and Cable Release
    Connect one end of the shutter connector cord to the
     release socket on the camera body and the other end to
   the connector cord socket on the lens board of the
    bellows attachment (see top photo). Mount the cable
     release securely into the cable release socket on the lens
    board (see bottom photo).
    With this simple step, the camera body and the bellows
    attachment are properly coupled, and you can now
    proceed to take close-up shots.


     Precautions on Use of the Cable Release
    In close-ups and macrophotography, the smallest pos-
     sible lens aperture is normally preselected. In order to
     obtain correct exposure, therefore, a considerably slow
     shutter speed must be used.
   When tripping.the shutter with the aid of the cable
     release, make sure the cable release is kept pushed in
     until the exposure is completed. For best results, make
        it a rule to pre-lock the cable release.


18
View original page 11Page 12 · Read text
How to use the Cable Release
                                                                                                      is  E ttre cable release is pre-locked when the lock ring
    turned to the left and the ring lifts up slightly.
  E When the cable release is pushed in in this state, the
    lock engages automatically, maintaining the release in
    pushed-in state.
  B To reset the cable release to its original state, push
    the lock ring.
    For close-up sequence, repeat steps E and B.
      Eil to release the cable release from the pre-locked state,
     give the lock ring a right turn.


20
View original page 12Page 13 · Read text
www.butkus.us


    Removing the Camera
   To remove the camera body from the Camera Mount,
    turn it to the left while pressing the lens release button
   on the camera body and lift  it out at the point where its
    red index aligns with the red dot on the Camera Mount.


    Removing the Lens
   To remove the lens from the Lens Board, turn the lens
     all the way to the left while pushing the Lens Release
     Lever.


22
View original page 13Page 14 · Read text
How to Use the Auto Bellows
Even without using other accessories, the Auto Bellows
attachment affords wide scope of use in close-up work
and macrophotography.
Before attempting to shoot your first series of close'ups,
acquaint yourself with the proper method of use by
actually manipulating the Auto Bellows without loading
film in your Gamera.
El First, determine the object field (ratio of magnifica-
tion) and extend the bellows accordingly by turning
either one'of the Control Knobs.
E While sighting through the viewfinder, approach your
subject to an approximate focusing range. Then, secure
focus by turning the control knobs and sliding the
camera forward or backward while maintaining the
preset extension of the bellows. To lock the bellows
after focusing, tighten the lock knobs. lf necessary,
rotate the focusing ring of the lens for critical focusing.
B To check the exposure, first stop down the lens by
pushing in the Diaphragm Stop-Down Button and giving
 it a 1 14 turn to the right.
View original page 14
Page 15 · Read text
www.butkus.us


EII After checking the exposure, release the Diaphragm
Stop-Down Button by turning  it to the left. When the
button is thus released, the subject can be viewed once
again at full aperture.
After checking the exposure, it is advisable to check the
focus once again.
El When the cable release is pushed in, the lens will
close down to the preset aperture and the shutter will
be tripped.
o When checking the exposure, have the Rubber Eye-
Cup over the viewfinder eyepiece to prevent exposure
inaccuracy due to backlight filtering in through the eye-
piece.
o In case exposure is to be made without sighting the
subject through the viewfinder, make it a rule to shield
off light entering into the viewfinder eyepiece.
. To determine the magnification ratio, take the scale
reading and refer to the table given on Page 40.
o When using the Auto Bellows, singly or in combina-
tion with the Slide Copier or Macro Stand, it is advisable
to mount  it on a tripod.
View original page 15
Page 16 · Read text
o How to Determine lmage Magnification
     (Subiect Distance)
    The image magnification can be determined by obtaining
    the difference between the scale readings indicated by
    the red dots on the Camera and Lens Boards and then
      referring to the magnification table given on Page 40.
     In case the lens board is mounted in reverse position,
     take the scale readings indicated by the red dot on the
    Camera Board and the white dot on the Lens Board.
        lf, when using the standard 50 mm lens, the r:ed dot on
    the lens board indicates 120 and that on the camera
    board shows a reading of 32, the difference between
     these readings will be 12O - 32 = 88. The magnif ication     table shows that the image magnification for 88  is
     approximately 2X.
   o Diaphragm Stop-Down Button
   The Diaphragm Stop-Down Button on the side of the
     lens board is used in case the exposure is to be checked
     or the depth of field previewed.
    This button locks when pushed in and given 114 of a
     turn to the right.


28
View original page 16Page 17 · Read text
www.butkus.us


  When using the standard or wide-angle lens, better
     overall effect can be obtained when the lens is used in
    reverse position, particularly in case a high ratio of
    reproduction  is desired.
  E Loosen the bellows frame thumbscrew and detach the
    bellows frame from the lens board. Then, shift the
    swing lock lever in the direction of the camera body and
    rotate the lens board on its pivot until the lens is posi-
    tioned in reverse.
   p Set the bellows frame over the lens front frame,
    seeing to it that the front frame is positioned properly.
    Then, tighten the lens front frame retainer thumbscrew
     securely.
    El These simple steps are all that is neededTor setting
    the lens in reverse position. In this state, the connector
    cord and cable release will be positioned in reverse.
  @ For even higher ratio of reproduction, manipulate the
    lens board control knob and remove the lens board
    assembly from the track; then, reset the lens board
    assembly in reverse position.


30
View original page 17Page 18 · Read text
Auto Bellows + Focusing Rail
   The use of the Focusing Rail in combination with the
   Auto Bellows affords most versatile close-up work and
    macrophotograPhY.
   To mount the Focusing Rail, fit the studs of the Bellows
   clamp Plate into the sockets on the front end of the
    track of the Auto Bellows and fix the rail securely by
    tightening the Mounting Thumbscrew. The method of
    oferation of the Auto Bellows remains the same as in
    the case of use of the bellows attachment without the
    Focusing Rail.
     .  Aftei presetting the bellows extension according to
    the desired image magnification, secure focus by turning
    the Focusing Knob of the Focusing Rail'
   o The Auto Bellows attachment features two tripod
                                                                         a     sockets, while the Focusing Rail permits mounting on
    standard or heavY-duty triPod.


32
View original page 18Page 19 · Read text
www.butkus.us


Especially when the object is positioned diagonally with
the film plane, precise focus can be obtained by taking
.advantage of the provision of lens board movement of
the extension bellows attachment.
For horizontal swing, shift the swing lock lever in the
direction of the camera body. For horizontal  shift,
loosen the shift lock knob. Left photo was taken by
taking advantage of the lens board movement provision.
As can be observed, the range of focus covers the entire
                                                                   aobject area - an effect which cannot be obtained with
fixed position lens board.                                             3
                                                                                                                                              _$s
                                               d
View original page 19Page 20 · Read text
The illustration shows the extent over which focus  is
    secured in relation with the lens board movement.
    In lase of an object (AB) set diagonally with the film
    plane, the angle produced by setting the lens board at a
    right angle with the optical axis at the prefocused point
   and extending the line to converge with the point where
   the line extended from A and B and the film plane
    converges should be taken as the standard of lens swing
   and the lens board must be shifted accordingly. The
    swing effect can be determined by observing through the
    viewfinder. Also, the lens can be shifted as a means of
    trimming. Even when the lens board movement pro-
    vision is utilized, the camera body can be readily rotated
    for either horizontal or vertical format shooting.


36
View original page 20Page 21 · Read text
www.butkus.us


   With the aid of the Focusing Rail, the Auto Bellows can
   be tracked laterally for a series of close-up shots of
    subjects which cannot possibly be covef-ed by a single
    exposure.
  E While keeping the Auto Bellows mounted on a tripod,
    loosen the Bellows Clamp Screw and remove the Bellows
   Clamp Plate.
   p After loosening the Mounting Thumbscrew, swing the
    bellows attachment 90 degrees to the right or  left.
   When set properly, tighten the Mounting Thumbscrew
    securely.
  o Two mounting sockets are provided on the base of
   the mounting on the Focusing Rail in two modes,
    namely, at the camera board end or at the center of the
    track.
                                                           the  B Wfrite sighting through the viewfinder, turn
    Focusing Knob to track the Auto Bellows laterally for
     precise picture composition.


38
View original page 21Page 23 · Read text
www.butkus.us

   By attaching the Slide Copier to the Auto Bellows,
     color transparencies or B&W negatives, in either mount-
   ed or filmstrip form, can be copied or reversed most
      readily.
    The use of the Macro Stand, on the other hand, affords
     convenier rt  macnrphotography of  insects, stamps,
    mechanical components or other small objects by main-
     taining the Auto Bellows upright.
   The stage of the Macro Stand is designed to provide
     surface ref lection of 18% assuring an ideal condition for
     close-up exposure.


42
View original page 23Page 24 · Read text
Auto Bellows + Focusing Rail + Slide Copier
To copy or reverse mounted slides or filmstrips, use the
Slide Copier in concert with the Auto Bellows and
Focusing Rail.
The Slide Copier attaches directly to the Auto Bellows
and, therefore, permits use even withotit the Focusing
Rail.
fl After properly attaching the Focusing Rail, mount
the camera body on the Auto Bellows.
E f ix the Slide Copier to the Slide Copier Mount of the
Auto Bellows by tightening the Mounting Thumbscrew.
Then, mount the lens on the Lens Board of the Auto
Bellows.
B Extend the bellows of the Slide Copier, fit the lens
front into the seat on the Lens Front Retainer Plate and
fix it securely by tightening the Lens Front Retainer
Thumbscrew. The Lens Front Retainer Plate features
a pair of magnets which reset the bellows to the original
position in one action when not in use.
View original page 24
Page 25 · Read text
www.butkus.us


    E! Set the mounted slide or filmstrip in the Slide Copier.
    Mounted Slides
    Place the mounted slide in the Mounted Slide Holder.
   Make sure the image is upright and unreversed when
    viewed from the camera side.
     Filmstrip
    Set the filmstrip in the Filmstrip Tray and clip it proper-
    ly with the aid of the Filmstrip Pressure Plate (see
      illustrat ion  )  .
  o For trimming the picture, slide the copier frame
     laterally or vertically. This frame features a clickstop
     at the normal position.
  E Direct the Slide Copier against light. Natural sunlight
    or artificial light can be used for slide copying.
    In case of artificial light, use a photoflood lamp or
     electronic flash.
  6 Secure focus by turning the control knobs of the
   Auto Bellows and extending or retracting the bellows.
  E Check the exposure and trip the shutter. Exposure
    compensation  is unnecessary in slide copying.


46
View original page 25Related documents and language editions
From the M. Butkus archive. Original publisher and archive notices are retained.
Check the model and edition against your equipment.
PDF verified 2026-10-10.