Film cameras
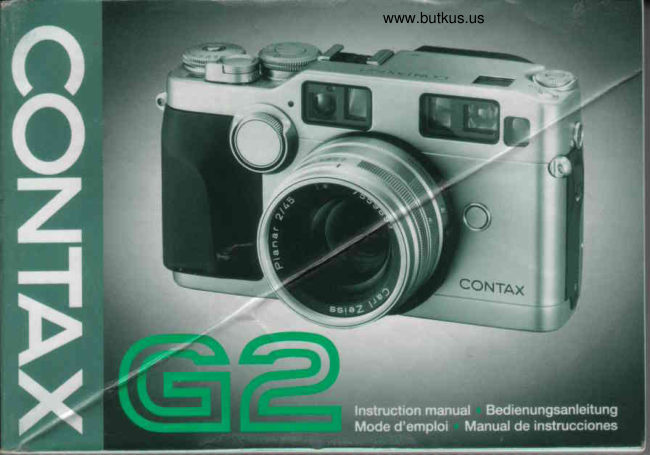
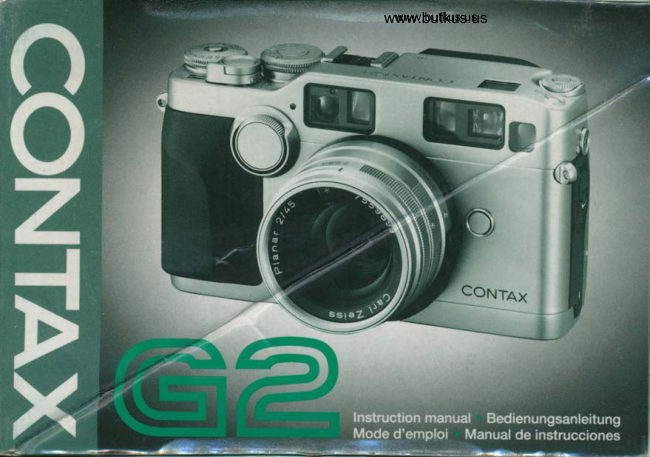
Contax G2 User manual
User manual for Contax G2. 110 pages in English. Read the original PDF, download or print a copy without registration.
110 pagesEnglish7.0 MB PDF
Loading your manual…Open PDF directly
Document details
- Brand
- Contax
- Model / document
- Contax G2
- Document type
- User manual
- Language
- English
- Pages
- 110
- File size
- 7.0 MB
- Category
- Film cameras
- Document date
- Not specified in catalog
Search available document text
Find a term, then jump to its page in the original PDF. Image-only pages may not be searchable; check the PDF for exact wording and diagrams.
Page 2 · Read text
Thank you for your purchase of a Contax G2.        HerzlichenGl0ckwunschzum Kauf einer Contax
   Based on the Contax philosophy of producing a     G2. Diese35mm-SchliherschluB-Kameramit   "carre?a          which works", this 35mm AF range        Autofokus und Realbildsuchervereintdie Vorteile
                                                 verschiedener                                                                    fotograf                                                                         ischerWelten                                                                                   auf bislang                        plane       camera                 with                      focal                                shutter                                                 is   -fnder                                                       einzigartige                                                    Weise                                                                                                    - handlich,                                                                                      direktund                                                                          doch   e\mely           easy                   to use,                      which                                      is                            a shade                                            different                                               dezentwie eine klassischeMeBsucherkamera,   from\in  gle-lens-reflex camera.                                                dabei komfortabelund reaktionsschnellwie   This camb*q[eatu res aperture-priority auto-         modernste Kompaktkameras, ohne den Fotografen
   exposure usrrlgqslusl stop-down aperture          zu entmrindigen, und dank der hervonagenden
   metering,a high-dpaedfocal-planeshutter          Cad-Zeiss-P-Wechselobjektive mit den Freiheiten
   (speeds up to 1/6000ttc,ond), high-speed           einer System-Kamera.
   continuous exposures(up to about 4 frameV        Die Kamera bietet Arbeitsblenden-Zeitautomatik.
   second),and many other advanced features,        einen SchlitzverschluB mit Zeiten bis 1/6000 s,
   within a compact body. Further,bi aOOingtne      Reihenaufnahmen mit bis zu etwa 4 B/s sowie
   optional multi-functiontype "Contax Data back      zaheinemIreichekompaktenweitere,Gehiiuse.fortschrittlicheMit derFualsnktionenZubehori n
  GD-2" you can perform intervalphotograp\.          lieferbaren Multifunktionsr0ckwand GD-2 sind  and add exposure data and dates to                                                                                               \    Intervallaufnahmen ebenso m6glich wie die   photographs.                                                      \ufzeichnung   von Belichtungsdaten und die
   Before using the camera, please read this in-         Eihbelichtung des Datums.
   struction manual carefullyto operate it correcily.     Bitte l9!eQ Sie diese Anteitung sorgfdttig durch,
                                                      gem!! Sre deq voilen Nutzen aus den vietf6ttigen
   This manual explains the operating procedures for this       Mdglichkeiten)gerContax G2 ziehen k6nnen.    excellent Contax G2 camera with G-mount Planar Tr45
  mm F2 lens. However, you can also use  it in the same       Die Bedienungwird in\ser  Anleitunqmit einemplanar
   way as described in this manual, unless otherwise        T-45mm t/2 mit G-Bajonelerlldrt. Faljskerneanoeren
    stated, for the integrated use of the camera with other       Erlduterungengegebenweroeh'kEnndiese Kamera
   G-mount Carl Zeiss T- interchangeable lenses.             jedoch auch auf gleicheWeise mrttrrderen Carl_Zeiss_
   o   lf you use the Hologon 16mm F8 lens, be sure to read     Wechselobjektivenmit G-Bajonettverv..arrd€rtwerden.                 "Using      the section                          the Hologon 16mm F8 lens" in this      o Wenn Sie ein Hologon 1:8/16mm venrentro,
     manual (p. 196), as wellas the instructions                  verfahrenSie bitte wie im Kapitel ,,Aufnahmci\iit
o    accompanying the lens.                         dem Hologon 1:8/16 mm" auf S. 'l g7 sowie in de, "
z                                                             Anleitung des Objektivs beschrieben.
View original page 2Page 4 · Read text
www.butkus.us


Namesof Parts                          ................8 ManualExposure                      .........124
r i3asrc*E'ps ...........:.:...:.: ::....::::...: :..'.'.'............t2    BurbExpoiure[B] ...::.....::..::::..:..::::.::.:..::........12
o Basic Operation Before Shooting            ExposureCompensation...........        ....128
Loadingthe Batteries..............         ........18    <1.Usingthe ExposureCompensationDial>......128
  <BatteryCheck>                            <2.Usingthe AE Lock>            ..............134
  <Battery Replacement>                        <3.UsingtheA.B.C.Mode(AutomaticExposure
  <Battery Precautions>                          Comoensationfor 3 ConsecutiveFrames)>...138
Mountingand Dismountingthe Lens ................26 FlashPhotography                     .......146
MainSwitch...............        .-....................34MultipleExposure                      ........164
Displayin the VieMinder........          .........36  Usingthe Self-timer..............         .........170
DisplayPanel/ExposureCounter.......................42   C
DiopterAdjustment                        ........46  CustomFunctions                      .......172
Loadingthe Film                         ............50    <Listof the CustomFunctions>................j74
Settingand Checkingthe FilmSpeed...............54   <Settingthe CustomFunctions>.................188
ShutterSpeedDial...........         ................62 ReleaseSockeVDetachingthe CameraBack ....192
DriveModeDial ...........         ....................64MeteringSystem                       ..........194
Focusmode Dial/FocusLock Button................68 Usingthe Hologon16 mm FB .........................196
Holdingthe Camera                       .......70  Depthof Field                        ..............208
Rewindingthe Film                        .......72  CameraCare and Precautions           ......212
o Focusing the Lens                         DedicatedAccessories(Optional)...................218
Relationshipbetween Drive Modes                Soecifications.............        ...................254
and FocusMode                         ............78
Focusingon Auto Focus            ..................86
Focusingon ManualFocus            ...........100
Remarkson the Auto FocusSystem...............106
(                          Techniqu i
Selectingthe ExposureMode              .......116
Aperture-priorityAuto Exposure.....................120
View original page 4
Page 6 · Read text
www.butkus.us


      O CameraBack ReleasePin
         (D Spool
          (3 Focus Lock Button
      O FocusMode Dial
          €) ShutterCurtain
      O ViewfinderEyepiece
      O DiopterAdjuster
         (D fitm MountingSpindle
      O Sync Terminal
      O CameraBack ReleaseKnob
         (D ManualRewindButton
      O fitm Check Window
      O CameraBack
      O BatteryCompaftmenVCover
      O Data back Contacts
         (D Tripod Socket
      O DX Contacts
      O rltm Chamber
View original page 6Page 7 · Read text
Basic Steps/Kurzsnleitung
  1


      Load the batteries            Mount the lens            Tum on the main switch
       (see page 18).                 (see page 26).                  (see page 34).

        Batterien einlegen               Obiektiv ansetzen            Kamera einschalten
       (sieheSeite19).                 (sieheSeite 26).                 (sieheSeite 35).

      Chargez les piles             Montez I'objectif              Enclenchez le
       (reportez-vousa la page 19).      (reportez-vousa b page 27).     commutateur principal
                                                                     (reportez-vousa la page 35).
        Instale las pilas              Monte elobjetivo
       (veala p6gina19).              (vea la pAgina2T).             Conecte el intemrptor
                                                                            principal (vea la p6gina 35).


7 2
View original page 7Page 8 · Read text
www.butkus.us
Etapes de base/Pasos bdsicos


                   "DX"         Load DX film, pullthe tip as far as the orange "l" mark,Set the film speed to
(see page 56).                      place it on the spool and close the cover (see page 50).
Filmempfindlichkeit auf           DX-Film einlegen, Lasche bis zur orangefarbenen                                                                    "l""DX"                                                           liber die Aufwickelspule ziehen und die      einstellen                   Markierung
(sieheSeite 56).                   Riickwand schlie8en (sieheSeite 51).
R6glez la sensibilit6 du film        Ghargez un film DX, sortez son amorce iusqu'A la
 i  la position "DX"               marque orange "l" sur la bobine et refermez le couvercle
(reportez-vousi la page 57).         (reportez-vousi la page 51).
Aiuste la sensibilidad de la        Gargue pelicula DX, tire de la punta hasta la marca "1" de
pelicula a "DX'                      color naranja, p6ngala en el carrete y cierre la cubiefta
(vea la p6gina 57).                 (veala pagina51).

                                                                           1 3
View original page 8Page 9 · Read text
www.butkus.us


                             "SAF'and the drive mode dialto       Set the shutter speed dial      Set the focus-mode dial to
       "S" (see pages 68, 64).                                                 to "AUTO" (see page 62).
                                                 "SAF', den             Zeitenring auf "AUTO"       Stellen Sie den AF-Betriebsartenknopf auf
                               "S" (sieheSeite 69, 65).                  drehen (sieheSeite 63).       Filmtransportknopf auf
       Mettez le s6lecteur de mode de mise au point sur "SAP'et  le     R6glez le cadran de vitesse
                                                     "S"                  d'obturation sur'AUTO"       s6lecteur du mode d'avancement du film sur
       (reportez-vousaux pages 69, 66).                                  (reportez-vousa h page 63).
                                      "SAF" y el dialdel          Aiuste el dialde velocidad       Aiuste eldialdel modo de enfoque en
                            "S" (vea las p6ginas69,67).                   del obturador a "AUTO"     modo motorizado en
                                                                     (vea la p6gina 63).


T4
View original page 9Page 10 · Read text
www.butkus.us

              **"[i                                                              (


Set your desired aperture      Aim the focusing frame at your subiect, and depress the
(seepage 120).                  shutter release halfway. The focusing mark turns on. Press
                                the shutter release and shoot (see page 88).
Geeignete Blende wdhlen                           AF-MeBfeld auf Hauptobjekt legen und Ausldser halb(sieheSeite121).
                                 eindrticken. Ausliisen, wenn Einstellentfernung durch
R6glez I'ouverture d6sir6e      Entfernungsindex markiert ist (sieheSeite 89).
(reportez-vousd la page 121).     Dirigez le cadre de mise au point vers le sujet et enfoncez i
                                moiti6le d6clencheur.Le repdre de mise au point s'allume.Ajuste la abertura que                            Enfoncez le d6clencheur et prenez la photodesee (veala pagina121).                               (reportez-vousd la page 89).
                                     Dirija el marco de enfoque al motivo, y presione a medias el
                                disparador. Se encenderd la marca de enfoque. Presione el
                              disparador y dispare (vea la pagina89).
                                                                                    1 5
View original page 10Page 11 · Read text
Attach the Strap (standardaccessory)
Attachthe strapas shownin the illustration.
                o
Anbringen des Riemens
(Standardzubehdr)
BefestigenSiedenTrageriemenwie in der
Abbildunggezeigt
                o
Fixation de la sangle
(Accessoirestandard)
Fixezla sanglede la manidreindiqu6edans
I'illustration.
                o
Instale la conea (accesorioestandar)
Instalela correacomose muestraen la
ilustraci6n.


                                                                                                                -  I
View original page 11Page 12 · Read text
www.butkus.us


                    "OFF"Be sure the main switch is                            before        Q Load two new 3V lithium batteries (type
replacingbatteries.                                                  l-  CR2l in the compartment with polarities
                                              aligned as shown.
1  Use a coin to turn the battery               o  lf battery polaritiesare not alignedcorrectly, I  compartment cover as shown and remove                                                 the camerawill not operateand may bethe cover.                                         damaged.

                               Q Replace the cover screw.
                                                                                             L,
View original page 12Page 14 · Read text
<Battery Precautions>                          <Batteriehinweise>
   o Alwayi replacethe batterieswith new ones of     o VenruendenSie immer nur zwei neue Batterien
     the sime type. Do not mix differentkinds of         gleichenTyps und gleicherMarke.MischenSie
     batteriesor new and old batteries. Always use       leine verschiedenenSorten oder neuen und
     two new batteriesof the same type and brand'        alte.
     r Generally,battery performanceis reduced by     o Wenn die BatterienliingereZeit niedrigen
     cold temperatures. lf you are shooting in cold       Temperaturen(unter0') ausgesetztwird, ldBt
     weather,it is advisableto keep the camera           ihre Leistungnach. Bei KdltebewahrenSie die
    warm in a bag or an outfit for protection          Kameraam bestenunterder Kleidungauf,
     againstcold. The battery reduced by low          solangeSie nicht Fotografieren'Die
     temperatureswill returnto normal when you          Batterieleistungnormalisiertsich wieder nach
     take picturesat an ordinarytemperature'           Enviirmung auf normaleTemperaturen.
     r Befoie loadingthe batterieswipe both poles      o Wenn die Batteriepoleverschmutztoder
     clean with a dry cloth becausepoor contact          oxidiertsind, kann es Kontaktschwierigkeiten
    may result if they are soiled with sweat or          geben.WischenSie die Polevor dem Einlegen
     grease.                                          mit einemtrockenenTuch ab.
   o  lf you are going on a long trip, bring new spare    a NehmenSie Ersatzbatterienmit, wenn Sie
      batterieswith You.                              ldngerunterwegssein werden.
      I Do not throw used batteriesinto fire or try to      o Batteriensind gefdhrlichund kdnnen
     changeor disassemblethem becauseit is           explodieren.LeereBatteriendurfennicht ins                                               Feuergeworfengeladen,kurzgeschlossen     dangerous.
   o The 3V lithium battery (CR2)cannotbe             oder auseinandergenommenwerden.
     chargedbY anYmeans.                      o Lithium-Batteriensind nicht wiederaufladbar'
   o Batteryshould be kept away from children'       o HaltenSie die BatterienauBerhalbder                                                 Reichweitevon Kindern.

24
View original page 14Page 16 · Read text
o  lf the lens is not properlymounted,or the red                                       Lens mount ring
     dot is not correctlyalignedwith the lens index,                                                Balonetting
         it will not lock with a click. In this case,remove                            Bague de la baiionnette
     the lensfrom the cameraonce. Then,turn the                                      de la montura
     lens mount ring (shadedportion)and the lens                                                 delobietivo
      grip ring in the directionof the arrowfully,as
      illustrated,to mountthe lens on the camera
     agaln.
                                                       Lens gnp nng
                                                                            Griffring
                                                    Bague de montage de l'obiectif
                                                                         Anillo de apoyo delobietivo


28
View original page 16Page 17 · Read text
www.butkus.us


   <Dismounting the Lens>                          Lens gip ring
  When holdingthe lensgrip ring and pressingin            Gritfring
   the middleof the lens releasebutton,turn the          Bague de montage de fobier;tif
   lens counterclockwiseas far as it will go and pull        Anilb de apoyo delobietivo
      it out toward you. After dismountingthe lens
   from the camera, protect the lens with the lens   cap and rearcap, and the camerawith the body               ffi
   cap.
   o Do not touch the lens surfaceand camera
      inside,contactsand so on with your fingers
    when mountingand dismountingthe lens.


                                                                                           This fjartdoes not rotate
                                                                                           Feststehendes lel
                                                                                         Cette paftie ne toume Bs
                                                                                             Esta r€,rte no gim


30                                                                                                                       -
View original page 17Page 18 · Read text
o Avoid direct sunlightor other brightlightwhen    o VermeidenSie beim Ansetzendes Objektivs
    changingthe lenswith film loadedin the             mit geladenerKameradirektesSonnenlicht                                                   odei andereshellesLicht' SetzenSie die    camera.
    Do not leavethe camera in direct sunlightfor       Kameranicht ldngereZei'tohne Objektivdem
    extendedperiodsof time when the lens is           direktenSonnenlichtaus.
     detachedfrom the camera.                   o FassenSie ein Hologon1:8i16mm zum
   o Alwaysmount and dismountthe Hologon          Ansetzenbzw. Abnehmenstets an den
   16mm FB lensby holdingthe lensguard'           graviertenFassungsteilen.
   When the lens is dismountedfrom the camera,      Bei einemabgenommenenObjektivdndertsich
    the aperturering operationrangewill change,       der Drehbereichdes Blendenrings.Dies ist
    but this is not a malfunction.The rangewill          normal.Sobald das Objektivangesetztist, ist
    returnto normalwhenthe lens is mountedto        der ursprunglicheZustandwiederhergestellt'
    the camera.


32
View original page 18Page 19 · Read text
www.butkus.us


    OFF psition                                 AN position
     OFF-Stdlung                                            ON-Stel/ung
      Position OFF                                                  Position ON
      Posici6n OFF                                               Posici6n ON


                                                                                MMaft
                                                                                               roteMarkierung
                                                                             Marqrcrouge
                                                                                        Marca raja

                                           "ON"   The main switchturns on and off the cameraand         mark
    sets it for AE lock (AEL).                     The camera'spower is turnedon. Usually,set the
   o The main switch shouldbe lockedat a click       switch in this position.
      positionwhen shootingto preventit from                                               "AEL"      shiftingby mistake.                              mark
                                          The AE lock is usefulfor shootingbacklighted
   OFF: Red mark not visible                      subjects or if you want to shoot moving subjects
   Whenthe red mark is not visible,the main switch    continuouslywith a fixed exposure.
     is set at OFF,turningoff the camera.              For detailson AE lock, see Page134.
       lf you are not using the camera,turn off the main
    switch to preventthe shutterfrom tripping
    inadvertently.
34
View original page 19Page 20 · Read text
The displayin the vievufinderwill turn on in the             lf you switch a button,dial,etc. whilethe display
    followingcases,then turn off automaticallyafter       is shown,the displaywill remainon for another
   16 seconds.                              16 seconds.
        t Whenthe main switch is turnedon.
    z Whenthe main switch is set to ON, and either:     (The illustration shows  all rnformation available in the
     The shutterreleaseis depressedhalfway,or          viewfinder for reference    /t dose not represent an actual
      the focus dial or focus lock buttonare              example of display.)
     ooerated.


                                                          www.butkus.us


36
View original page 20Page 21 · Read text
www.butkus.us


   OPicture Area Frame              @ Shutter Speed/Shooting Distance
   Whenthe shutterreleaseis depressedhalfway,     Normally,displaysthe shutterspeedfrom 1/6000
   the pictureareaframe on displaychanges         secondto 16 seconds,in 1/2 step intervals.On                                                        "6000"                    "200"    automaticallyaccordingto the shootingdistance,    the scale,     means1/6000second,                                                                                "'16""    lensfocal length,etc.                      means1/2O0second,and    means16
   To shoot,placeyour subjectwithinthe displayed    seconos.
   frame.                              Whenthe focus lock button is pressedin the                                            "MF"                                                  (manualfocus)mode,the displayindicates
   QFocus Frame                                 the shootingdistanceto the subject(thedisplay
   Placeyour subjectto focus in this frame.               is shown only whilethe button is held depressed).
   gFlash Mark                              eExposure Mark                                                                                          "a"       lf your are usingthe Tl-A flash systemfor taking       ln the auto exposuremode,the over    or under                                                          "v"                                          "                                              "                                              mark indicatingdeviationfrom the exposure                                    willturnon as                                                                      l    flashpictures,the flashmark
   soon as the flash is fully charged. lf your subject    controlrangewill be displayed.In the manual                                                                                                "    ",     "a"          "v"     is correctlyexposed,it will blinktwo seconds      mode,the correct C   over    or under
    afterthe flash has fired.                      mark will be displayed.
   OExposure CompensationMark              When lookingthrough the vieMinder, some        "+"                 "-"              mark will lightwhen exposure          vignetting(shading)may be noticed in the   The           or
   compensationis performedwith the exposure        lower-rightcomer of the viewfinderdue to
   compensationdial,or A.B.C.mode.                 occlusionby the lens barrel,or use of a filter or
                                                      lens hood. Such vignetting,however,will not
   OFocusing Indicator                          appear on the final photograPh.
   Showsthe conditionof focus. For details,see the         "Focusing                   the lens"on p.74.    section
38                                                                                                                                                                                                                                                                                                                           II                                                                                                                                  r-
View original page 21Page 24 · Read text
/;\   Ftt it ln whib Pttshingin thb
                                                                                                                                                                                      l,        dirrction.
                                                                                                                          ln diau  Richtung schiebefl
                                                                                        und dnseaffi.
                                                                                               4ustezq   Pussant dans
                                                                                            @tte diredon.
                                                                                       A@telo  mienfras Pr*iona
                                                                                                                      q, estadirwidn.


    Camqastq   stoqqer                              Aoqter lffis
     Riemenschnalle                                       DioPtienlinse
     Banette de la counoie de faPPreil                         Lentillede conectbn
    Top delaconadelacdman                        Lente di6qtia             www.butkus.us
   <lnstalling a DioPter Lens>                        illAs shown in the illustration,while pressingthe
  When installinga diopterlens,hold the camera        pointed end of the camera strap stopper in the
   with the vievvfindereyepiecepointingupward,to       hole on the side of the vieMindereyepiece,lift
   help preventthe diopterlensfrom droppingout'       up and removeup the eyepieceframe.
   Also,take care in handlingso as not to soil the
    diopterlenswhen installingit.                          i? Placethe diopterlens insidethe eyepiece
                                                     frame.
                                                 OFit the pins on the left side of the eyepiece
                                                frame into their holes,and pressdown the
                                                frameto its originalPosition.

48
View original page 24Page 25 · Read text
www.butkus.us


                                                                                  Data back contacts
                                                                                        Data-Back-Kontakt
                                                                                        Contacts du dos dateur
                                                                                       Contactos del respaldo
                                                                                de datos

    1  Open the camera back by erecting and     Q  Inseft the film cassette slantwise into the
       I   rotating the camera back release knob in     L   tilm chamber with its protruding end
    the direction of the arrow.                   downward as illustrated.
    After the camera back is opened, replacethe
   knob in place.                                  Note on the shutter cuftain:
                                             The shutter curtain is a precision part. Never
   o When loadingfilm, be sureto removethe          touch it with your finger or strike it with the film
      protectivesheet in the camera's picture area          tip. When the film tip lies on the shutter curtain,
      frame.                                                   in particular, never trip the shutter.
                                               o Take care not to touch or contaminatethe DX
                                                     contacts and data back contact.
                                               o Alwaysload and unloada film in subduedlight.
50
View original page 25Page 27 · Read text
www.butkus.us


              When DX automatic film speed seffing is
               USed
                   Bei automatischerEinstellungder
                       FiIm empfindIichkeit uber DX-Code
                  Lorsque la sensibilit6du film est r6glee
                  automatiquementau moyen du code DX.
                Cuando se emplea el ajuste automdtico
                 de sensibilidad de la pelicula DX.


              When manual film speed setting rs used
                   Bei manuellerEinstellungder Film-
                      empfindlichkeit
                  Lorsque le reglagede la sensibilitedu film   <Checking the Film Speed>                     est effectuemanuellement.                                               With the main switchset to ON, if the ISO button
                Cuando se emplea el ajuste manual de       is pressed,the film speed (lSO number)will                      sensibilidad de la pelicula.                                             appearin the displaypanelfor about 16 seconds.
                                     When DX automaticfilm-speedsettingis used,                                            "DX"                                                                    will appearin the display.
                                               o lf the shutterreleaseis depressedhalfway
                                                     whilethe film speed is displayed,the display
                                                                    will returnto the shootingdistancedisplay.


54
View original page 27Page 28 · Read text
I
   <Setting the Film Speed>                      <Einstellen der Filmempfindlichkeit>
   Thefilmspeedmn besetintwoways:automatic       Die Einstellungder Filmempfindlichkeitkann auf
    settingmodewithDXcodesandmanualsettingmode.   zwei Arten edolgen: in der automatischen
                                                      Betriebsart                                                          uber DX-Codeoder in der manuellen                                Mode:                                I                   Automatic                               Setting       (ox)                                   "DX"                                                        Betriebsart.    S o                                     and                            film speed                                          is set to                                  lf the                 I t't                       fi
                      l )-l r^l    you are usingDXfilm,the camera          I Automatische Einstellbetriebsart:                                                     "DX"                        will automaticallyset itselfto the     Wenn Sie    wdhlen,wird die Empfindlichkeit
                speedof the film you are using.       beiVerwendungvon Filmenmit DX-Code
   DX films are avaalablein a range of ISO 25 to 5000.    automatischeingestellt.Der DX-Code-Bereich
   The DX mark and film speedare printedon the film      umfaBt ISO 25-50m. DX-Codierungund
    box.                                           Empfindlichkeitsind auf der Filmschachtelund -
   o  lf the camerais loadedwith non-DXfilm, the film    patrone angegeben.
     speed will be automaticallyset to ISO 100.        o Wenn ein Film ohne DX-Codeeingelegtwird,
                                                                    stelltdie KameraautomatischISO 100 ein.
                                I ManualSetting Mode:
                 Set the film speed as you desire.lf        I  Manuelle Einstellbetriebsart:                                                    StellenSie die Empfindlichkeitauf den                you are using non-DXfilm, or if                                               gewrinschtenISO-Weftein. Die manuelle                you want to changethe film speed
                    fronr that of the film you are using,    Empfindlichkeitseinstellung konnen Sie benutzen,
                                        wenn Sie Filmeohne DX-Codeveruvendenoder                   set the film speed manually.                                                einenanderenISO-Werteinstellenwollen.   o You can set the film speed in 1/3 step                                                                              r Sie kdnnen die ISO-Werte in 1/3-Stufen von      increments in a range of ISO 6 to 6,400.
   o Whenthe film speed (lSO number)has been        lSO6-64(X)einstellen.                                               o Bei manuellerEinstellungder      set manually,that manuallyset speedwill be                                                     Filmempfindlichkeithat dieseVorrang,selbst     used even if DX code film is later loaded in the                                          wenn spdterein DX-codiefterFilm eingelegt     camera.                                                         wird.56
View original page 28Related documents and language editions
From the M. Butkus archive. Original publisher and archive notices are retained.
Check the model and edition against your equipment.
PDF verified 2026-10-10.