Film cameras
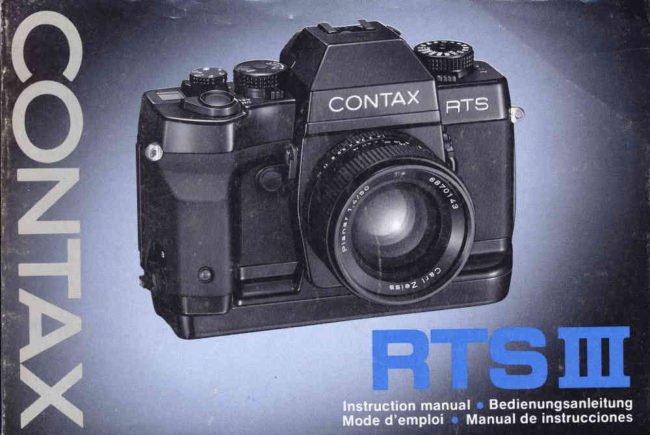
Contax RTS III User manual
User manual for Contax RTS III. 148 pages in German. Read the original PDF, download or print a copy without registration.
148 pagesGerman14.3 MB PDF
Loading your manual…Open PDF directly
Document details
- Brand
- Contax
- Model / document
- Contax RTS III
- Document type
- User manual
- Language
- German
- Pages
- 148
- File size
- 14.3 MB
- Category
- Film cameras
- Document date
- Not specified in catalog
Search available document text
Find a term, then jump to its page in the original PDF. Image-only pages may not be searchable; check the PDF for exact wording and diagrams.
Page 2 · Read text
Thank you for your purchaseof a Contax RTS lll.           wir danken lhnen,daB sie sich fur die contax RTS lll
Based on the "Real rime" concept of the contax RTS     entschiedenhaben.
series,this contax camera of the highest ctass offers,     Auf der Grundlagedes Echtzeitkonzeptesder contax
in addition,more sophisticatedfeatures such as ultra-     RTS-seriebietet lhnen diese contax-Kamerader
fast 1/8000sec. shutter speed, RTV (RealTime            hochsten Guteklassezusdtzrichefortschritiliche
Vacuum)system,TTL pre-flashcapabirity,and narrow-     Merkmale,u.a.eine ultrakuze verschluBzeitvon
area spot metering.                                  1/8000sek., ein RTV-system(Real rime Vacuum),TTL-
To make full advantageof its functions and               vorblitz-Lichtmessungund Engbereichs-spotmessung.
capabilities,pleaseread this manuarcarefullythrough      Bitte lesen Sie diese Bedienungsanleitungvor
before using the camera so that you can understand      Inbetriebnahmeder Kamera aufmerksamdurch, damit
them well and use it correcily.                          Sie mit allen Funktionenvertrautwerden und
                                                   optimalenGebrauchvon ihren M6grichkeitenmachen
Thismanualusesa multi-modepranarT* 50mmF1.4(MM)lens      konnen.
equippedon thecamerafor explainingitsoperatingprocedures.
However,youcanalsouseit in thesamewayas describedin
this manual when  it is equipped with other multi-mode Carl Zeiss         Die Erkldrungen dieser Bedienungsanleitunggehen davon aus,
interchangeable lenses                                       daB ein Mehrbetriebsarten-objektiv(MM) planar T*  f 1 ,4lso mm an
                                                                     der Kamera angesetzt ist, doch gelten die gleichen
                                                                Bedienungsverfahrenauch fur alle anderen Mehrbetriebsarten-
                                                                 Wechselobjektive von Carl Zeiss.


                     www.butkus.us
View original page 2Page 3 · Read text
Nameof Parts                           B    <3>  Usingthe A.B.C.Mode
BasicSteps                                  1 2         (AutomaticBracketingControl)             90
o Basicoper"ii;;  ;;i;re shootins                  Depthof Field                              96
MountingandDismountingtheLens               1 B   Usingthe Self-timer                      100
Loading the Batteries                         20    MultipleExposure                          102
  < Main Switch>                           22    FlashPhotography                        104
  < Battery Check >                          24    Mirror-upLever/ReleaseSocket                  1 2 2
Diopter Adjustment .                          28        InfraredCompensationMark                   124
Settingthe Film Speed                        30    Printingthe Dateor Time                      126
Loadingthe Film                            32   CameraCareand Precautions                  1 3 0
Display in the Viewfinderand Display Panel         36    DedicatedAccessories                      134
Drive Mode Selector Dial                       44    Specifications                               1 4 2
ExposureMode Selector Lever ....                46
ShutterSpeedDial                         4B
Holdingthe Camera                          50
Focusingthe Lens                           52
Rewindingthe Film                           54
  < Rry (RealTimeVacuum)System>            56
o Camera Functionsand Applied Techniques
Selectingthe ExposureMode....               5B
  Aperture-priorityAuto Exposure               62
  Shutter-speed-priorityAuto Exposure            64
  ManualExposure                         72
  BulbExposure                             74
MeteringSystem                         7B
ExposureCompensation...,.                    82
< 1 > Usingthe ExposureCompensationDial .      82
<2>  Usingthe AE Lock..                   B6
View original page 3
Page 4 · Read text
O  ExposureCompensationDial
                       @ FilmSpeedWindow
                              O  ShutterRelease
                       @ DriveModeSelectorDial
                              O  DisplayPanel
                       @ MainSwitch
                              O  A.B.C.Lever
                       @ StrapLug
                              O  ExposureCheckButton
                       @ CableReleaseSocketfor Bulb
                                          Exoosure
                                        RewindLever                       o
                     @ Vertical-positionShutterReleaseLock
                     @ Vertical-positionShutterRelease
                     @ Self-timerLED
                     @ AccessoryShoe
                     @ Dedicated-flashContact
                     @ DirectX-contact
                     @ DiopterAdjuster
                     @ ShutterSpeedDial
                     @ ShutterSpeedDial Lock Release
                                               Button
                     @ ExposureModeSelectorLever
                     @ ApertureStop-downButton
                     @ MeteringModeSelectorLever
                     @ LensIndex
                     @ ScreenReleaseClaw
                     @ MirrorUp Lever
                     @ LensReleaseButton

www.butkus.us
View original page 4Page 7 · Read text
www.butkus.us

   Loadfilm, pull out its tip as far as                                    Set the drlve mode Selector                                         ry-Wffi   the orange"@"  mark and place   e*FDialto "S", "CL" or "CH".
 it on the spool.                                                           ffi StellenSie den Filmtransport-
 ffi LegenSie den Film ein,ziehenSie  s# Wahlringauf "S", "CL" oderu#   den Filmanfangbis ZUT           "cH".
orangefarbenenMarke3t    " aus der                                         ry R6glezle cadrande sdlection
Patroneund legenSie ihn auf die      n# de moded'entrainementsur
Filmtransportrolle.                 "S", "CL" ou "CH".
4 Chargezun film, extraireson         ry Ajusteel aro del selectordelW amorcejusqu'dla marqueoraqge  # modo motorizadoa "S". "CL"
"w'    ' et placez-lesur la bobine.      o "cH".
*#ffi Carguela pelfcula,tire hacia fuera   de su punta hasta la marca       n'*R"naranja     y coldquelaen eJ
carrete.

                                                                            13
View original page 7Page 9 · Read text
Shutter-speed-priorityauto
exposure
(with MM type lenses only) (see page 64)
Belichtungsautomatikmit
VerschIu RzeitenvonruahI
(nurbeiVerwendungvonObjektivenmit
MM-AnschluB)(Siehe Seite 65 )
Exposition automatique i  priorit6 d
la vitesse
(avec objectifs de type MM seulement)
(voir page 65)                                                                  ffi Set the exposuremode selector  ry Set the shutterspeed and shoot.
                          %#leverto "Tv" and set the lens to   dExposicionautomdticacon
prioridadde velocidaddel                    its minimumaperture(green).        ry Stellen$ie die gewunschte
obturador                                                ffi StellenSie den Belichtungs-    # VerschluRzeitein und machenSie
(solo con objetivo del tipo MM)           %#betriebsarten-Wahlschieberauf   die Aufnahme.
(vea la pagina 65)                          "Tv" und das Objektivauf den           ffi Reglezla vitessed'obturationet
                                       kleinstenBlendenwertein.          # d6clenchez.
rsfiitr,                                                     ffi Placezle levierde s6lectionde    ry Ajuste la velocidaddel obturador
                          %#mode d'expositionsur "Tv" et    6 y dlspare.
                                       r$glezI'objectifsur son ouverture
                             maximum(vert).
                                                                  ffi Ajustela palancadel selectordel
                          %#modo de exposiciona "Tv" y
                                        ajusteel objetivoa su abertura
                                 mfnima(verde).

                                                                                      1 5
View original page 9Page 11 · Read text
ffimssc#             fommfspaW
 Mmrfoermsfesffi#r        b#mgrrmffimrspx
#pdrm#meedw        dmpnse ds M&##s
  #pxmrmcrs$sry&s$s    #s dm#d#spmn{p


                                                                           1 7
View original page 11Page 12 · Read text
< Mounting the Lens>                             < Dismounting the Lens>
    First,removethe camera'sbodycap and the lens'rear       Whilepressingin the lens releasebutton,turn the lens
   cap by turningthem counterclockwise.Then,alignthe red      counterclockwiseas far as it will go and pull it out toward
   dot on the lenswith the lensindexon the camera,fit it in       you. After dismountingthe lensfrom the camera,protect
   and turn it clockwiseuntilit lockswith a click.                the lenswith the rear cap, and the camerawith the body
                                                        cap.
                                                       o Do not touchthe lenssurfaceand camerainsidewith
                                                       yourfingerswhenattachingand detachingthe lens.
                                                       o Avoiddirectsunlightwhenchangingthe lenswith film
                                                      loadedin the camera.

                      www.butkus.us
1 8
View original page 12Page 13 · Read text
www.butkus.us


     All mechanisms o/ the Confax RIS  lll including the         o The batteriesthat come with the camera are sample
    shutter, film winding and rewinding mechanism are          batteriesthat can be used only for testing the camera
    battery operated. lt will not operate without batteries.       operation.
                                                    Use the followingbatteriesdependingon the application
   S Erectthe batterycompartmentcover lockingknob,      O  Six 1 5V alkalinebatteries(AA size)
    & turn it in the directionof the arrow(themark "o" will     Recommendedfor general use.                                    '   movefrom              e  " to " G "), then removethe battery     @ Six 1 2V Ni-Cd batteries(M  size)
   compartmentcover.                              Recommended especiallyfor shooting in cold weather
                                  @ One 6V lithium battery (2CR5)
    {h Insertthe batterieswith the plus @ and minusO ends    Recommendedwhen you are to use the same battery for
   K  correctry,as illustratedinsidethe battery                 a long time, because of its low natural discharge
   compartment.The camerawill not operateif the @ and            It is also good as a spare battery to take with you on a
   O endsare wrong.                                                trio
20
View original page 13Page 14 · Read text
In ON position/Position EIN         ln OFF positrcn/Position AUS
                                                                                   Position ON/En la posicion ON     Position OFF/En la posicion OFF

                                                   < Main Swich >
                                              The mainswitchhas threepositions:"OFF", "ON", and
  Q Fit the guidepin on the cameraintothe fixingholein      "AEL" (AElock).
    rJ the battervchambercover and replacethe cover.       OFF: To set the main switchto OFF,turn it so that the
   Thenfix it in placeby turningthe lockingknobin the         red dot is concealed.
   directionof the arrowas far as it will go (themark "o" will    At OFF,the camera'spowerswitchwill turn off.
  m o v e f r o m " G " t o " e " )                                                          lf you are not usingthe camera,set the main switchat
                                         OFF to preventtrippingthe shutterby mistake.
                                              ON: Turn the main switchso that the dot on it comes
                                                     opposite"ON".
                                                         At ON, the camera'spowerswitchwill turn on.
                                                  AEL: Turnthe main switchso that the dot it comes
                                                     opposite"AEL".
                                                          At AEL.exoosureis locked.ThisAE lock is usefulfor
                     www.butkus.us     objectshootingat ina fixedbacklightexposure.or continuousshootingof a moving
                                                     o For detailson the AE lock,see page 86.22
View original page 14Page 16 · Read text
< BatteryPrecautions>                           < VorsichtsmaBregeln  f lir die Batterien >
    o Alwaysreplacethe batterieswith new ones of the         o Tauschensie immeralle Batteriengleichzeitiggegen
   sametype.Do not mix differentkindsof batteriesor old       frischeBatteriendes gleichenTypsaus.MischenSie nicht
    batteries.                                                  alte und neue Batterienund solcheverschiedenerTypen.
    o Generally,batteryperformanceis reducedby cold        o Bei remperaturenunterNullnimmtdie Batterieleistung
    temperatures(under0'C). lf you are shootingin cold        vorubergehendab. Beim Fotografierenin kaltemWetter
    weather,it is advisableto keepthe camerawarm in a bag     solltendaherfrischeBatterienverwendetund die Kamera
    or an outfitfor protectionagainstcold.The battery           vor den Aufnahmenwarmgehaltenwerden.Die durchtiefe
    performancereducedby low temperatureswill returnto      TemperaturenbeeintrdchtigrteBatterieleistungwird jedoch
    normalwhen you take picturesat an ordinary               wiederhergestellt,wennAufnahmenspdterbei normaler
    temperature.                                     Temperaturgemachtwerden.
    o Beforeloadingthe batteries,wipe both polesclean        o Vor dem Einlegender BatterienbeidePolemit einem
    with a dry clothbecausepoor contactmay resultif they      trockenenTuch abreiben,da bei einerVerschmutzungder
    are soiledwith sweator grease.                        Polemit SchweiRoder Fett keineinwandfreierelektrischer
    o Do not throw usedbatteriesintofire or try to chargeor    Kontaktgewdhrleistetist.
   disassemblethem becauseit is dangerous.               o VerbrauchteBatterienauf keinenFall in ein offenes
    o   lf you are goingon a longtrip.bringa new set of spare   Feuerwerfen,aufzuladenversuchenoder zerlegen,da
    batterieswith you.                                   Verletzungsgefahr besteht!
                                                      o WennSie auf ldngereReisengehen,nehmenSie einen
                                                      SatzfrischerBatterienals Reservemit.


                      www.butkus.us
26
View original page 16Page 17 · Read text
Thiscamerahas a built-indiopteradjustmentunit.To
   adjustthe viewfindereyepieceto your eyesight,lift up the
   diopteradjusterand turn it untilthe circlein the centerof
   the viewfinderappearsclear The adjustablerangeis
   + 1 - - 3 d i o p t e r s .

    o Afteradjustment,pushin the diopteradjuster.
    o   lf you cannotadjustwith the camera'sbuilt-indiopter
    adjuster,use the optionalFM type dioptercorrector                   '136.   lenses.See page


28
View original page 17Page 18 · Read text
You can set the film speed in two ways: automatic
    setting with DX film and manual setting.

    < Automatic  Setting >
   Turnthe exposurecompensationdialwhileliftingit up so
    thatthe "DX" markingin the film speedwindowcomes
   oppositethe film speedindex,then lock it with a click.
       lf you use DX-codedfilm (lSO25-5000),the camerawill
    automaticallyset its film speed.The DX markingand film
   speedare printedon the film box.
       .  Automaticallyset film speedsare not displayedon the
   camera.
       .    lf non-DX-codedfilm is usedin the automaticsetting
   mode,its film soeedwill be set to ISO 100.

                                                   < Manual Setting>
                                                                                                         lf you use non-DX-codedfilm, or if you want to shootwith
                                                      a film speedthat is differentfrom that of the film you are
                                                         using,use the manualsettingmode.Turnthe exposure
                                                  compensationdialwhileliftingit up, and set it at your
                                                       desiredspeed.In this mode,the camerais set to the
                                                 manualspeedeven if you use DX-codedfilm.
                                                       Filmspeedscan be set in a rangeof ISO6-6400 in
                                                        1/3-steoincrements.

                      www.butkus.us
30
View original page 18Page 19 · Read text
0 0 0 0 8 0 0 0


                                                                                                                     0 0 0 0 0 0 0 0 0 0 0 0 8 o 0 t r 0


    # Erectthe cameraback releaseknob,turn it in the              ffi Insertthe film cassetteslantwiseintothe film chamber
    # directionof the arrowand openthe cameraback.        #  with its protrudingend downwardas illustrated.
    Afteropeningthe cameraback,returnthe knobto its
    originalposition                                     Note on the shutter curtain:
                                                 The shuttercurtainis a precisionpart.Nevertouch it
                                                           with yourfingeror strikeit with the film tip.
                                          Whenthe film tip lieson the shuttercurtain,in
                                                               particular,nevertrip the shutter.

                                                      o Takecare not to touchor contaminatethe DX contacts
                                                 and data back contact.
                                                      o Alwaysloadand unloadfilm in subduedlight.

32
View original page 19Page 20 · Read text
www.butkus.us


        fl  Pull out the film tip as far as the orange "r"    ffi?Ik            -ff4  Close the camera back, set the main switch at ON and     .J and place it on the spool.                                 deoress the shutter release The mark
    Take care that the film does not float up (see illustration).      in the display panel, the film will automaticallyadvance
         .    lf the length of film protrudingfrom the cassette is too       into positionfor the first shot and the exposure counter
     long, adjust it by winding film back into the cassette             will show "O'1".
    before loadrnothe film.                                     o   lf the exposure counter does not move from "00", the
                                                                         film is not advancing properly.Open the camera back and
                                                              load the film correctly again.
                                                              o The exposure counter can be checked both in the
                                                                display panel and in the viewfinder.
                                                              o The film check window will let vou check if there is film
                                                                             in the camera or not
                      www.butkus.us
34
View original page 20Page 21 · Read text
www.butkus.us


   < Displayin the Viewfinder>
   The displayin the viewfinderis a backlighttype and uses   O  ExposureMode Indicator....The exposuremode is
   a power-savingdesignso that it turnson for'16secondsin    displayed."Av" showsaperture-priorityauto exposure,
   the followingcasesthenturnsoff automatically.           "Tv" shutter-speedpriorityautoexposure,''M"manual
  @ Wfrenthe main switchis set at ON.                   exposure,and "B" bulbexposure.
  @ Whenthe mainswitchis at ON:            @ ApertureValue ....In the aperture-priorityauto
    o Whenthe shutterrelease,exposurecheckbutton,or      exoosuremodeand manualexoosuremode,the aperture
   aperturestop-downbuttonis depressed.                    that is set on the camerawill be displayed,and in the
    o Whenthe pre-flashleveror rewindleveris set at ON.      shutter-speed-priorityautoexposure,the aperture
                                                   determinedin accordancewith the shutterspeed.
      lf a dialor othercontrolsare switchedwhilethe display    O  Flash Mark ....Whenshootingwith the TTLflash
   appearsin the viewfinder,it will remainon for additional     system,the flashmark "  t  " will turn on as soonas the    '16      seconds.                                           flashis fullycharged.
36
View original page 21Page 22 · Read text
Flashmeter....When the pre-flashis "ON", the bar               lf the shutter speed has been fixed in an exposure mode
will turn on in a range of +2 EV to show an exposure         "Tv", "M" or "AEL", it will blink.fhe shutterspeed wil
error relativeto the correct exposure in 112-EVsteps  lf         also blink when it has been automaticallyswitched for
the error exceeds + 2 EV, all bars on the corresponding             f lash photography.
sidewill turn on The flashmeterwill also show the light              '.'i,'Exposure Compensation Mark .... lf the exposure
controlconditionafter f lash exposure on TTL direct light       compensation dial is set for exposure compensation (other
control                                                                                                     t h a n " 0 " ) , t h e " + "  o r " - "   s i g n w i l l b l i n k .
   Exposure Counter .... The exposure counter will                  i", Metering Mark .... For display of the metering mode
advanceone by one each time the film is wound  lt will       and AE lock:
count down while the f ilm is rewinding                     Center-weightedmetering:The mark " C] " lights
In addition,the counter has the followingfunctions:          Spot metering:The mark "f.]l " lights
o  Displaysthe time on bulb exposure (repetitionof         AE lock on center-weightedmetering:The mark "f  ]  "
00 - 59 seconds)(exceptingwhen the cable release           b l i n k s .
socketfor bulb exposure is used)                       A E l o c k o n s p o t m e t e r i n g : T h em a r k " o  " b l i n k s
o Displaysthe remainingtime when the self-timeris
operating(10 sec. - 00)                           < Display Panel>
o  Displaysthe operationorder on A B.C mode                      ;, BatteryWarningMark....Fordetails,see"Battery
o Displayswhen the end of the film is reached.            check" on page 24
   o Smm Pre-flash Metering Range                                              ,' Exposure Counter.... Shows the number of exposures
   s 3mm Spot Metering Range                           taken, even when the main switch is at OFF.
   Shutter Speed .... The shutter speed from 1/8000 to 4         Film Transport Mark
secondsand LT (6 - 32 seconds)are displayed."8000"
shows 1/8000 seconds, and "4s" shows 4 seconds
lf two shutter speeds are displayed,thier intermediate
value is the shutter speed being set
lf the mark " 4"  blinks,it means overexposure;and if
"LT" blinks,it means underexposure,
The shutter speed determined by the camera will be
disolaved                   www.butkus.us
                                                                        37
View original page 22Page 23 · Read text
E    .... Multiple Exposure
                                                    See page 102

                                                    Frame rates with different batteries
                                                                  (shutterspeed11250or faster,ISO32 or higher)
                                                         Aufnahmegeschwindigkeitenbei verschiedenenBatterien
                                                              (VerschluBz-eit11250Sek.oder kUrzer,ISO32 oder hdher)
                                                         Fr6quencesde photos avec les diff6rents types de piles
                                                                   (vitessed'obturation1 1250ou plus,ISO32 ou plus)
                                                     Margen de fotogramascon pilas diferentes
                                                                (Velotidaddel obturadorde 11250o mayor,ISO32 o mayor)
                                                                                                                     Drive mode
                                                                          Battery                      Aulnahmebetriebsart
                                                                                 Batteriety.,p              Mode dnentrainement
   You can choose the following drive modes depending          Plle                      Modo motorizado
   on your shooting obiect. Io sef the drive mode selector      PJlas
     dial, turn it while lifting it up.                                                 CL             CH
                                                                                Alkalinebatteries   About 3 frames/sec    About 5 frames/sec
   S ....Single-frameShooting                                         Alkalibatterien      ca 3 Bilder/Sek       ca 5 Bilder/Sek
   Eachtime the shutterreleaseis depressed,the camera          Pilesalcalines     Environ3 photos/sec   Environ5 photos/sec
    will exposeone frame,windthe film for the nextshotand         Pilas alcalinas    Unos3 fotogramas/seg Unos5 fotogramas/seg
   stopwinding                                                    Ni-Cd batteries     About 3 frames/sec   About 4 5 f rames/sec
   CL and CH ....ContinuousShooting                         NiCd-Akkus        ca 3 Bilder/Sek      ca 4,5 Bilder/Sek
   As longas the shutterreleaseis depressed,you can take        Piles Ni-Cd        Environ3 photos/sec  Environ4,5 photos/sec
    picturesin successionat a rateof up to aboutthree              Pilasde Ni-Cd    Unos3 fotogramas/seg Unos4,5 fotogramas/seg
       f rames/sec.(CL)or aboutfive f rames/sec(CH) (The                             About 2 frames/sec   About 35frames/sec
   frameratewill differwith the shutterspeedand the                                 ca 2 Bilder/Sek      ca 3,5 Bilder/Sek
                                                                                                                            3,5 photos/sec    conditionsof batteriesin the camera)                       2CR5            Environ2 photos/sec  Environ
   U z and U t0 ....Self-timerShooting                                      Unos2 fotogramas/seg Unos3,5 fotogramas/seg
   You can takepicturewith self-timerwith a delayof 2 or 10          . With new batteries                  * Avec des piles neuves
   secondsFor details,see page 100                                                           . Gilt fur f rischeBatterien         * Con oilas nuevas
44
View original page 23Page 24 · Read text
The ContaxRTSlll offersthe followingexposuremodes:
    aperture-priorityauto exposure,shutter-speed-priorityauto
   exposure(withMM type lensesonly),manualexposure
   and bulbexposure.Set your desiredmodewith the
   exposuremodeselectorleverwhilepressingin the
   exposuremode lock releasebutton.
    For detailson the exposuremodes,see pages58 -76.

    < Exposure Check Button >
   Whenthe mainswitchis at ON, depressthe exposure
   checkbutton.The displayin the vieMinderwill turn on to
     let you checkthe exposure.You can alsocheckthe
   exposureby depressingthe shutterreleasehalfway.


                      www.butkus.us
46
View original page 24Page 26 · Read text
w
   To take sharp pictures,the camera must be held steady
   Because blurred pictures are most often caused by
   camera shake, it is recommended to learn how to hold the
   camera steady by practicing it Place the camera in the
   palm of your left hand and hold the distance ring of the
    lens so that you can operate it with your fingers. Hold the
    grip with your right hand and put the forefingerlightlyon
    the shutter release.Stick the left elbow to the body, press
    the camera lightlyagainstyour face and look through the
    viewfinder Always depress the shutter release very gently
   The camera can be held not only in the horizontalposition,
    but also in the vertical positiondependingon the subject.
    In any case, study your comfortable camera positioning
   and practice until you get used to it. lt is also good to
   supportyour body or camera with a building,tree, and so
   on
   < Using the Vertical-positionReleaseButton>                %
   The vertical-positionrelease button is convenientfor         ,::
    taking pictures of people and other objects in the           i*i,
    vertical position lt allows you to operate the                         .
   shutterreleasein a naturalposture.
    First,unlockthe releasebuttonby turning
   the vertical-oositionreleaselock lever
   towardthe arrowas far as it will go, then
   depressit to takeyourpicture,
       lf you do not use this button, turn the lever to the
    oositionwhere the red mark is concealed,
                      www.butkus.us
50
View original page 26Page 27 · Read text
< RTV (Real Time Vacuum) System >              <Systdme RTV (Real Time Vacuum)>
   By adoptinga ceramicpressureplateand RW System,it     En adoptantune plaquede pressionceramiqueet le
   has becomepossibleto securethe flatnessof the film to     systdmeRTV,il est devenupossiblede fixer la planeitedu
   an upgradedextentthat was impossiblewith the               film d'unemaniereimpossibleavec le systeme
   conventionalsystem.                                   conventionnel.Le systemeRry peut attirerle film sur la
   The RW Systemcan attractthe film on the pressureplate    plaquede pression,justeavantle deplacementdu premier
    just beforethe first curtainof the shuttertravelsand         rideaude I'obturateuret reldcheI'aspirationlorsquele
   releasethe suctionafterthe secondcurtainhas traveled.    deuxiemerideaua fini de bouger.ll fonctionnedans les
      It operatesin the "Av", "TV" and 'IM'' modes.           modgs"Av", "TV" et "M".
   o The RTVSystemdoes not operatein the bulb exposure    o Le systemeRW ne fonctionnepas dans le mode
    ("8") mode.                                           d'expositionprolong6e("8").
   o   lt does not operate,to save powerwhen the battery       o   ll ne fonctionnepas non plus,pourdes raisons
   warningmark"o-"  lights.                           d'6conomied'rSnergie,lorsquela marqued'avertissement
                                                 des piles("-   ") s'allume.
                                                     ffi
                                                                                                                                                                 ffi
   < RTV-System (Real Time Vacuum)>               <Sistema RTV (Vacio de tiempo real)>
   Der EinsatzeinerKeramik-Andruckplatteund des Rry-      Adoptandouna placade presioncer6micay el sistema
   Systemssorgtbei dieserKamerafur eine gegenuberdem    RTV,ha sidoposibleasegurarla planitudde la pellculaa
   herkommlichenSystemstarkverbessertePlanlagedes      un puntomejoradoel cual fue imposiblecon el sistema
   Films.                                            convencional.
   Das RW-Systemsaugtden Film an die Andruckplatte,      El sistemaRTVpuedeatraerla pellculaen la placade
   kurzbevordie erstenLamellendes verschlussesbetdtigt    presionjustoantesde que la primeracortinadel
   werden.Nach Betdtigungder zweitenLamellenwird die      obturadorse desplacey liberela succiondespu6sde que
   Ansaugungwiederaufgehoben.DieseEinrichtungist in        la segundacortinase hayadesplazado.
   den Betriebsarten"Av", "TV" und {'{M"wirksam.         Operaen los modos"Av", "TV" y " M".
   o Das RTV-Systemstehtin der Zeitbelichtungs-          o  El sistemaRW no operaen el modode exposicionde
   Betriebsart("8") nichtzur Vertugung.                 pose(" 8").
   o Es arbeitetauBerdembei blinkendemBatterie-          o CuandOla marca "a   " de advertenCiade laSpilaSSe
   Warnsymbol"a   " nicht,um die Batterienzu schonen.      encienda,no operarApara ahorrarenergla.

56
View original page 27Related documents and language editions
From the M. Butkus archive. Original publisher and archive notices are retained.
Check the model and edition against your equipment.
PDF verified 2026-10-10.