Film cameras
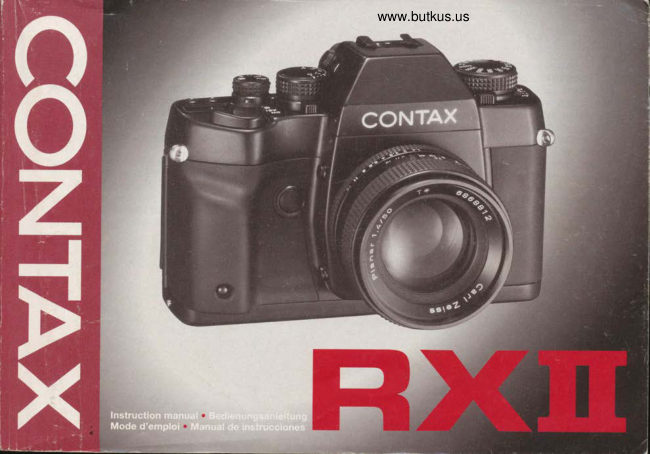
Contax RX II User manual
User manual for Contax RX II. 89 pages in English. Read the original PDF, download or print a copy without registration.
89 pagesEnglish6.2 MB PDF
Loading your manual…Open PDF directly
Document details
- Brand
- Contax
- Model / document
- Contax RX II
- Document type
- User manual
- Language
- English
- Pages
- 89
- File size
- 6.2 MB
- Category
- Film cameras
- Document date
- Not specified in catalog
Search available document text
Find a term, then jump to its page in the original PDF. Image-only pages may not be searchable; check the PDF for exact wording and diagrams.
Page 2 · Read text
Thank you for your purchase of the Gontax RXII.      Wir gratulieren lhnen zum Kauf dieser Contax RXII.
This camera is a multi-mode auto-exposure single-    Diese Spiegelreflexkamera mit Mehrfach-
lens-reflex camera with various exposure control      Belichtungsautomatik  bietet lhnen universelle
features such as aperture-priority auto exposure,    M<iglichkeiten zur Belichtungssteuerung wie
shutter-speed-priority  auto exposure, programmed Programm-, Blenden- und Zeitautomatik.
auto exposure.                                     Die "lndividual-Funktionen"  erlauben lhnen die
Further the "Custom Functions" will make the          Voreinstellung bestimmter Kamerafunktionen nach
camera best suited to your own use.                 eigenen Wtinschen.
In combination with the CONTAX TLA Flash System   Mit CONTAX TLA-Sytemblitzgeriiten werden
with automatic flash setting feature, the film speed    Filmempfindlichkeit und vorgewdhlte Blende
and aperture set in the camera are automatically set   automatisch von der Kamera [ibertragen.
to the flash unit.
Before using the camera, please read this manual      Bitte lesen Sie vor dem Gebrauch der Kamera diese
                                                                Bedienungsanleitung  sorgfdiltig durch, um ihre vielencarefully through to use it correctly.                                                                   Moglichkeiten optimal zu nutzen.
                                                                                             Anleitung                                                                                                          erfolgen am                                                                                                                           Beispiel                                                                                                                                 einer                                                                    Die Erkliirungen                                                                                                            in dieserThis manual uses a multi_mode planar T" 50mm Fl .4 (MM) lens                                                                                                                anderen                                                                                                                       Mit                                                      Kamera                                                                                mit T- Planar                                                                        1'4l50mm                                                                                             MM-objektiv'                                                      its                             for             the camera                             explainingequipped on                        operating
                   youprocedures.                                                                         it in            However,                       can                               also use                                            the same way as      carl-Zeiss-MM-objektiven erfolgt die Bedienung auf die                                                                      gleiche Weise'described in this manu-al when  it is equipped with other
Multiple-mode Carl Zeiss interchangeable lenses.
View original page 2Page 4 · Read text
Donate:Donate: www.PayPal.me/butkuswww.PayPal.me/butkus venmo:venmo: @mike-butkus-camera@mike-butkus-camera Ph.Ph. 20832083View original page 4
Page 7 · Read text
3
Bssic Sfeps                                                       -
(Auto Exposure)
Kurzqnleitung
(B e I i c h t u n g sa uto m ati k)

                                    Load the battery.         Turn on the main         Set the film speed toEtapes de              a'a€))w  swltch.                   "DX".
base
(exposition                      Legen Sie die Batterie    Stellen Sie den           Stellen Sie die
automatique)                             ein.                      Hauptschalter auf        Filmempfindlichkeit                                                      "oN"                    auf "DX"
                                     Chargez les piles.        Activez le               R6glez la sensibilitePosos Bdsicos
de Operaci6n                                 commutateurprincipal.              du"DX".film d la position
(Con Exposicidn
Automdtica)                         Introduzca las pilas.     Ponga el interruptor      Ajuste la sensibilidad                                                                         principal en "ON".      de pelicula a "DX"
View original page 7Page 8 · Read text
www.butkus.us


                                                                           Aperture-priority Auto Exposure (see page 72)
                                                                     Zeitautomatik mit Blendenvorwahl (siehe Seite 73)
                                                                     Exposition i priorit6 au diaphragme automatique
                                                                       (Se r6f6rer a la page 73)
                                                                       Exposici6n AutomAtica con Prioridad de Abertura eag. 73)


                                                                         Shutter-speed-priority Auto Exposure
                                                                                 (with MM type lenses only) (See page74)
Load DX film and pull out      Set the drive mode selector         (nurBlendenautomatikmit [,4M-Objektiven)mit Zeitvorwahl(Siehe Seite 75)
 its tip as far as the orange       dial to "S" or "C".                  Exposition i priorit6 i la vitesse d'obturation automatique
 "-" mark and place  it on the                                           (avec objectifs du type MM Seulement) (Se r6f6rer a la page 75).
spool.                          Stellen Sie den                       Exposici6n Autom6tica con Prioridad de Velocidad del Obturador
Legen Sie den DX-Film ein     Filmtransport-f un ktionsring         (36lo con el objetivo tipo MM) (Pag. 75)
und ziehen Sie die Lasche     auf "S" oder "C".
bis zur orangefarbenen
Markierung rlber die          Fermez le dos de l'appareil.
Aufwickelspule.                Puis rdglez le cadran du         Programmed Auto Exposure
                               s6lecteur de mode                    (with MM type lenses only) (see page 78)Chargez le film DX et sortez                              d'entrainement e la position       Prog ra m mautomatikson amorce jusqu'd la                             "S" ou "C".                             (nur mit [/]N/-Objektiven) (siehe Seite 79)marque orange "-" et sur la                                        Exposition automatique programm6ebobine.                                 Cierre la tapa trasera.               (avec objectifs du type lvlM Seulement) (se r6f6rer a la page 79)
Introduzca una pelicula DX,    Luego, coloque el disco           Exposici6n Automdtica Programada
extraiga su punta delantera    $elector del modo de                (56lo con el objetivo tipo MM) (Pag. 79)
hasta la marca "-"             impulsi6n en "S" o "C".
anaraniada, y p6ngala
sobre el canete.

                                                                                                                13
View original page 8Page 9 · Read text
Set the exposure mode selector lever to "Av".

Stellen Sie den Belichtungsadenhebel auf "Av".
R6glez le levier de s6lection de mode d'exposition d la position "Av"'
Coloque la palanca selectora del modo de exposici6n en "Av"'


Set the exposure mode selector lever to "Tv" and then set the lens
aperture to the minimum aperture (in green).
Stellen Sie den Belichtungsartenhebel auf "Tv" und am Objektiv die
kleinste Blende (grun) ein.
R6qlez le levier de s6lection de mode d'exposition a la position "Tv"
et liouverture de I'obiectif, a I'ouverture minimum (en vert).
Coloque la palanca selectora del modo de exposici6n en "Tv" y
ajuste la abertura del objetivo a la minima (Verde)

Set the exposure mode selector lever to "P" and then set the lens
aperture io the minimum aperture (in green).
Stellen Sie den Belichtungsartenhebel auf "P" und am Obiektiv die
kleinste Blende (grun) ein.
R6qlez le levier de s6lection de mode d'ouvedure  il la position "P"
et iYouverture de t'objectif, a l'ouverture minimum (en vert).
Coloque la palanca selectora del modo de exposici6n en "P" y
aiuste la abertura del objetivo a la minima (Verde).
View original page 9
Page 10 · Read text
www.butkus.us


                                 Set your desired aperture and shoot.
                                 Wtihlen Sie eine geeignete Blende. Dann konnen Sie den Bildausschnitt
                                      wiihlen, scharfstellen und ausldsen.
                                R6glez I'ouverture d6sir6e et effectuez les prises de vues.
                                            Elija la abertura que desee, entoque y dispare.

7                              Turn and set the shutter speed dial to your desired speed and shoot.                             Wdhlen Sie eine geeignete Zeit. Dann konnen Sie den Bildausschnitt
                                 wAhlen, scharfstellen und auslosen.
                                Tournez et r6glez le cadran de vitesse d'obturation A la vitesse d6sir6e et
                                   effectuez les prises de vues.
                                  Ajuste la velocidad del obturador, enfoque y dispare.


7    Focus the lens, compose your picture and shoot-
      Dann konnen Sie den Bildausschnitt wahlen, scharfstellen und auslosen

      Mettez au point avec l'objectif, composez l'image et d6clenchez.

      Enfoque y dispare.

                                                                                                      15
View original page 10Page 11 · Read text
Attach the strap (standard accessory)                    Attaching the Eyecup F-5 (standard accessory)
      Attach the strap as shown in the illustration.                Attach the eyecap as shown in the illustration.
     Anbringen des Riemens (Standardzubehor)             Anbringen der Augenmuschel F-5
      Befesiigen Sie den Trageriemen wie in der                 (Standardzubehor)
      Abbildung gezeigt.                                        Befestigen Sie die Augenmuschel wie in der
                                                             Abbildung gezeigt.


                   (11-11lr
                                               rl

                                    ;ll'oeilleton F-5 (accessoire standard)                                                 Comment fixer
      Fixer la courroie (accessoire standard)                       Fixer la courroie comme montr6 dans la figure
       Fixer la courroie comme montr6 dans la figure.
                                                                  lnstalaci6n del marco del ocular F-5
     Forma de colocar la correa (Accesorio normal)            (Accesorio normal)
     Colooue la correa en la forma ilustrada.                 Monte el marco del ocular en la forma ilustrada

16
View original page 11Page 12 · Read text
www.butkus.us


          Basic Operations Before Shooting
                                 o
       Vorbereitungen uor dem Fotografieren
                                 o
Opdration de base auant d'effectuer les prises de uues
                                   a
        Operaci6n Bdsica Antes de Disparar
View original page 12Page 13 · Read text
<Mounting the Lens>                          <Dismounting the Lens>
     First, remove the camera's body cap and the lens' rear     While pressing in the lens release button, turn the lens
   cap by turning them counterclockwise. Then, align the      counterclockwise as far as  it will go and pull  it out
    red dot on the lens with the lens index on the camera,      toward you. After dismounting the lens from the
       fit it in and turn it clockwise  until  it locks with a click.       camera, proiect the lens with the rear cap, and the
                                                    camera with the body cap.
   a  lf the lens is fitted on the camera body without aligning  it
       with the red dot, levers and other mechanisms will be       a Do not touch the lens surface and camera inside with your
      exposed to excess force leading to damage or failure.                fingers when attaching and detaching the lens.
                                               a Avoid direct sunlight when changing the lens with film
                                                                     loaded in the camera.


18
View original page 13Page 14 · Read text
www.butkus.us


     All of the major functions of this camera including the      r)  Insert the 6V lithium battery (2CR5) with the plus
     shutter, film winding and rewinding are battery-         ,Q "+" and minus -" ends correctly. as illustrated
    operated. The camera does not operate without             inside the battery compartment.
     battery.
  1 With a coin, loose the battery compartment cover    r  screw on the camera bottom and remove the
    cover.


20
View original page 14Page 15 · Read text
Guide Pin
       FLihrungsstift
      Goupille de guidage


               www.butkus.us

  2  Fit the guide pin on the camera into the fixing hole     <Battery Check>    .,f in the battery compartment, replace the cover and       After the battery is loaded, operate the camera first,
     fix it in place by turning the locking screw in the            the battery voltage is normal  if the mark "c"  (battery
    direction of the arrow as shown as far as it will go.         warning mark) does not appear in the display panel.


22
View original page 15Page 16 · Read text
www.butkus.us

   <Battery Replacement>                          <Batteriewechsel>
        lf the mark "E"  turns on in the display panel, it is time    Wenn das Symbol "D" auf dem Monitor erscheint,
    to replace the battery. Set the main switch at OFF,       muB die Batterie gewechselt werden. Schalten 9ie die
   open the battery compartment cover and replace the      Kamera aus, dffnen Sie das Batteriefach und tauschen
    battery with new one.                                       Sie die Batterie gegen eine neue aus.
   o Though you can take picture even after the mark ":"   has    o Sie kdnnen nach dem Erscheinen des Symbols "{--.r" noch
       turned on, it is recommended to replace the battery as soon        weitere Aufnahmen machen. Es empfiehlt sich aber, sobald
      as possible. Be careful because the mark "s"   will blink or        wie mdglich eine neue Batterie einzusetzen. F:illt die
      go out and the camera will no longer operate  if the battery     .    Batteriespannung unter den Grenzwert, blinkt bzw. erlischt       capacity has dropped below the effective limit. In this case,        das Symbol "a", und die Kamera funktioniert nicht mehr.
       the last picture you took may not turn out correctly                Dabei kann es sein, daB die letzte Aufnahme nicht mehr
      exoosed.                                                                       richtig belichtet wurde.
   o Some batteries may tend to decrease their voltage         o Bei bestimmten Batterien tritt unmittelbar nach dem
       temporarily when they are loaded. You need not worry               Einlegen eine vorubergehende Spannungsabnahme auf.
       about this because they recover their performance when            Dies ist jedoch kein Problem, da ihre Leistung beim
       the power is turned on.                                            Einschalten der Kamera wiederhergestellt wird.
   o  lf the mark "9"  appears soon after the batteries are       a Wenn das Symbol "a"  kurz nach dem Einlegen der
       loaded, turn off the main switch and then turn it on again. lf         Batterien erscheint, schalten Sie den Hauptschalter einmal
       the mark "G" goes out, you can use this battery.                aus und wieder ein. Falls Symbol "8"  danach
                                                                         verschwindet, k6nnen die eingelegten Batterien verwendet
                                                                    weroen.


24
View original page 16Page 18 · Read text
www.butkus.us


                                                         Red Mark
                                                                       Roter punkt
                                                              Marque fouge
                                                               Marca rsia


         OFF position                      ON position                     AE Lock (AEL) position
         OFF - ausgeschaltet                ON = eingeschaltet                AEL = MeBwertspeicher
             Position "OFF" (arrCt)                          Position ON (marche)                   Position de verrouillage AE (AEL)
            Posici6n OFF                                Posici6n ON                              Posici6fl AEL (Enclavamiento AE)

   The main switch turns the camera on or off and selects    "ONt'mark
    or release the AE Lock.                               The camera is turned on
    a The main switch should be locked at a click position when
       shooting to prevent it from shifting by mistake             "AEL" mark
                                                      The AE lock is useful for shooting backlighted subjects
  OFF: Red mark not visible                             or if you want to shoot moving subjects continuously
                                                                 with a fixed exposure   When the red mark is not visible, the main switch is set
     at OFF, turning off the camera.                                                    a For details on AE lock, see page 100.        lf you are not using the camera, turn off the main
    switch to prevent the shutter from tripping
     inadvertently.
28
View original page 18Page 19 · Read text
<Display in the Viewfinder>
    <Sucheranzeigen>
    <Affichage dans le viseur>
    <lndicaciones en el Visor>
                                                                                                         Microprism Collar
                  Matte Screen                                                                             Mikroprismenring
                   Mattscheibenfeld                                                             Boque de microprisme
                   Verre d6poli                                                                                      Collar microprismetico
                    Pontalla mate
      Horizonial Splii-image spot
      Horizontaler
          Schnittbildindikatot
     Zone 6 stigmom6tre
         horizontal
     Punto de imagen dividida
         Horizontal


   The display in the viewfinder will turn on in the                                 lf you switch a button, dial, etc. while the display is
    following cases, then turn off automatically after 16          shown, the display will remain on for another 16
    seconds.                                                  seconds.
   1 When the main switch  is turned on.
   2 With the main switch on,
     When the exposure check button or the shutter
       release is depressed halfway. the display panel wi
       turn on.

30
View original page 19Page 20 · Read text
www.butkus.us


   <Display in the Viewfindep              @ Exposure Counter
                                                  The exposure counter shows the number of frames in    Display in the Viewfinder is the information center of                                                                   position for exposure.    the camera. lt contains aperture, shutter speed and so                                                             Besides the counter function,  it also provides the     forth.
                                                                   following functions:
                                          o Display of the remaining time (10 or 2 sec.-00) while the  O Flash Mark                                                             self-timer  is operating;        lf you are using the TLA flash system for taking flash     o Display of the operation order in the "A.B.C." mode                  l     pictures, the flash mark"l" will turn on as soon as the         (automatic exposure compensation for three consecutive
    flash is fully charged.  lf your subject is correctly                  frames).
    exposed,  it will blink two seconds after the flash has      o Display of the end of the film.
     fired.                                                        (O Aperture Value
                                                                                ln the aperture-priority auto exposure (Av) and manual  O Exposure Gompensation Mark                                                        exposure (M) modes, the aperture you have selected is        lf you set the exposure compensation dial anywhere                                                              displayed in the viewfinder. In the shutter speed-    except "0", the "+" or "-" mark will blink.                                                                             priority (Tv) and programmed auto exposure (P)
                                                     modes, the displayed aperture is the aperture selected  O Metering Mark                                                           by the camera in accordance with the shutter speed    This mark indicates the metering mode and AE lock.                                                      you have selected.
    Center-weighted metering mode: The "f l" mark is     @ Exposure Mark
    displayed.                                                               ln the auto exposure mode ("Av", "Tv", or "P"), the
    Spot metering mode: The "f.1" mark is displayed.          over "4" or under "v" mark indicating deviation from
    Center-weighted metering and AE locked mode:            the exposure control range will be displayed. In the
   The "[ ]" mark blinks.                                "M" or "X" mode, the corrgct "i", over "a  f -a  f l rl" g;'
    Spot metering and AE locked mode:                     under "r. ). v-t v" mark will be displayed.
   The "o" mark blinks.
                                                               (D Shutter Speed
                                                   The camera displays the shutter speeds from 1/4000
                                                               sec. to '16 sec. "4000" means 1/4000 sec. and "125"
                                                means 1/125 sec., and "16" means 16 sec.32
View original page 20Page 21 · Read text
<Display Panel>
    <LCD-Monitor>
    <Panneau d'affichage>
    <Panel Display>         ,sf nnnn
       D ECF


  O ISO/DX Indicator                                 a Display of the operation order in the A.B.C. mode;
   When displaying the film speed or in the film speed        a Display of the multiple exposure setttngs
    setting mode, this indicator will be displayed.            a Display of set condition for custom functions
   a When auto set mode with DX code, alwavs "DX" is           a Display of the end of the film
       displayed.
                               O Battery Warning Mark
  @ Exposure Counter/Film Speed                          Indicates the time to replace the battery.
    Normally,  it shows the number of exposures on a filnr.
        lf the "UP" button or "DOWN" button is depressed and   O Multiple Exposure Mark
    held, it switches to display the film speed.                  Displays when the camera is in the multiple exposure
     In addition,  it has the following functions:                 mode.
    a Display of the remaining time while the self-timer  is
       operating;                                                  €) Custom Function Mark
   a Display of the ttme (sec.) that has elapsed on bulb exposure      Displays when setting the custom function.
36
View original page 21Page 23 · Read text
Data back contact/
                                                                                                Data-Back-Kontakte
                    www.butkus.us                                                               Contact du dos dateur/
                                                                                               Contacto para el respaldo de
                                                                                                  datos
       While pushing the lock release button in the center,     r)  Insert the film cassette slantwise into the film     I     r   slide down the camera back opening lever and        z, chamber. with its protruding end downward as
    oDen the camera back.                                             illustrated.

    a When loading a film, never forget to remove the protect          Note on the shutter curtain:
       sheet inside the camera.                               The shutter curtain is a precision part. Never
                                                              touch  it with your finger or strike  it with the film
                                                                                          tip. When the film tip lies on the shutter curtain, in
                                                                            particular, never trip the shutter.
                                               o Take care not to touch or contaminate the DX contacts and
                                                                       data back contact.
                                               a Always load and unload a film in subdued light.


40
View original page 23Page 24 · Read text
www.butkus.us


       10000800000


       r0000000000000008000
      o@  oo


                                              mark       /   Close the camera back, turn on the main switch  Q Pull out the film tip as far as the orange "-"   rJ and place it on the spool. Take care that the film         -l  and deoress the shutter release.
   does not float up (see illustration).                      The film will automatically advance into position for the
                                                                                     first shot and the exoosure counter will show "01."
                                          a  lf the exposure counter in the display panel is blinking and
                                                                does not move from "00," the film is not advancing
                                                                                properly. Open the camera back and load the film correctly
                                                                                  again.
                                               a The exposure counter can be checked both in the display              lf@othe drawn out section of the filmrexis too long, do not try to         panel and in the viewfinder.
       continue loading the film. Wind  it back up into the film
        cartridge to adjust the length.


42
View original page 24Page 25 · Read text
The film speed can be set in two ways: automatic
    setting with DX codes and manual setting.
   The film speed can be checked on the display panel,

         lf "DX" is displayed in the display panel, the film
    speed is automatically set by the DX code. When
     usinq film with DX code, no adiustment  is required.
      With-out the "DX" mark, be sure to set the film
    speed manuallY.


                                                     <Setting the film sPeed>
                                                                      I  Turn the main switch on. While depressing the                                                                      I  exoosure mode lock release button, turn the
                                                        exoosure mode selector lever to set the exposure
                                              mode index to "lSO".
                                              a The film speed appears on the display panel.


44
View original page 25Page 27 · Read text
SO   antl                                                 tuLt                                              )X
                                        t-l  a                                  )^t I


   eD Set the exposure mode selector lever to exposure    <When "DX" is selected>
  J  mode. This completes the film speed settrng. The             lf you select "DX", using the film with DX code allows
    display panel indicates the exposure counter'               the camera to automatically set the film speed'
   o Once set, the film speed is kept in memory until  it reset to      The film with DX code is available in the range of ISO
       another value.                                        25 to 5000.
   a You cannot take pictures  if the exposure mode selector       The "DX" mark and the film speed are indicated on the        lever is set to "lSO" or "CF."                                                                outer case of the film cassette.
                                          o  lf the camera is loaded with non-Dx film, the film speed will
                                                              be automaticallY set to ISO 100.


AA
View original page 27Related documents and language editions
From the M. Butkus archive. Original publisher and archive notices are retained.
Check the model and edition against your equipment.
PDF verified 2026-10-10.