Film cameras
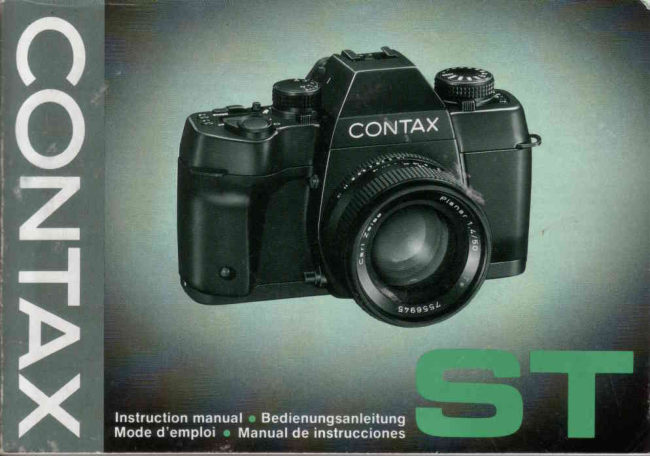
Contax ST User manual
User manual for Contax ST. 71 pages in English. Read the original PDF, download or print a copy without registration.
71 pagesEnglish8.2 MB PDF
Loading your manual…Open PDF directly
Document details
- Brand
- Contax
- Model / document
- Contax ST
- Document type
- User manual
- Language
- English
- Pages
- 71
- File size
- 8.2 MB
- Category
- Film cameras
- Document date
- Not specified in catalog
Search available document text
Find a term, then jump to its page in the original PDF. Image-only pages may not be searchable; check the PDF for exact wording and diagrams.
Page 3 · Read text
Thank you for your purchase of a Contax ST'             Wir danken lhnen. daB Sie sich fiir die Contax ST
This camera is a multi-mode auto-exposuresingle-       entschiedenhaben.
lens-reflex camera which offers various sophisticated      Bei dieser Kamera handelt es sich um eine einAugige                                                        Mehrbetriebsarten-Spiegelreflexkamera mitfeatures such as aperture-priority auto exposure, spot                                                     Belichtungsautomatik,die sich durch eine Reihemetering, 1/6000 sec. high speed shutter on auto, and                                                                   fortschrittlicher Merkmale auszeichnet, u.a.
1/200 sec. flash synchronizing speed.                    Belichtungsautomatik mit Blendenvorwahl,
It also provides a large-size shutter speed dial which      Spotmessung, eine sehr kurze VerschluRzeitvon
allows you lo check the camera operation and            1/6000 Sek. bei Automatikbetrieb sowie
information at a glance as well as an exposure mode       Blitzsynchronisation bei 1/200 Sek.
selector lever for switching the operation quickly. The     Dar0ber hinaus verftigt die Contax ST tiber einen
display can be illuminated when you take pictures in      groRdimensioniertenVerschluRzeitenring,der lhnen auf
dim light. Before using the camera, please read this       einen Blick eine Kontrolleder aktuellen Betriebsartder                                             Kamera und verschiedener relevanter lnformationenmanual carefully through to use it correctly.                                                               gestattet, sowie iiber einen Belichtungsbetriebsarten-
                                                    Wahlschieber fiir schnelles Umschalten zwischen denThismanualusesa multi-modePlanarT* 50mmFl 4 (MM)lens
equippedon thecamerafor explainingits operatingprocedures.     einzelnen Betriebsarten. Bei Aufnahmen in schwachem
However,youcanalsouseit in the samewayas describedin this     Umgebungslichtkann der Monitor beleuchtetwerden'
manualwhenit is equippedwithothermulti-modeCarlZeiss          Bitte lesen Sie diese Bedienungsanleitungvor
interchangeablelenses.                                   lnbetriebnahme der Kamera aufmerksam durch, damit
                                                       Sie mit allen Funktionen vedraut werden und
                                                    optimalen Gebrauchvon ihren Moglichkeitenmachen
                                                 konnen.
                                                     DieErklarungendieserBedienungsanleitunggehendavonaus,daB
                                                            einMehrbetriebsarten-Objektiv(MM)PlanarT. f1,4/50mman der
                                              Kameraangesetztist,dochgeltendiegleichen
                                                  Bedienungsvedahrenauchfur alleanderenMehrbetriebsarten-
                                                      WechselobiektivevonCarlZeiss.
                            www.butkus.us
View original page 3Page 5 · Read text
O ExposureComPensationDial
                        O A.B.C. IndexMark
                  @ Rewind Lock ReleaseButton
                  @ fitm RewindSwitch
                        O DisplayPanel
                  @ Drive Mode SelectorButtor/
                              "DOWN" Button
                        O fitm Speed Button/"UP" Button
                  @ Strap Lug
                                                                   I  vain Switch
                   @ Shutter Release
                                  C) A.B.C. Lever
                                     (E Lens ReleaseButton
                   @ Self-timerLED
                                     (E eattery CompartmentCover Guide Pin
                                     (E DiopterAdjuster
                                   (D AccessoryShoe
                                         lE Dedicated-flashContact
                   @ DirectX-contact
                                   (D SfrutterSPeed Dial
                   @ ExposureMode DisPlaY
                   @ ExposureMode SelectorLever
                   @ Lens Index
                   @ Aperture Unkage Lever
                                     (E Screen ReleaseClaw
                   @ ProgramCouPlingLever
                                   (D Automatic DiaphragmCoupling Lever
                   @ ApertureStoP-down Button


www.butkus.us
View original page 5Page 8 · Read text
Aperture-priority auto exposure (see page 66)
Belichtungsautomatik mit Blendenvolwahl (SieheSeite67.)
Exposition automatique  i  priorit6 au diaphragme
(voirpage 67)
Exposici6n autom6tica con prioridad en la abertura
(veala p6gina67)


Shutter-speed-priority  auto exposurle
(with MM type lensesonly)(see page 68)
Bel ichtungsautomati k m it Versch luBzeitenvorwah | (nur bei
Venruendungvon Objektivenmit MM-AnschluB)(SieheSeite69.)
Exposition automatique  i  priorit6  i  la vitesse
(avecobjectifsde type MM seulement) (voirpage 69)
Exposici6n autom6tica con prioridad en la velocidad del
obturador (s6locon objetivosdel tipo MM) (veala p6gina69)


Programmed auto exposure
(with MM type lensesonly)(see page 72)
Programm-Belichtungsautomatik (nur bei Venruendungvon
Objektivenmit MM-AnschluB)(SieheSeite73.)
Exposition automatique programm6e
(avecobjectifsde type MM seulement) (voirpage 73)
Exposici6n autom6tica programada
(solocon objetivosdel tipo MM) (veala pagina73)
View original page 8
Page 10 · Read text
Set your desiredapedureand shoot.

                                  StellenSie das Objektivauf den gewunschtenBlendenwertein und machenSie
                                  die Aufnahme.

                             Reglezle diaphragmed6sireet d6clenchez.

                                Ajustela aberturadeseaday dispare^


                             Turnand set the shutterspeeddialto your desiredspeedand shoot.ffi                           DrehenSie den VerschluBzeitenring,um die gewunschteVerschluBzeit
                                  einzustelten,und machenSie die Aufnahme.
                            Tournezet r6glezle cadrande vitessed'obturationpour [a vitessed6sir6eet
                             d6clenchez
                                Girey ajusteel controlde la velocidaddel obturadora la velocidaddeseaday
                                 dispare.

q3                         Focusthe lens,compose your pictureand shoot.
                                  StellenSie das Objektivscharf,wdhlenSie den gewunschtenBildausschnittund
                          machenSie die Aufnahme.

                                Effectuezla mise au point, composezvotre photo et declenchez.

                            Enfoqueel objetivo,compongala imageny dispare.
                                                                            15
View original page 10Page 11 · Read text
7


             Attach the Strap                         Attaching the Eyecup F-4
             (standardaccessory)                       (standardaccessory)
             Attach the strao as shown in the        O Removethe eyepiecering by turning
               illustration.                                                          it as shown.
                          *            @ Attacn the Eyecupto the eyepiece
           Anbringendes Tragriemens            and fix the eyepiecering again in place
            (Standardzubehor)                      by screwingit in.
            BringenSie den Tragriemenwie in                          *
             der Abbildung gezeigtan.                Anbringender AugenmuschelF-4
                          *                        (Standardzubehor)
             Fixationde la courroie            O DrehenSie den Okularringwie
             (accessoirestandard)                        gezeigt,um ihn zu entfernen.
            Fixezla courroiecomme indiqu6      @ BringenSie die Augenmuschelam
           dans                                    Okularan und schraubenSie denIt                   I'illustration.*                         Okularringwieder                                  ' Inion de la correa                                                         ein.*
             (accesorioestdndar)                       Fixationde l'oeilletonF-4                   @
          Una la corea como se muestraen            (accessoirestandard)
                la ilustracion.                  O Retirezla bague de I'oeilletonen la
                                                        tournant comme indiqu6.
                           @ FixezI'oculairesur I'oeilletonet fixez la
                                               bague de I'oeilletonde nouveauen place
                                               en la vissant.
                                                                *
                                              Uni6n del marco del ocular F-4
                                                        (accesorioestdndard)
                                   O Extraigael anillodel ocular girdndolo
                                           como se muestra.
                           @ Una el marcodelocularen el oculary
                                                                                fije el anillodel ocular en su lugar
                                                     enrosc6ndolo.

     L6                          www.butkus.us
View original page 11Page 12 · Read text
<Mounting  the Lens>                             <Dismounting  the Lens>
    Frrst,removethe camera'sbody cap and the lens'rearcap    Whilepressingin the lensreleasebutton,turn the lens
   by turningthem counterclockwise.Then,alignthe red dot     counterclockwiseas far as it will go and pullit out toward
   on the lenswith the lensindexon the camera,fit it in and      you. Afterdismountingthe lensfrom the camera'protect
    turn it clockwiseuntilit lockswith a click.                   the lenswith the rearcap, and the camerawith the body
                                                                                                             ud|J.

                                                     o Do not touch the lenssurfaceand camerainsidewith
                                                      yourfingerswhen attachingand detachingthe lens.
                                                     o Avoiddirectsunlightwhen changingthe lenswith film
                                                     loadedin the camera


1 8
View original page 12Page 13 · Read text
Attof the maior functions of this camera including the      f$  Inserlthe batterreswiththe plus@ and minuse ends
    shutter, fitm winding, and rewinding are battery         &  correctlv,as illustratedinsidethe batterycompartment.
    operated.                                                                                 lf batteriesare loadedwith their@ and e ends incorrectly,
   The camera does nof operate without batteries.          the cameradoes not operateand may evencause
                                                       malfunctioning.
    1  W,t^a coin.loosethe batterycompadrrentcover        x The batteriespackedwith the cameraare sample      i"  screwon the camerabottomand removetne cover'      batteriesTheycan be usedonlyfor testingthe camera
                                                      operation.

                                             Usefour 1.5VAAA-sizealkalinebattertes.
                                                                                        r Youcan also use rechargeableNiCd battertes.
                                                                                                                                    j AAA-si2smanganesebatteriescannotbe used because
                                                                  theircaoacitvis too low
20                          www.butkus.us
View original page 13Page 15 · Read text
n
   <Battery Precautions>                         <VorsichtsmaBregeln fiir die Batterien>
   o Always replacethe batterieswith new ones of the same type. Do     o TauschenSie immeralleBatteriengleichzeitiggegenfrische
    not mix differentkinds of batteriesor new and old batteries.Always     Batteriendes gleichenTypsaus. MischenSie nichtalte und neue
    use four new batteriesof the same type and brand.                   Batterienund solcheverschiedenerTypen.VerwendenSie immer
    o Generally,battery performanceis reduced by cold temperatures.     vier neue Batteriendes gleichenTypsand Fabrikats.
       lf you are shootingin cold weather,it is advisableto keep the                r Bei Temperaturenunter Null nimmt die Batterieleistung
    camera warm in a bag or an outfit for protectionagainstcold. The      vorubergehendab. Beim Fotografierenin kaltemWetter sollten
    battery performancereduced by low temperatureswill return to        daher frische Batterienven'uendetund die Kameravor den
    normalwhen you take picturesat an ordinarytemperature.         Aufnahmenwarmgehaltenwerden.Die durchtiefeTemperaturen
    o Beforeloadingthe batteries,wipe both polescleanwith a dry        beeintrAchtigteBatterieleistungwird jedochwiederhergestellt,wenn
     cloth because poor contact may resultif they are soiled with sweat    Aufnahmenspdterbei normalerTemperaturgemachtwerden.
    or grease.                                                o Vor dem Einlegender Batterienbeide Pole mit einemtrockenen
    o Do not throw used batteriesinto fire or try to charge or            Tuch abreiben,da bei einerVerschmutzungder Pole mit SchweiB
    disassemblethem becauseit is dangerous.                        oder Fett kein einwandfreierelektrischerKontakt gewiihrleistetist.
    o  lf you are going on a longtrip, bringa new set of sparebatteries    o VerlcrauchteBatterienauf keinen Fall in ein offenesFeuerwerfen,
    with you.                                                   aufuuladenversuchenoder zerlegen,da Verletzungsgefahrbesteht!
                                                            o Wenn Sie auf lAngereReisengehen,nehmenSie einenSatz
     Battery types and their capacities (Numberof rolls of 24-            frischerBatterienals Beservemit.
    exposurefilm that can be exposedwith new batteries;accordingto
    Contax testing standard)                                            Batterien und ihre Kapazit6t (AnzahlvonRollen24er Films,die
                . t1.q:seq\:Tri1   qti*ii!La!:;                                $    8ffi6                                            mit frischenBatterienbelichtetwerdenkonnen;dieseAngabe
                                                                 beruhtauf Contax-Testbedingungen.)
     Four 1.5V alkalinebatteries(AAAsize) About 50                                                                                Batterietyp              Normaltemp#Ctil-i'**
     Four 1.2V Ni-Cd batteries(AM-size)  About 30.                                                                 Vier1,5-V-Alkalibatterien(AAA)      ca.50
      * Whenfullycharged.                                                               Vier1,2-V-NiCd-Akkus1nn4;        ca.30.
                                                                                                          .                                                        lm vollstAndigaufgeladenenZustand.


24                          www.butkus.us
                                                                                                                                         : . . . - -
View original page 15Page 16 · Read text
"                   "                                                                                      ["  mark....At !", the camerais turnedon and set for
                                                         center-weightedaveragelight metering.
                                                        This mode is convenientfor ordinaryshooting.
                                                     o For detailson center-weightedaveragelight metering,
                                                  see page82.
                                                                                   "                   "                                                   O" mark....At O", the camerais turned on and set for
                                                        spot metering.
                                                     o Fordetailson spot metering,see page 82.
                                                            'IAEL"         "AEL"                                                                     mark....At      the exposurevaluemeasuredby
                                                        spot meteringis locked.The AE lock is usefulfor shooting
                                                           backlightedsubjectsor if you want to shoot moving
                                                           subjectscontinuouslywith a fixed exposure.
                                                     o For detailson AE lock,see page92.
  ONposition/PositionEIN     OFFposition/PositionAUS
    PositionON/Enla posicionON   PositionOFF/Enla posicionOFF

   The main switch turns on and off the camera and sets
       it for center-weighted average light metering (D), spot
    metering (O), or spot metering AE lock (AEL).
   o The mainswitchshouldbe lockedat a clickposition
   when shootingto preventit from shiftingby mistake.
   OFF : Red mark not visible....Whenthe red mark is not
    visible,the mainswitchis set at OFF,turningoff the
   camera.
       lf you are not usingthe camera,turn off the mainswitchto
    preventthe shutterfrom trippinginadvedently.
26
View original page 16Page 17 · Read text
Diese Kameravertilgt  tiber eine eingebaute
                                                                 Dioptercinstellung. Um das Sucherokular auf lhre
                                                          Sehschdrte einzustellen, drehen Sie den
                                                                       Dioptereinsteller, bis der Kreis in der Suchermitte
                                                                 schart erccheint. Der Einstellbercich betrdgt +1 bis -3
                                                                   Diopter.

                                                     o Wenn sich mit Hilfedes eingebautenDioptereinstellers
                                                         keineeinwandfreieEinstellungezielen ldBt,empfiehltsich
                                                         der Gebrauchder als SondezubehdrerhdltlichenFM-
                                                              Diopterlinsen.


    This camera has a built-in diopter adiustment unit. To
     adiust the viewfrnder eyepiece to your eyesight, tum
    the diopter adjuster untilthe circle in the center of the
     viewfinder qpears  sharp and clear. The adiustable
    range is from +1 to -9 diopters.
      r   lf you cannotadjustthe eyepieceto your eyesightwithin
    the camera'sdiopteradjustingrange,acquirean optional
   FM type diopter corrector lens.


28                          www.butkus.us
View original page 17Page 18 · Read text
!ilil                ff


   The fitm speed can be sef rn two ways: automatic         <Automatic  Film Speed Setting with DX
    setting with DX codes and manual setting.             Codes>                                                                         "DX".   o  lf you are usingDX film,you need not set the filmspeed    Set the film speedto                                                                           "DX"   becausethe camera'sfilm speedhas beenfactoryset at           lf the film speedhas beenset to    and you are using    'DX"       and the camerawill automaticallyset itselfto the ISO   DX film,the camerawillautomaticallyset itselfto the speed
   speedof the filmyou are using.                              of the filmyou are using.DX filmsare availablein a rangeof
   o Onceset, the film speedwill not changeuntilit is set to     ISOspeedsfrom 25 to 5000,The DX markand film speed
   anothervalue.                                        are printedon the film box.
    <Film Speed Button>
       lf you pressthe film speedbutton,the film speedbetngset    1  Pressthe filmspeedbuttonfor about1.2 secondsor
     willturn on in the displaypanel.And if you keep on                     I  more.The filmspeedin the displaypanelwill startto
    pressingit for about 1.2 secondsor more,the filmspeed      blink.As soon as it starlsto blink,removeyourfingerfrom
     will startto blink,which meansthat the camerahas been     the button.
    switchedto the filmspeedsettingmode.Youcan now
30 changethe film speed.
View original page 18Page 21 · Read text
1  Whilepushingthe lock releasebuttonin the center,    Q  Inserlthe film cassetteslantwiseintothe filmchamber       I   slidedown the cameraback openingleverano open     4  with its protrudingend downwardas illustrated.
    the cameraback.
                                                     Note on the shutter curtain:
                                                The shuttercurtainis a precisionpart.Nevertouch it
                                                             with yourfingeror strikeit with the filmtip.
                                           Whenthe filmtip lieson the shuttercuftain,in particular,
                                                        nevertrip the shutter.
                                                                                        r Takecare not to touch or contaminatethe DX contacts
                                                 and data back contact.
                                                                                        r Alwaysloadand unloadfilm in subduedlight'

36                          www.butkus.us
View original page 21Page 22 · Read text
i -  t  f
                        DX            , J   l
                          S
            EViewfinder
                                                                Sucher
                                                                           Viseur
                                                                       Vrsor

                                                                  "       "                                            mark            r While the frlm s advancingrnto posltionfor the first shot    {P  P,rllotrt the frlm trp as far as the orange
   q# and rnsed rt Lrnderthe mark, Take care thal the ftlnr        the displaywill switch from the exposure counter to the film
   does not float up (see illustratiorr)                       speed mode, lt wil return to the exposure counter mode
                                                          as soon as the frlrr sets tself into positionfor the first shot.
                                                            o Whrlethe frlm is advancingto the first frame. you can trrp
                                                               the shutter but cannot take ptctures                                                                                                                   '00"                                                            o  lf the exposure counter does not move from      the
                                                                    frim rs not acivancingproperly Cpen the camera back ano
    o  li ll're-.length 6f filrn prctrLtdinqfronr.the cassette s ioo       oad the fi rn cor-rectivagart
      lrrq, adllrst tt bV wrncjtlq fllm back into the cassette before    o The exrJosrtrecoLtrrtercan be checked both in the
     r,.adrnqthe filr.r                                            displavpanel arrrl lr 1n6vlsvvfln6g;
             (l ose thp catrreraback,   n on the nlain swrtch and      o The film clrecr.y"rr(i.\!  ,r,l let vou check rf there ts filrnin       -,€     € deoresSilrp ShU'lcrrere                               the camera of trl'
   The film will at-rtontatrcallyacivance nlo Dr:sitionfor the first                                              '01"   ShOtarrrlthe exDOsUreCOunterrn,ltilShOw38
View original page 22Page 23 · Read text
Matte Screen
     Mattscheibenfeld
    Vene depoli
      Pontalla mate

     Micropism Collar
     Mikoprismenring
    Boque de microqrisme
      Collar mhropismetico

    Horizo ntal Split-image Spot     Hor2ontaler Schnittbildindikator            EEE-    Zone 6 stigmomdtre horizontal                   b'f
     Punto de imagen dividida
        horizontal


   The displayin the viewfinderand displaypanelwill turn on     <Display  in the Vlewfinder>
    in the followingcases,then turn off automaticallyafter 16    O Aperture Value .... In the aperture-priorityauto
   seconds.                                          exposureand manualexposuremodes,the apertureyou
  O Wnen the main switch is turned on.                   haveselectedis displayedin the viewfinder.In the shutter-
  @ Witfrthemainswitchon,                                 speed-priorityand programmedauto exposuremodes,the
     r When the shutterreleaseis depressed;                   displayedapertureis the apertureselectedby the camera
     r When the rewindswitch is turned on;                          in accordancewith the shutterspeed you haveselected.
     r When the drivemode selectorbutton,film speed button,   O Spot Metering Mark .... Thismarkwillturnon when
    or illuminationbuttonis depressed.                        the meteringmode is switchedto the spot meteringmode
                                                               (O),and blinkwhen the AE lock (AEL)is activated.
      lf you switcha button,dial,etc. whilethe displayis shown,
   the displaywill remainon for another16 seconds.www.butkus.us40
View original page 23Page 24 · Read text
I      €) Exposure Gounter.... The exposurecountershows      <Display Panel>
     the numberof framein positionfor exposureand advances      t  ISO/DX lndicator .... lf the film speed button ("UP"
     one at a time eachtime the film is wound.                   button)is depressedto show the film speed,the camera's
     Besidesthe counterfunction,it also providesthe following     film speed settingwill be displayed.
      functions:                      @ Exposure Gounter/Film Speed.... Normally,it shows
        r Displayof the remainingtime (10 sec.-00)whilethe         the numberof exposureson a film.lf the filmspeedbutton
      self-timeris operating;                                             is depressed,however,it switchesto displaythe film                                      "A.B,C."        r Displayof the operationorderin the      mode        speed.In addition,it hasthe followingfunctions:
      (automaticexposurecompensationfor threeconsecutive        r Displayof the remainingtime whilethe self-timeris
      frames).                                               operating;
        r Displayof the end of the film.                                          r Displayof the time (sec.)thathas elapsedon bulb
        Flash Mark .... lf you are usingthe TLA flashsystemfor    exposure;                                                   "   "      takingflash pictures,the flash mark  I   will turn on as            r Displayof the operationorderin the A,B.C.mode;
     soon as the flash is fullycharged.lf your subjectis correctly     r Displayof the end of the film.                                                                                                            "Battery     exposed,it will blinktwo secondsafterthe flash has fired.      €) eattery Warning Mark .... For details,referto
      €) Shutter Speed .... The cameradisplaysthe shutter      Check"onpage22.
     speedsfrom 1/4000sec,to 1 sec. and LT (2 - '16sec.).      G, Single-frame Exposure Mode Indicator.... Turnson     "4000"                      "'125"         means1/4OOOsec,,and    means1/-125sec.,    when the drive mode is set to the single-frameexposure
      etc.   lf there are two shutterspeedson display,the shutter   mode.
     speedwhich is set is an intermediatevaluebetweenthem.   G GontinuousShooting Mode Indicator.... Turnson                "A"                                 "LT"          lf the mark     blinks,it meansoverexposure;and if        when the drivemode is set to the continousshooting                                 "4000"    "A"      blinks,it meansunderexposure.lf      and     turn on    mooe.
      at the sametime, it means1/6000sec.                    (P Selt-timer Mode Indicator.... Blinkswhen the drive
     The measuredvalueof shutterspeedwill turn on in the dis-   mode is set to the self-timermode.
      play,and it will blinkif it has been lockedin the exposure            "Tv","M"  "AEL".    mode         or     The shutterspeedwill also blink
    when it has been automaticallyset for flash pictures.
   @ Exposure Gompensation Indicator .... lf you set the                                                      "0",    "+/-"     exposurecompensationdial anywhereexcept    the
     markwill blink.                                                                                                                  4l
View original page 24Page 25 · Read text
I
                                                 Wenn es so dunkel  ist, daB Sie die Anzeige auf dem
                                                                 Monitor nicht erkennen kdnnen, drilcken Sie die
                                                                Beleuchtungstaste neben dem Sucherokular.
                                                         SolangeSie dieseTastegedruckthalten,und weitere16
                                                    Sekundennachdem Loslassen,werdender Monitor,die
                                                               Belichtungsbetriebsarten-Anzeigesowie die Einstellskalen
                                                       des VerschluBzeitenringsund des Belichtungskorrektur-
                                                                  ringsvon einerLampebeleuchtet.
                                                          o Wird die EnstellungeinerTaste,einesRingesoder
                                                         anderenBedienelementsder Kameraveriindert,waihrend
                                                                  die Anzeigebeleuchtetist, so bleibtsie genauwie bei
                                                        Sucheranzeigeund Monitorweitere16 Sekunden
                                                                   eingeschaltet.
                                                          o WennSie den Ausloserhalbeindrucken,wird die
                tf it is so dark that you cannot see the display clearly,     Lampeausgeschaltet.
         depress the illumination button besrde the viewfinder
         eyeptece.
        Whileyou hold on the buttonand 16 secondsafteryou
        haveremovedyour fingerfrom it, the displaypanel,
        exposuremode display,shutterspeed dial (settingscale),
        and exposurecompensationdial(settingscale)willbe
         illuminatedby a lamp.
        o  lf a dialrs switchedor a buttonis pressedwhilethe
         displayis illuminated,the displaywill remainon for another
        16 secondsas in the case of the displayin the viewfinder
        and displaypanel.
        o The lampwillturn off when you depressthe shutter
          releasehalfwav.                www.butkus.us    48
View original page 25Page 27 · Read text
Shuffersped
                                                                              Verschlu{keit
                                                                            t4tessed'obturation
                                                                       Velocidaddel obturador


   <Exposure Mode Selector Lever>                   <Shutter Speed Dial>
   The exposuremode selectorleverallowsyou to selectthe    The shutterspeed dial is used for adjustingthe exposure
    aperture-priorityauto exposure(Av),shutter-speed- priority    time of the film,lt is usablein the shutter-speed-priority
   auto exposurefl-v)(withMM type lensesonly),              auto exposuremode and manualexposuremode.
   programmedauto exposure(P)(with MM type lensesonly),    Shutterspeedscan be set in 1-step incrementsfrom
   manualexposure(M),and bulb exposure(B) modes.While   1/4OOOsec, to 1 sec. and at X (1/200sec.).
   depressingthe exposuremode releasebutton,operatethe
   exposuremode selectorleverto set your desiredmode'      o The shutterspeed dial should be fixed at a click position
    For detailedinformationon these exposuremodes, referto    when shooting.
   pages 62-80.

52                           www.butkus.us
View original page 27Page 28 · Read text
To take sharp pictures,the cameramust be held steady.
   Becauseblurredpicturesare most often caused by
   camerashake,it is recommendedto learnhow to hold the
   camerasteadyby practicingit. Placethe camerain the
   palm of your left hand and hold the distanceringof the   lens so that you can operateit with your fingers.Hold the       N\
    grip with your righthand and put the forefingerlightlyon
   the shutterrelease.Stick the left elbow to the body'
   pressthe cameralightlyagainstyour face and   lookthroughthe vieMinder.       FN
   Alwaysdepressthe shutterreleasevery
    gently.The cameracan be held not only in
   the horizontalposition,but also in the
    verticalpositiondependingon the       N    subject.In any case, studYYour   comfortablecameraPositioning       M,Fl
   and practiceuntilYouget used
    to it. lt is also good to suPPort
   your body or camerawith a
    building,tree,and so on.


                                                                                       I
                                                                                                                                                                                                                                                                                                                                                                                                                                                                                                                                                                                                                                                                                                                                                                                                              II
                                                                                   loIl

54
View original page 28Page 29 · Read text
This camera is normally equipped with a focusing        <Microprism  Collar and Matte Screen>
   screen FW-l (horizontal split-imagelmicroprism type).    Turnthe distanceringuntilthe imageon the microprism
   Focusing can be done on a horizontal split-image spot     collaror mattescreenappearssharp.lf the subjectis not
     in the centen on the microprism collar around  it, and        in sharpfocus,the imageon the mrcroprismcollarwill
   on the surrounding matte area.                       appeargrainyand that on the mattescreenblurred.
                                                     o Whenusinga slow lensor takingclose-upswith a high
    <Horizontal Split-image Spot>                       magnification,focusingmay be difficult.In such cases,use
   Whileiookingthroughthe viewfinder,turn the distancering    the mattescreento focus.
    untilthe upperand lowersegmentsof the imagecoincide,                                                                                                          .                                                       InterchangeablefocusingSCreenSare alsoavailable.For       lf the subjectis not in sharpfocus,the two segmentswill
    not coincide.                                              details,referto page 134

56                           www.butkus.us
View original page 29Page 30 · Read text
Bei Erreichen des Filmendes wird der Film nicht mehr
                                                                       weitertransportiert, und die Anzeigen des Bildzdhl'
                                                        werks und der Aufnahmebetriebsart beginnen zu
                                                               blinken.
                                                                                              "l                                                            HaltenSie den Ruckspulfreigabeknopfbei
                                                                                        r  eingeschaltetemHauptschaltergedrucktund schieben
                                                         Sie den Filmruckspulschalterin Pfeilrichtung.Danach
                                                          beginntdie Kamera,den Filmzuruckzuspulen.
                                                     o Wdhrenddes Rucksoulensblinktdie Nummerder
                                                                letztenAufnahmeauf dem BildzAhlwerk.Nach Erreichen
                                                    des Filmanfangswird die Ruckspulungautomatisch                                                                                                       "00".                                                           abgeschaltet,und das Bildzdhlwerkzeigt
                                                     o AchtenSie darauf,den Fingervom Filmruckspulshalter
                                                    zu nehmen,sobalddas Ruckspulendes Filmsbegonnen
    After the last frame is exposed, the camera will stop        hat, Der Schalterkehrt daraufhinautomatischin seine
    winding the film and the exposure counter and drive       Ausgangsstellungzuruck.
   mode display will start to blink.
    1  With the main switch on, slidethe film rewindswitch in
       I   the directionof the arrowwhile pressingin the rewind
    lock releasebutton.The film will start to rewinditself.
   o Whilethe film is rewinding,the numberof the last
   exposedframe on the counterwill remainon and continue
    to blink.As soon as rewindingis completed,the motor will                                     "00".    stop and the counterwill returnto
   o  lf the rewindingoperationhas started,be sureto remove
    your fingerfrom the rewindswitch.The rewindswitch will
    automaticallyreturnto its originalposition.
58
View original page 30Related documents and language editions
From the M. Butkus archive. Original publisher and archive notices are retained.
Check the model and edition against your equipment.
PDF verified 2026-10-10.