Film cameras
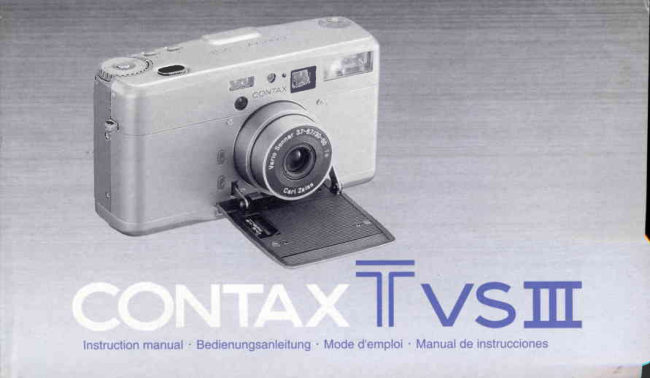
Contax T VS III User manual
User manual for Contax T VS III. 62 pages in English. Read the original PDF, download or print a copy without registration.
62 pagesEnglish3.4 MB PDF
Loading your manual…Open PDF directly
Document details
- Brand
- Contax
- Model / document
- Contax T VS III
- Document type
- User manual
- Language
- English
- Pages
- 62
- File size
- 3.4 MB
- Category
- Film cameras
- Document date
- Not specified in catalog
Search available document text
Find a term, then jump to its page in the original PDF. Image-only pages may not be searchable; check the PDF for exact wording and diagrams.
Page 2 · Read text
Thank you for your purchase of the CONTAX      Wir danken lhnen, daB Sie sich ftir eine                         I
Tvs lll.                             CONTAXTvs lll entschieden haben.                    (
Based on the CONTAX philosophy of             Diese Kleinbild-Kompaktkameraist ein                       t
producing a "camera,                         Ergebnisder CONTAX-philosophie,,eine                 I
which is pleasurableto own, to use and takes     Kamera zu schaffen, deren Besitz Freude                   t
an excellent photograph",                     macht und exzellenteAufnahmen erm6glicht.,,            i
this 35mm lens-shuttercamera is extremely       Die Tvs lll ist mit einem v6llig neuen               a
simple to use.                                 Zoomobjektiv ausgestattet, erlaubt die            F
The camera features a newly designed            automatische und manuelle Fokussierung         a
retractable zoom lens. The focusing system is     sowie die Belichtungsfunktionenprogramm-        c
switchable between auto focus or manual, and    und Zeitautomatik.                             p
the exposure control system                                                                  e
offers aperture-priority auto exposure and         Vor der Verwendungder KameralesenSie bitte
programmed auto exposure.                          sorgfiltigdieseAnleitung.                         L
                                                                                                                                                                                                            vl
Beforeusingthe camera,be sureto readthis
instructionmanualcarefully.


                            www.orphancameras.com
View original page 2Page 3 · Read text
3.Takinspicture                      ..................eo    COntgntS                                                                4. Takingoutthe film:.........,...          ...............102
      QuickGuideto Shooting                                ..... 16    Shooting Techniques
    N a m e o f P a r t s . . . . . . . . . . . . . . . ' ' . . . . . . . ' ' ' ' . . . ' ' ' ' ' . . . ' ' 2 o 1 ' F o c u s L o c k . . . . . . . ' . . . .
      Preparations before Taking Pictures                  2. AperturePriorityAutoExposure(Av) "......'.......""114
       1. Loadingthe Battery                             .........26     3. ExposureCompensation..................---'-.---.'---.'-----122
        <BatteryReplacement>                                 4. FlashPhotography:...................         ........130
       2. Frontcover ..........                            ...........36      <1' Auto-flashMode>
       3. Concerningthe main powerswitch                      <2. Red-eyeReductionAuto{lash Mode>
         and/orfocusingdial. ............            ............40      <3' Flash-offMode>
       4. DiopterAdjustment                        ..........42     <4' Fill-inFlashMode>
       5. Displayin the viewfinder..............           ........44      <5' Nightscene PortraitMode>
       6. Displaypanel and ApertureDisplayLcD ...............52      <EffectiveRangeof the Built-inFlash>
                                             <Home Position>       7. How to Pressthe ShutterReleaseButton ..............58
       8. Set up and Printingthe Dateand Time ...................62  5. shootingwiththe self-timer:            "'-----.----152
       9. Loadingthe Film:                           ............74   6. ManualFocusishooting               "'................160
      10. Holdingthe camera                                 ......80     <Depthof Fieldrable>
     11. Basicphotographicconcepts               ...........83      7' custom Functions                          """"' 166
      Basic procedures  for Taking Pictures                  <Listof custom Functions>
       1. Turnthe Main powerswitchto "AF" .......................gg      <settingthe custom Function>
 .      2. Choosethe subjectsize(ZoominS)........................94
4
View original page 3Page 4 · Read text
Camera Care and Precautions:         o  This camera containshigh-voltagecircuits.In case
    O  Fingerprintsand dirt on the lens and other parts            of malfunction,never try to disassembleit by
                                                                 yourselfbecauseit is dangerous.        can adverselyaffectthe accuracyof the camera. lf
                                           a   lf you are going to use the camera for important       _ they are soiled,cleanthem lightlywith lens
         cleaningtissuemoistenedwith cleaningfluid.That        events such as an overseastrip or wedding
            is enough in most cases.                           ceremony,check to make sure it operatescorrectly
        To removedust, blow off with a blower or dust off          or make test exposuresbeforehand.lt is arso
         with a lens brush.                              recommendedto bring a spare batterywith you.
    O To clean the camera body, wipe off with a soft      O The camera is a precisioninstrument.Do not drop
           cloth. Never use organicsolventssuch as Denzene             it and avoid intenseshock.
        and thinner.
    O  After shootingon a beach or in a dusty place,clean    <Using the Camera in Cold Weather>
         the camerathoroughly.Salt air can cause                       lf you are usingthe camerain cold weather,keep it
          corrosion,and sand and dust can adverselvaffect      insideyour clothingto warm it up.
         the cameramechanism.                       As the temperaturedrops,the batteryperformancewill
    O   lf the camera is suddenlybroughtinto a warm room    be temporarilyreducedand the cameramay not
         from the outsidewhere it is cold, the lens mav be       operate.However,the battery performancereturnsto
         clouded.                                      normalat ordinarytemperature.
       The cloudinesswill disappearaftera while,but
         avoid suddentemperaturechanges if possible.
1 0
                               www.orphancameras.com
                             -,i.:i:,.,)$ J-'ar,;
View original page 4Page 5 · Read text
<When camera does not operate>             Kamerapflegeund Vorsichtshinweise:
 It occurs,though rarely,that the camera does not       O  Fingerabdrrickeund Schmutzauf dem Objektivund
operatedue to strongexternalelectricity.In this case,         anderenTeilenkonnendie Leistungder Kamera
turnoff the main switch again and take out the battery.         beeintrachtigen.EntfernenSie Verschmutzungen
Turnon and off the main switchand then reloadthe           durch leichtesAbwischenmit einem Blatt
batteryafter the displayon display panel disappears.          Objektivreinigungspapier,das mit etwas
Also,re-setdate and time.                                   Reinigungsfltjssigkeitangefeuchtetist. Staub mit
                                               einem Blasepinselentfernen.
<Camera Storage>                         o Zum Reinigendes KameragehAusesreibenSie es
O Keep the camera away from heat, moistureand           mit einemweichenTuch ab. VerwendenSie auf
   dust and store it in an airy place.                       keinen Fall organischeLosungsmittelwie Benzol
  Do not store it in a wardrobedrawer containing          oder Farbverdunner.
   mothballsor in a laboratorvwhich handles         a  ReinigenSie die Kameranach Aufnahmenam
   chemicals.                                  Meer oder an einemstaubigenOrt sorgfdltig.
O Do not leave the camera and film for a long time in         SalzhaltigeLuft kann Korrosionverursachen,und
   hot places.(on a beach in summer,in a closed car         die Mechanikder Kamerakann durch Eindrinoen
   under direct sunlight,etc.) becausethe camera,         von Sand und Staub beschddigtwerden.
   film and batterymay be adverselyaffected.        o Wenn die Kameravon einem kaltenan einen
                                             warmen Ort gebrachtwird, kann das Objektivglas
                                                    beschlagen.DieserBeschlagverdunstetnach
                                                           einigerZeit, doch solltenpl6tzliche
                                                Temperaturwechselmdglichstvermiedenwerden.11
View original page 5Page 9 · Read text
O Exposurecompensationdial   @ ApertureButtonB (Page114)  @ Select Button (Page 59)
    (Page 122)          @ ApertureDisplayLCD (Page  @ Tripod Socket (Page 152)
@ VieMinder (Page 44)             114)           @ Set Button (Page 59)
  /v? \  Self-timerLED (Page 152)   @ FrontCover(Page36)     @ Manual Rewind Button
@ LightSensor        @ Lens                           (Page 102)
                                                                                Battery Compartment/ \!,  FocusingWindow      @ LensBarrel          o
@ AF-assistBeam Emitter    @ Flash(Page130)                 Cover (Page 26)
   (Page 98)         @ DisplayPanel(Page52)    @  Film Check Window
          Release Button    @ ViewfinderEyepiece(Page   @ Camera Back Releaseo Shutter
   (Page 58)                         44)                           Knob (Page 74)
@ Zooming Button (Page 94)   @  DiopterAdjustmentDial (Page  @  Film Tip Mark (Page 74)
@ Dial Lock Release Button            42)            @ Spool (Page 74)
   (Page 160)         @ FlashModeButton(Page130) @  Film Chamber (Page 74)
@ Main Power Switch and    @ CameraBack        @ DX Contact (Page74)
   Focusing Dial (Page 40)    @ StrapLug (Page196)     @  Film Guides (Page74)
@ Strap Lug (Page 196)     @ Self-timerButton(Page152)
@ Aperture Button A (Page   @ DateButton(Page59)
   114)                           www.orphancameras.com
View original page 9Page 10 · Read text
n         r|r|                                                      u)^l


    O Open the battery       @ LoaO the battery in the battery <Battery Check>
        compartment cover by          compartment with the plus(+)  Afterthebatteryis loaded,turnon the
          turning it with a coin in the      and minus(-) ends correctly   camera.Then,"   " (oisotavot                                                                       $
          direction of the arrow.           placed as illustrated, then     RemainingBatteryCapacity)appearsin
                                         replace the cover.            thedisplaypanel.

         Use one 3V lithiumbattery(CRl23 or DLl23A) / Eine 3 V-Lithiumbatterie(CR123
           oder DL123A)veMenden. / Utilisezune pile lithium3V (CRl23 ou DL123A)/
26         Utiliceuna pila de litio de 3V (CRl23 o DL123A)
View original page 10Page 12 · Read text
<Battery Precautions>                      o The camera does not operateif the batteryis
    O  Generally,the batteryperformanceis temporarily        loadedwith "+" and "-" ends wrong.
        reducedby low temperature.lf you are taking          The 3V lithiumbattery(CR123Aor DL123A)can not
         picturesin cold weather,keep the camerawarm by       be recharged.
          puttingit insideyour jacket and taking it out only     a  Keep the batteryout of reach of children.
       when it is needed.The batteryperformance
        reducedby low temperaturereturnsto normal at an
         ordinarytemperature.
    O   lf the (+) and (-) poles of the batteryare soiledwith
        sweat or grease,poor contactwill result.Wipe both
         poles clean with a dry cloth before use.
    O   lf you are going on a long trip, bring a spare new
          batterywith you.
    O Never put the batteryin fire and do not recharge,
          short,disassembleor heat it becauseit is
        dangerous.

32
View original page 12Page 13 · Read text
<Precautions  for front cover and during
                                                            operation  of lens barrel>
                                        O When the front cover or lens barrel is operating,do
                                                                 not force it to stop.
                                        O   lf you put pressureon the tip of the lens by
                                                             accidentor turn the main power switchto " e  " =
                                                           "AF" while in a camera case, it may rattlefor
                                                            approx. 1 to 6 seconds.This is not a malfunction,
                                                               but it works to protectthe inner mechanism. At that
                                                                  time, if the lens is stuck,try the following:      <Precautions  for Opening and Closing the
                                                          e   Turn the main power switchto "@ " once.      Front Cover>
                                @  Turn the main power switchto "AF" again after    O Openingand closingthe front cover must be done                                                             a while.
         through"@" <+ "AF" of main power switch.                      -                                                                                                                       lf the lens does not returnwith the first try,
                 lf you force the cover to open by hand or try to                                                                repeatO and @ severaltimes.Then, the        push it closed by hand, it may cause malfunctionor                                                                   protectionmechanismwill be releasedand
       damage.                                                                     returnto normalcondition.
    O Do not put extremeforce to the tip of front cover or
36      the tip of lens barrel lt may cause malfunctionor
                              www.orphancameras.com        damage.
View original page 13Page 14 · Read text
Entriegelungsknopf


              Main PowerSwitchand/or FocusingDial                      HauptschalteruncUoderFokussierrad

     Use main powerswitchand/orfocusingdial for on/off       Hauptschalterund/oderFokussierradzum Ein-/
      switchof camera'spower and manual focus              Ausschaltender KamerafOrmanuellesFokussieren
      shooting(Page160).When you changefrom @    " to      verwenden.(Seite161).Wenn Sie von @    " auf "AF"
      "AF",then the cameracan be set to'Full Automatic        wechseln,kann die Kameraauf ,Vollautomatische
      ShootingMode'(Page88). Also, when pressingthe'Dial     Funktion'eingestelltwerden(Seite89). AuBerdemkann
      Lock ReleaseButton'andsetting "infinity- 0.5",then           - durch Drrlckendes Entriegelungsknopfesund
      'Manual            FocusShootingMode'can be set.                 Einstellenvon "Unendlichbis 0,5" - die Funktion
                                                      ManuelleFokussierungeingestelltwerden.40
View original page 14Page 15 · Read text
Viewlinder                                                   Sucher


           Diopter Adjustment                                                   Dioptrieneinstellknopf
            Dial

     This camerahas a built-indiopteradjustment      Diese Kamerahat eine integrierte
       unit.To adjustthe viewfindereyepieceto your       Dioptrieneinstellung.
      eyesight,turn the diopteradjustingdial untilthe    Zum Einstellendes Sucherokularsauf lhr
     focusframe in the viewfinderappearssharp and    Sehvermogenden Knopfdrehen,bis der
      clear.The adjustablerange is from +2 to -3.5       Fokussierrahmenim Sucherscharfund deutlich
      diopters.                                        erscheint.Der einstellbareBereichreichtvon +2
                                                          bis -3,5 Dioptrien.
42
                              www.orphancameras.com
View original page 15Page 17 · Read text
@ Focusing Indicator(also Distance lndicator)    @ rlasn mark:
  <Whensetting to Auto Focusing>                      Lighted: Readyto fire the flash.
                                                 Delayedblinks(Twiceper second):The flash is   Lightedor blinks accordingto the resultsof focusing.
                                                           charging.
        *---':'- 5. 5-2. 2-1.  1: - 0.5 blinks   =:J anO          Quickofblinks(Fourrange of flashtimesshooting.per second):(lf theWarningsubjectisout       J:10.5either                  1- 0.5blinks                                                             too close, it will be'Over Exposed.And if the
      one of them is                                                            subjectis too far, it will be'Under Exposed'.)
        lighted.                    O StrutterSpeed:
                                                '1000'means                                                           1/1000secondsas to the displayof      Focus within   Too close to   Not possible         'Shutterre                                       Speed'and'15' means 1/15seconds.
       the distance     sublect. Make  to focus          When two shutterspeeds displayat the same time,
      range of        distance more                                       it means that the shutterspeed is in-between.
      display        than 0.5m.                         Also, if 'LT' is lit, it means that the shutterspeed is
                                              between1/10 sec. and 16 sec.
                                            And if it blinks,it means that there is a deviation
 <When setting at Manual Focus>                      from the exposurecontrolrange. lt will be'Under
  Eitherone of -  : 5, 5- 2,2- 1, 1- 0.5 is lighted            Exposed'.'1000'blinks,                                                      Also, if              this meansdeviationfrom the  accordingto the settingvalue.                                                 exposurecontrolrange. lt will be'Over Exposed'.
                                                                       45
                            www.orphancameras.com
View original page 17Page 18 · Read text
Displayin the viewfinderis indicatedwhen the followingoperation      L'atfichagedans le viseur est activ6dans les cas suivants.ll
 isperformed.The displaywill go off automaticallyafter 8 seconds.      disparaitautomatiquementaprds 8 secondes.Cette temporisation
Thisdesignof displayin the viewfinderis to save the battery.          d'affichage6conomisel'6nergie.
1)Whenmainswithturnedto'AF'                                   1) Quandon d6placel'intenupteurprincipalsur'AF'
2)Withmain power switch to 'AF', it displaysby pressingthe           2) LorsqueI'interrupteurprincipalest d6jd sur'AF', l'affichage
shutterreleasebutton halfwaydown. Also, ij you operatethe           r6apparaitlorsquele d6clencheurest enfonc6d mi-course.
buttonsduringdisplay,the displayis postponedfor another8           Si une commandeest manipul6een cours d'affichage,la
sec0nos.                                                     temporisationest repouss6ede I secondes.


DieAnzeigeim Suchererfolgt,wenn die folgendenVorgdnge        Para visualizarla informaci6nen el visor, se debe realizarla
durchgeftihrtwerden.Die Anzeige erlischtautomatischnach 8         operaci6ndescritaa continuaci6n.La informaci6nse apagard
Sekunden.um die Batteriezu schonen.                         autometicamenteal cabo de 8 segundosa fin de no gastar
1) Wennder Hauptschalterauf ',AF'gestelltwird                   excesivamentela oila.
2) Wenn in dieser Positionder Ausloserleichtgedrucktwird.           1) Girar el bot6n de encendido/apagadoa la posici6n'AF'
WennSie ferner Einstelltastenwdhrendder AnzeigedrLlcken,         2) Pulsarel disparadorhasta la mitad para obtenerla informaci6n
wirddie Anzeigeum weitere8 Sekundenverlangert.               en el visor.
                                                                   Si toca cualquierbot6n con la informaci6nen el visor, 6sta se
                                                       mantendradurante8 segundosmds.
                                                                   51
View original page 18Page 19 · Read text
@ Sef-timer Display(10secondsor 2 seconds)
                                                 (Page 152)
                                ffimlrfiffiIr     @ exposure Counter, Date and Time,
                                                 Exposure Compensation Value, Manual
                                                   Focusing Set-up Distance, Self-timer
                                                        counter, Each display of Custom Function
                           @ ftash Mode Mark (Page 130)
                                                   AutoFlashmode " f,o    ''    +H.HtrH;HHwww.butkus.us                                                Red-eyereductionflashmode "g6r' "
                                                          uO "                                                                  Flash-offmode
    O  Oate Mark (Page 62)                                         Fill-inflash mode  " U "
        Y.M.D(Year,Month,Date),D.H.M(Day,Hour,             Night Scene Portraitmode "S1gt   "
         Minute),M.D.Y(Month,Day, Year),D.M.Y(Day,
        Month,Year)
   @ Spot Focus Display
               It is displayedwhen focus range is spot focus.
        (Page 166, 178)
   @ Oisplay of Remaining  Battery Capacity
52      (Page 28)
                              www.orphancameras.com
View original page 19Page 20 · Read text
<Aperture Display LCD>                   <Blendenanzeige-LCD>
                               O  " P " (seite91,181)
              @  " P "(Page 90, 180)           Wird angezeigt,wenn die Belichtungsfunktion
                      When exposuremode is         "Programmautomatik"eingestelltist.
                                   set' ProgramAuto',is                               @ glendenskala (Seite 1 15, 181)                              displayed.
                                                         Wird angezeigt,wenn die Belichtungsfunktion
              @ eperture  Scale (Page          "Zeitautomatik"eingestelltist.
                             1 1 4 , 1 9 0 )                               @ glendenwert  (Seite 1 15)
                              This scale displayswhen         Die Anzeigedes Blendenwertesist der Wert bei
                             AperturePriorityAuto is         30 mm (Weitwinkel).
                                  set.                         Der tatsdchlicheBlendenwertbei 60 mm (Tele)   @ eperture Value (Page 114)                                                              wird auf Seite 1 19 angegeben.
        The displayof aperturevalue is the value at
        30mm(wide-angleside).Actualaperturevalue at    @  " G r T "
        GOmm(telephotoside) is indicatedon Page 1 18.          Dies ist der tatsdchlicheBlendenwertbei 60 mm
                                                                   (Tele),wenn der Blendenwertvon F3,7 bei 30 mm   @  " G . 7 "                                                                   eingestelltist (Weitwinkel).
         This is actualaperturevalue at 60mm(telephoto
          side)when set with actualaperturevalue of F3.7 at
        30mm(wide-angleside).
56
View original page 20Page 21 · Read text
Press the shufter release button halfway:
                                                           This works for Focusingand ExposureMetering.
                                                        Press the shutter release button fully:
                                                    Lens movesto the focusingposition,trips the shutterfor
                                                           shooting.Afterthat,the film is winding.

                                                                                *                                                        Pressthe shutterreleasebuttonlightlywith the pad
       Presstheshutterreleasebuttonfully                                of your indexfingerto preventcamerashake.Also,
                                                          pleasereferto 'Holdingthe Camera'(Page80).

     The operationof the shutterreleasebuttonhas two      O  Focusingpositioncanbe changedwhenpressingthe
       steps.To pressdown to one step, is called'Pressthe           shutterreleasebuttonhalfwaydown.
       shutterreleasebutton halfway'.And to press down from
     one step to secondstep, is called'Pressthe shutter
      releasebuttonfully'.Shutterreleasebuttonworks for the
      followingfunctions.

58
                               www.orphancameras.com
View original page 21Page 23 · Read text
@     @     @
                       . l -        =ru ml=M  l%,1

@ Press select button and the number blinks    a As to settingthe time,when 'Minute'blinks,press
  which you want to set.                              selectbuttonsimultaneouslywith the time signalto
                                                           set the correcttime, startingfrom "00" seconds.
                                                  Date and time displayto be set is turned off after 8
@ Press set button and set correct number.                                                 secondsand switchto exoosurecounterwith date
                                              mark displayonly.                                'Time',                      'Date'                      and@ Wnen finish setting                                  press      The displaywith blinkingchangeto date mark and
  select button until the blinking of number         the displayof exposurecounterif it leavesas it is
  turns off.                                                  for approx.60sec.This can be set to the numberof
                                                       the displayof the blinkingvalue.Correctionof date
                                                                      63                                               and time must be finishedwhile blinking.
                             www.orphancameras.com
View original page 23Page 24 · Read text
<Printing the Date and Time>
      This cameracan printdate or time automaticallywhile
      takingpictures.
    O  Press the date button and choose the date
        mode.
        Each time you press the date button,the dating
       mode switchesin the followingorder: (No printing)
        = Month-Day-Year.= Day-Month-Year= Year-
        Month-Day+ Day-Hour-Minute.Set your desired
        mode.                                                                                          PrintingPosition
    O  Settingdate and time displaydisappearsafter       o The positionof printingis in the bottom right
        appox.Ssec. and switchesto exposurecounter           corner. lf the backgroundof printingpositionis
          with date mark displayonly. Press the date button         brightlike whiteor yellow, it may be difficultto
                 if you desireto check the contentsof printing.           read the number.
                                           o   lf you do not want to print the date or time, set -----
                                                                                     --- and shoot.   @ Depress the shutter release button  to
                                                                Last frame which has been taken beyond
         shoot and date or time will print.                    prescribedframes, it may not printed correctly70
                                                              according to the mechanism of this camera.
View original page 24Page 25 · Read text
Tho film tip mark / Symbol for Filmanfangsposition/
                                                                               Repere pour I'amorc€ / Marca para la punta de la
                                                                                               p€llcula


                                                                                Spool /
                                                                                       Filmaufwickelspule/     Film Guide / Filmt0hrung/
                                                                               Bobine r6ceptrice/       Bails de guidage / Gulas pan
                                                                               Bobina                    la pellcula

        Open the camera back by pushing down the camera       The film tip shouldbe pulledout as far as the orange"1"markand
          back release knob in the direction of the arrow.             placedon the spool. Place the film insidethe upper and lower film
            z  Load DX-coded lilms and set the film tip to the mark "1".    guides and take care that it does not curl up
         The film cassette is inserled slantwise in the film
         chamber.


74
                              www.orphancameras.com
View original page 25Page 26 · Read text
Close the camera back securely.
          Turn the main power switch to "AF"(main power switch                  lf the main power switch is otf   '           film does not                                                                                             @'the
           is'ON'), then the film advances automaticallyand stops        advance automatically.
        when the exposurecounter shows "01".


76
View original page 26Page 27 · Read text
lf the exposure counter blinks at "00", the film is not         Wenn der Bildzdhlerbei "00" blinkt,wird der Film nicht
         advancing properly. Open the camera back and reload            richtig transportiert. Die Kamerartlckseiteoffnen und den
          the film.                                                    Film erneuteinlegen.
                                                     Wenn Sie DX-codiertenFilm benutzen,stelltdie Kamera                   lf you are using DX-coded film, the camera
                                                                  automatischdie Film-emptindlichkeitein. Wenn Sie nicht          automaticallysets its film speed. lf you are using non-
                                                                    Dx-codiertenFilm benutzen.wird die Film-empfindlichkeit
         DX-coded film, the film speed is automaticallyset to                                                                  automatischauf ISO 100 eingestellt.
        tso 100.                                               Daraufachten,die DX-Kontaktenichtzu bertlhrenoder zu
     o  Take care not to touch or soil the DX contacts.                verschmutzen.
     a  Always load and unload film in subdued light.               Den Film stets bei geddmpftemLichteinlegenund
     o  When loading film for the first time, be sure to remove         entnehmen.
           the protective sheet in the camera's picture area frame.        Beim erstmaligenEinlegeneines Films unbedingtdas
                                                                   Schutzpapierin der Filmfuhrungentfernen.


78
                              www.orphancameras.com
View original page 27Related documents and language editions
From the M. Butkus archive. Original publisher and archive notices are retained.
Check the model and edition against your equipment.
PDF verified 2026-10-10.