Film cameras
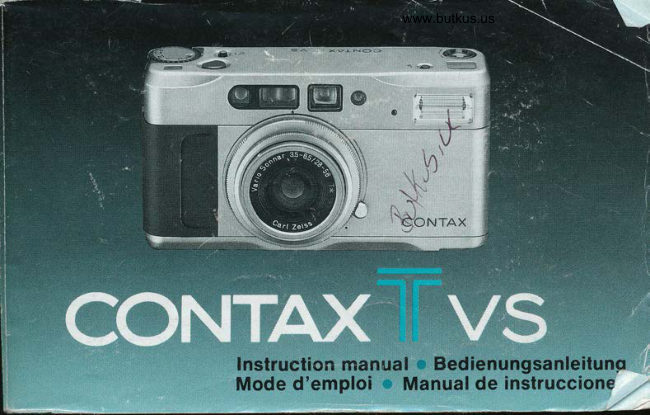
Contax Tvsinstruction Contax T vs Contax T vs Contax T vs User manual
User manual for Contax Tvsinstruction Contax T vs Contax T vs Contax T vs. 70 pages in German. Read the original PDF, download or print a copy without registration.
70 pagesGerman5.0 MB PDF
Loading your manual…Open PDF directly
Document details
- Brand
- Contax
- Model / document
- Contax Tvsinstruction Contax T vs Contax T vs Contax T vs
- Document type
- User manual
- Language
- German
- Pages
- 70
- File size
- 5.0 MB
- Category
- Film cameras
- Document date
- Not specified in catalog
Search available document text
Find a term, then jump to its page in the original PDF. Image-only pages may not be searchable; check the PDF for exact wording and diagrams.
Page 2 · Read text
7

      Thank you for your purchase of a Contax  Vielen Dank, daB Sie sich f0r eine Contax
       Tvs. Based on the Contax philosophy of     Tvs entschieden haben. Damit besitzen
      producing a "camera which works," this     Sie eine Kompaktcamera, die in Verar-
    35mm lens-shutter camera is extremely  beitung und technischer Ausstatfung einen
      simple to use.                               Spitzenplatz einnimmt und hochsten
             It features a newly designed zoom lens, an  Anspriichen geniigt. Um mit allen
        electronically controlled focusing system, Eigenschaften dieser Camera vertraut zu
      and an exposure control system consist-  werden, sollten Sie vor der ersten
        ing of aperture-priority auto exposure plus  Inbetriebnahme unbedingt die Bedie-
     programmed auto exposure.             nungsanleitung sorgfAltig lesen.
      Before using the camera, be sure to read
        this instruction manual carefully to use  it              "'-      ;;;;;il


I
View original page 2Page 5 · Read text
www.butkus.us


O Aperture Index (black): Set   @ Self-timer LED: Blinks while     €9 Camera Back
   your desired apefture on the         the self-timer is operating.    @ Film Check Window:  lt
   apefture ring to this mark.      (DZoom Mark When the main         allows you to see  if there is
@ Camera Back Release             switch (knob) is within this              film in the camera or not.
   Knob                                 range, the camera is turned on    (p VieMinder Eyepiece
@ Aperture Ring: The aperture       and ready for shooting.     @ Panoramic Mask
    ring is used for setting the    @ Main Switch (Knob): Turns   @ Film Tip Mark
   apefture and the programmed      on and off the camera oower.   @ Spool
   exposure mode.         @ Viewfinder          @ Gamera Back Release Pin
@ Exposure Compensation    @ Lens Front Ring: The lens   @ Manual Rewind Button: Use
   Dial: Exposure compensation        cap, filters (optional acces-             this button  if you want to
   up to +5 EV can be set in 1/3-         sories), and lens hood (option-       rewind the film in the middle of
  EV steps.                                    al accessory) are attached to        a roll.
(D Display Panel: The flash                           it.               @ Battery CompartmenV
   mooe, exposure compensa-      (D Lens                          Cover
   tion value, and battery check   @Zoom Ring: Change the focal  @ Panoramic Mode Switch
   mark are displayed on  it.              length of the lens by turning   @ film Guides
(E Flash Mode Button: Used for        this ring (zooming). The main   @ DX Contact
   switching the flash mode.            switch (knob) moves at the       (D Picture Area Frame
(D Flash                         same time.           @ film Chamber
                                  @ Strap Lug
                                  @ Tripod Socket
View original page 5Page 7 · Read text
www.butkus.us


           (lhis illustration shows all information availabte in the     () Flash Mark Turns'on when the picture is to be
          viewfinder for reference. lt does not represent an        taken with flash. lt blinks while the flash is charging,
   ,      actual example of display.)                         and turns on with steady light when the flash is fully
                                                             charged.
   ,   O Picture Area Frame: when the shutter release  is    ($ Focusing Indicator: Shows the focusing mode.
        depressed halfway, the picture area frame on dis-    @ Programmed Mode Indicator: Turns on when   I                                                                                             set to "P" (program AE), or when   -      play changes automatically according to the shoot-      the aperture ring is          ing distance, lens focal length, etc.                      the aperture is automatically stopped down and the
   :    To shoot, place your subject within the displayed       exposure mode is switched to program AE.
          frame.                          O Strutter Speeds: The camera displays the shut-
   ;    o When shooting in the auto-focus mode, the pic-       ter speed in a range of 700 (1/700 second) to 1 O (1 6
          ture area frame for taking close-ups is displayed         seconds).
          while the shutter release is depressed halfway and    o Shutter speeds are displayed in 1/2-step incre-
                                    after you remove your finger. In     ments.    .      for about 2 seconds
         the manual-focus mode,  ii is Oisplayed when the     o  lf "P700" or "500" blinks, it means that your sub-
         distance is set.                                                 ject will be overexposed.  lf "16" blinks, it means that
      o When taking pictures in the panoramic mode, the    an exposure for more than 16 seconds is required to
        panoramic format frame is displayed.                    obtain correct exposure. ln this case,  if you keep on
     O Focusing Frame: Place your subject to focus in     depressing the shutter release, the camera switches   ,      this frame.                                                to the bulb exposure mode.
     O Exposure Compensation Mark When expo-    o The above items of O "Exposure Compensation
         sure is compensated , "+" or "-" is displayed accord-    Mark" to O "Shutter Speeds" are displayed when
          ing to the type of compensation.                                                                                            15
L.                                                                                                          ,/
View original page 7Page 8 · Read text
the camera is operated as described in 1 and 2    @  lf you are taking pictures in hot temperature or
         below. They are displayed for B seconds, then auto-     looking into the viewfinder at certain angles, the
           matically turn off to save the battery.                mask or "OFF" mark may appear very lightly when
             1 . When the main switch (knob) is turned on.            there is no item to be displayed. This is an intrinsic
          2. With the main switch on, when the shutter             characteristic of the liquid crystal and does not
              release, zoom ring, focusing dial, or flash mode     mean anything is wrong.
            button is operated.              @ fne mask switches to display the needed frame
         While the shutter is opened (the film is being          when you switch the camera to the panoramic or
          exposed), the display turns off. jn the case of long       close-up mode. But the display may differ from the
         exposure, take particular care to prevent camera         setting depending on the operating procedure.  In
         shake while the display turns off.                            this case, you can reset the normal display by
    @ Off Mark: This mark appears when the main       depressing the shutter release button halfway.
         switch (knob) is set to "'" (OFR,                    Example of display (panoramic mode)
                                                                      This line is not within the picture-area frame.
        <Note on the Display in the Viewfinder>
          This camera automatically displays the liquid crystal
       mask in the panoramic or close-up mode.
       When you take pictures, keep the following points in
          mind:
    O fre picture area frame is the inner frame of the
       mask which is displayed. The fine line inside the
       mask is not within the picture area frame.                   The-picture area frame (The area inside this frame
    t6                                                     appears on the picture)
\
View original page 8Page 10 · Read text
Venmo @mike-butkus-camera  Ph. 2083
PayPal Name  Lynn@butkus.org      www.PayPal.me/lynnbutkus
View original page 10
Page 11 · Read text
<Lens Cap>                         <Capuchon d'objectif>r   The accessory lens cap (K-31) can be put on the     Le capuchon d'objectif accessoire (K-31) peut etre
         lens front frame and removed from it while oush-     place sur le cadre avant de I'objectif et retire en
         ing the left and right knobs inward.                  poussant les boutons droit et gauche vers l'interieur,
       o Be sure to remove the lens cap when taking      o Retirez toujours  le capuchon d'objectif pour
         pictures. Caution is required because the shutter     prendre des photos. Faites attention car I'obtura-
                                                                                                                                                                             lffiitl...+lll'lilru..l.lli,ii..''.''ll.itn  teu r peut etre declenche avec le
                                                                                                      ffi.iib1..1+.ii.."ii'',..,i capuchon d'objectif en place'        the lens cap to protect the lens.       ti:'i'iutliii..i.


      <Objektivdeckel>                                                                                                                                                               :                                                                                                                                                                                                                                                                                                                                                 ,,.i'......., <TaPa del objetivo>                                                                                                                                                                                                                              ,,,:
      Zum Anbringen und Entfernen des                                       "  ::,:,:,i:, La tapa del objetivo accesoria
         mitgel iefeden Objektivdeckels  (K-
        31) am bzw. von Objektivfrontring die beiden       marco frontal del objetivo y se saca presionando
       Kndpfe links und rechts nach innen drucken.          las lenguetas izquierda y derecha,
      o Vor dem Aufnehmen nicht vergessen, den        o Asegurese de extraer la tapa del objetivo antes
       Objektivdeckel abzunehmen.                     de fotografiar. Hay que tener cuidado porque  el
       Vorsicht ist geboten, da der VerschluB auch bei      obturador se dispara con la tapa del objetivo
      angesetztem Objektivdeckel ausgeldst wird.          puesta.
      o Nach dem Aufnehmen den Objektivdeckel        o Despues de fotografiar, asegurese de poner la
       wieder anbringen, um das Objektiv zu schutzen.      tapa del objetivo para protegerlo.

                                                                                   27
View original page 11Page 16 · Read text
www.butkus.us


                                 o  lf you are using DX-coded film, the camera
                                                      automatically sets its film speed.  lf you are
                                                   using non-DX-coded  film, the film speed is
                                                     automaticallY set to ISO 100.
                                    o Take care not to touch or soil the DX con-
                                                             tacts.
                                     o Always load and unload film in subdued
                                                                          light.
                                        jWfren loading film, be sure to remove the
                                                        protective sheet in the camera's picture area
                                                       frame.
   sx Close the camera back securelY.
   *3 ns soon as the camera back is closed,
    the film advances automatically and stops
   when the exposure counter shows "01".
                                                                           Protective Sheet
  o  lf the exposure counter blinks at "00", the                   SchutzfolieFeuille de p,rotection
    film is not advancing properly. Open the cam-            Una lamina Protectora
    era back and relciad the film.
38
View original page 16Page 17 · Read text
(''"                                           to  r' ) "   Move the main switch (knob) from
   (zoommark)inthedirectionofthearrow(see
     illustration). The camera is now turned on and
    ready for shooting.
  o  lf you are not taking pictures immediately,
    retuin the main switch to ".'' (OFD to prevent
                          inadvertently'                 shutter            the    tripping     'When                                     is reset to "'", the              main switch            the   o
40  lens is retracted at the same time'                 Also, "OFF" is disPlaYed
View original page 17Page 20 · Read text
www.butkus.us


ln the viewfinder, you will see the letter "P"         ter that can be set by it is '11500 sec. or slow-
and the shutter speed being set.                        er.
o When the aperture ring is set at "P",  it is     o  lf the shutter speed in the viewfinder blinks
recommended to shoot with lens focal length     al"P7O0", your subject will be overexposed
at 35mm or longer because an aperture of      because  it is beyond the camera's exposure
F3.5 will be required  if the light is dim.            coupling range,  lf the shutter speed blinks at
                                                "500" when the aperture is set to F16,  it will
o  lf the subject is so bright that the camera      be overexposed.
cannot provide correct exposure within  its     o  lf "16" blinks,  it means underexposure.  lf
shutter speed range when  it is set to aper-      you keep on depressing the shutter release,
ture-priority AE,  it automatically switches to       the camera switches to bulb exposure after
program AE and selects a proper aperture      16 seconds. (For details, refer to "Bulb expo-
and shutter speed that provide correct expo-     sure" on page 100,)
sure. In this case, the fastest shutter speed    o This camera is designed to fire its built-in
which can be set by the camera is 1/7OO sec.     flash automatically in dim light when the flash
When it is set to program AE, "P" is displayed   mode has been set to automatic flash activa-
in the viewfinder.                                   tion (" fo,'o "). (For details on flash photogra-
lf the aperture ring is set to Fl6, the camera      phy, refer to page 82.)
does not switch to program AE and the shut-
View original page 20Page 21 · Read text
o The aperture values change with the focal     Exposure Gontrol Diagram (f=28mm)
    length, The aperture value index (orange) indi-
    cates an approximate apefture at the focal
    length of 56mm when the apefture ring is set
    to F3,5.  lf the aperture is stopped down to F4
    or smaller, the actual aperture is approximate-                                                                                                                   F8
      ly 2 stops smaller. The camera's metering                                                                                          F56
    function, however, operates properly in accor-
   dance with the change of the aperture by
    zooming.

                                                           16  I  4  2  1   112 1/4 1/8 1/15 1/30 1/60 1/125 1/250
     In the program AE and aperture-priority AE         "P": Program AE
    modes, the metering range and shutter                             " P" : Program mautomatik
    speeds corresponding to each aperlure             "P": Exposition automatique  (AE) programmee
    change as shown in this diagram.                     "P": Exposicion automatica (AE) programada


52
View original page 21Page 22 · Read text
www.butkus.us


   While looking at the subiect
    viewfinder, choose the subiect size by
   turning the zoom ring (zooming).


54
View original page 22Page 23 · Read text
o As the lens moves, the field of view in the    o Beim Zoomen des Objektivs dndert sich
    viewfinder changes accordinglY,                das Bildfeld im Sucher entsprechend.
   o Zoom the lens with the zoom ring.  lf you  o Zoomen Sie des Obiektiv mit dem
   zoom with the main switch (knob), caution  is    Zoomring. Beim Zoomen mit dem
    required because the flash reflector may be      Hauptschalter (knopf) ist Vorsicht geboten, da
    blocked with your finger when the lens is set     der Blitzreflektor bei Einstellung des Objektivs
    to telephoto.                                        auf Telefoto u,U. durch einen Finger verdeckt
   o The lens focal length can be confirmed on      wird.
    the exposure counter.  lf you depress the      o Die Brennweite kann im Bildzdhlwerk kon-
    shutter release button halfway, the exposure        trollierl werden. Das Bildzahlwerk schaltet auf
    counter switches to show the focal length         die Anzeige der Brennweite um, solange der
    while the shutter release button is               Ausloser leicht eingedruckt wird. Bei der
    held depressed.                              Anzeige der Brennweite handelt es sich
    The focal length on display is                        lediglich um einen Ndherungswerl.
     available only as a guide.


56
View original page 23Page 24 · Read text
www.butkus.us


    I  When the focusing dial is set to
    " AF" (auto-focus)  .....

                                                                                                                         lf you depress the shutter release button all  S Aim the focusing frame at the subject you     ffi                                                                                                                       picture.  & want to focus, and depress the shutter        ffi tfre w?y, the shutter trips to take your
    release halfway.                          -#   The lens focuses  itself automatically and the                                       #$-ffii $$   mark "." in the focus display turns on.
58
View original page 24Page 25 · Read text
o When the shutter release button is depressed      o Wenn Sie leicht auf den Ausloser drucken, dndert
     halfway, the picture area frame in the viewfinder          sich der Bildrahmen im Sucher entsprechend der
    changes according to the shooting distance and       Aufnahmeentfernung und Brennweite. Achten Sie
      lens focal length, To shoot, place your subject within     darauf, daB das Motiv innerhalb des Rahmens liegt,
     the displayed frame.                        o Blinkt das Signal " )", und liiBt sich die Camera
   o  lf the mark " )" blinks, the shutter does not trip        nicht auslosen, sind Sie zu nahe am Motiv.
    because your subject  is too close to the camera.       VergrdBern Sie die Aufnahmeentfernung auf min-
    Take your picture at a distance of 0.5m or more.        destens 0,5 m.
   o  lf the camera-to-subject  distance  is 0.3m or small-   o Bei einer Motiventfernung von 0,3 m oder weniger
      er, the mark "o" m?V turn on but the subject  is not in     leuchtet zwar das Signal "." , das Motiv wird jedoch
     sharp focus.                                             u.U. nicht scharf abgebildet.
   o When the mark " > <" blinks, the subject cannot     r Wenn das Signal " ) {" blinkt, ist keine automa-
    be focused by the camera's auto-focus system and     tische Fokussierung m6glich, und der VerschluB l6st
     the shutter does not trip. Use the focus lock, turn on     nicht aus. Veruuenden Sie den Schdrfespeicher, so
     the mark "." and shoot.                            daB das Signal "." aufleuchtet, um die Aufnahme zu
   o  lf it is difficult to focus because the subject  is dimly   macnen.
     lighted or its contrast  is low, the AF-assist beam is    o Falls ein schwach beleuchtetes oder kon-
     automatically emitted on                                trastarmes Motiv die automatische Fokussierung
     the subject to increase                                  erschwert, wird das AF-Hilfslicht automatisch auf
     the accuracy of the                                 das Motiv projiziert, um die Funktion des Autofocus-
     auto-focus system.                                Systems zu unterstutzen,

60
View original page 25Page 26 · Read text
www.butkus.us

    I When the focusing dial is set within
   the manual-focus range
     (oo - 0.5 (m)) .....
    ru Aim the focusing frame at the subject you  & want to focus and operate the focusing
     dial while looking at the subject through the
     viewfinder.
   o The picture area frame  i'n the viewfinder
   changes according to the shooting distance
    set with the focusing dial and the lens focal
    distance. Place your subject within the dis-
    played frame.
    d:b Depress the shutter release  all the way.
     ffi fne shutter trips to take your picture.


   o The AF-assist beam is not emitted in the
    manual-focus mode.
62
View original page 26Page 27 · Read text
Focusing Indicators                   Fokus-Signal
    3'<" mark (turns on)  ... The lens is focused    "<" Symbol (leuchtet) ... Entfernung auf
   on a point nearer than the subject in the         einen Punkt vor dem Motiv eingestellt
    focusing frame (front focus).                     (Fokussierung zu nah)
    "d' mark (turns on) ... The lens is focused       "o" Symbol (leuchtet) ... Entfernung exakt
   on the subject in the focusing frame (sharp       auf das Motiv eingestellt (Fokussierung richtig)
    focus)
                                                                                                                                r' >" Symbol (leuchtet) ... Entfernung auf
    '(>" mark (turns oll) ... The lens is focused     einen Punkt hinter dem Motiv eingestellt
   on a point farther than the subject in the         (Fokussierung zu weit)
     viewfi nder (rear focus).                      *)  {" Symbol (blinkt) ... Motiv wird nicht
    'I> {nn mark (blinks)  ... The subject cannot     scharf abgebildet, da Entfernungsmessung
   be correctly focused because  it is impossible     unmoglich.
    to measure its distance.


64
View original page 27Page 28 · Read text
www.butkus.us


   As soon as the entire roll of film is exposed,   o The camera does not operate unless the
   the camera rewinds the film automatically.   camera back is once opened.
    While the film is rewinding, the exposure       o To rewind the filrn in the middle of a roll, press
    counter counts down. When rewinding  is         the manual rewind button on the camera bot-
    completed, the motor stops and the number    tom with a fine-pointed object. (Do not press  it
    "00" in the counter blinks.                         with a sharp-pointed object such as a needle.)
    After the film is rewound, open the camera     o Take the exposed film for processing as
   back and take out the film.                    soon as possible.
66
View original page 28Page 30 · Read text
www.butkus.us


   o When the shutter release button is depressed      o Wenn Sie den Finger vom Ausloser nehmen, wird
     halfway, the focus is locked and the exposure  is         die Speicherung geloscht.
     fixed at the same time (AE lock).                o Bei leichtem Druck auf den Ausldser wird gleich-
   o In the following cases, the lens may not be able to     zeitig die Entfernung und der Belichtungswert
    focus itself properly on the subject. In such cases,       gespeichert (AE Lock).
    focus the lens on another object located at the same   o Folgende Objekte sind nicht oder nur schwierig zu
    distance as the subject, lock the focus with the          fokussieren. Wdhlen Sie in solchen Fdllen ein
    focus lock and shoot.                                    "Ersatzmotiv"  in gleicher Entfernung und veruvenden
     1 , When the subject  is very bright or very dark.          Sie.1  den Schdrfespeicher.
     2. When the contrast between the subject and its                . Bei sehr hellen oder sehr dunklen Motiven.
    background  is extremely low.                             2. Bei sehr schwachem Kontrast zwischen Motiv
     3. When there is a strong light source such as sun-     und Hintergrund.
      light in the focusing frame or around.                     3. Bei starken Lichtquellen, z. B. Sonne, in oder
     4. When there are two or more subjects you want to    nahe dem AF-MeBfeld.
    take at an extremely different distance  in the focus-       4, Wenn sich zwei oder mehrere Motive in sehr
     ing frame.                                                  unterschiedlichem Abstand in der Fokuszone befinden.
     5, When the subject has vertical lines alone or a         5. Motive mit senkrechten Linien oder einer aus
    repeated pattern of vertical lines.                       senkrechten Linien bestehenden Struktur,z. B. ein
     6. Fast moving objects.                               Gartenzaun.        '
     7, When the subject has no concrete shape such as     6. Motive, die sich schnell bewegen.
    flame or smoke.                                          7. K6rperlose Motive wie Flammen oder Rauch.
     B. Extremely small objects.                                B. Extrem kleine Motive.
70
View original page 30Page 31 · Read text
The AE tock allows you to fix the exposure by       Der MeBwertspeiche'r erm6glicht es, mit
    depress ing the shutter release button halfway.       teichtem Druck auf den Aus/ose r den automa'                      )                                                                tisch gewdhlten Belichtungswert zu speichern
        lf you want to set exposure on a subject which is not    (AE-Lock).
     in the center of your picture frame, aim the camera    Wenn Sie die Belichtung speziell auf ein Motiv
     at the subject, depress the shutter release button       abstimmen wollen, das nicht in der Bildmitte liegt,
    halfway to lock the exposure, then recompose your      richten Sie die Camera auf das Motiv, drucken leicht      I
    subject and trip the shutter. Thus, the subject  is cor-     auf den Ausloser, um die Belichtung zu speichern,
     rectly exposed with the AE lock. The focus lock is      wdhlen dann den gewunschten  Bildausschnitt und
    activated simultaneously with the AE lock.  lf the sub-    drucken den Ausl6ser ganz durch, so wird das Motiv
     ject you want to focus is not the same as that which      richtig belichtet.
    you want to set exposure on, focus the lens manual-    SchArfespeicher und MeBwertspeicher sind immer
      ly and set exposure with the AE lock by depressing      gekoppelt. Wollen Sie Scharfe und Belichtung an
    the shutter release button halfway.  lf you want to       verschiedenen Motivdetails orientieren, muB manuell        '
    take pictures continuously with the exposure and        fokussiert werden.
    focus locked, do not remove your finger from the       Wollen Sie mehrere Aufnahmen mit gleicher
     shutter release button after tripping the shutter and      Belichtung machen, geben Sie nach der Auslosung
    hold the shutter release button depressed halfway.      den Ausloser nicht ganzfrei, sondern halten ihn                                                ,
    Then, trip the shutter again by depressing  it all the       weiterhin leicht gedruckt. So bleibt der gespeicherte      i
    way. To measure exposure each time, remove your      Bel ichtu ngswert erhalten.
     finger from the shutter release button and depress  it     Fur eine neue MeBwertspeicherung den Ausloser
     agarn.                                                   freigeben und erneut leicht drucken.
72

                                                                                                                                                                                                                                                                                                                                                                                                                                                                                                                                                                                                                                                                                                                                                                                                                                                                          I
View original page 31Page 33 · Read text
No compensation
                                                                                   Keine Korrektur
                                                                                Pas de compensation
                                                                                               Sin compensaci1n


                                                   Compensation to the "+" side
                                                                 Positivef Ko rrektu rfakto r (" + ")
                                                   Compensation sur le cOte "+"
                                                 Compensacion hacia el lado "+"
    f  For backlighted subjects, compensate    sate exposure in a range of +0.3 - +5 EV to
   exposure in a range of "+0.3 - *5."           increase the exposure.
        lf you are shooting a portrait in backlight,
    against a bright sky or sea, in front of a win-
   dow, etc., where the greater part of your pic-
    ture is occupied by a bright background, your
    subject will be underexposed and turn out
    dark like a silhouette. In such cases, compen-
76
View original page 33Related documents and language editions
From the M. Butkus archive. Original publisher and archive notices are retained.
Check the model and edition against your equipment.
PDF verified 2026-10-10.