Film cameras
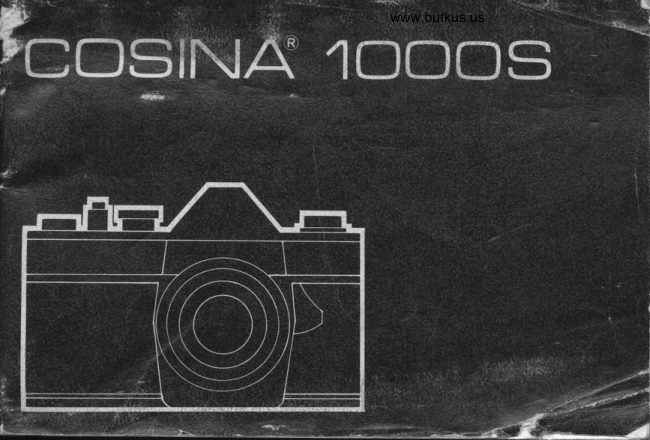
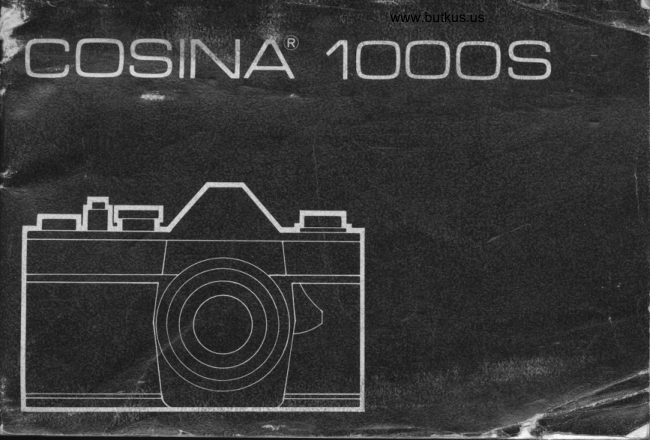
Cosina 1000s User manual
User manual for Cosina 1000s. 21 pages. Read the original PDF, download or print a copy without registration.
21 pagesOriginal document5.6 MB PDF
Loading your manual…Open PDF directly
Document details
- Brand
- Cosina
- Model / document
- Cosina 1000s
- Document type
- User manual
- Language
- Check the original document
- Pages
- 21
- File size
- 5.6 MB
- Category
- Film cameras
- Document date
- Not specified in catalog
Search available document text
Find a term, then jump to its page in the original PDF. Image-only pages may not be searchable; check the PDF for exact wording and diagrams.
Page 4 · Read text
eTNZELTE tBEzEtcHNUNG | @ oescRtprtoN @ oescRrprroN @


/ -''              .--\
View original page 4
Page 6 · Read text
@ rrusenrrNG BATTERY
         pLAcE DE LA prLE AU MERCURE:@rurse EN
@ eTTLEGEN BATTERTE
qr trusentMENTo BATTERTA
t9 COLOCATION DE LA PILA
View original page 6Page 7 · Read text
www.butkus.us
 B
LOADING THE FILM
MISE EN PLACE DU FILM
EINLEGEN DES FILMS
INTRODUZIONE DELLA PELLICOLA
GARGA DE LA PELICULA
View original page 7
Page 8 · Read text
4
UNLOADING THE FILM
POUR RETIRER LE FILM
HERAUSNEHMEN DES FILMS
SCAR ICAMENTO DE L L'APPAR ECCH IO
DESCARGA DE LA PELICULA


                      www.butkus.us
View original page 8Page 9 · Read text
www.butkus.us
 b
EXPOSURE CONTROL
CONTROLE DE L'EXPOSITION:
BE LICHTUNGSMESSUNG
CONTROLLO DE LL'ESPOSIZ IONE                  ",  .   .t-
CONTROL DE EXPOSICION
View original page 9
Page 10 · Read text
6
CORRECT EXPOSURE
EXPOSITION CORRECTE             @ Over Exposure
RIGHTIGE BELICHTUNG             @ Surexposit ion                                                                      'rr    @ Ueber belicht ungAVVERTENZA:                   @ Sovraesposizione
EXPOSICION CORRECTA             @ Exposicidn Excesiva


                          @ Correct Exposure
                         @ Exposit ion Cor r ecte
                         @ R icht ige Belicht ung                                                 CD Esposizione Corretta
                         @ Exiosicidn Correcta


                         @ Under Exposure
                         @ Sous-Exposition
                         @ Unt er belicht ung                                                   (D Sottoeseosizione
                                                        ,1.  , ,,       @ Exposici6n Deficiente


                @
View original page 10Page 11 · Read text
www.butkus.us
 7                      E
EXPOSURE FACTOR         @ rocusrlc
FACTEUR D'EXPOSITION       @ necmcE DE LA DrsrANcE
COS  I NA TTL.L   I CHTM EBSYSTEM                    (MISE AU POINT}
COEFFICENTE DI ESPOSIZIONE:         rrurrsRNUNGsE TNSTELLUNG                    QFACTOR DE LA EXPOSICION                                       !1 FOCHGGTATURA                      9 ENFOOUE:


                o
View original page 11Page 12 · Read text
I
DEPTH OF FIELD
PROFONDEUR DE CHAMP
SCHARF ENTIEFE
PROFONDITA'DI CAMPO
PROFUNDIDAD DEL CAMPO VISUAL


                @
View original page 12Page 13 · Read text
to                           ITwww.butkus.us
FLASH PHOTOS                   @ e serrlrucUTILISATION AVEC UN FLASH:                   @ eose: sBLITZLICHTAU FNAHMEN                   @ LANGZETTBELTCHTUNGFOTO CON FLASH                     .E PRESE tN PosA ,,8-
FOTOGRAFIAS CON FLASH                                €)POStCtoN B


                o
View original page 13Page 15 · Read text
www.butkus.us
                              Page 4 I  Page 2-3             2
 DESCRIPTION                      INSERTING BATTERY
  1. Exposure counter                           1. Remove the Battery Compartment Cover by
 2. Shutter release button                             turning it in the direction of the arrow with a
 3. Film wind lever                                         "toi!. 4. Shutter speed setting ring                   2. Install the battery in the compartment, making
 5. Film speed setting dial                           sure that the (-) side faces inside. Then close
 6. Fiim plane mark                                    the battery Compartment Cover securely.
 7. Focusing ring
 8. Aperture setting ring
 9. Film rewind knob w/Rear cover release
10. Meter switch
11. M sync. terminal
12. X sync. terminal
13. Film rewind crank
14. Sprocket
15. Film take-up spool
16. Rear cover
17. Film rewind button
18. Tripod bush
19. CdS Battery (Evered E-675)
20. Battery compartment cover
View original page 15Page 16 · Read text
l-ENc,LrsH  1
                                 Pase 6      Pase  5              4  3   LOADING THE FILM                UNLOADING THE FILM
                                                                                     1 . When the Exposure Counter indicates the  f igure    1. Flip up the film rewind crank. Pull it out one
        step and then pull it out with stronger force,       "2O" 1"36" in case of a 36-exposure  f ilm), the
      and the back cover will open. As the back cover          "rf ilrn has been completely exposed.
                                                                                                        base of       has opened, "S" will automatically appear in    2. Push in the Film Rewind Button on the
        the exposure counter window.                       the camera. There is no need to keep pressing  it
    2. Put a film cartridge into the film chamber'       during the rewinding operation. When the new      Make sure that the end of the film cartridge  dtrt       film is wound on, the Button will pop up
        of which its spindle just out comes on the side        automatically.
         of the bottom of the camera body.              3. Fold out the Rewind Crank-Handle on the Film
      3.  Pull out the tip of the film leader a little bitas      Rewind Knob and turn it in the direction of the
      shown in the photo. Pass it over the sprocket        arrow.
       and insert it into the sPool slit.                        4.  Before the film-end slips off the Take-up Spool,
     4.  It is advisable to take up the film until  its        you'll feel a slight resistance, but keep turning
        perforations are in gear with the sprockets, by        the Crank-Handle.
        turning the film wind lever bit by bit.                  5. Stop rewinding when the Crank-Handle  rotates
      5.  After ascertaining that the film has been taken        freely. Open the Back Cover and take out the
       up evenly, snap the back cover shut.                 exposed film.
      6. Turn the film wind lever until  it does not move       Note: Avoid direct sunlight when loading or
        further and then depress the shutter button.               unloading Your camera.
       Repeat this action while taking a look through
       the window.  lf you can see "1" in the film
       wind window, you are ready to take the first
         shot.


                                         (E
View original page 16Page 17 · Read text
www.butkus.us       fENGLtSH  I
   Pase 7                              Pase 85                    6
EXPOSURE CONTROL                 OVER.EXPOSURE
 1. Film Speed Setting                       When the Meter needle is in the upper half of the
   Turn the Film Speed Setting Dial so that the     scale, it warns against over-exposure. Adjust the
    figure or the line standing for the ASA/DlN     sfiuqer speed to a faster setting or the aperture to a
    film speed of the film in use aligns with the dot     smaller setting.
   on the window. The lines between the settings
  on the Film Speed setting Diat indicate the
    intermediate   f ilm speeds.  r             r    CORRECT EXPOSURE2. Aperture Setting                              Correct exposure is obtained by centering the
   Select the desired setting by turning the    needle. However, check that the shutter/aperture
   Aperture Setting Ring. Depress the Meter    combination  is just right for the subject.
   Switch to turn 'ON' and keep it depressed. The
   diaphragm is stopped down to the pre-selected
   aperture setting for measuring exposure at the   UNDER EXPOSURE
   taking aperture.                         When the meter needle is in the lower section of3. Shutter Speed Setting                              the scale,  it advises you of under-exposure. Select a
   Turn the Shutter Speed Setting Ring and center     slower shutter speed or a larger aperture setting.   the meter needle in the viewfinder.  lf it fails to
   position in the centre mark, select.
4. Perfect Exposure
  When the needle is centered, the camera is set
   for correct exposure. Remove your finger from
   the Meter Switch and the diaphragm will open
   to full aperture. You can view through the
   finder at maximum brilliance during picture-
    taking.

                                       (D
View original page 17Page 18 · Read text
9                                 I  Pase 107 PaseEXPOSURE FACTOR                 DEPTH OF FIELD
The easy-to-read Through-the-lens metering system   When you focus on a specific subiect, an area in
incorporated in the Cosina 10005 measures the   front of and behind that. subiect will appearaverage brightness of the light entering through the   acceptably sharp in your picture. This area, or
taking lens. Consequently this system assures   zone, of acceptable sharpness is DEPTH OF
perfect exposure without troublesome cornpen-   FIELD.
sation of exposure factor; even when using inter-   Depth of field is determined by the f-stop you
changeable lenses,  f ilters, close-up lenses, extension     select and the distance from the subjdct in focus to
tubes and bellows, etc.                            the film plane. As you get closer to your subject,
                                              or as you open your lens (e.9. from f16 to f2.8),
                                                    the depth of field becomes shallower. By stopping
                                               your lens down (e.9. trom f2.8 to f16), this depth
                                              or zone of acceptable sharpness can be increased.E                                           Another factor in depth of  f ield is the focal length
FOCUSING                                  of the lens being used. As a rule, the longer the
While looking through the finder, turn the focusing    focal length of a lens the shallower the zone of
ring so that your subject is clearly visible. When the    acceptable sharpness becomes; the shorter the focal
image of your subject does no longer "flicker" in    length, the greater the depth of  f ield. Knowing the
the small round center of the finder,  it means that    depth of field limitations of your lens can enhanceyour subject is focused. In the event that the lens  is   the creativity of your pictures. A deep zone of
stopped down for metering purposes and the inside    acceptable sharpness provided by shorter focal                                                                                                                                                                                       f or "snapshooting" whenof the finder looks dim, press the aperture release    length lenses is idealbutton.                                              there isn't time to focus properly, as in fast action                                                  photography. Shallow depth of  f ield can be used to
                                               throw distracting foregrounds and backgrounds out
                                               of focus to add separation between a subject and
                                                                              its surroundings.

                                     (D
View original page 18Page 19 · Read text
www.butkus.us     [ENGnsH  ]
       Pase 1 1                    IT      lfl.    FLASH PHOTOS                     B SETTING
        In flash photography, correct exposure is obtained At the B setting, the shutter remains open for as
      by dividing the guide number of the flash unit or   long as the Shutter Release Button is depressed.
       the flash bulb by the camera-to subject distance.    This .setting is used for long exposures under dim
    ExamPre:                                               light conditions and for special effects.-                     Si,iX?$". ?3,
                32+4 = 8 (correctaperture).                                                                   .
     The Cosina 10005 has M-X synchronization and
       accepts electronic flash units and M-F clasS bulbs.
      1. Electronic Flash: Synchronization at  125
           setting. (at all shutter speeds from 1l'125 sec. to
          1 sec. and B)
      2. M class bulb synchronization at all shutter
           speeds.


                          '@
View original page 19Page 20 · Read text
IeNGf rsTll
   12 Pase 12                  rB
    USE OF CABLE RELEASE              LENS INTERCHANGEABI LITY
     The use of a cable release is recommended when  A feature of the Cosina 10005 it its thread mount
      using slow shutter speeds or bulb (B) exposure.    for interchangeable lenses. lt accepts a large variety
     Mount the camera on a tripod and screw a cable    of ".ingerchangeable lenses from wide-angle to
      release into the socket of the Shutter Release    telephbto. Mounting  is very easy. Whatever lens is
       Button.                                    mounted on your camera, the precise Thru-the-
                                                      Lens metering system and the luminous viewfinder
                                                   ir                 remain unchanged.
    FILM PLANE MARK
     The red mark on the camera top indicates tfre   ACCESSO R  I ES
      position of the film plane. In close-up photo-    Cosina offers a wide range of top quality acces-
      graphy, it is advisable to measure the distance from    sories for you 10OOS. These accessories will not
        this mark to the subject in order to secure the most    effect the easy-to-use Cds Metering system but add
       accurate focus.                                    to the versatility of the camera and also extend the
                                                scope of your picture-taking from microphoto-
                                                         graphy to macrophotography.r


                                           (D
View original page 20Page 21 · Read text
www.butkus.us                                                          l-ENGLtSH

    SPECI FICATIONS
'    Shutter:             Copal Square metal focal plane shutter with speeds from B, 1 to 1/1000
                                     sec., M-X synchronization.
    Viewfinder:         Reflex viewfinder with frtl^snel screen micro split-image focusing spot;
                           meter needle visible in the  f inder.
     Exposure Meter:      Matching-needle Thru-the-Lens CdS meter coupled to shutter-aperture
                                   settings; meter nee{.le visible in the finder; ASA range 25-1600.
     Film Transport:       Single-stroke   f ilm wind lever advances film, sets shutter, counts exposure.
     Other features:       Automatic  re-setting exposure counter, and prevents double exposure.
    Lens:             Auto Cosinon 50mm f11.9 4 group 6 element lens stop down to f/16.
                            (Only Automatic)
                      Auto Cosinon 55mm 112.8 3 group 4 element lens stop down to   f 122.
                            (Only Automatic)
     Lens shade        Lens            Screw-in type          Slip-on type
   & filters:                                           f /2.8        49mm           51mm
                                                        f 11.9       49mm           54mm
    Dimentions:       145mm(W) x 96mm(H)x 52mm(D) (Body only)
    Weight:             Z10g (Body onlyl


                                         (E
View original page 21Related documents and language editions
From the M. Butkus archive. Original publisher and archive notices are retained.
Check the model and edition against your equipment.
PDF verified 2026-10-10.