Film cameras
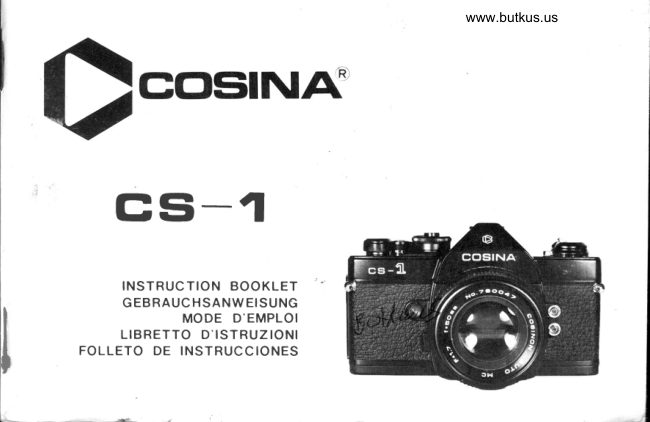
Cosina CS-1 User manual
User manual for Cosina CS-1. 15 pages in French, Spanish. Read the original PDF, download or print a copy without registration.
15 pagesFrench, Spanish2.0 MB PDF
Loading your manual…Open PDF directly
Document details
- Brand
- Cosina
- Model / document
- Cosina CS-1
- Document type
- User manual
- Language
- French, Spanish
- Pages
- 15
- File size
- 2.0 MB
- Category
- Film cameras
- Document date
- Not specified in catalog
Search available document text
Find a term, then jump to its page in the original PDF. Image-only pages may not be searchable; check the PDF for exact wording and diagrams.
Page 1 · Read text
www.butkus.us


  csi


           I N S T R U TC I O N B O O K L E T
    G EBRAUCHSANWEISUNG
         MODE D'EMPLOI
     L I B R E T T OD ' I S T R U IZO N I
FOLLETODE INSTRUCCIONES
View original page 1Page 2 · Read text
F:NCLISH
     Welc o m e   t o   t h e e x c i t in g wo rld  o f Co sin a . Yo u  n e w ca mer a  is one of a fam ily  of  pr ofessional
      q u a li t y  c a m e r a s d e s i g n e d with  th e se rio u s p h o to g ra p h e r  in m ind. And  the nam e Cosina is your@  a s s u r a n c e o f s u p e r b l y cra fte d o p tics a n d o u tsta n d in g me ch anical per for m ance and  r eliability.


     I)EUTSCH
     Wir b e g r t i f l e n S i e   i n d e r a u fre g e n d e n We ltd e r  COS INA .  lhr e neue Kam er agehor t  zur F am ilie der
@  gprofessionelleriraf e n  e n t w i c k e Oualitdtskameras,l t  w u rd e .  De r Ma dierke nuntern a me BerricksichtigungCOS INA   ist  lhr ederGewdhrAnsprtichefur    r .iberernsthafterr agende Optik,Foto-
     hervorragende Technik  und Zuverldssigkeit.

     F'RAN(]AIS
     Bienvenuedans le monde passionnantde Cosina.Votre nouvel appareilphotogrraphiqueest un
@  moddlele nom dedela Cosinafamille desest appareilspour vousde I'assurancequalit6 professionelle,d'une optiqueconqusuperbementpour le photographetravaillee.averti.d'uneEt
     performance m6canique remarquable,et d'une robustesseinsurpassable.


      ITALIANO
     Benvenuti nel mondo eccitante della COSINA. La Vostra nuova macchina fotografica fa parte di
    una famiglia di macchine di qualitd professionalestudiate tenendo presentele esigenzedel pii
     serio fotografo. Ed  il nome COSINA d I'assicurazionedi un'ottica superbamentecostruita,e dic  prestazioni meccanicheeccezionali.

    ESPANoI-
     Bienvenido al mundo emociohante de la Su nueva cSmarapertenecea una familia de c6marasde
@  calidadY  el nombreprofe'sionalCOSINAque eshansu sidogarantiadisefradasde 6pticapensandoespl6ndidamenteen el fot6grafofabricadaserio. y de funcionamiento
    mec6nico destacadoy de precisi6n.

   +.q
                                                                                        .;a&$rd--*,                                       i        --1gs-                        ..,3d*'.iuu                                                                      i.
View original page 2Page 7 · Read text
@ Descriptionof Controls
     1 . Exposure Counter Window
      2. Film Advance Lever
      3. Shutter Speed Index
      4. Fif m Rewind Button
     5 . G u i d e P i n
      6. Shutter Speed Dial
      7. Film SpeedASA Window
      8. Hot Shoe
      9. Film PlaneReference
    10. Main Switch
    1 1 . F i l m R e w i n d K n o b
    1 2 . F i l m R e w i n d C r a n k
    1 3. Lens F lange
    14. Aperture Ring
    1 5. Ape rturelDistanceScale Index Line
    16. Depth of Field Scale
   17 . FocusingR ing/D istanceScale
    18. Inf rared Mark
    19. Shutter ReleaseButton
    20. Lens Mount ReleaseButton
   21 . Sefftimer LED
    22. Removable Door Hinge                31. Film AdvanceSprocket
    23. Cable/Remote ReleaseSocket           32. Film Take-up Spool
    24. Carrying Lugs                          33. Film PressurePlate
    25. " A" Cutlet                            34. Film ReminderClip
    26. "X" Sync PC Outlet                    35. DIN/ASA ConversionChart
    27. Film Chamber                         36. Tripod Socket
    28. Film Ape.rture                      37 . Battery Compartment Cover
    29. Viewfinder                            38. Auto-winder Coupler
    30. F ilm G uide Rails                       39. Back Cover
View original page 7Page 8 · Read text
POWER SUPPLY                                             www.butkus.us  @
Your CS-1 is powered by two, 1 .5 volt silver
oxide batteries(Eveready5-76, Mallory MS 76,
G 1 3 o r e q u i v a l e n t ) .
Battery installation
1. Open the battery compartment by unscrew-
   ing the  battery compartment cover (37)
   with a coin .
2. Insert the batteries with  the positive (+)
   s i d e sf a c i n gy o u . ( F i g . 1 )
3. Replacethe cover and tighten it firmly.                     Fis1
Testing batteries
Test the batteriesfor suff icient power levelsby
takingthe f ollowing procedure:              FILM LOADING1. Wind the Film advanceLever 12) if previous-
    ly not wound.                                Your CS-1 accepts 35mm, Black & White or
2. Turn the Main Switch Lever (10) to "ON"        Color f ilm standardcassettes.
   p o s t t t o n .                                   To load the camera:
3. Depressthe ReleaseButton (19) slightly and         1. Pressthe releasebutton to clear the camera
   look into the viewfinder.                      mechanism.
One of three LE D indicators (two arrows and       2. Fold out and lif t up on the F ilm Rewind
one dot)  for  metering located in the upper         Crank n2l  to open the cameraback. (Fig.2)
portion of viewing area (see Fig.5) will illumi-      3 . Insert the film cassettein the Film Chamber
nate if there is sufficient power. lf batteriesare          Q7l,  then push down the Film Rewind
below the operational voltage of the camera        K n o b  ( 1 1 ) a n d  t u r n  i t s l i g h t l y t o   l o c k t h e
system, replacethem with a fresh set.                    cassettein place.
NOTE: Turn back the main switch lever to        4 .  Pull film leader across the Film Aperture
"OF F"  position when you  are not  taking           (28) and insert the end of leaderinto one of
prctures.                                              the slots in the f ilm take-upspool. (Fig.3)
View original page 8Page 9 · Read text
/=\
C,  5. W i t h   t h e  f i l m  r e w i n d c r a n k   i n  t h e  f o l d e d o u t     SETTINGFILM SPEED
        p o s i t i o n ,  r e w i n d   t h e  f i l m  s l i g h t l y   t o  r e m o v e         F o r p r o p e r l y e x p o s e d p h o t o g r a p h s , y o u r C S - 1 ' s
        a n y  s l a c k   i n   t h e   f i l m  c a s s e t t e . R e c h e c k   t o          e l e c t r o n i c a l l y c o n t r o l l e d m e t e r i n g s y s t e m m u s t
         s e e   t h a t    t h e    f i l m   r e m a i n s s e c u r e d   t o    t h e          b e s e t  f o r   t h e c o r r e c t A S A   ( o r D I N   -    f o r D I N
                t a k e - u p s p o o l a n d  t h a t    i t   i s p r o p e r l y a l i g n e d         e q u i v a l e n t s ,  r e f e r  t o   t h e D I N / A S A  C o n v e r s i o n
      w i t h    t h e S p r o c k e t   ( 3 1 ) . F o l d d o w n   r e w i n d        C h a r t    ( 3 5 ) ,      l o c a t e d  o n     t h e  b a c k  o f  y o u r
         c r a n k .                                                        c a m e r a )  r a t i n g o f  f i l m y o u a r e u s i n g .
    6 . C l o s e  t h e B a c k C o v e r  ( 3 9 ) u n t i l y o u h e a r a n
        a u d i b l e c l i c k , w h i c h    i n d i c a t e s t h a t  t h e c o v e r        To set the film speed:
                     i s  l o c k e d   i n  t h e c l o s e d p o s i t i o n . A d v a n c e  t h e          1 .  L i f t    t h e  c o l l a r  o n    t h e S h u t t e r S p e e d D i a l
                 f i l m  b y  a l t e r n a t e l y  w i n d i n g    t h e  a d v a n c e                   ( 6 ) .
         lever and pressing the shutter release button        2 . Turn the collar until the ASA rating for
        u n t i f   t h e n u m b e r   " l "   a p p e a r s  i n   t h e F i l m           your  film appears in the ASA Window.
       Counte r Window   ( 1 ) . As the advance lever is                   ( F i g . 4 )
      w o u n d ,   t h e  f i l m   r e w i n d k n o b s h o u l d  r o t a t e ,       3 . Release the collar to  lock the setting in
                     i n d i c a t i n g   t h a t    t h e   f i l m     i s a d v a n c i n g p r o -           place.
        p e r l y .                                           4 .  Insert tab from the end of film box in the
                                                                  film reminderclip, and that remindsyou the
                                                         type of fllm you are using.


         Ft92                 Fis3                       Fis4
View original page 9Page 10 · Read text
SHUTTERSPEEDSELECTION                               www.butkus.us  @
The CS-1 has a shutter speed range of 4 seconds
 t o  1 / 1 ' 0 0 0 s e c o n d , p l u s  " 8 "    ( B u l b )   f o r T i m e
E x p o s u r e s . T o  s e t  t h e  s h u t t e r  s p e e d ,  t u r n   t h e
s h u t t e r  s p e e d  d i a l  u n t i l    t h e  d e s i r e d  s h u t t e r
s p e e d  i s a l i g n e d w i t h    t h e S h u t t e r S p e e d  I n d e x
 ( 3 ) . W h e n u s i n g s h u t t e r s p e e d s b e l o w 1 l 3 O o f a
s e c o n d ,   i t    i s a d v i s a b l e  t o  u s e a   t r i p o d  a n d a
c a b l e r e l e a s e o r   t h e e x c l u s i v e  r e m o t e c o n t r o l l e r
 t o e l i m i n a t e  t h e p o s s i b i l i t y o f  v i b r a t i o n d u e  t o                                     Fis5 t h e  c a m e r a m o v e m e n t .  T h e C S - 1   i s e q u i p p e d
w i t h a  t h r e a d e d C a b l e R e l e a s e S o c k e t  ( 2 3 ) a n d
Tripod  Socket  (36)  for  use with  these acces-    FOCUSINGTHE CAMERA
s o n e s .                                            Y o u r C S - 1 ' s  f o c u s i n g s c r e e n  i n c l u d e s a c e n t r a l
                                                            h o r i z o n t a l   s p l i t - i m a g e   r a n g e f i n d e r , w h i c h      i s
TIME EXPOSURES                                    s u r r o u n d e d b y a m i c r o p r i s m c o l l a r . ( F i g . 5 )
W h e n m a k i n g   t i m e e x p o s u r e p h o t o Q r a p h s , y o u r         To focus  .lccurately:
camera should  always be tripod-mounted  and          1 . C e n t e r   t h e  s p l i t - i m a g e  r a n g e f i n d e r o n  y o u r
u s e d w i t h  a    l o c k i n g  c a b l e  r e l e a s e . T h e C S - 1 ' s              k e y s u b j e c t a n d  t u r n   t h e F o c u s i n g R i n g  ( 1 7 )
electronic shutter  is capable of time exposures             u n t i l   t h e u p p e r a n d   l o w e r p o r t i o n s o f y o u r
of up to 4 seconds.                                          subject become one, clear vertical image
                                                            2 .  T h e  s u r r o u n d i n g m i c r o p r i s m c o l l a r w i l l   a )
For  the  time  exposures  of  over 4 seconds  in            appear     f ragmented  when    the  image   is
duration:                                                       e n t i r e l y o u t o f   f o c u s , b ) a p p e a r s h i m m e r i n g
1 . A l i g n  " 8 "  s e t t i n g o n s h u t t e r s p e e d d i a l w i t h              but  viewable when image is nearly  in focus
       t h e s h u t t e r s p e e d  i n d e x .                              and c) appears clear when your subject is in
2 . A d v a n c e    t h e    f i l m  a n d  p r e s s   i n  o n    t i p  o f             focus.   lt  is especially useful when there are
   cable release to open the shutter. Turn  the            no  pronounced  vertical  lines on your  sub-
    c a b l e r e l e a s e l o c k  t o h o l d s h u t t e r o p e n .                                               j e c t , m a k i n g   t h e u s e o f   t h e h o r i z o n t a l , s p l i t
3.  After  the desired exposure time  in seconds                                 i m a g e r a n g e f i n d e r d i f f i c u l t .
   has elapsed, release the cable release lock to
    close the shutter.
View original page 10Page 11 · Read text
@ 3. The entire focusing screen may be used for                           f ull range, change the shutter speed to either
       both focus and composition of your photo-            slower  or  faster one  according  to  "+"   or
       graph. The h uman eye tends to ignore m ino r                     " - "  m a r k s   i n  t h e a r r o w s s o  t h e g r e e n L E D
       differencesin sharpness.Therefore,the hori-                                i f l u m i n a t e s . T h e s h u t t e r s p e e d  i s  i n d i c a t e d   i n
       zontal split image rangefinder and/or the              v i e w f i n d e r .  ( F i g . B )
      microprism collar should always be used for      W h e n a c e r t a i n a p e r t u r e s i z e ( F - s t o p n u m b e r )    i s
        critical focus when possible.                        desired because  of  the  depth  of    f ield  ef fect
                                                                      (refer  to  the  next  paragraph), set the desired
  METERINGSYSTEM                                                               tFh-es tgorpe ef inr sLt EaDn di ltl uu rmn i nt ah tee ss h. u t t e r s p e e d d i a l u n t i l
    Your CS-1 has the open-aperture,TTL center-      N O T E : W h e n  b o t h   r e d  L E D s    i l l u m i n a t e ,  y o u
    weighted average,match LE D metering system.       have gone beyond  the cameras metenng  range
    Setting the exposure:                                     a n d s h o u l d ,   i f p o s s i b l e a l t e r  t h e a p e r t u r e s o  t h a t
     1. Advancethe film.                                      a different speed can be used.
    2 . S e t t h e M a i n S w i t c h ( 1 0 ) t o  " O N " .  ( F i g . 6 )
     3. Select a desired shutter speed by rotating
       the shutter speeddial.
     4. Depress the  shutter release button quite                        Fis6        slightly so that one of the LED indicatorsin
        v i e w fi n d e r i l l u m i n a t e s(.F i g . 7 )
    5 . The LED indicators will  tell you whether
       the present setting is over, under or correct
       exposure.
    6 . When one of  the red arrows illuminates,
        rotate the Aperture Ring n4l  of the lens
        untif the green LED between the arrows
        illuminate, you then have correct exposure.
      The arrows indicate the direction in which
       the aperture ring should be rotated.
    7 .  lf  either red arrow remains illuminating           FisT           FisB      though the aperture ring has been rotated its
View original page 11Page 12 · Read text
D E P T HO F F I E L D                      S E L F T I M E R     www.butkus.us   @
The aperture  setting determines  the near and        The selftimer delays the tripping  of the shutter
far areas in which  items other  than  your  key        mechanism   for   approximately   10  seconds,
subject  will  remain  acceptably  sharp.  This          a l l o w i n g  y o u    t o    i n c l u d e y o u r s e l f   i n  t h e p h o t o -
"zone  of focus"  is refered to as depth  of  f ield.        graph when  desired. The timed delay   f unction
Y o u r   l e n s  f e a t u r e s a d e p t h o f F i e l d S c a l e ( 1 6 ) ,                       i s f u l l y e l e c t r o n i c , w i t h a s e l f t i m e r L E D d i s p l a y -
which  allows you  to  select the zone  of  focus          ing  the  lapsed  time.  The  camera  should  be
w h i c h  w i l l  a p e a r     i n     t h e    f i n a l  p h o t o g r a p h .         tripod-mounted   or  placed on  a  firm  support
( Fi s . 9 )                                         when this feature is used.
U n d e r  n o r m a l     l i g h t i n g  c o n d i t i o n s ,  s e l e c t i n g a        To activate the selftimer:
l a r g e r a p e r t u r e  o p e n i n g   ( e g : F 2 . B o r  F 4 l w i l l           1.  Focus and compose photograph.
a l l o w  y o u    t o  k e e p y o u r  k e y  s u b j e c t   i n  s h a r p           2.  Adjust  controls  for  correct  exposure  dis-
f o c u s w h i l e p u t t i n g d i s t r a c t i n g e l e m e n t s   i n o u t             p l a y . ( g r e e n L E D )
of focus the foreground  or background  of your          3 .  T u r n     t h e  m a i n  s w i t c h      l e v e r   t o   " S E L F "
p h o t o g r a p h . U n d e r s a m e c o n d i t i o n s , s e l e c t i n g a             p o s i t i o n . ( F i g . 1 2 l
s m a l l e r a p e r t u r e o p e n i n g  ( e g : F 1 1 o r F 1 6 ) w i l l           4.  Press the shutter release button.
b r i n g b o t h  n e a r a n d  d i s t a n t o b j e c t s   i n   f o c u s .           5.  Position yourself  in photograph  area within
( F i s . 1 0 &1 1 )                                                 1 0 s e c o n d s .
                                                                                                                                                      'trin1'Y   ' O\'' NOTE:    lf you  decide not  to use the selftimer                                                                 after  setting   it,  turn  back  the  lever  to  the
                                                            o r i g i n a l p o s i t i o n . A l s o a f t e r p h o t o g r a p h i n g w i t h
                                                               selftimer,  turn  back  the  lever  to  "ON"   or
                                           E . . ^ 1      " O F F "   p o s i t i o n u n l e s s y o u    i n d e n d   t o   t a k e  t h e
                                                                                      r l g   I "I  n e x t o n e w i t h  s e l f t i m e r .
                                                  Mount  the eyepiece cover (inserted in hot shoe)
                                                     on   the  eyepiece  whenever  you  photograph
                                              w i t h o u t    l o o k i n g  t h r o u g h  t h e v i e w f i n d e r .

                                                                      10               Fis9                       Figl 2
View original page 12Page 13 · Read text
@ FLASH PHOTOGRAPHY             INTERCHANGINGLENSES
    The  CS-1   is synchronized  for  electronic      Any wide-angle or telephoto, interchangeable
     flash photography by using either the hot shoe        lens with  K type  bayonet  mount  can be
     (8) or the "X" Sync PC Outlet (26). With either      mounted on your CS-1 camerabody.
    connection,the shutter should be set at the red                                                  To take off the lens:    1/60 second marking on the shutter speeddial.                                                                 1. Push the Lens Mount ReleaseButton (20).   When photographingunder lighting conditions
     that  require the use of supplementary f lash        2. Hold the cameraand lens body steadily,and
     illumination, use an electronic flash unit for            rotate the lens body counter-clockwise.
    consistencyof results.                                   3. Rotating approx. 65 degreesthe lens will
                                                          then become free.
   AUTOMATICEXPOSURECONTROL        To mount the lens:
    Your Cosina CS-1 is designedfor conversionto         1. Join  the  red index marks both on the
    aperture-preferedautomatic operation with the         cameraand lens.
    addition of the Cosina AEC adapter. The AEC         2. Rotate the  lens body clockwise until  it
    couples  directly  to  the  camera's metering          snaps"
    system. In use, the lens is set at the desired
     aperture, the  fi lm advance lever is wound, and    REMOVINGFILM
     the  LE D  metering system  is  activated by      When you have finished exposing the last frame
    depressingthe shutter release button halfway.         in your  film  cassette 112, 20, 24 and 36-
    Operated by   its  own,  independent power       exposuresettingsare coded in red on your film
    supply (a single,6-volt silveroxide battery), the       counter dial), remove the cassette.
    Cosina AEC adapter respondsimmediately to
    the LED metering system'scommand signalby       To rewind the film:
                                                        1 . Push  in  the  F ilm  Rewind Button  l4l .     setting the correct shutter speed. Now, focus                                                                                                  ( F i s . 13 )    and shoot!
       ( S e e " I N S T R U C T I O N O F C O S I N A A C C E S -       2. Fold out the f ilm rewind crank and turn in
   SORIES" for more details.)                               direction of arrow.
                                                 3 . When the crank turns freely (without ten-
                                                           sion or "drag"), pull up on the crank to                                                                                                                                                                                                  li
1 1
                ...j,urjM;,.'                  #,        ,       r*iii          ;$fu"*'ireri.,,',*a;x,"                                                                                         I
View original page 13Page 14 · Read text
o p e n  t h e c a m e r a b a c k . T h e  f i l m c o u n t e r w i l l    CARINGFOR YOURwww.butkus.usCAMERA   @   automatically  reset to zero.                                                           1. Never f orce any camera operation. Consult4. Remove the exposed cassette for processgO.                                                              this  instruction manual  if any questions    Insert a  f resh  roll of  film  while  the Cfmera                                                       occur.   b a c k     i s  s t i l l  o p e n ,  o r  c l o s e   t h e  b a c k   f o r                                                            2. Remove  batteries when  storing camera.   storage.                                                        Batteries can  leak as they  dg€, causing
N O T E :  D o  n o t     l o a d  o r  u n l o a d  y o u r  c a m e r a        damage to your camera. Always inspect the
u n d e r d i r e c t s u n l i g h t .                                     batteries for signs of leakagebefore install-
                                                         ing them in your camera.
                                                           3. Keep the  lens cap on when not  taking
                                                   photographs. The cap protects your  lens
                                                  from dust or dirt particles.
                                                           4. Clean your camera's interior. Periodically
                                              remove any dust or film particles from the
                                                                                                           f if m chamber, rear lens element, tdke-up
                                                    spool area or film pressureplate with an air
                                                     blower.  Inspect film  pressure plate  for
                                                accumulated deposits from  film  backing,
              Fisl3                          and clean with  lens cleaner and tissue if
                                                       required.
                                                  5 . Keep your  camera and  film away from
                                                           direct sunlight or  heat. Never store your
                                             camera or film on the rear window deck,
                                                     glove compartment or other hot areas in
                                                   your car.
                                                          6. Protect your camera from moisture. Do not
                                                       store your camera in a moisture-retaining
                                                   enclosure or environment. In areas of high
                                                      humidity, extra care should be taken to
                                                      insure that your camera is kept in a com-
                                                        parativelycool, dry location.
                                                  7 . Do not touch shutter curtain.             12
View original page 14Page 15 · Read text
e sPEcrFrcArroNs
    Camera Type:       35mm  electronic single lens reflex camera with  TTL,  open-aperture,
                        exposure balancesystem
     Film Format:       24mm x 36mm
    Lens Mount:         K type bayonet mount
                         Flange back focus distance: 45.44mm
     Shutter:              Magnetically controlled cloth curtain focal plane shutter with shutter speed
                         trom 4 to 111000sec.and B (Bulb) Flash (X) synchronisationat 1/60 sec.
                             Electrically  controlled  selftimer of 1O-secondduration with  flickering
                                                                  l a m p
     Viewfinder:           Fixed pentaprism type
                            Magnification: 1 X (with f=55mm lens)
                            Dioptre: -0.9
                            Field of view: 93% for both horizontaland vertical Focusingwith horizontal
                          split-imagecenter with surroundingmicroprismcol lar on matt fresnelscreen
                           Informations: Optimum, over and underexposuresand relative shutter speed
    MeteringSystem:     TTL, open-aperture, match LED metering system. (aperture prefered when
                        used with AEC adapter) Avegage metering (centerweighted)with two CdS
                               cell metering range: EV2 - EV19 (ASA 100)
     Film Speed range:    ASA 25 - 3200
     Film Advance:       135o rotation of wind lever with standoff angle of 30"
     Shutter Releae:        Electrically controlled solenoid switch
     Film Counter:         Progressivetype
                           Automatically resetswhen camera back is opened.
    PowerSource:        2 X 5-76 (or MS 76 or G 13) 1.S-Voltsilveroxide battery
                           Battery test with LEDs in viewf inder
     Reir Cover:         Removable hinge type
    D i m e n s i o n s t '       1 3 6 . 5 x 8 3 . 2 x 5 1 m m
    Weight:             530 gm.
     Attachable accessories:Cosina AEC adapter, Cosinaauto-winder
1 3
                               !:1.",r     -;]ridi                                                           ,...;i,rrii**l;*r              .*,r;-.;r,;,,..         ,.j,il.      .r*ia
View original page 15Related documents and language editions
From the M. Butkus archive. Original publisher and archive notices are retained.
Check the model and edition against your equipment.
PDF verified 2026-10-10.