Film cameras
WITH VIEWFINDER User manual
User manual for WITH VIEWFINDER. 17 pages in English. Read the original PDF, download or print a copy without registration.
17 pagesEnglish1.7 MB PDF
Loading your manual…Open PDF directly
Document details
- Brand
- Various brands
- Model / document
- WITH VIEWFINDER
- Document type
- User manual
- Language
- English
- Pages
- 17
- File size
- 1.7 MB
- Category
- Film cameras
- Document date
- Not specified in catalog
Search available document text
Find a term, then jump to its page in the original PDF. Image-only pages may not be searchable; check the PDF for exact wording and diagrams.
Page 1 · Read text
www.butkus.usiJ'

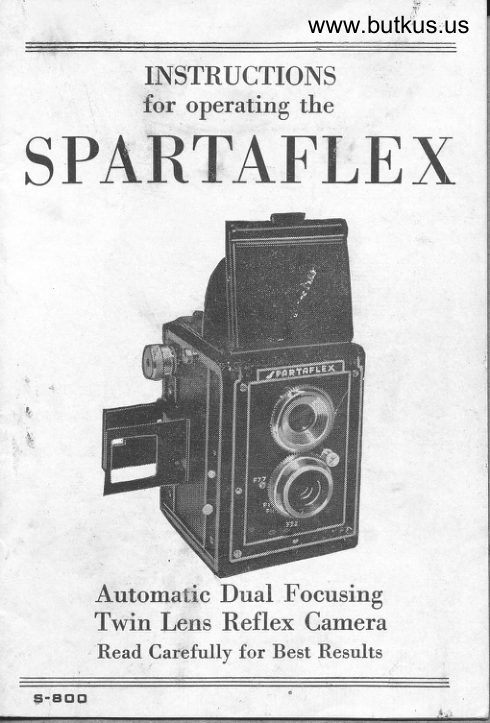
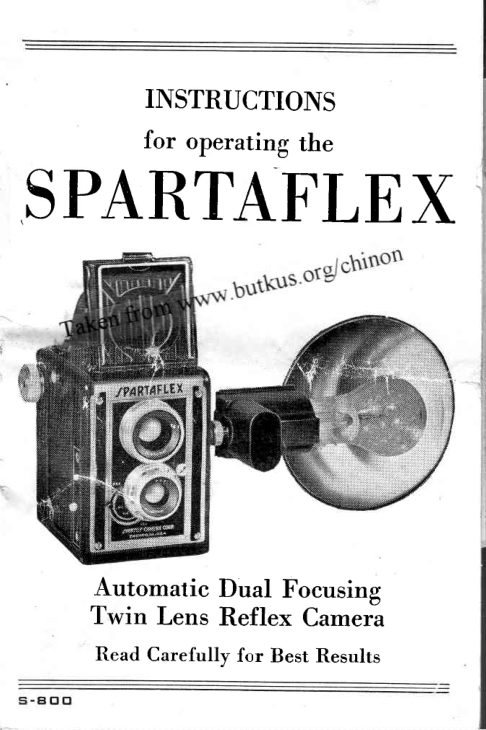
        INSTRUCTIONS
          for operating the
SPARTAF'LEX


     Automatic Dual Focusing
     Twin Lens Reflex Camera
      Read Carefully for Best Results
View original page 1Page 4 · Read text
www.butkus.us
          INTRODUCNON
  This type of reflex cqmero is gucrrcrnteed to
                                                 oc-qive good results if used properly crnd in
cordqnce with these instructions. If for qny req-
son your cqmero is not doinq os well os you
think- it should, consult your deqier Ior informcr-
tion or write direct to us. Do not be sotisfied
until you get good results from every roll ol film'
  Your cctmerq is o precision built instrument
so hcrndle it qs such ond you will be rewqrded
for your core with consistent sqtisfcrctory results.
    WHAT YOUR CAMERA DOES
 When cr film which is sensitive to liqht is
plcrced in your comero crt o determined distance
iro* the lLns ond the shutter lever' is tripped,
the lisht odmitted throuqh the lens for the time
the sliutter remdins open is focused by the lens
onto tft" sensitive film. The film is then termed
"exposed" qnd when chemicolly trecrtel pP-
duc-es cr negotive of the imqse picked up by the
Iens. As noted from the above, light is the most
importont foctor in the ort of picture- tokinq.
Since this is true, controls qre ploced on the
cqmerq for qdjustinq the qmount of light thct
should enter to properly sensitize the film. This
is qccomplished on the cctmero by chcrnqine
the size of the hole locoted neor or inside the
lens. This is commonly known os o stop, dicr-
phrcrgm, or operture qnd is expressed in values
bf f, such qs'f7.7, fI6, etc.
                           3
View original page 4Page 5 · Read text
Films qre mqde of vqrious sensitivity, known
 crs "speed," and manufqcturers supply you
 with this speed rcrting so crs to encble you to
cdjust your ccrmerq to properly expose the par-
ticulor type of film you qre using. Instructions
for the correct "f" vqlues for your comero will
follow.
  As there is c definite relqtionship from lens to
object crnd lens to film, in order to obtqin shorply
defined pictures, it is necessary to crdjust this
reiotionship by whqt is colled "focusing." This            It
is qutomcrticclly accomplished by turninq the
focusing ring to the proper footoge, or by wotch-
inq the view finder for the cleqrest imqge qs
the focusing mount is revolved.
         INSTRUCTIONS FOR
        OPENATING CAMERA
  Use cny stqndqrd size No. 120 film, type crnd
speed to meet yoar requirements. You-will get
12 exposures (ZVa, x 2Ya) from eoch roll.
  Eefore tqkinq cny pictures, fomilicrize your-
self with the cemero. Reod the instruct-ions,
which will exploin the woy to open ond locd
the _cqmero, how to odjust the controls,methods of focusing. In generql, ocquoint your-""J
self -with lttq          so thot whln vo,i *!qecrdy to "shoo!,""qtpmentyou will be oble to'hcndle
the cqmera in the best mqnner to produ"; ih;desired results.
                         1
View original page 5Page 6 · Read text
, !F
                      www.butkus.us         TOADING CAMENA
  To open the cqmerq for locrding, qently  lift
 the bcck lockinq brqce (B) cnd press down the
 L shoped bock (A)-do not force the bcrck fcrrther
thcn it will qo.

                                                        crn  When purchosed the cctmerc will hcve
       spbol in the upper gRool comportm-ent'                                out windins"*pivio ^i"bf,ice qn empty spool, pull
k;.tidj  ond turn in- diiection of qrrow until it
remcrins in outword position. Plqce the spool
 *itft tt.tted hole towcnd the knob ond put the
other end of the spool over the stud on-opposile
     Drop the spool in ond releqse the knob,
                                                             istuming""a.    until ths tonsue on the knob shoft
          in the slotted hole in the spool.
".rqoqtd
  Now tqke cl spool of film, remove the outside
*r"opi"- cnd insert it in the lower chqmber
;idth"  tlcck side of the film focins the inside
oiift" cctmerc. Pull the pqper leqder crcross the
dark comportment towoid the empty spool-cmd
tni."a the poper leader in the wider slot' Give
tne *indinq knob one or two turns to the right,
mokinq sure thot the pcrper leqder is firmly cen-
tered between the spool flcrrqes. If the pcrpe!
leqder hcrs not been inserted correctly, the spool
will hcnre q tendency to bind, therefore, press
the paper gently sidewcrys to properly c-enter it.
Cloie ihe lock of comerc cmd be sure that it ls
securely locked.
                            s
View original page 6Page 7 · Read text
After loading ond the back is locked, look
  into the smqll round window in the bocl cnd
  turn the windins knob (C) in direction oi  until the wqrning honds crppeqr. Then    ".i"*
  windinq_ve_ry slowly until L series of dots"o"ii"""ond  the No. I shows in the window. you crre now reody to          tqke the                           first                        picture.                                 After                                     the f-irri-.*--in posure,       wind              the               knob                            until No.                         2 opp"o.,
 the window. Repeot this ofter eoch biroi until
 the 12th (lost) elrposure hqs been mode. With color film yo_u will get nine exposures.
   Cqution: Remember to wind to ;;;i  number qfter eqch exposure.
      UNTOADING THE FILM
  When oll 12 pictures hcrve been errposed;.con_
 tinue to wind untit the ena Jihe;6;;;;;,
 the-window, qfter whiqh, keep *i"dfi;f;.;;;_ erol more           turns                 to make                               ,,rr5                                   trroi;ii                                                   til                                                ;;;_ tective        pcrper                  is wound                     on                           the spool.                                           ll"r"                                       oil" the bg.ck, pu! out the windinJ-kn-ot,';;d;["
 the roll out of the chcrmber. L;TA"+.fy**li,
                                                                                                                                                                        I ten the summed l.rbq! prorrid"o qnd pcrste to
                                                                                                                                                                                                                                                                                        I       prevent roll to                unrcrvellinq.                           Tro"rf* ifrS                                            .?iliispool      from           the                opposite compcrrtment                                              the                 I                                    towindinq       knob compcntment to G;;;&   f,; ;:    Jother      loodinq.
    METHOD OF HOI^DING CAMERA
  Hold the comero. firmly cscinst y;u. bodvwith the left hcmd crt thg p-pri a-rrt;;;-qTdr" t;,::cleorly the imqse on the sro;"a            i:i il:
                         t
View original page 7Page 8 · Read text
www.butkus.us
    finder cdter the vievrfinder hood D) hcs b*l
     iitt"a to the open position. Ploce the riqht thq*b
   on top of shutter lever (H) ond support the bof
   tom of the ccrmero with the remqining fingers'
   While viewins the subject in the finder, hold ttre
   cqmero perfectly  still crnd press the lever qently
   down os for os it will go. Rqise thumb crnd lever
    will return into position for next exposure. The
    foregoing coveri instructions for using the "re-
    flex" or "wqist level" type finder. Instructions
    for the "sportsmcm" or "eye level" finder will
    follow.
     Note: The smqll recn sportsmon linder moy
   be rqised from the sround qlqss or ccrn be left
   down qnd used to center subjects on the ground
    gloss.
                 SHUTTER
     The shutter is cr fixed speed type qiving cln
    exposure oI l/60 of a second.  It cqn  be
    odjusted for either time or instqntcrneous ex-
    posures. For all snopshots qnd when the sub-
    ject is in motion, push lever (G) to INST. The
    mqjority of your pictures will be tqken under
     this condition.
              TIME HI(POSI'RE
    When liqhtinq conditions cne poor qnd qn
    instontcrneous exposure is not sufficient to prop-
    erly expose the film, set the lever (G) to TIME.
   When mqking this type of exposure, the subiect
    must remcin perfectly  still crrd the comercr mustl;
View original page 8Page 9 · Read text
be plcced on some rtqid obJect such cs cr tcible,
 etc. Hold the cqmerc firmly cnd press the shutter
 lever down, holding it down for the reguired
 crmount of light exposure. Time of exposure cqn
be determined from the exposure toble ctccom-
ponying the film. Focus your subject crs you
 would do normolly belore tripping shutter lever.    ,
             FOCUSING
  By grcspinq and turning the geor wheel on
the taking lens (F) subjects ony distqnces from
 sliqhtly less thqn 6 feet to infinity (as fqr qs the
eye can see) cqn be photogrcrphed shorply. To
focus your subject, find sqme in the finder crnd
revolve the toking lens in either direction qnd
observe the imcrqe chonge in the finder. When
the finder imqge is as shorp qs it cqn get, the
ccrmero is in focus.
  For convenience, the lens mount is colibroted
in feet crround its dicrmeter. To focus merely
tum the mount until the footoge on the dicl cor-
responds with the distance in feet from the sub-          :
ject to the cqmera. This is q fost qnd reqsonobly
sure method of focusinq.
     USE OF APERTURE OR "STOP"
  The "stop lever" (D is for regulqting the
crmount of light permitted to enter the lens in
qccordqnce with the type of film being used.
When film is purchosed the manufqcturer speci-
fies the "speed." Three common speeds ore:
25, 50, crrd 100.
View original page 9Page 10 · Read text
www.butkus.us
  The follor,vtnq ls cm exposure tcrble for use
with your cctmerq:
   ETIPOSURE TABIE FOB SHUTTER SPEED OF T/60
            SECOND FOB DAYTTTE
Speed of Film  Brilliqnt I  ftief,r    Avercrge     Shqded
       25                                         r/8     -ffi         -ilr6 l=nt- -     f./tr       50        -Td-l-ilto      100   TXffil--Tz,- -ilro - TT
-  I.  Brillicgrtdistqnt londscupesSubiectc: Beqch,qnd mountoinsmqrine qndwithoutsnow scenesipromi-
      nent dcnk objects in foreground.
   2. Bright Subiecls: Neor-by people in mqrine, beqch,
      or snow scenes; scenics with foreground objects.
   3. Avercae Subiects: Necr-by people, gordens, houses
     qnd scenes not in shqde. Use this clossificotion  iI
       in doubt.
   4. Shcrded Subiecls: People, gordens qnd other sub-
        jects in the open shode (liqhted by open sky-not
      under trees, porch roof, etc.).
   TO TAKE FLASH LIGHT PICTURES
  For best results with flosh liqht, we recom-
mend the use of crny qood relioble film with o
speed rqtins of J00.
  The Flcsh-Gun supplied with your cqmero
requires very little ottention, crnd only the fol-
lowing'steps ctre necessqry to put it in operqting
condition:
l. The reflector should be polished with a sofl
   cloth or tissue. This should be repeoted at
   intervols to keep reflector cleqn ond hiehly
    reflective.
                            I
View original page 10Page 11 · Read text
2. Two "Pen Llte" bpc dry eell bcrtterles musi
   be instclled in the bcrttery compcntments in
   the gun. To do this, unscrew the small
   knurled screw on the bock cover which will
   then qllow you to remove the reflector. Then
   slide the back cover off by pushins it up-
   word. Plqce one bcrttery in one of the chom-
   bers with the tip down crnd then ploce the
   other bcrttery in the other chqmber with the
    tip end out or towqrds you.  It does not motter
   in which chqmber the botteries ccre plqced
    just qs lonq qs one is ploced with the I'IP
  DOWN ond the other with the TIP UP.
  Now slide the cover bqck on, mqking sure
    the slots on the side of the cover cre engqged
   on the trocks on the side of the body. Push
     it down qs fcn os it will qo then insert the
   knurled screw thru the hole in the bock cover
   qnd screw it in severol turns. Now insert the
    reflector thru the slot on the cover crnd under-
   necth the screw. Adjust the reflector up or
  down to center it with the porticulqr size
    flcrsh bulb you wish to use, then tiqhten the
   screw which will securely lock the bcrck
   cover qnd reflector in plqce.
  Your ccrmerc is equipped with c synchronized
shutter qnd no qdjustments on the cqmero cre
necessory, other thcrn to plcce the flosh-gun ln
its position. This is done by inserting the recr
prong of the gun into the reor receptccle on the
                           r0
View original page 11Page 12 · Read text
www.butkus.us
       To Take Flcsh light Pictures-conl
   cqmercr. In this positi'on the round knurled
   thumb screw will 6e over the threqded stud on
    the cqmerc. Now engqge the thumb screw on
    the stud ond turn to the right os tiqht crs possible
    to lock the gun-imporiontin Position.    The lost           step essential to tcrkinq
 f   flosh pictures is the instollinq of the flcrshliqht

    I                                             scrme   bulb. This is done by merely screwing
    into the socket, the scrme cts you would screw
J   in an ordinory iiqht bulb. With your unexposed    film indexed to the next number ond your sub-
    jects in position, you qre now reqdy fol c flqsh
   shot. After the shot is completed the film
   should be turned to next number, the bumed
    out bulb removed ond q new one inserted, to
   be ready for the next shot.
    IMPORTANT: When operqtins the shutter
   press it firmly ond gently downword (do not
    hesitote or stop durins the down stroke) until  it
    clicks ond then relecrse. This will qssure good
    synchronizotion crnd even exposure.
1   When the flosh-gun is removed from comerct
  I   qnd contoins botteries, do not ploce it on crny
i!   metollic object. This mcry cquse a short circuit
    ocross the connector prongs which will ruin the
    bqtteries. If the gun is to be stored crwqy for q
    consideroble lenqth of time, it is q'Jviscrlcle to
   remove the bqtteries. Your flosh-gun will oc-
   commodqte the most populor size bulbs obtoin-
    qble, ncorrely:                                         ll
View original page 12Page 13 · Read text
Sylvania #40
               Sylvania #25
           Gen. Elec. # 5
           Gen. Elec. #IlA
  Lcnger type bulbs ecm crlso be used.
  To use the Sylvania #25 or the G.E. #5, on
odcrpter is necessory. These ccrn be procured
of your locol photo supply store for q nominol
fee.
    It is reeommended  thcrt flcsh shots should not
be mqde crt c distance greqter thqn twelve feet
with obove nqmed bulbs. Subjects at grecrter
distqnces cqn be photoqrcrphed with the lcnger
bulbs.
  The bcrtteries {or the flosh-gun cre obtcincrble
from your photo supply deqler, hcndwcne, or
department store. They hcrve cr shelf life of six
months ond since the current consumed by the
flcsh bulb is very smqll, they should last you
for this period with normol use. If ever in doubt
qs to the condition of the botteries,  it is odvisqble
to obtoin new ones. Their cost is very rectson-
oble.
  With cr minimum qmount of ccrre cnd ccmtion,
you should qet very fine results crnd derive q
great crmount of pleosure with this eguipment.
                            t2
View original page 13Page 14 · Read text
www.butkus.us
       TAtrING COTOR PICfl'NES
  To tcrke color pictures outdoors, use qny
stqndcnd #120 outdoor colorfilm. The subjeet
must be in briqht sunliqht to toke sncrpshots.
The best time o{ the doy to toke color pictures is
lote morning or eqrly cdternoon. At noon the
light is too hiqh crnd tends to give crn unnqturql
qppecrrcrnce. Do not ottempt to tqke sncrpshots
when the subject is in shcdow, or the liqht is
too dull. Follow instructions thcrt qccompqny
your film.
  To take color pictures indoors, toke any
stqndcnd #120 indoor color film. For liqhtlnq
use flosh or photo flood lqmps in reflectors. Do
not mix doyliqht with flosh or photo floods. If
possible, use q qood exposure meter to give the
correct operture opening.
 The Spartaflex Cqmera is equipped with cr
"Sportsmqn" view finder in addition to the reg-
ulqr sround gloss reflex finder. When toking
flosh bulb pictures, be sure to use this Sport*
mqn view finder so thqt the flosh of the bulb
does not strike the eyes

                            l8
View original page 14Page 15 · Read text
TIIINGS TO NEMEMIER
  l. Be sure dicrphrcrgm is properly set accordinq to ltght
     condition.
 2. Set focusing mount to proper distcrnce.
 3. Advonce film crfter eoch exposure to ovoid spolling your
    pictures by double exposrre.
 4. Before crnd ofter using, clwcys clecrn lenses with q soft,
    dry cloth to remove dust, fingerprints, etc.
 5. Do not toke pictures focing the sun. The sun should be
   behind your bock when toking pictures.
 6. Locqte your subjects in the position desired in the view-
    finder. The cqmerc tokes sliqhtly more thon you cctu-
    olly see through the viewfinder.
 7. Be sure to hold cqmerc still when toking plctures ot
     cll tlmes.
 8. Plcce time lever to "INST" when toking sncrp shots crnd
    to "TIME" position when toking time pictures.
            DONTS TO NEMEMBER
  DON'T loqd or unlood your cqmerq in direct sunlight.  II
 you hcrve to loqd out-of-doors, seek c shcdy spot or inter-
 pose your body between the sun ond the comerq.
  DON'T hqve the sun directly in front of you when tqking
c picture. Endeqvor to orronge your viewpoint so thot the
sun is behind qnd q little to one side of you.
  DON'T jerk the releose of the crcrmerq. Press gently and
 slowly.
  DON'T be ofroid to toke cr "Time" exposure in poor light.
It is os eosy crs toking a snopshotrproviding the comerq is
plqced upon some suitoble support.
  DON'T lcy your comero obout on the sqnd:.
  DON'T unroll the spool of film to "see the picture." There
is nothing to be seen until qfter development, which must
be done in c proper dcrrkroom or light-tiqht tonk. Any
whtte light whtch reqches the film will spoil the pictures ln
 : fraction of q secrond
                            la
View original page 15Page 16 · Read text
www.butkus.us
                       Gullf,iltll
                fre SPcrtdlel Qmtsjq
le unconditionclly gucrronteed cgoinst defective workmqn'
ship ond moteriql for o period of ONE YEAR. FOR SERVICE
return cqmero to foctory with this guorcntee qttoched ond
$I.50 to cover hcrndling ond postoge. Crocked or broken ports
ore not covered by this service chorge, therefore, PACK
CAMERA VERY CAREFULLY AND ALWAYS INSURE
PARCEL. For replocement pcnts see list below.  If necessory
to return comero to foctory be sure to enclose the $1.50
hqndling chqrge os fqilure to do so will deloy the repoir
and retum of your comerq.

  Should your cqmerc require ctny or the following repcrirs,
 it will expedite mqtters  if you will send us remittonce qccord-
ing to the following schedule qt the sqme time thot you
moil us your cctmerq:
Nome Plqte, Both Lenses & Mounts                                                   . $5.00
Top Lens & Mount.                                  ....2.00
BottomLensdMount.                     ......2.50
Nqme Plqte .                                                     .50
Bcrck.                                                        ..  1.50
Riqht Sid+-Knob Side.
Left side                                                       .. .. . 1.00
Shutter Assembly                                                               . ..  1.00
Lecther Strop .                                                  .25
Top Assembly ..
      HEROLD PRODUCTS CO., lNC,
715W. LsLe SL                       Chlccgo 6,Illlnolr
                             rt
View original page 16Page 17 · Read text
{
   PROTECT YOUR CAMERA
        with a Custom-Built
  CARRYII\G CASE


Here's o bequtiful Evereody cqirying cqse   .
mqde of rich brown genuine leqther reinforced
for mqximum weqr.
Avoilcble from your deoler or send $5.00 cnd
include nqme of deqler.


  HEROLD PRODUCTS CO." INC.
     ?15 W. Lcrke St. - Chiccrgo,6lll.
View original page 17Related documents and language editions
From the M. Butkus archive. Original publisher and archive notices are retained.
Check the model and edition against your equipment.
PDF verified 2026-10-10.