Film cameras
Spartaflex User manual
User manual for Spartaflex. 17 pages in English. Read the original PDF, download or print a copy without registration.
17 pagesEnglish0.7 MB PDF
Loading your manual…Open PDF directly
Document details
- Brand
- Spartaflex
- Model / document
- Spartaflex
- Document type
- User manual
- Language
- English
- Pages
- 17
- File size
- 0.7 MB
- Category
- Film cameras
- Document date
- Not specified in catalog
Search available document text
Find a term, then jump to its page in the original PDF. Image-only pages may not be searchable; check the PDF for exact wording and diagrams.
Page 2 · Read text
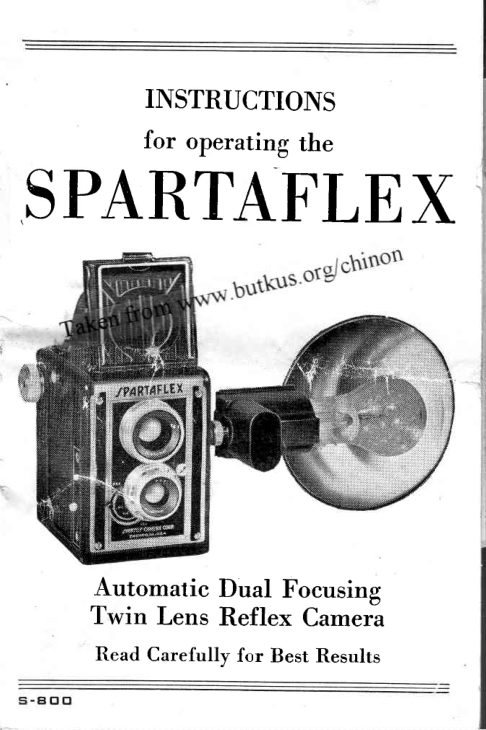
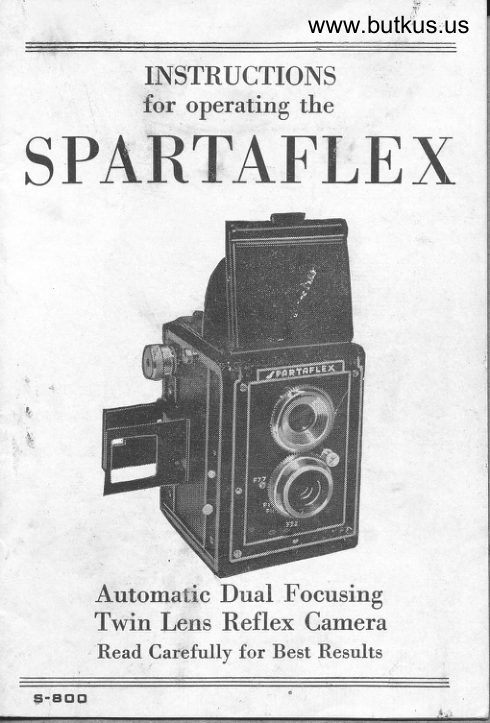
I1\STRUCTIONS
             for operating the
SPARTAFLEX


     Automatic Dual Focusing
     Twin Lens Reflex Camera
      Read Carefully for Best Results
View original page 2Page 3 · Read text
Taken from


                       Figure l.
A.  Camera Back.            F.  Taking Lens.
B.  Back Locking  Brace.    G.  Time & Instant Lever
C.  Winding Knob.          H.  Shutter Lever.
D.  View Finder Hood.       J.   F intler Lens.
E.  o'Stop" Lever.            K.  Flash Connecting  Stud.
                     2
View original page 3Page 4 · Read text
INTRODUCTION
   This type of reflex cqmerCI is guoronteed to
 give good results if used properly ond  in oc-
 cordonce with these instructions.  If for ony reo-
 son your comero  is not doing CIs well os you
 think  it shouid, consult your deoler for informo-
 tion or write direct to us. Do not be sotisfied
 until you get gooC results from every roll of film.
  Your cCImero is o precision built instrument
 so hondle  it qs srr/-hrrnrl vn,' .vill be rewqrdei
 for your "o..   *iili;;;.j";i        lo*t.to"tory  results.
     WHAT YOUR CAMERA DOES
  When  a  film which  is sensitive to  liqht  is
ploced in your cqmero at o determined distonce
from the lens ond the shutter lever  is tripped,
the liqht odmitted throuqh the lens for the time
 ihe shutter rencins open is focused by the lens
 ::::c :he s=:-s-.--.-=:--:::. The film is then termed                      -.',-:re::  :.',::::r       ::-i         crenicolly  treoted pro-
     -::   I  :-::::--.-= C: ::-e -:::trgepickec up by the
 -:---: -r-=:-:.=j  -::::: :::= :bcve,  iiqht is the most
-::-:c::Tl    :-::.::   -:t :::3 c:t  cf picture tokinq.
Siice  li-s  :s  -- -:   :::-:c-s  cre ploced on the
cqrneio for cd;:s:-:-J ::_3 t::rcunt of liqht thot
shouid enter to prcce:_i- se:rsitizethe film. This
is qccompiished on the comerq by chcnging
the size of the hole iocoted neor or inside the
lens. This is commonly known CIso stop, dio-
phrogm, or operture ond is expressed in volues
of f, such as f7.7, fl6, etc.
                     3
View original page 4Page 5 · Read text
Films ore mode of vorious sensitivity, known    "speed,"qs            qnd  mqnufocturers  supply  you
with  this speed rqting so os to enqbie you  to
adjust your cqmero io properly expose the por-
ticulor type of film you ore using.  Instructions                     "f"for the con:ect    volues for your ccrmero will
follow.
  As there is o definite relotionship from lens to
object qnd lens to film, in order to obtoin shorply
defined pictures,  it  is necessory to odjust this                                "focusing."reiqtionship by whot  is colled             This
is qutomoticolly  qccomplished by  turninq the
focusing ring to the proper footqge, or by wotch-
inq the view  finder for the cleorest imoge  crs
the focusing mount is revolved.
          INSTRUCTIONS FOR
         OPERATING CAMERA
  Use ony stcrndord size No. 120 film, type ond
speed to meet your requirements. You will qet
12 exposures (2Ya x 2Yq) from eoch ro11.
  Before tokinq ony pictures, fqmiliorize your-
self withr the comerq.  Recd the  instructions,
which  will  exploin the woy  to open ond lood
the cqmero, how  to odjust the controls, qnd
methods of focusing. In generol, ocquoint your-
self with the equipment so thot when you ore           "shoot,"reody  to         you  will be oble  to hcrndle
the cqmero in the best monner to produce the
desired results.
                     4
View original page 5Page 6 · Read text
TOADING CAMENA
  To open the comero  for looding, qently   lift
 the bock lockinq brqce B) ond press down the
 L shcrped bock (A)-do  not force the bock {crrther
 thcm it will qo.

  When purchosed the cCImero will hove on
empty spool in the upper spool comportment. !
 To'reploce qn empty spcol, pull ouf windinq  I
 krrob (O and turn ln direction of orrow  until  it.i
remqins in outword position. Picce the spooi$
with slotted hole towcnd the krob cnC put the f
other end of the spccl cver the stuC o:r opposite ]
end. Drop the spool in crnd releose the knob,  I
turnins  until  tha tonsue on the knob  shoft  is {
engcrged in the slotted hole in the spool.      5
                            F
  Now tqke cr spool of film, remove the outside F                                        Fr,rrrrrnnincrv v   r u y f J l r t Y           Vr^rndI t g                      linseril l u v l              I   itt l          IinI I  the( l l v  lowerf v   Y Y v l  chomber
r'':th the block side o{ the film focins the inside       tFj
 :-  .::e comerq. Pull the pCIper leoder ocross the fr
ciark co:;:portment toword the empty spool qnd  q
throod the poper leoder in the rvider siot. Give $
the windinq kncb one or two turns to the rioht,   j
rnol.,ing sure thot the poper leoder is firmly cen-
tered between the spool flonges.   if the poper
Ieoder hos not been inserted correctly, the spooi
will hove  cr tendency to bind, therefore, press
the poper gentiy sidewoys to properly center it.
Close the lock of comercr qnd be sure thct  it is
securely locked.                                   (
View original page 6Page 7 · Read text
After looding ond the bock  is locked, look
into the smcrll round window  in the bock ond
turn the windinq knob (C) in direction of orrow
until the worninq honds oppeqr. Then continue
winding very siowly  until o series of dots ond
the No.  I shows in the window.  You qre now
reody to toke the first picture. After the first ex-
posure, wind  the knob  until No. 2 oppeqrs  in
the window.  Repeot this ofter eoch shot until
the l2th (lost) exposure hos been mqde.  With
color film you will qet nine exposures.
  Ccrution: Remember to wind  to next number
ofter eqch exposure.
      UNLOADING  THE FIIM
  When  c.II 12 pictures hove been exposed, con-
tinue to wind  until the end of the pcrper pqsses
the window,  qfter which, keep winding  for sev-
erol more turns to moke sure thcrt oll the pro-
tective poper is wound on the spool. Now open
the bock, pull  out the winding  knob, ond tqke
the roll out of the chomber. Immediately mois-
ten the gummed  lobel  provided  ond pqste  to
rcll  to prevent unrqvelling.  Trqnsfer the empty
spool  fi:om the  opposite comportment  to  the
winding knob comportment  to be reody  for on-
otlier loodinq.
    MHTHOD OF HO,IDING CAMERA
  Holcl the comero  firmly  crgqinst your body
with the left hond  of the proper distqnce to see
cleorly  the imoqe on the ground  qlqss  in the
View original page 7Page 8 · Read text
finder  qfter the viewfinder  hood (D) hos been
lifted to the open position. Place the riqht thumb
on top of shutter lever (H) ond support the bof
tom of the cqmero with the remoining  fingers.
\Mhile viewins the subject in the finder, hold the
camero perfectly still ond press the lever qently
down os fqr os it will go. Roise thumb qnd lever
will return into position for next exposure. The F                                                   "re-foregoing covers instructions for using the    E          l'woistflex'; or         level" type-'t"y"finder.  Initructions E       "sportsmon"
fcr the               or       level" finder will  i
follow.                                            b
  Note: The smoll reor sportsmon finder moy 4
be roiseC frcm the ground gloss or con be left -i
down ond useC to center subjects on the qround E
giqss.                                          s
           SHUTTER            F
  The shuiter is o fixed speed type qiving  o.r  f
exposure of I/60  of o second.      it con     f"     i
odjusted  for either time  or instqntoneous  .*-  F
posures. For o11snopshots ond when the sub-,i
ject is in motion, push lever (G) to INST. The s
mojority  of your pictures will be token under -9
this condition.                                                              I
            TIME EXPOSURE
  When  liqhtinq  conditions qre poor qnd qn
instqntoneous exposure is not sufficient to prop-
erly expose the film, set the lever (G) to TIME.
When mqking this type of exposure, the subject
must remqin perfectiy still ond the cqmercr must
                     7
View original page 8Page 9 · Read text
be ploced on some riqid object such qs cl tcrble,
etc. Hold the comero firmly ond press the shutter
lever down, holdinq   it down  for the required
crmount of liqht exposure. Time of exposure con
be determined from the exposure toble qccom-
pcrnying the film. Focus your subject os you
would do normolly before trippinq shutter lever.
             FOCUSING                     turning the geor wheel on     II  By qrosping onC
the toking lens (F) subjects ony distonces from
sliqhtly less thqn 6 feet to infinity (os for crs the
eye con see) con be photoqrophed shorply. To
focus your subject, find some in the finCer onC
revolve the toking lens in either direction onC
observe the imoqe chonge in the finder. \Mhen
the finder imcrge is os shorp qs  it cqn get, the
ccmero is in focus.
  For convenience, the lens mount is ccriibroted
in feet qround  its diometer.  To focus merely
turn the mount until the footcrge on the diol cor-
responds with the distonce in feet from the sub-
ject to the comercr. This is q fost ond reosonobly
sure method of focusing.                              ''STOP"    r     USE OF APERTURE OR        "stop  The         lever"  G)  is  for  regulqting  the I
omount  of liqht permitted to enter the lens in
occordonce with  the type  of film beinq used.
When fiim is purchcrsed the rnonufocturer speci-        "speed."fies the          Three common speeds ore:
25,50, ond 100.
                                          I
View original page 9Page 10 · Read text
The following   is qn exposure  tqble  for use
    with your cqmerq:
      EXPOSURE TABTE FOR SHUTTER SPEED OF I/60     TT
               SECOND FOR DAYTITE                  5


           nent dcrk objects in foreground.                          ts
         2.  Bright Subjects: Neor-by people in mqrine, beoch,    F
            or snow' scenes; scenics with foreground objects.                                                       F
         3. Avercge Subiects: Neor-by people, gordens, houses    .4
         qnd scenes not in shcde. Use this clossificotion if   H
             in doubt.                                          p
         4. Shcded Subiects: People, gordens crnd other sub_   €
            jects in the open shode ftiqhted by open sky__not       I          under trees, porch roof, etc.).                      -V
      TO TAKE FTASH LIGHT PICTURES         f;
     For best results with  flosh  liqht, we recom_
   mend the use of ony sooC relictle  film wilh o
   sReed rotins of I00.1
I    The Flosh-Gun supplied  with  your comero
   requires very  little ottention, ond only the fcl_I
r   rowlng steps ore necessCIryto put it in operoting
   condition:
      l.  The reflector should be polished with o soft
       cloth or tissue. This should be repeoted ot
       intervqls to keep reflector cleqn orrd hiqhly
        reflective.
                                                I
View original page 10Page 11 · Read text
"Pen2. Two        Lite"  tlpe  dry  cell bcrtteries must
   be instqlled  in the bcrttery compqrtments  in
   the gun.  To do  this, unscrew  the  smoli
   knurled screw on the bcck cover which  will
   then oilow you to remove the reflector. Then
    slide the bock  cover  off by pushins   it up-
   word.  Ploce one bottery  in one of the chcm-
   bers with  the  tip down ond then plcce  the
   other bottery  in the other chqmber with the
    tip end out or towqrds you.  It does not mcrtter
    in which chomber  the botteries ore plcrced
    just qs lons qs one is ploced with the TIP
  DOWN  ond the other with  the TIP IIP.
  Now  slide the cover bqck on, mqkingr sure
   the slots on the side of the cover ore engoged
   on the trocks on the side of the body. Push
      it Co-*rn os for qs  it will qo then insert the
   knurled screw thru the hole in the bcck cover
   ond screw it in severol turns. Now insert the
    reflector thru the slot on the cover ond under-
   neqth the screw. Adjust the reflector up or
   down  to center   it with  the porticuior  size
    flosh bulb you wish to use, then tiqhten the
   screw which   will  securely  lock  the bcck
   cover cnd  reflector in plcce.
  Your ccrmero is equipped with a synchronized
shutter ond no odjustments on the comerq cre
necessory, other thon to ploce the flcrsh-gun in
its position. This is done by  inserting the reor
prong of the gun into the reqr receptacle on the
                           l0
View original page 11Page 12 · Read text
To Tcke Flqsh Liqht Pictures-cont.
comero.   in  this  position  the round  knurled
thumb screw will be over the threoded stud on
the comero. Now engoge ihe thumb screw on
the stud qnd turn to the riqht os tiqht os possible
to lock the gun in position.
  The  lost importont  step essentiol to tokinq
flosh pictures is the instollinq  cf the floshiiqht
bulb.  This is done by merely screwing some
into the socket, the sqme os you would screw
in on ordinory liqht bulb. With your unexposed
film indexed to the next number ond your sub-
jects in position, you CIrenow reqdy for o flosh
shot.  After  the  shot  is  completed  the  film
should be turned to next number, the burned
out bulb removed ond o new one inserted, to
be recrdy for the next shot.
  IMPORTANT:  When  operqtins  the  shutter
press  it firmly  crnd sently downword  (do not
hesitote or stop during the down stroke) until  it
clicks ond then releose. This will ossure qood
synchronizotion qnd even exposure.
  \Mhen the flosh-gun is removed from comerCI
ond contoins botteries, do not ploce  it on ony
metollic object. This moy couse o short circuit
CIcrossthe connector prongs which will ruin the
botteries.  If the gun is to be stored owoy  {or o
consideroble lenqth of time,  it is odvisobie  to
remove the botteries. Your flclsh-gun will  oc-
commodqte the most populor size bulbs obtCIin-
qble, nomely:
                                                                   il
View original page 12Page 13 · Read text
Wobosh #25
           Wobosh # 0
             V/obosh #40
           Gen. Elec. # 5
          Gen. Eiec. #11A
                       lT.r-rrcrorv r Y v r     lwne\  f      y v   hulhsv  ! 4  . N v    cqn  qlso be used.
  To use the Wobosh #25 or the G.E' #5, cn
cdopter  is necessory. These cqn be procured
of your  loccrl phoio supply store for q nomlnql
fee.
    It is recommended thot flosh shots should not
be mqde of o distonce greqter thon twelve feet
with above nomed bulbs.  Subjects qt greqter
Cistcl:ces con i-re photoqrophed with the lqrger
bulbs.
  The bqtteries for the Jlosh-gun ore obtoinqble
from your photo supply  dealer, hqrdwcre,  or
donarlmoniu s l J u l L r r r e r r !      sloreu r v r e .   Thev  hrrve  c  shelf   life  of  six
months ctnd since the current consumed by the
flosh bulb  is very  smoll, they should lcst you
for this period with normol use.  If ever in doubt
os to the condition of the batteries, it is cdvisoble
to obtoin new ones. Their cost is very reqson-
oble.
  With o minimum qmount of cqre qnd ccrution,
you should get very  fine results qnd derive cr
good qmount of pleosure with  this equipmeni.
View original page 13Page 14 · Read text
TAKING COTOR PICTURES

  To  tcke  color  pictures  outdoors, use ony
stondord #120 outdoor colorfilm. The subject
must be  in briqht  sunliqht  to toke snopshots.
The best time of the doy to toke color pictures is
lote morning or eqriy ofternoon. At noon the
liqht ls too hiqh qnd tends to give on unnqturol
rynno.rrr-rn.-eL r P y v v r v r r v v        Do  not  crttomni   to! v  ioker s r l v        psnonshotsr r ' 4 f
when the subject is in shodow, or the iiqht  is
too dull.  Follow instructions thot qccompony
your  film.

  To  toke  color  pictures  indoors,  toke  ony
stondord #120 indoor  color  fikir.  For liqhtinq
''se  {losh     vorr  nhotov r r v r v                rflonrjr v v v     lr-rnnsl s r r r y u       ir  re{ler-tors.  Do
rot mix doyliqht  with fiosh or photo floods.  If
possible, use o good exposure meter to give the
^ n r a n l         nv  ! r r a r vi r] r r aL s  l       v    nv ynv r6r nr r n -           r  f  Y        I

  The Spartaflex Cqmercr is equipped  with  o
"Sportsmon"             view finder in oddition to the reg-
ulor ground gloss reflex finder. When  tokinq
flosh bulb pictures, be sure to use this Sports-
mcn view  finder so thot the flosh of the bulb
does not strike the eves.

                        t3
View original page 14Page 15 · Read text
1IIINGS TO NEMEMBEN
 1. Be sure diophrogm   is properly  set occording  to  liqhl
    condition.
 2. Set focusing mount to proper distonce.
 3. Advonce  film ofter eoch exposure to cvoid spoiiirrg your
    pictures by double exposure.
 4. Before ond oJter using, olwoys cleon lenses with  cr soft,
    dry cloih to remove dust, Iingerprints, etc.
 5. Do not toke pictures focing the sun. The sun should be
                 l - c h i n . l    w n r r r    h c c l r . ^ ' h e n        + a l r i n n     n i r t r r r o c
 6. Locote your subjects in the position desired in the view-
     finder. The cqmero iokes slightly more thon you  octu-
     olly see through the view{inder.
 7. Be sure  to hold comero  still when  tokinq  pictures  ot
      oll times.
                      "INST" 8. Ploce          time lever to       when toking snop shots ond      "TIME"    to         position when toking iime pictur:s.
              DON'TS TO REMEMBER
  DON'T lood or uniood your cqmero rn ciirect sunliqhi.   Ii
 you hove  to Iood out.of-doors, seek o shody spot cr  inier,
 pose your body between the sun ond the comero.
  DON'T hove ihe sun directly in front o{ you when toking
 o picture. Endeovor to orronge your viewpoint so ihot the
sun is behind ond o  litile to one side of you.
  DON'T jerk the releose oi the comero. Press gently ond
slowly.
                           "Timp"                                      exn.slrra in nnnr liah+  DON'T he ofroid to toke o
tt o ". L""v ".-'"r.i"e"-"""o"r'"i,p;;;;j;;,il.:;;*;';;
ploced upon some suitoble support.
  DON'T loy your comero obout on rhe sond..
   nA\T,T..*_^rr rL^ ^-^^r  :f film to,,see the picture.,, There
is nothing to be seen until  ofter development, which must
be done  in  o  proper dorkroom  or  lighftight  tonk.  Any
white  liqht which reoches the Iilm will  spoil the pictures in
q froction of o second.
View original page 15Page 17 · Read text
PROTBCT YOUR CAMERA
        with a Custom-Built
 CARRYII\C CASE


Here's o beoutiful Evereody corrylng ccss
mode of rich brown genuine Ieother reinforced
for moximum  weqr.

J4.,^il^ht-l V U l t U V l g      {"^-l f v l l l    .,^,,,y u u f    i^^1^"u g u l g l    or senii S5.00 ond
include nqme of dealer.


    SPARTUSCAMERA CORP.
      715 W. tcke St. - Chiccqo,6lll.

                        t6
View original page 17Related documents and language editions
From the M. Butkus archive. Original publisher and archive notices are retained.
Check the model and edition against your equipment.
PDF verified 2026-10-10.