Sewing machines
Frister & Rossmann Model 35 Zig-Zag — User manual
User manual for Frister & Rossmann Model 35 Zig-Zag. 32 pages in English. Read the original PDF, download or print a copy without registration.
32 pagesEnglish12.3 MB PDF
Loading your manual…Open PDF directly
Document details
- Brand
- Frister & Rossmann
- Model / document
- Frister & Rossmann Model 35 Zig-Zag
- Document type
- User manual
- Language
- English
- Pages
- 32
- File size
- 12.3 MB
- Category
- Sewing machines
- Document date
- Not specified in catalog
Search available document text
Find a term, then jump to its page in the original PDF. Image-only pages may not be searchable; check the PDF for exact wording and diagrams.
Page 1 · Read text
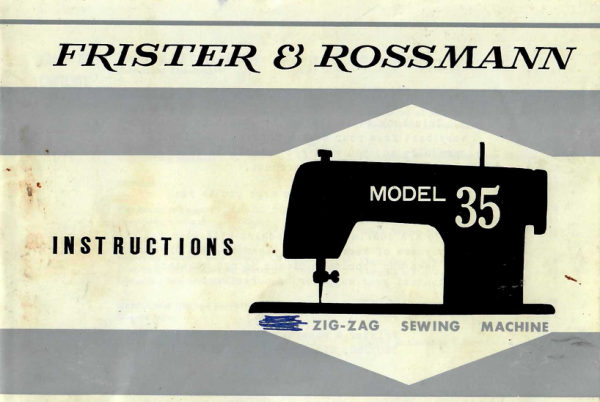
FRISTER & ROSSMANN


                     MODEL
                  35
INSTRUCTIONS


                         E ZIG- ZAG  SEWING MACHINE
View original page 1Page 2 · Read text
Dear Homemaker:

    This booklet is the key to obtaining the
very best from your sewing machine. Follow it
carefully and you will get unbeatable value
from this superbly made product.

    In your own interest we urge you to read
pages 2-13 before using your machine.

    We are convinced this machine will give you
many years of service, and pleasure, but should
you have any problems, please do not hesitate
to contact your supplier or ourselves.

                                Sincerely,

          Frister & Rossmann Sewing Machines,
          350/356, 01d Street, London E.C.1.
View original page 2Page 5 · Read text
INSTALLING MACHINE HEAD IN CABINET


Loosen the two hinge screws under holes in the rear edge of the machine bed (1).
Raise hinge pins in the cabinet cutout (2).
Slip machine head onto the pins and tighten hinge screws securely (3).
Lower machine head to front flap.


CONNECTING MACHINE

Push the plug onto the connector under
the machine motor. See illustration. Plug
machine cord into the wall outlet.


                                                                       3
View original page 5Page 6 · Read text
SEWING LIGHT


         The sewing light is located inside the face cover
           plate as shown. It may be turned on or off by

           turning light switch clockwise, which is located
         on the right side of machine column.


     screw capbulb 15 w


          To change bulb, disconnect sewing machine first,
         and open the face cover plate by swinging it open,
           twist old bulb away from you and remove.
        Then insert new bulb.
View original page 6Page 7 · Read text
NEEDLE AND THREAD TABLE


NEEDLE SIZE

Use System 705 needles. The size of the needle should conform to the size of the thread and
both should be suitable to the material. The same size thread should be used in the bobbin as
 on the upper part of the machine for ordinary sewing.
Never use a bent needle nor one with a blunt point.


                         NEEDLE
   THREAD SIZE             SIZE              FABRIC

 Cotton 60 - 100
                                      Sheer cottons, silks, and synthetics
 Synthetic               7 - 8
                                                              This is the exact length of Silk A                  (70 - 80)                                            Fine laces Machine embroidery                                               the needle to be used in
 Cotton 60 - 80                       Medium weight cottons                your machine. Comparison Mercerized 50                                                with this illustration will
                        8 - 9       Medium weight silk Synthetic                                                determinewhether  the                       (80 - 90)     Mediumweight synthetics Silk   A                                                      needle you have is the
 Machine         embroidery                           Light weight woolens
                                                                correct one for your ma-
 Cotton 40 - 60                        Heavy weight cottons                 chine.
 Mercerized 50           9 - 10      Medium to heavy weight woolens
                       (90 - 100)
 Mercerized heavy duty                 Heavy drapery fabrics

                                         Heaviest cottons as for men's work
 Cotton 30 - 50            11 - 12        clothes
 Mercerized heavy duty    (110 - 120)     Heaviest woolen coating

                                                                             5
View original page 7Page 9 · Read text
WINDING THE BOBBIN


Place thread on spool          Wind thread around              Press bobbin winder lever
post. Draw thread as            bobbin a few times.            down.
shown.


Release clutch by turning         Bobbinwinder thread guide is          Tighten clutch knob and                                         adjustable.  If bobbin winas asclutch knob toward you.  5                                                           indicated        remove bobbin.
Start machine.                               correct this situa-                                        tion. Whenbobbin is full, wind-
                                      ing mechanism stops.
View original page 9Page 11 · Read text
THREADING UPPER MACHINE


                       * Raise take-up lever to its highest
                       position by turning handwheel.
                * Guide thread through threading
                      points as illustrated.
                 * Draw sufficient thread through eye
                     of needle.
View original page 11Page 13 · Read text
STITCH LENGTH CONTROL                FEED DOG CONTROL


                            STITCH LENGTH


Loosen knob and move stitch length control       The feed dog control knob is situated on thelever between 0 and 4; tighten knob. The4         right front of machine bedplate. When knob
setting is the longest stitch.  The size of stitch          is turned to the left, feed dog drops and does
you select will depend on the fabric you want        not pull material.  This allows the operator
to sew. Select stitch length and tighten knob        freedom of movement of material, as for darn-
so that forward andreverse stitches will be          ing.  For regular sewing, turn knob to the
approximateiy the same size.                            right.


REVERSE STITCHING               TURNING A CORNER
Raise lever for reverse stitching.Lower lever       Stop sewing machine with needle in fabric.
for forward stitching.  It is best to begin and        Raise presser foot. Turn fabric. Lower presser
end most seams with reverse stitching often        foot and continue stitching.
called back tacking.
                                                                 11
View original page 13Page 15 · Read text
ADJUSTING TENSIONS (CONT'D)


          INCREASE TENSION                    DECREASE TENSION


                  Turn Clockwise                           Turn Counter Clockwise


When stitching is unsatisfactory as in figures 2 and 3, adjust the upper thread tension.
Lower thread tension requires adjustment less frequently than the upper thread tension.
When stitch is satisfactory, as in figure l and seam is badly puckered, the cause may be
tight tensions and lower may be adjusted. (See page 12)

When adjusting the tension on the bobbin case, make slight adjustments with a screwdriver.
(See page 26)


                                                                                   13
View original page 15Page 16 · Read text
INSERTING AND REMOVING THE MATERIAL


  For all kinds of sewing, consult chart page 5.
  Before placing the material on the machine
 see that:

  * The presser foot and needle clamp screws
   are both tight.
 * The sizes of the needle and thread suit the
   kind of work to be done.
  * The needle is at its highest position.
 * The ends of threads have been drawn about
   4 inches to the rear of the machine.

  * The feed dogs are up.


   Place material under the presser foot, insert the needle into the material by turning the hand-
   wheel toward you, lower presser foot and start sewing.
   Experiment by sewing of the fabric to be usedto determine tension adjustment and correct
    stitch settings.
   To remove the work, first turn the handwheel toward you until the needle is at its highest
   position, then raise the presser foot, draw materials to the rear and cut off excess thread with
   the thread cutter located on the presser bar. To avoid sewing off the end of the material, back
   tack each seam.
  IMPORTANT: Always turn the handwheel toward you! When the machine is not being used,
   place a piece of material over the feed dog and lower the presserfoot.  Always have fabric
   under the presser foot when operating the machine. Operating threaded machine without fabric
   will cause it to jam by forcing lint into the shuttle. See page 22.

14
View original page 16Page 17 · Read text
CHANGING THE PRESSER FEET             FASTENING A SEAM


                                                           4-  F


The various attachment feet available for certain                                          Be sure both threads are drawn back underkinds of work are to be fastened to the presser •
                                                         the presser foot. Lower needle into fabricbar.
                                                          about ½ inch from beginning of seam. Raise
To attach the foot, raise the presser bar to its          stitch length control lever upfor reverse
highest position by raising the presser foot lever.            stitching.    Stitch in reverse untilneedle
Drop feed dog, loosenthe presser foot thumb         reaches beginning of seam.
screw, choose the proper foot and insert from        Movestitch length control lever down for
the front.                                               forwardstitching and complete seam. When
                                            you reach the end, raise the stitch length
Tighten the screw using the large screwdriver          control lever and sew back over ½ inch of
and make sure that the foot is secure.                 completedseam.

                                                                               15
View original page 17Page 18 · Read text
STITCH WIDTH CONTROL                                               OVERCASTING


                0 1 2 3 4


                     STIT


 Move stitch width control lever to the
  desired position between 0 and 4 on the                                               Set stitch width to 4.Set stitch length at   stitch width indicator plate.                                            4.Zigzag stitch around raw edge of fabric  Zigzag stitch width increases from 0 to 4.                                                             to completely cover the edge.
  Straight stitching is possible only with con-
  trol on 0.

16
View original page 18Page 19 · Read text
BUTTONS


  Center holes in button in slit in presser foot. Lower
  presser foot to hold securely. Drop feed dogs. Turn
  handwheel by hand until needle goes into hole in
  button. Adjust stitch width so that needle goes into
  secondhole.   Stitch a number of times to hold
  securely.


 NOTE : To make a small thread shank when sewing
  on a flat button, place a straight pin or needle
  between the holes of the button.


                                                  17
View original page 19Page 20 · Read text
BUTTONHOLES


         1. Set the stitch width to 1}. Stitch forward until desired length for buttonhole is obtained.
        Stop with needle tip piercing in the right side of stitching.
     2. Raise presser foot and turn material.
   3.       Setleft.the stitch width to 2 and drop feed dog. Lower presser foot and take one stitch to the
   4.Set the stitch width control dial to 4. Bartacking should be completed with needle on the         left side.
   5.Set stitch width to 1}. Raise feed dog and sew back to other end of buttonhole. Stop with       needle on the left.
    6. Set stitch width control dial to 4. Drop feed dog and bartack.
      It is recommended that tailor's chalk be used to determine length of buttonhole before sewing.
    For a firm buttonhole the stitching can be repeated over the same area- then cut buttonhole
    opening.

18
View original page 20Page 21 · Read text
CORRECTIONS

          - Instruction books for Models 35, 45 and 46 -

Page       Wrong               Correct

19   Copy and illustration of blind        Material must be passed under the         stitching.                  arm of the machine, as correct
                                    copy and illustration shown below.

     BLIND STITCHING        BLIND STITCHING
        Fold and baste hem. Turn back so    1. Fold material and baste.
          that edges of hem project beyond    2. Make second fold overlapping
       fold. Setsewing machine for      basting as shown.
          straight stitching and stitch along    3. Straight stitch for approximately
         fold of hem for approximately ½      ½ inch, then zigzag one stitch
          inch. Then zigzag one stitch using      using #2 stitch width position,
         stitch width set 2, catching the       catching second fold as shown.
          right side of the material.            Continue thisprocedure until
        Continue straight for ½ inch and     hem is completed.
        repeat process until hem is com-                                            4. Unfold, exposing right side of
          pleted.                              material with completed blind
                                                  stitching. Remove basting and
                                               press hem.
View original page 21Page 22 · Read text
BLIND STITCHING

       Fold and baste hem. Turn back so that edges of hem
        project beyond fold. Set sewing machine for straight
         stitching and stitch along fold of hem for approximately
        inch. Then zigzag one stitch using stitch width set 2,
        catching the right side of the material. Continue straight
         for ½ inch and repeat process until hem is completed.


                                                  19
View original page 22Page 23 · Read text
DARNING


                                                    Feed dog control        Left position

                                    Remove presser foot.   Stretch fabric between
                                          embroidery hoops and place under needle. Draw
                                               the bobbin thread up through fabric by holding
                                                 the upper thread and taking one stitch at the spot
                                        where you wish to begin darning. Lower presser
                                                 bar. Start sewing at a medium machine speed.
                               Move the fabric back and forth with a steady
                                        rhythm to cover the darning area. Then turn the
                                                 fabric and sew another layer of stitching at right
                                                   angles to the first. Move the fabric fast for long
                                                     stitches, slowly for short stitches.

                                                           If you wish to darn without using an embroidery
                                           hoop, leave the presser foot attached, move feed
                                       dog control to the left, and push down outer ring
                                                 of presser foot knob, thereby the pressure on the
                                               presser foot is released. Then proceed as above,
                                                   stretching fabric tightly between hands.


20
View original page 23Page 24 · Read text
ADJUSTABLE ZIPPER AND CORDIND FOOT


This attachment is both versatile and adjustable. It always allows you to insert a zipper and
to cover cord with ease.It also allows the needle to enter the fabric close to the metal
part of the zipper without danger of damaging it, and close to the cord without sewing
through it.
In order to move the foot from right to left, loosen the screw on the horizontal bar. Move
the foot from side to side so that the needle can enter the slot on the left or the right.
If you wish to stitch along the left side of the zipper, adjust the foot so that it is to the left
of the needle with the needle passing through the opening on the right side of the foot, but
if you want to stitch on the right side of the slide fastener, the foot should be placed to the
right of the needle so that the needle passes throughthe opening on the left of the foot.
The same instruction will be applied for cording or welting.
                                                                                   21
View original page 24Page 26 · Read text
OILING MACHINE

Keep the moving parts free from dust and threads
for quiet and efficient operation. Cleaning should
be done with a small brush. When machine runs
hard or makes excessive noise, place a drop of
sewing machine oil at the points indicated.

Tilt machine head back to oil points indicated on
underside of machine head.


                                                  23
View original page 26Page 27 · Read text
WHAT TO DO


PROBLEM         PROBABLE CAUSE                CORRECTION

                        Incorrect size needle.              Choose correct size needle for thread and fabric (page 5).
                     Improper threading.                 Rethread machine (page 9).
                    Loose upper thread tension.            Tighten upper thread tension (page 12).  Irregular
                        Pulling fabric.                 Do not pull fabric: guide it gently.
  Stitches
                         Light pressure on presser foot.         Increase pressure on presser foot (page 10).
                   Loose presser foot.                 Reset presser foot (page 15).
                      Unevenly wound bobbin.             Rewind bobbin (page 7).

                         Pulling fabric.                 Do not pull fabric: guide it gently.
 Breaking
                       Incorrect size needle.             Choose correct size needle for thread and fabric (page 5).
  Needles              Incorrect setting of needle.           Reset needle (page 6).
                    Loose presser foot.                  Reset presser foot (page 15).

Bunching of                                       Draw both threads back under presser foot (page 10).
  Thread           yeper and under reado toot.
                  Feed dog down.                    Raise feed dog (page 11).

                        Incorrect thread tension(s).          Reset thread tension(s) (page 12-13).
                        Light pressure on presser foot.        Increase pressure on presser foot (page 10).

 Puckering            Kinds owo different sizes of or       Upper thread and bobbin thread should be same size and kind.
                    Bent or blunt needle.                   Insert new needle (page 6).
                   Loose presser foot.                  Reset presser foot (page 15).
                      Fabric too sheer or too soft.        Use underlay of tissue paper when stitching.
View original page 27Related documents and language editions
From the ISMACS International. Original publisher and archive notices are retained.
Check the model and edition against your equipment.
PDF verified 2026-10-11.