Sewing machines
Frister & Rossmann New Model Vibrating Shuttle Lockstitch — User manual
User manual for Frister & Rossmann New Model Vibrating Shuttle Lockstitch. 22 pages in English. Read the original PDF, download or print a copy without registration.
22 pagesEnglish15.2 MB PDF
Loading your manual…Open PDF directly
Document details
- Brand
- Frister & Rossmann
- Model / document
- Frister & Rossmann New Model Vibrating Shuttle Lockstitch
- Document type
- User manual
- Language
- English
- Pages
- 22
- File size
- 15.2 MB
- Category
- Sewing machines
- Document date
- Not specified in catalog
Search available document text
Find a term, then jump to its page in the original PDF. Image-only pages may not be searchable; check the PDF for exact wording and diagrams.
Page 1 · Read text
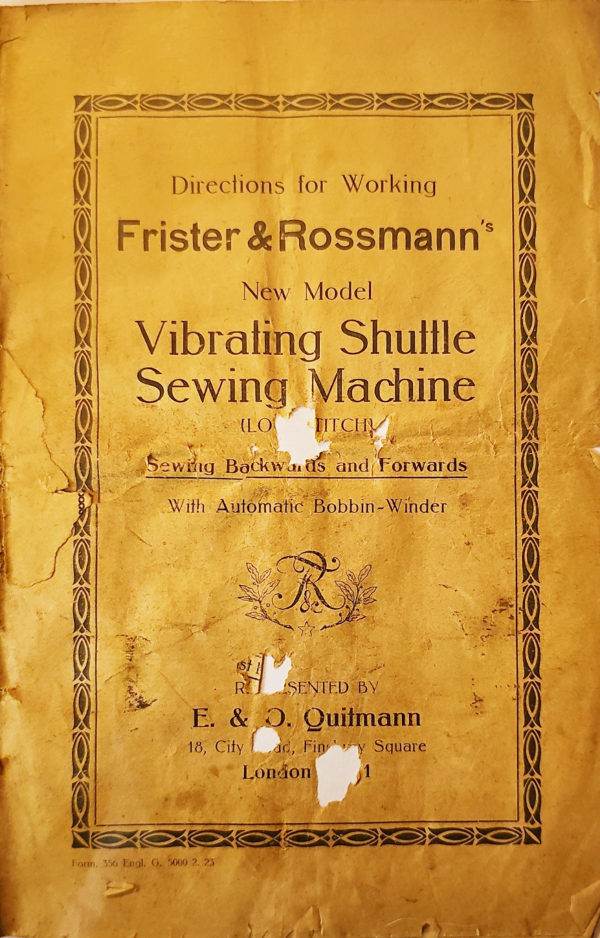
Directions for Working
   Frister & Rossmann®

          New Model
   Vibrating Shuttle
  Sewing Machine
            ILO  TITCHY
      Sewing Backwards and Forwards

         With Automatic Bobbin- Winder


                   SENTED BY
        E. 8, 0. Quitmann
               18, City    ad, Fin     Square
             London


Form. 356 Engl. G. 5000 2. 23
View original page 1Page 2 · Read text
PURCHASERS OF NEEDLES

                                          is on all Packets ofare particularly re-      RADE MARM
                                               Needles they purchase,
quested to see that
                                                    as inferior needles that
     F. & R.'s                           do not work properly

                                         are being offered!!TRADE MARK, thus:


            Needles, Parts,
Specially Prepared Oil, and all Requisites

 For FRISTER & ROSSMANN'S SEWING MACHINES

 may be obtained from our Agents (the leading Drapers and
               Stores throughout the country).

 A Staff of skilled   chanics       pt at our wholesale depôt,
 18, dity Road, Fingbury *                           london, 1. Criter repairs are attended to in the most efficient
                      at the lowest cost.


 All Machines sent for Repair must be forwarded CARRIAGE
 PAID, and should be sent WITHOUT the attachments.
 Repairs may be forwarded either direct or through our
  Agents, the leading Drapers and Stores throughout the country.
 To ensure prompt attention, senders's name and address,
                                    e enclosed with machine.  together with full instructions,


                                                      ; are cautioned to insist
 CAUTION. - Purchasers of Nee.with F. & R's Trade Mark on,  on having packets of
                           ne needles, made on our own  as none others are the
  dies of the best quality       finish for F. & R. Machines. Do
  not be put off with inferior needles stated to be just as good,
  which frequently break the cotton and cause missing of stitches.
View original page 2Page 3 · Read text
Directions for working

the Vibrating shutile sewing machine
       (sewing backwards and forwards).


       I he following directions will be found sufficient to enable
anyone to acquire a perfect knowledge of the management of this
machine without any personal instruction. The best plan for the
 learner to pursue is to carry out practically on the machine all the
 instructions given in each paragraph.
     Belore being sent out for the tactory every machine is
carefully examined in all pard geaded and quite ready for use,
so that there is no delay it suring to work. In order to avoid
 rusting in transit all parts are well greased before the machine
is packed.
     Havingcarefully taken the machine out of the box, wipe
away the grease in case any dirt should have got into the machine
from the packing material, pour a little parafin on such places.
and remove the dirt with a soft cloth.
    Be careful to note the guiding of the upper thread,, and the
thread round the winderin order to follow more easily the
   following descriptions.
     Before starting to use the machine see that all parts are well -
 cleaned and oiled.

§ 1. The Cleaningand Oiling of the machine.

      To clean and oil the machine lift up the presser-bar A, by

the lever D (see fig. 4) and let the needle bar B go up, then

wipe all open parts above and beneath the bed plate, with a soit

cloth, (the lacquered preferably with a soft leather), take the oil
can filled with the best machine oil between your first and second
finger, and press putting the spout into the oiling points, pressing
View original page 3Page 4 · Read text
with the thumb the underneath part of the can, and in doing so
a drop of oil will flow.
    Hand control machines should have all parts in the turning
mechanism well oiled.


              8 76


                  15


                                    Fig. 1
       In the treadle machines the large fly wheel must be oiled
  at the axle, also the upper and lower ends of the pitman and
  the two turning points of the treadle plate.


                                     Fig. 2
View original page 4Page 5 · Read text
Fig. 3
    The shuttle-race should be kept clean and when constantly
in use should be well oiled.
    Having oiled every necessary part put the machine in motion
liftingup the presser-foot, so that the oilcan easily penetrate
into all the mechanism. Any oil that may overflow, must be
carelully wiped away, in order not to soil the material.
       If the machine has not been in use for some time and the
 oil has thickened, which shows itself by the heavy working, oi
the machine then act as when oiling, only instead of oil, parafin
should be used. Having in this manner loosened the thick oil,
then re-oil the machine and carefully note that parafin is only
used for cleaning, but never for oiling purposes.

               § 2. Treadling.

     In order to get well accustomed to the treadle, loosen the

fly-wheel so that it does not injure the sewing mechanism un-
View original page 5Page 6 · Read text
necessarily as illustrated C fig. 1 (page 2) in $ 9, the fly-wheel
 C turns of its own accord then, without moving the other parts
 of the machine.
     The nearer the person sits to the machine the easier the
 treadling is. Raise the presser-foot E high, put both feet flat on
 the treadle and begin by turning the flywheel towards you with
 the right hand, and never in the opposite direction, with the
 instep in such a position as will enable the toes and heels to
 be used with equal power in treadling, and have such control
 over the treadle as to be able to tread quickly or slowly at
 pleasure, stop and begin again until one has mastered the proper
treadle motion.
       $ 3. Guiding the material.
     Connect the hand-wheel C fig. 1 which has been disconnected
 for the treadle purposes, having lifted up the presser-bar 4, remove
the sample and in its place put a piece of material under the
 presser-foot E, now, let the presser-bar down again, and thread
the needle, and having; opened   el front slide Fl, tig. 1, and
turned the hand-wheel until the shuttle carrier appears under the
opening, take out the shuttle as illustrated (page 6) in § 7, then
the slide F 1 must be closed again, now put the machine in
motion, and guide the materialin streight or uneven lines as

required, until good results have been obtained.

    Note:
    The machine must not beput in motion without some
material being put under the presser-foot, as otherwise the machine
will get damaged, neither should the machine be put into motion
while the shuttle and needle are threaded. Besides do not pull
the material as this will cause the needle ro bend, but let the
machine feed without assistance.

§ 4. The stitch regulator and reversable feed.
    The screw J to the right is for making the feed reserve from
forwards to backwards. Adjusting the screw upwards the machine
sews backwards, pressing it downwards it sews forwards, either
way can be done while sewing without stopping the machine.
To alter the size of the stitch adjust the screw J to the centre
of the plate. By turning the screw to the left the stitch is
View original page 6Page 7 · Read text
lengthened, by turning to the right it is shortened. After turning
   the screw it must be pressed either up or down. The backwards
  sewing is especially favourable for finishing off the ends of the
   thread, to avoid the seam coming undone. When starting a seam
   begin about an inch from the end, and sew backwards and then
  forwards to the end, after which backwards again, the ends of
   the thread can then be cut off and the seam will not come undone.
      Should the work require extra strengthening and be cumber-
  some in turning on account of size, the backward sewing can be
  applied very favourably.
          § 5. To set the needle.
        First raise the needle-bar B fig. 4 to its highest point, and
  pass the needle with the left hand into the slit of the needle bar


            D-


                          65                                                       - ca. 7 cm:-


                         Fig. 4
so that the long groove of the needle is placed to the left. After
the needle is placed as high as it will go under the clamp, tighten
View original page 7Page 8 · Read text
the clamp screw L fig. 4. Inferior, bent, or blunt needles must not
be used to sew satisfactorily. Choose the size of needles according
to the work and size of cotton (see page 11).
  § 6. Guiding thread and threading needle.
     Place a reel of cotton on spindle M fig. 4 and guide the
thread through the needle-eye 1 downwards, then between the
tension-discs 2 from right to left, and upwards again through the
hook of the check spring 3. Then upwards into the slot of the
thread lifter 4. downwards through the eyelet 5 on the head plate
and under the hook of the needle holder 6, and finially from left
to right through the needle eye 7. When the threadlifter is at its
highest point then the thread mus be pulled through the needle eye,
about four inches, before starting to sew.

 997. Putting the shuttle into the machine and
              threading shuttle.

the thread.BeforeThethreadingfollowing thedescriptionsir ale parefullyis easier to thefollow.positionIn doingof


   F.g 5                      Fig. 6                                Fig. 7
View original page 8Page 9 · Read text
so take out the shuttle from the machine, raise the needle-bar
 to its highest point, draw the front lever as far as possible towards
 you, press down the shuttle lever on the shuttle carrier on the
 right hand. In doing so the shuttle will be lifted so far that one
can easily take it out with the left hand, place it in a vertical
 position with the open end below, this will cause the bobbin to
fall out.  To fix a new bobbin take the shuttle between the
thumb and finger of the left hand with the pointed end towards
you and put the bobbin in the shuttle, so that the end with the
hole in the metal disc shows upwards, fig. 5, then pull the end


                      HOI


                                 Fig. 8
of the thread through the slanting slot towards the point of the
shuttle, as illustrated fig. 6, and then towards the open end under
the tension spring of the shuttle fig. 7, this completes the threading
of the bobbin which then is ready to be put into the shuttle.
View original page 9Page 10 · Read text
Attention should be paid that the thread must unwind to the
 right when the shuttle is in a position as fig. 5. To regulate the

 tension turn the little screw near the pointed end of the shuttle

to the right if you want to increase, and to the left if you want
to deminish the tension. Before commencing to sew close the
slide F, and the loose thread must be pulled up.For the latter
purpose take hold of the upper thread with the left handand
with the right hand turn the flywheel once round, until needle-
bar is at its highest point. The lower thread then appears as a
small loop above the stitch hole, and must now be pulled out
with the assistance of a pointed tool.
      § 8.Winding the bobbin.
     Observe carefully the threading of the machine when sent
from the factory, guide the thread to the bobbin from the reel
through the eyelet 11, and the two tension discs 12 to the lower
part of the bobbin 13, under the well of the spindle to the front


                                     Fig. 9
bobbin G. The bobbin G must be put into such a position into
 the well of the spindle Q that the pin fits into the hole of the metal
disc, by pulling the piston H out and guiding the left point of the
 bobbin into the centre of the bobbin H. Put the end of the thread
View original page 10Page 11 · Read text
between Q and the right brass disc of the bobbin. Push up the
 winder N and set the flywheel C into motion which causes the
 threading of the bobbin.  The winding of the bobbin is done
 automatically while sewing. When the bobbin is filled it jumps
 out automatically. Should the bobbin not work of its own account
 owing to the india-rubber ring being worn, tighten same by
 screwing the screw O at the lower end of the winder so far
 backwards until the rubber ring is pressed firmly against the
 hand-wheel.

 § 9. Loosening the hand-wheel whilst winding.
      In order to disconnect the fly-wheel hold the wheel with the
 left hand, and turn the friction screw which is on the right side, to
 the left (loose). By turning the screw to the right (firmly) the
 machine is again connected with the fly-wheel. The disconnection
 of the fly-wheel snall be made use of
               Whilst practising to treadle.
               Whilst winding the bobbin.
            As long as the warme is not in use.

             § 10. Sewing.
    Having now made all the preparations according to the
instructions given, one should start sewing. Place a piece of
 material (laid double) on the needle plate, so that it covers the
 stitch-hole, let down gently the presser-foot, put the two ends
backwards under the presser-foot,slowly turning the small fly-
wheel, and then sew treading with the feet.  The material should
only be guided, on no account should it be pulled or drawn, the

machine itself does this. Now sew in different directions, slowly

turning the material to the left or right, at times quickly, at others
slowly, for the sake of practice, changing the length of stitch.
    Having finished the sample, and in order to remove same
from the machine turn the fly-wheel so that the needle is at its
highest point, lift up the presser-foot, this releases the tension
automatically with lever D fig. 4, draw out backwards the material
with both hands under the presser-foot, andcut off two thread
ends, on the thread cutter fixed on the presser-bar. Try samples
in layers of different thicknesses, also in cloth and silks, etc. When
sewing across seam treadslowly, and slightly lift the presser-foot.
View original page 11Page 12 · Read text
10

In the case of sewing sharp corners let the needle remain in the stitch
that is to form a corner. When the needle is in its lowest position
 lift up the presser-foot a little, turn the material by using the needle
as turning point to the angle required, let down the presser-
foot and begin sewing.
      § 11. The regulation of tension.
    By drawing the 2 threads together at each stitch the machine
produces the double stitch which will not come undone. In order
to sew a straight seam the threads must be placed cross-ways
(loops) as illustrated in fig. 10, the stitch is at its best when it
appears the same on both sides of the material without being
puckered. This can only be done by regulating the tension of
both threads and by using the correct size needle and cotton.

Drawing of thread                                                  Correct tension of
  in the middle of                                                 and lower
                                                                     thread
          Fig. 10
Loop stitch on top                                                  Upper thread drawn
  upper thread not                                                      too tight or lower
     drawn                                                        thread too loose
          Fig. 11

 Underseam loops,                                            Upper thread too
                                                                        oose, or under
     drawn                                                          thread too tight
          Fig. 12
       If there are loops showing on the upper side of the material
as in fig. 11, the tension of the upper thread is too tight, and
 if it shows on the surface of the material under as in fig. 12, then
the tension of the upper thread is too loose. All this is regulated
by the screw S fig. 1. By screwing to the right the tension of the
 upper thread becomes tighter, and by turning to the leit the tension
of the thread becomes looser. If the correct stitch cannot be
obtained by regulating the upper thread, change the tension of the
 shuttle (lower thread) by regulating the screw of the shuttle.
Usually the regulation of thetension of the upper thread is
sufficient.
§ 12. The regulation of the cloth presser-bar.
       If more pressure should be required on the material, turn the
 screw X, fig. 4, to the right, and if less pressure is required turn
the screw X to the left.
 bar should not be changed.For ordinary work the cloth presser-
View original page 12Page 13 · Read text
11 -

   § 13. Indicating size of needle and thread.

       The thread must be placed so that it can easily be drawn

 through the eyelet, and that the loop formed by the stitch fills the

 hole caused by the needle. The size of the lower thread must be

 finer than the upper thread, should the latter be too fine for the

 needle it causes an uneven seam, and if too coarse loops appear on

 the under surface of the material, besides being drawn too much

 the material puckers and the thread breaks. It is natural that with
 thicker material a tighter tension is required than with a soft pliable
 material, and size of needle and cotton has also to be considered.
 When sewing thick calico the needle is liable to get warm through
 friction, to avoid this run a little dry soap on the sewing suriace.
    When buying needles ask for the Vibrating Shuttle Machine
 Needles, quality (691). Should same not be procurable order them
 at agents and enclose money order.
         In order to choose the right size needle which is required
 for the material in use, it is advisable to follow the following table:
           Table Indicating size of thread is needles
         to be used for v                           dig Shutti, Machine.

                    No.    No.      No.                   Thread    linen     CLASS OF WORK
  Needle   Cotton     silk

                                       Very fine linen, thin silk material,
 10 ог 0  150 - 100   000                                       very fine muslin, voile and nett.

                                           Linen, thin calico, very thin calico
 11 , B  100-80    00                thin silks, thin whithe material.
12 , ¼ 80-60                         Calico, silks, muslin, sheeting,                                               thin wool material, thick, linen.

                                       Thick silk, thick calico, thin*13  "         60--50   A               wool material, thicker Linen.

                                Wool material, ticking, dill cloth
        150-40   B    80-60 21%                           boy suits, ladys coating, suiting.
15       40. -20             60 - 50   Thicker wool material, buckskin * 2                                  thick drill, thick dress material.

                                       Thick overcoat material, very
                      50-40    thick winter  material, thick16 " 3  -    D                                                  taylors material.
View original page 13Page 14 · Read text
§ 14. Hindrances and faults whilst sewing.
       If the machine does not sew satisfactorily and skips some
 stitches, or the thread tears, the cause might be as follows
     1. The needle is not according to directions
         (see § 5) and has not been properly set, it is either too
               low, blunt or bent, or has too sharp an eyelet for the size
        of cotton or material in use, or is of inferior quality and
          not suitable for the machine.
     2. By not using the right cotton suitable for
        the needle and material (see § 13) or the cotton
      may be of uneven thickness or knotted, or of inferior
         quality.
     3. The tension ofthe thread may not be regu-
        lated accordingly (see $ 11).
    When skipping stitches examine the needle first, the cause
 as a rule is easily rectified. Should the thread tear when the needle
 is properly set, the needle-eye may be too sharp (when tearing, the
 thread frays at the a  ce of prpatin) or the tension too tight, or
the needle too fine for the cotton or material, or the shuttle may
have a sharp edge. When the shuttle thread tears, the lower thread
tension may be too tight, or the stitch hole in the needle plate may
have become sharp through setting the needle.Should the carrier
after constant use not act properly after sewing thick material,
loosen the screw, raise thecarrier, and tighten the screw again.
When the driving belt has become slack, and slips oft, remove
same and cut a piece off, pierce a new hole for hook and connect
both belt ends by means of the hooks.  The belt must not be
stretched too tightly so as to prevent the machine from working
freely. Should the machine not work satisfactorily after following
these instructions, refer to the firm where the machinewas
purchased, don't tamper with the machine as it may cause injury
and the repairs of which may take long time.

           § 15. Attachments.
                1. The Ordinary Presser.
               2. The Straight Guide (Fig. 13).
               3. The Quilter Guide (Fig. 14).
               4. The Narrow Seam-feller foot (Fig. 15).
View original page 14Page 15 · Read text
13


                      5. The Broad Seam-feller foot (Fig. 15).
                 6. The Seam Feller (Fig. 16).
                7. The Corder No. 1 (Fig. 17).
                 8. The Gatherer (Fig. 18).
                9. The Straight Guide Screw.
               10. The Packet of Needles Assorted.
              11. Four Extra Bobbins.
               12. Screw Driver.
               13. Shuttle Screw Driver.
             14. One Oil Can.
              15. One Instruction Book.

            § 16. Use of Appliances.
     To get well into the working of the machine practice the
 use of the following appliances, for which directions as follows
 are given.
                          1. The Presser.
     The presser is connected to every machime on the presser-
 bar A, by means of the screw 5 (see fig. 4) and is used for ordinary
 work. It is also used as follows
                   with the straight guide,
                   with the quilting guide,
                   with the seam feller foot,
                  with the binder.
                      2. The straight guide.
    • The straight guide (fig. 13)serves toguide the material
in astraight line.  The straight guide is fastenedto the
plate by the guide screw, and the edge parallel with the guide as
illustrated in (fig. 13). The guide can be fixed in various distances
from the stitch hole. In connection with the straight guide the
presser-foot. is used. Should a long narrow seam be required,
continue to turn down the already started seam, and guide the

material by means of the straight guide.

                      3. The quilter guide.
    The quilter guide is used for quilting padded materials it
straight lines and squares are required. It is attached by a screw
on the presser bar by means of the gauge arm as illustration
View original page 15Page 16 · Read text
14


(fig. 14). The gauge arm can be adjusted to the required distance
from the stitch hole according to the size of the squares required.
After having tacked the material on the wadding, so as to keep it


                                    119. 13%
firm, sew the first seam so as to obtain a sraight line, as illustrated.
 After having fixed the appliance by means of the screw, adjust the


                                 Fig. 14
View original page 16Page 17 · Read text
gauge arm to the required distance for the next line of stitching
 and guide the material with the line already sewn directly under
 the gauge arm.  This second line serves in a like manner as a
  guide for a third and so on, thus forming the squares.

              4. The narrow hemmer. (2½ mm seam)

                 5. The wide hemmer. (4 mm seam)

     The hemmer figure 15 is attached in place of the ordinary
 presser foot on the presser-bar.  For starting seam turn down
 the edge of the material and draw it according to the width of
 hem required, through the hemmer under the needle allowing
 sufficient material for the hem to be turned down double. Guide
 the folded seam by means of the thread with one hand and the


                                  Fig. 15
material in the other.drawing it towards you, When the seam
    is prepared for hemming and is jeady to be stitched down, drop
the hemmer gently and start machine, by guiding the folded
material with the left hand, several trials will soon show the mani-
puiation as too much material must not be allowed to enter the
hemmer thus causing the seam to pucker. The hemmer must all-
ways cause the stitches to be made close to the edge of the hem.
After a little practice the guiding thread can be dispensed with by
View original page 17Page 18 · Read text
16 —


cutting the lower piece of stuff as close as possible to the seam.
which will pass it through the hemmer with scarcely any guidance
of the hand.
                          6. The seam feller.
     The seam feller differs from the seam hemmer by not having
any spirals. In felling a seam lay the two materials together, but
View original page 18Page 19 · Read text
17


let the edge of the lower piece project about a quarter of an inch.
 it is this projecting edge alone which must be run through the
feller, and in this way the two pieces are joined. This done spread
the stuff out, smooth the seam a little and pass the upright edge
which is now formed again through the feller to be stitched down.

                      7. The corder No. 1.

     The corder fig. 17 is furnished with one large groove on its
undersurface.  After dress material and lining have been seamed
together spread them out and lay the cord in groove of the presser,
and sew it with rather large stitches, exactly over the seam.

                               .8. The gatherer.

    The gatherer fig. 18. When using the gatherer on double
 material the undersurface will be frilled or pleated while the upper
 surface remains firmly stitched.   The lower material is placed as
usual under the appliance, the upper guided into the slit of the


                                     Fig. 18

gatherer. The upper material is guided when sewing by the slit
while the lower is pushed forward by every movement of the
 projecting part, and put into small pleats. The longer the stitch
the fuller the pleat. There is more lower material required than for
View original page 19Page 20 · Read text
— 16 -

the upper, the management of which will require some practice.
Note that single material can be pleated or gathered by means
of the ordinary presser, by taking stronger cotton making the
 stitch long and the tension of the upper threat very loose, which
enables the operator to gage the seam on the lower thread.


                               >•83
View original page 20Related documents and language editions
From the ISMACS International. Original publisher and archive notices are retained.
Check the model and edition against your equipment.
PDF verified 2026-10-11.