Film cameras
Fujica Auto-5 User manual
User manual for Fujica Auto-5. 30 pages in English. Read the original PDF, download or print a copy without registration.
30 pagesEnglish4.9 MB PDF
Loading your manual…Open PDF directly
Document details
- Brand
- Fujica
- Model / document
- Fujica Auto-5
- Document type
- User manual
- Language
- English
- Pages
- 30
- File size
- 4.9 MB
- Category
- Film cameras
- Document date
- Not specified in catalog
Search available document text
Find a term, then jump to its page in the original PDF. Image-only pages may not be searchable; check the PDF for exact wording and diagrams.
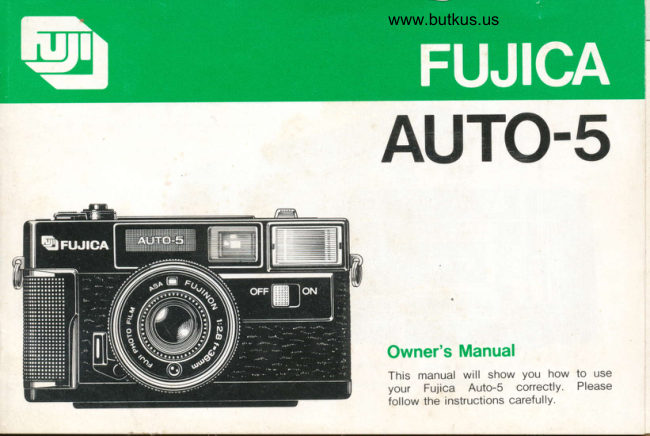
Page 1 · Read text
www.butkus.us

AUTO.5


 Owner's Manual
 This manual will show You how to use
 your Fujica Auto-s correctly Please
 follow the instructions carefully
View original page 1
Page 6 · Read text
ABRIDGED INSTRUCTIONS   (Forrefer moreto aredetailedgiven in instructions,parentheses.) read the main text. The pages to

    Load the batteries (page 10)         Load the film (page 12)    Q  Insert the tilm tip in the                                                                             r,   film-tip gate (page 13)


 With your fingernail, open the Battery    Open the Camera Back, insert the lilm    While pressing down the film cartridge
 Compartment Cover and insert two bat-     cartridge in the Film Chamber and pull     to prevent it from turning, insert the film
 teries, plus and minus ends correctly.          the film tip out as far as the red line on      tip deep into the Film-tip Gate and make
                                             the inside of the Camera Back.                sure the film stretches  tight.

                                                                           Taking:ing flashh pictures
                                                                         (pagele  ,20)                                              I
                                          @.lIJ                                                                       tw\

Measure the distance from camera to     Hold the camera  still and press the Shut-                         Switch)n ano       yoursubject with your eye and set the Focus-      ter Release gently down with your finger.  ,a"""Wpicture as soon as the qrgreen        turns ing Ring to that distance.                As soon as you release your finger, the                           ":l'jffi
                                                 film will automatrcally advance into posi-
                                                        tion for the next shot.
View original page 6Page 7 · Read text
www.butkus.us

    Press in the rewind knob             Set the main switch to RUN  A                                U  Set(oaqethe16)film speed selector


Close the Camera Back and press in the   As soon as the Main Switch is set to     With your fingers, turn the Film Speed
Film Rewind Knob against the camera    BUN, a red light will turn on and blink,       Selector and set it for the speed of the bottom.   ^                     and the film will automatically advance       film you are using. lf you are using Fuji
                                                        into position lor the first shot.                     color film, set it so that a red mark shows
                                                                                                                      in the Film Soeed window.
      Rewind the film (page 25)           Unload the film (pase 26)     1 O  To prevent tripping the shut-                                                                                                                              I L   ter inadvertently, be sute tol0                 11                                                                        switch the Main Switch to
                                                        LOCK atter you are through
                                                                                     taking pictures.


Set the t\,lain Switch to REW and press in    Open the Camera Back and take out the
the Film Rewind Button until the Red      film cartridge.
Lamp stops blinking.
View original page 7Page 8 · Read text
PUTTING THE CAMERA IN ITS CASE AND ATTACHING THE HANDSTRAP


oTo avoid damaging the camera,
  use the camera case and hand-
   strap to carry it around.


                                  www.butkus.us

                                Pass the Strap Ring through the    Open the metal clip on the end
                                opening in the side flap of the     of the Handstrap by pulling it up
                                camera case.                     and turning  it around 180 degrees.
View original page 8Page 10 · Read text
LOADING THE BATTERIES
                 1I compartmentOpen the batterycover   2 uaathe batteries
.Use two 1.s-volt penlight bat-
  teries (AA-size alkaline-manga-
 nese or manganese batteries).
o Make sure the two batteries
  are of the same type and brand.
a Do not use nickel-cadmium
  batteries.
ORegarding battery life and ca-
  pacity, see "Specifications" on
  page 29.

                             With your thumbnail, open the      Insert the batteries in the Bat-
                                  Battery Compartment Cover by     tery Compartment, plus and mi-
                                   pushing  it toward the arrow.         nus ends correctly as shown in
                                                        the Battery Compartment, then
                                                                            close the cover.


                                       Note:  lf you are not using your camera for some time, remove the
                                                  batteries before putting  it away because battery leakage can
                                        cause serious damage to the camera.
View original page 10Page 11 · Read text
www.butkus.usCHECKING AND CHANGING THE BATTERIES
                1                              I  Checkingthe flash readythe batterieslamp   with    2  Checkingthe film wind/rewindthe batteries lampwith
a Always check the batteries after
  loading and after they have
  been left idle for a long time.
aTemoeratures of 0'C or under
  can temporarily reduce battery
  efficiency. In freezing weather,
  carry the batteries in your pock-
  et and take them out only
  when they are needed.

                              Turn on the Flash Switch and        lf the Film Wind/Rewind Lamp
                                wait.  lf it takes more than 30      (red lamp) blinks with a dull light
                             seconds for the Flash Ready      while the film is winding or re-
                            Lamp (green lamp) to turn on, the      winding, or if it doesn't turn on
                                          batteries need changing.                at all, the batteries are spent and
                                                                 need immediate changing.


                                                                                                              11
View original page 11Page 12 · Read text
LOADING THE FILM
                       Open the camera
                          back            2 Putl out the film end


aUse 35mm cartridge-packed  film.   Open the Camera Back by push-      Insert the film cartridge in the
                                        ing down the Camera Back Lock.     Film Chamber as shownabove
  aAlways load and unload       (The Film Rewind Knob will auto-    and pull out the film end until                                         matically pop out when the Cam-     the tip reaches the red Film-tip    film in the shade.                                    era Back is ooened.)                   Setting Mark on the inside of the
                                                            Camera Back.
View original page 12Page 13 · Read text
www.butkus.usLOADING THE FILM
                               Insert the film tip in    r Check the film                             the film-tip gate     4 guides


                                   www.butkus.us


                                  Whrle pressing down the film car-    Make sure the bottom edge of the                          td-\                                          tridge with your left thumb to pre-     film is inside (not on) the Film
                               vent it from turnrng, insert the     Guides.
                                                                                                               f ilm tip deep into the Film-tip  .Make sure the film leading
   end is not too severely      Gate so that the film stretches
     Dent.                                         tight.
View original page 13Page 14 · Read text
LOADING THE FILM
  5 Clo"" the camera back


   While taking care to make sure    oYou cannot close the Camera     Make sure the Main Switch is set
   the film will not slacken, close     Back if the cartridge is float-     to LOCK, then push the Film Re-
    the Camera Back.                      ing and not resting in the bot-    wind Knob tightly against the
                                     tom of the Film Chamber.          camera bottom.

                                          Nole: Do not apply force to
                                      close the  camera
                                                Back.


14
View original page 14Page 15 · Read text
www.butkus.usLOADING THE FILM

7 S"t ttr" main switch to RUN
                                           Note:
                          QThe film will not advance
                                    and you cannot release the
                                              shutter unless the Film Re-
                                    wind Knob is pressed tight-
                                              ly against the camera bot-
                                           rom.
                          @The Film Wind LamP (red
                                     lamp) will not blink if the
                                          film is not advancing Pro-
                                                   perly'
As soon as the Main Switch  is                              The Film Confirmation Window                                                                                                   glanceset to RUN, the Film Wind LamP                                        will show you at a
(red lamp) will start blinking, the                                         whether there is film in the cam-
film will advance automaticallY                                       era or no. lf you are using Fuii
into position for the first shot,                                                           filft, it will also show you the
and the number "1" will aPPear                                         type of film that is loaded in the
in the Exoosure Counter.                                                camera.
View original page 15Page 17 · Read text
www.butkus.usTAKING AUTOMATIC EXPOSURE PICTURES
I Po"r" the lens      2 corpor" your picture
                                            elf your subject is 1.5 meters (5             Oll you. subject  is between 0.9 and
                                                         feet) or more away from the cam-              1.5 meters (3 and 5 teet) away
                                                   era                                             lrom the camera.   .

                                                            frame                      ff",o".-uo                                                                                                 corectili
                                                                                      Marks


To focus the lens, measure the    .Use the entire area described     aFrame your picture within the
distance from camera to subiect       by the bright white frame in the        area enclosed by the close-up
with your eye and set the Focus-        Viev'dinder to compose your         correction marks.
ing Ring to that distance.                  orcrure.


  Note: lf you are taking quick snapshots outdoors in bright sunlight,
        shoot with the Focusing Ring set to 3m (10 ft.) ( I  ). Practica-
           lly everything between 1.5m (5 ft.) from the camera to infinity
          will turn our sharp in your picture.

                                                                                                     17
View original page 17Page 20 · Read text
www.butkus.usTAKING AUTOMATIC EXPOSURE PICTURES
                                                              After you are through
5 C"r"r"-shake warning lamp                    0 taking pictures


lf a red light turns on in the View-    oTo take pictures of nighttime      After you are through taking pic-
finder when the Shutter Release        street scenes and fireworks,      tures be sure to lock the camera
is pressed about halfway down,       mount the camera on a tripod    by switching the Main Switch to
the light is too dim and a slow       and shoot without using flash.      LOCK.
shutter speed is needed. In otner
words, you'll have to use flash
to take your picture.


                                                                                                           19
View original page 20Page 21 · Read text
TAKING FLASH PICTURES
   I turn on the flash     2 w"t"t', the ftash ready tamp


   Turn on the flash by switching     As soon as the Flash Ready Lamp   aDo not trip the shutter before
    the Flash Switch to ON.               turns on you are ready to take       the Flash Ready Lamp turns on.
                                         your flash picture.                              lf you do, the flash may not
                                                                                discharge or it may not provide
                                                                enough light for full exposure.


20
View original page 21Page 22 · Read text
www.butkus.us

3 po"u" the lens and trip the shutter


To take your flash picture, focus the Lens, keep your fingers off the    aWhen taking pictures with the
Flash Lamp-face, and trip the shutter by pressing down the Shutter      camera held vertically, be sure
Release.                                                                         to position the flash side up.

 * FLASH
                             ASA 4OO film  SHOOTING
  RANGE    l._nsn roo tttt


            0.9m
View original page 22Page 23 · Read text
TAKING FLASH PICTURES

  4 nn"r. you are through taking flash pictures


   As soon as you finish taking    aThe batteries will last only a-         lf you are shooting souvenir pho-
    your flash pictures, turn off the       bout two hours if the camera is     tos of a group of people and want
    Flash Switch.                                       left with the Flash Switch on.       to get into the pictures yourself,
                                                                               or if you are going on a one-man
                                                                                              trip and want to take pictures of
                                                                                   yourself, use the Self-timer. To
                                                                          take Self-timer oictures. the cam-
                                                                              era must be taken out of its case
                                                                   and mounted on a triood.


22
View original page 23Page 24 · Read text
www.butkus.us

I S"t tr" self-timer    2 Pr""" down the shutter release


To set the Self-timer, just push      Start the Self-timer by pressing      alf the Self-timer does not start
the Self-timer Lever all the way    down the Shutter Release for a-       with one pressing of the Shut-
down.                                bout one second.                       ter Release, press it down a
                                        In about 10 seconds, the shutter      second time.
                                                will trip to take your picture.       aThe Self-timer can also be
                                                                         started by pushing the Self-
                                                                                  timer Lever slightly up.
View original page 24Page 25 · Read text
REWINDING THE FILM
  I ena of fitm                                  2 switchSwitch totheREWmain
                                        a lf you try to get more ex-
                                            Dosures out of a roll of film
                                            than the soecified number..'

                          OThe Film Rewind Lamp (red
                                         lamp) will turn on and stay on
                                     and the shutter will not trip.
                         @The film perforations will be
                                       forced out of shape and the
                                                     last frame will be exposed sev-      www.butkus.us
                                           eral times. Also, the Film Re-
    After completing the specified       wind Lamp will not turn on.      To rewind the film, first switch   number of exoosures. wind the                          OThe last frame may be elimi-     the Main Switch to REW.    film back into its cartridge. (The       nated in the lab after process-
   number of exposures possible on          ing.
   a roll of film is printed on the film
     box.)

      Note: The batteries will be drained  if the camera is left with the Film
          Rewind Lamp tutned on.  lf the Lamp turns on and stays on,
          be sure to switch the Main Switch to LOCK or rewind the film
          as quickly as possible.
.A
View original page 25Page 26 · Read text
www.butkus.us

  Press in the film            Finish rewinding the      Open the camera
  rewind button                 film                     back


Next. Dress in the Film Rewind     Rewinding is completed when the     Switch the Main Switch to Lock
Button and hold it there. Make    Red Lamp stops blinking.            then open the Camera Back by
sure the Red Lamo blinks.        aBe sure to rewind the film un-      pushing down the Camera Back
                                                                        til the Red Lamp stops blinking.       Lock.
                      aThe Exoosure Counter  will
                                   count back only as far as "1".
View original page 26Page 27 · Read text
TAKING BACKLIGHTED PORTRAITS

  6 UntoaO the film      1 U"" the camera's built-in flash for fill-in tight
                                                                                        a Taken with fill-in tlash


    With your fingers, pull the film    .Subjects standing against a     ashoot from a distance of 2 to
     cartridge out of the Film Chambe..     window or under the shade of      4 meters (6 to 12 feet).
                                     a tree will turn out dark  if taken     oln daylight, the effects of fill-in
     aTake the exposed film to         without  fill-in flash.                     flash will differ with the shoot-
        your photofinisher as soon                                         ing distance and surrounding
        as possible.                                                                       brightness.


26
View original page 27Page 28 · Read text
www.butkus.us


                                                            1. Your Fujica Auto-S is a precision instrument which requires
                                        careful handling. Do not wet it or drop it on the floor.
                                                 2.   lf you are not using the camera for a long time, remove the
                                          batteries and keep it away from heat, dust, and moisture.
                                             3.  Dust and soil on the Lens Glass and Vievrfinder Window are
                                 removed with an air blower and by wiping lightly with a piece
                                         of soft, lint-free cloth.
                                      In hot weather, do not leave your camera in a closed car or
                             on an ocean beach except temporarily for a very short time,
                              and never leave  it in moist places.
                                             5.  In case of mechanical  trouble, do not try to repair the camera
oYour Fujica Auto-S accepts 46         yourself because  it is equipped with high-tension  circuits. mm screw-in  filters. Exoosure                                             6.  Use your film before the expiry date printed on the film box. compensation is unnecessary
 because the filter will cover
  both the Lens and the EE Win-
  oow.
View original page 28Related documents and language editions
From the M. Butkus archive. Original publisher and archive notices are retained.
Check the model and edition against your equipment.
PDF verified 2026-10-10.