Film cameras
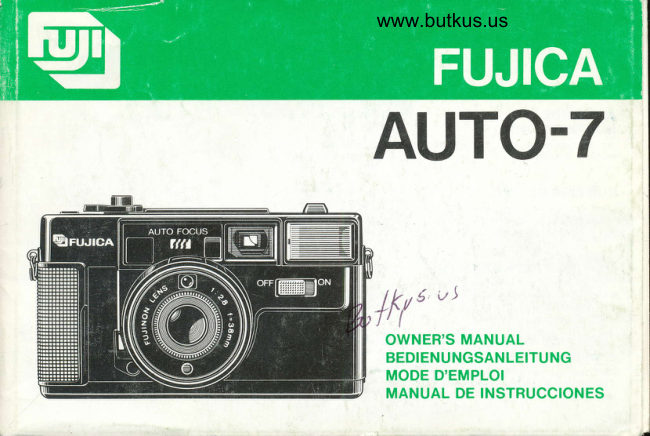
Fujica Auto-7 User manual
User manual for Fujica Auto-7. 23 pages in English. Read the original PDF, download or print a copy without registration.
23 pagesEnglish4.9 MB PDF
Loading your manual…Open PDF directly
Document details
- Brand
- Fujica
- Model / document
- Fujica Auto-7
- Document type
- User manual
- Language
- English
- Pages
- 23
- File size
- 4.9 MB
- Category
- Film cameras
- Document date
- Not specified in catalog
Search available document text
Find a term, then jump to its page in the original PDF. Image-only pages may not be searchable; check the PDF for exact wording and diagrams.
Page 4 · Read text
3                4              www.butkus.us5
                       D
.  Pull out the film tip (pagp 17)                    . Insert the film tip in the tilm-tip gate        . Preas down the shutter release (pago
Pull out the film tip as tar as the red line A        (page 1 7)                                    17)
                                           While pressing down the film cartridge to     Close the Camera 8ack, push the Shutter
                                             prevent  it from turning, insert the film tip     Lock Lever to the front and press down the
                                       deeo into the Film-tio Gate and make sur-.      Shutter Release. The film will automatically
                                                   the film is stretched  tightly                     advance  into position for the first shot.

. Herausziehen des Filmvorspanns          e EinfUhren des Filmvorspanns in den        . Driicken des Ausl<isers  (Seite 29)
  (Seite 28)                                      Filmeinfelelschlitz (Seite 2B)            SchlieBen Sie  die   Kamerariickwand,
Ziehen Sie den Filmvorspann  bis zur roten      Fijhren Sie den Filmvorspann tief in den      schreben Sie Cen Ausloserverriegelungshe-
Linie (A) heraus.                                     Filmeinfddelschlitz  ein unC halten Sie dabei      bel nach vorne und drucken Sie auf den
                                         die Filmpatrone fest, damit sie sich nicht      Ausldser. Der Film wrrd automalisch in Stel
                                          drehen kann. Achten Sie darauf. daB der      lung  fijr die erste Aufnahme gebracht.
                                                  Film gut gespannt   ist.
 . Extraire l'amorce de film (page 41)            . lntroduire I'amorce dans la fente d'in-        . Appuyer sur le d&lencheur (pagp 41)
Extraire l'amorce de    f ilm lusqu'au  trait        sertion (page41)                            Relermer  le dos de l'appareil, pousser vers
rouge A.                                  tn pressant sur le chargeur pour I'empe        l'avant le levier de verrouillage du declen-
                                            cher de tourner, introduire I'amorce de film      cheur et appuyer sur le d6clencheur. Le
                                          profond6ment dans la fente d'insertion du       film avance automatiquement  et se met en
                                                       film et s'assurer que celui-ci est bjen tendu.        position pour la premidre photo.
 r Tirar de la punta de la pelicula (p69.      r Inserci6n de la punta de la p€licula €n        . Apretar el disparador (pas. 54)
   53)                                                   ta ranura (pfu. 531                          Cerrar la tapa poslerior de la camara, co
Tirar de la punta de la pelicula hasta  la     Al tiempo que se presiona el cartucho de       rrer la palanca de bloqueo del disparador
altura de la raya roja (A).                        pelicula para evitar que gire, insertar  la      hacia adelante y presionar el disparador.
                                                 Dunta de la oelicula bien dentro de la ranu              I a pelicula avanzarA automdlrcamenle a Ia
                                                     ra de rnsercron, y cercrorarse de que la pe       posrcron del prrmet fotograma.
                                                              licula queda cargada sin laxos.
                                                                                                                                                                      11
View original page 4Page 6 · Read text
ro              www.butkus.usIt                                      @\
                                                                                     Y\)ilt/                                                                                         /
                                            TV                            ;?s'                                                              . Automaticffi@tfilm rewind (F,age 22)          c Unload the film (paSe 22)
                                         the    When the film has reached the end and the    Open the Camera Back and take out the
                                                   ture.       last frame has been exposed, it will auto-       film cartridge.
                                                      matically wind itself back into its cartridge.


 . Blitzlichtaufnahme (Seite 32)                     . Automatische Filmrtickspulung (Seite     o Herausnehmen des Films (Seite 34)
Schalten Sie den Blitzschalter ein. Sobald        34)                                      Offnen Sie die Kameraruckwand  und neh-
die grune Lampe aufleuchtet, konnen Sie    Wenn das Filmende erreicht und die letzte    men Sie die Filmpatrone heraus.
 auf den Ausldser driicken.                  Aufnahme gemacht worden ist, wird der
                                             Film automatisch in seine Patrone  zuriick-
                                                     gespult.

 r Photographie au flash (page 45)                 . Rebobinage automatique (page 46)            . Cf6chargement (page 47)
Allumer le commutateur du flash, atlendre      Lorsque  la fin du film est arrivde et que la      Ouvr,ir le dos de I'appareil et enlever  le
lusqu'd ce que le t6moin vert s'allume, puis      dernidre image a dt6 expos6e, le film sera      chargeur.
prendre la photo.                                rebobrn6 automatiquement dans le char-
                                                        geur.

 . Toma de fotografias con flash (p59.        . Rebobinado autom6tico de la pelicula       . Descarga de la pelicula (nag. SSI
  JT)                                                  (pas. sg)                                      Abrir la tapa posterior de la c6mara y ex-
Conectar el conmutador del flash, esperar     Cuando la pelicula ha llegado al fin y el      traer el cartucho de pelicula.
hasta que la lampara verde se encienda, y      ultamo fotograma ha sido expuesto,  la peli-
despu6s tomar la fotografia.                     cula se rebobinard automaticamente en el
                                                    carlucho.
View original page 6Page 13 · Read text
SPECIAL FEATURES  This manual will show you how to use your
  Fujica Auto-7 correctly. Please follow the instruc-        1. Automatic focusing
  tions carefully.                            oA built-in beam sensor automatically focuses the
                                                           lens even in the dark to give you sharply focused
                                                                     pictures.
                                                 2. Automatic first-frame positioning
CONTENTS                                                 oFuji's easy-load system affords simple film loading
                                                                                                                         theAbridged instructions                    10        -  even the novice can do it easily. Also,
Special features                          14       camera automatically advances the first frame into
Names of parts                          15          position for taking pictures.
Attaching the strap and using the camera            3. Automatic film advance
case                                    15       oPressing down the shutter release automatically
Loading the batteries                     6       moves the film ahead for the next shot -  no need
Checking and changing the batteriss            I 6          to wind the film with your thumb each time.Loading the film                            7      4. Automatic film rewind
Setting the film sPeed selector                       1 8      oThe cameras senses the end of the film and auto-Getting ready to take pictures        -.      8        matically winds the film back into its cartridge
Taking pictures                         199         then stops when rewinding is completed.
Taking flash pictures                    20      5. Automatic film speed setting
Using the self-timer                        21        olf you are using an ASA 100 or ASA 400 Fuji film,
Rewinding the film                                  the camera will automatically set itself for theTaking backfighted portraits   -                     speed of the film loaded in it. All you do is set theFilters to use      -1    -1                          film speed selector so that a red mark shows in
Camera care                          23         the film soeed window.
Specifications                         23      6. Automatic exposure control
                                              oThe camera's programmed  electronic shutter gives
            -1                                you the correct exposure automatically  all the way
                   -23                       from dim light to bright sunlight.
View original page 13Page 14 · Read text
www.butkus.us
 7. Automatic flash exposune           @ Sprocket Wheels
 oJust switch on the flash and the camera's auto-   @ Ftm-tip cate
  focus signals will do the rest automatically to give   @ ritm Guioe
  you perfectly exposed flash pictures everytime.    @ ritm Chamber
                       @ Battery Compartment Cover
NAMES OF PARTS              @ tripod Socket
                       @ Film-tip Setting Mark (red line)
O  Film Wind/Rewind Lamp (red lamo)               @! Pressure Plate@  Film Rewind Button               O Camera Back
R]  Shutter Release              @ fitm Confirmation Window
@  Shutter Lock Lever
rn  Exposure Counter                    ATTACHING THE STRAP AND USING
@  Auto-Focus Windows                    THE CAMERA CASE
O  Auto-Focus Distance lndicator Window
@  Strap Ring                              To avoid damaging the camera while carrying  it
 r0)  Film Speed Window                                   around, use the canreta case and slrap.
     Self-timer Lever                                 1. Attach the strap (Fig.l)
    Flash Ready Lamp(green lamp)                    oPick up one end of the Strap, press out the clip@o
@  Flash Lampface                                          lock and swing  it around as far as it will go.
@  Viewfinder                                                Clip Lock (Fig.1-A)
@  Flash Switch                                           oPull out one of the camera's Strap Rings out of the
@  Beam Sensor                                             hole in the side flao of the camera case.
@  Camera Lens                               oOpen up the metal clip on the strap tip by pres-
@  Film Speed Selector                                    sing down the clip lock into the vertical groove as
@  EE Window                                         shown, and hook the clip on the Strap Ring.
@  Film Speed Setting Pin                          oClose the clip by swinging the clip lock around
     Fork                                     and snapping it back into its original position.
@6  Camera Shake Warning Lamp                             (Fig.2)
6^  Viewfinder Eveoiece                                 oNext, clip the other end of the strap on the Strap
View original page 14Page 15 · Read text
Ring provided on the opposite side of the camera.       Note:
2. Camera case and lens cap (Fig.3)                             lf you are not using your camera for some time, re-
Snap Fastener (Fig.3-A)                         move the batteries before putting  it away because
Lens-cap Thong (Fig.3-B)                                  battery leakage can cause serious damage to the
Attach the lens cap thong to the snap fastener in the      camera.
back of the camera case as shown.
An opening is provided on the case top so that you    CHECKING AND CHANGING THE
can check the Flash Ready Lamp without taking the    BATTERIES
camera out of its case.
                                                    .Temperatures of 0"C and under can temporarily  re-
LOADING THE BATTERIES                     duce battery efficiency. In freezing weather, carry
                                                          the batteries  in your pocket and take them out only
(Batteries)                                       when they are needed.
.Use two 1S-volt penlight batteries (AA-size      olf you are traveling abroad with your camera, you
  alkaline-manganese  or manganese batteries).           can save yourself a lot of trouble by changing the
oDo not use nickel-cadmium (NiCd) batteries.                batteries with a new set and taking a pair of spare
.Always change the two batteries at one and the         batteries along.
 same time and make sure they are of the same     1. Checking the batteries with the flash ready
  brand.                                          lamp (Fig.6)
.Regarding battery life and capacity, see "Specifica-      Turn on the Flash Switch and wait. lf it takes more
  tions" on page 24.                                    than 20 seconds for the Flash Ready Lamp (green
1. Open the battery compartment cover (Fig. )       lamp) to turn on, the batteries need changing.
With your thumbnail, open the Battery Compartment      2. Checking the batteries with the  film
Cover by pushing  it toward the arrow.                      wind/rewind lamp (Fig.7)
2. Load the batteries (Fig.s)                                   lf the Frlm Wind/Rewind Lamp (red lamp) blinks
Insert the batteries in the Battery Compartment,  plus      with a dull light while the film is winding or rewind-
and minus ends correctly as illustrated  in the Battery       ing, or if it doesn't turn on at all, the batteries are
Comoartment. then close the cover.                        spent and need immediate changing.
                                                                 olf you are taking pictures with extremely spent bat-
View original page 15Page 16 · Read text
www.butkus.us
   teries, the filni may stop while it is advancing.           Mark (red line).
 Note:                                          Red line (Fig.l1-A)
 lf you are changing the batteries while the film is re-     4. Insert the film tip in the film-tip gate
winding, be sure to press in the Film Rewind Button      While pressing down the film cartridge with your
after replacing them. Otherwise double exposure will     thumb to prevent it from turning, insert the film tip
result if you depress the Shutter Release to take     deep into the Film-tip Gate (indicated with yellow
your next picture.                                          arrows) so that the film end stretches tightly.
                                                 5. Check the film guide (Fig.12)
LOADING THE FILM                           Make sure the bottom edge of the film is inside (not
                                                          on) the Film Guide.
Use 35mm cartridge-packed film.                               Film-tip Gate (Fig.1 2-A)
oAlways load and unload film in the shade.                 Film Guide (Fig.12-B)
.Make sure the film leading end is not bent too sev-      6. Close the camera back
  erely. (Fig.8)                                     While taking care to make sure the film will not
 Good (Fig.8-A)                                            slacken, close the Camera Back.
 Bent (Fig.8-B)                                You cannot close the Camera Back if there is anv
1. Open the camera back (Fig.9)                       slack in the film.
Open the Camera Back by pushing the Camera      7. Press down the shutter release (Fig.l3)
Back Lock down toward the camera bottom.             Push the Shutter Lock Lever to the front and press
Camera Back Lock (Fig.9-A)                       down the Shutter Release.
2. Load thefilm (Fig.lO)                           (Automatic  first frame positioning> (Fig.1a)
Slide the   f ilm cartridge slantwise into the Film      As soon as you take your finger off the Shutter Re-
Chamber so that its protruding portion points to the        lease, the film will advance by itself until the number
camera bottom and the opposite side catches the               "'t " appears in the Exposure Counter. Also, the Film
Fork.                                              Wind/Rewind Lamp (red lamp) will keep blinking
Fork (Fig.lO-A)                                           while the film is advancing.
3. Pull out the film tip (Fig.l 1)                     Red lamp (Fig.14-A)
Pull out the film tip as far as the Film-tip Setting       Notice:
                                           The Film Wind/Rewind Lamp (red lamp) will not
View original page 16Page 18 · Read text
www.butkus.us
   What        you should3.                know about the viewfinder     TAKING                                              PICTURES   gright                  (Fig.2O-A)       FrameO                                                      (Shoot from                                                          a distance of at least 1 meter)    lf your subject is 1.5 meters or more away from
  the camera, everything seen within the Bright      1. Unlock the shutter lock lever
                                                                                                                                                                                                                                     if(?^ FrameClose-upwill Correctionregister on theMarksfilm.(Fig.2O-B)           @TheforwardShutterso thatLockit showslever rsa redunlockeddot.  by pushing                                                .l     lf your subject is between                       and |.5 meters away   @ lf you are not taking pictures for the time oerng,
  from the camera, only the area seen within the        push the Shutter Lock Lever back to its original
  Close-up Correction Marks will register on the          position so that you won't trip the shutter by
    film.                                                          mistake.
OCamera Shake Waming Lamp (F;9.2O-C)           2. Press down the shutter release
    lf you think the light might be too dim for taking     When your subject is in the center of the viewfinder
   pictures, press the Shutter Release about halfway        (Fig.21)
  down. lf the Camera Shake Warning Lamp turns     @Press the Shutter Release slowly down about half-
   on, you'll have to shoot with flash.                         way. The lens has been focused by this operation.
@ Auto-Focus Frame (Fig.2O-D)                   @lt your subject is within the area covered by the
  Bring the Auto-Focus Frame in the center of the         Auto-Focus Frame, take your picture by pressing
   subject you want to focus the lens on. lf that cen-          the Shutter Release all the wav down.
  ter is an empty space, use the "Auto-Focus      ORtter taking your picture, but without releasing the
              (For detaits, see page ,0,                        pressure on the Shutter Release, look through the*Nemory."                      fru+kuL, OJ      Auto-Focus Distance Indicator Window in the lens
Remember, the picture area that will appear on the            barrel.  lt will show you the point on which the lens
print might turn out slightly smaller than that covered         has been focused.
by the negative.                            @ As soon as you take your finger off the Shutter
                                                            Release, the film will automatically advance into
                                                                     position for the next shot and the auto-focus sym-
                                                            bols in the Auto-Focus Distance Indicator Window
                                                                          will return to their original positions  ( A  setting.)                                                              (fig.221
View original page 18Page 19 · Read text
3. Auto-focus memory                                              oatterns.
When the center of your sublect is an empty space.     @Wnen shooting against a very bright light or in the
(Fig.23)                                                  presence of strong light reflections.
lf the area covered by the Auto-Focus Frame is an       Note:
empty space in the subject you have composed, use      To cope with such situations, focus the lens on some
the "Auto-Focus Memory" as follows:                        object located about the same distance as the sub-
(a) Center the Auto-Focus Frame on something       ject you want to shoot, activate the Auto-Focus
   nearest the center of your subject then press the     Memory by pressing down the Shutter Release
    Shutter Release slowly down about halfway and       about halfway, then return to your subject and shoot.
   hold it there, (Fig.24)
(b) Now re-face your camera and trip the shutter by     TAKING FLASH PICTURES
   pressing the Shutter Release all the way down.
Note:                                             1. Turn on the flash
As long as you don't trip the shutter, you can repeat      The flash is turned on by switching the Flash Switch
(a) as many times as you want.                                  to ON.
4. Camera-shake safety lock                        2. Watch the flash ready lamp
lf you press down the Shutter Release too fast, the     As soon as the Flash Ready Lamp (green lamp on
shutter will lock itself to prevent taking pictures with       the camera top) turns on, you are ready to take your
a shaky camera. Be sure to press the Shutter Re-        flash picture.
lease slowly and gently down.                             Caution:
5. Taking nighttime pictures                ODo not put your finger on the Shutter Release be-
To take pictures of neon-lit scenes, fireworks, etc. at          fore the flash is fully charged because  it will stop
night, mount the camera on a tripod to prevent         charging if you do.
camera shake and shoot without using flash.        @Do not trip the shutter before the Flash Ready
(Focusing reminders)                            Lamp turns on. lf you do, the flash may not dis-
Though rarely, the lens may not focus itself precisely         charge or it may not provide enough light for full
in the following cases:                                           exoosure.
CWnen taking pictures of a low-contrast, monotone      3. Beam sensor (Fig.25)
   wall, water surface, or object marked with fine       With the Flash Switch on, you can turn on the Beam
View original page 19Page 20 · Read text
www.butkus.us
Sensor in the lens front to permit the lens to focus      going on a one-man trip and want to take pictures of
by itself even in the dark by simply pressing the        yourself, use the Self-timer.
Shutter Release about halfway down.                   1. Set the self-timer (Fig.26)
4. Trip the shutter                              To set the Self-timer, lust push the Self-timer Lever
To take your flash picture, keep your fingers off the         all the way down.
Flash Lampface and trip the shutter by pressing     oTo take Self-timer pictures, remove the lens cap,
down the Shutter Release.  (lf you are using "Auto-        take the camera out of its case, and mount it on a
Focus Memory", refer to page 20).                                 triood.
                                              2. Press down the shutter release Gig.27)
  O Flash shooting range                        To start the Self-timer, oress the Shutter Release
                                                               gently down.
      |-ASA        40O film-+;                 oThe Self-timer will not start if you press down the
                                                               Shutter Release too fast.
                                                    oln about 10 seconds, the shutter will trip to take
                                                            your picture.
                                                 3. Taking self-portraits with the self-timer
                             O Set the Self-timer by pushing down the Self-timer
                                                                     Lever.
                                      @Aim the camera at some object located about the
5. After you are through taking flash pictures         same distance from the camera as the spot
After you finish taking your flash pictures' be sure to        where you intend to place yourself, then press
turn off the Flash Switch.                            down the Shutter Release. (Fig.28)
.The batteries will be depleted in about 10 hours  if   O HotO down the Self-timer Lever with your   f inger
  the camera is left with the Flash Switch on.              and aim the camera at the spot where you intend
                                                                  to place yourself.
USING THE SELF.TIMER                         oSteps @and @ are not necessary  if you are plac-                                                     ing yourself 3 meters or more away from the
lf you are shooting souvenir photos of people and       camera.
want to get into the pictures yourself, or if you are    @Release the Self-timer Lever and place yourself
View original page 20Page 21 · Read text
on that spot. fihe shutter will trip to take your pic-        down. The film will automatically wind back into
  ture in about I0 seconds after the Self-timer              its cartridge.
  Lever is reteased.) (Fig.29)                   @fne film will come to a stop automatically 2 or 3
                                                       seconds after the Exposure Counter returns to "S"
REWINDING THE FILM                             Rewind Button. (Fig.31-A)
                                                     Rewind Button Lock. (Fig.31-B)
.Your camera is fully automated. lt will sense the     3. Unload the film (Fig.32)
 end of the film by itself and automatically wind the     Check to make sure the Exposure Counter has re-
  roll back into its cartridge then stop when rewind-       turned to "S" then open the Camera Back, press your
  ing is completed.                                           finger against the bottom end of the film cartridge,
olf you must rewind the film in the middle of a roll,      and take it out of the Film Chamber.
  just press in the Film Rewind Button. The film will     oTake the exposed film to your photofinisher as
  automatically wind back into its cartridge.                soon as possible.
1. Automatic film rewind (Fig.3O)           O tt you are changing the batteries while the film is
O After you have completed exposing the specif ied         rewinding, be sure to press in the Film Rewind
  number of frames and the film has advanced          Button after replacing them.
  about the length of a frame or two further, press   @ Thougn  it rarely happens, the film perforations
  down the Shutter Release. In a second or two, the       may become deformed and cause the last frame
   film will automatically wind itself back into its          to be exposed several times.
   cartridge.                      @ tt you have exposed more frames than the speci-
@lf the film does not rewind, iust cap the lens and          fied number of exposures, your photofinisher may
   oress down the Shutter Release a second time.           sometimes eliminate the last frame.
OThe Film Wind/Rewind Lamp will keep blinking      (Shooting without film in the camera) (Fig.33)
   while the film is winding back.                                         lf you are testing the camera by giving it a dry run
@ Rewinding  will automatically stop 2 or 3 seconds       (shooting without film in it), the camera will automat-
    after the Exposure Counter returns to "S"                   ically switch to the rewind mode after about 10
2. Pushbutton film rewind (Fig.31)                     shots then stoo when the Exposure Counter returns
O Rewinding  will automatically stop 2 or 3 seconds       to 6 or 7. But this does not mean there is anything
   press the Film Rewind Button (marked "R") lightly      wrong with the camera and can be ignored.
                                                                                                                                     i
View original page 21Page 22 · Read text
www.butkus.us
TAKING BACKLIGHTED PORTRAITS                     3. Dust and soil on the Lens Glass, Auto-Focus Win-
                                                    dows, and Viewfinder Window are removed wlth
 (Taken without fill-in flash) (Fig.34)                    an air blower and by wiping lightly with a piece of
 Subjects standing against a window or under the            soft, lint-free cloth. Tenacious contaminants  are re-
 shade of a tree will turn out dark  if taken without fill-      moved by wiping off with Fuji Lens Cleaning
 in flash.                                                Paper moistened with a small amount of Fuji Lens
(Taken with fill-in flash) (Fig.35)                          Cleaning  Fluid.
 .Shoot from a distance of 2 lo 4 meters. (6 to 12          4. Do not leave your camera in a closed car, on an
   feet).                                             ocean beach, or in moist places except temporari-
 oThe results of fill-in flash will differ with the shoot-            ly for a very short time.
  ing distance and surrounding brightness.                        5. In case of malfunction, take the camera to your re-
                                                                         pairer. Do not try to repair it yourself because it is
FILTERS TO USE                                   equipped with high-tension  circuits.
                                                                                 6. Always use your film before the expiry date
(Use 46mm dia., O.7Smm pitch-screw-in-filters.)           printed on the film box.
The filter is screwed into the lens front. Exoosure
compensation  is not required because the lilter will     SPECIFICATION
cover both the Lens and the EE Window.
.Use black-rimmed   f ilters. Avoid those with a      oFilm
  silvered-metal  rim.                                     Cartridge-packed 135 roll film.
                                                      oPicture Size
CAMERA CARE                                 24 x 36mm.
                                               .Lens
 1.Your camera is a orecision instrument which re-      Fujinon 1 :2.8, 38mm, 4 components, 4 elements;
   quires careful handling. Do not wet it or drop  it on    46mm screw-in  filter.
   the floor.                                           oShutter
 2. lf you are not using your camera  for a long time,      1/8-l/500-sec. programmed electronic shuttei.
   remove the batteries and keeo  it away from heat,       Bright frame; 0.5X magnification.
    dust. and moisture.                                  oViewfinder
View original page 22Page 23 · Read text
841o ot better field of view: parallax correction marks      oBattery & Battery Life
(close-up correction marks); camera shake warning     Two penlight batteries (do not use NiCd batteries.)
lamp; auto-focus frame.
oFocusing                                                                             36-exposure        36-exposure
Automatic; provided with distance indicating sym-               Battery             rolls with flash       rolls without flash
bols, focus memory capability, and beam sensor.
oFocusing Range                                                      Alkaline
1 meter to infinity (-)                                      manganeseIEC LR6 (AM3)       5 or more          15 or more
oExposure Control
CdS EE, fully automatic from EV 6 - EV 17 with ASA        Manganese
100 film.                                                     IEC R6 (SUM-3)      2 or more         6 or more
oFilm Speed Settings
ASA 64, 100, 200, and 400; automatic film speed       Note:
setting for ASA 100 and ASA 400 Fuji films.             The above represents battery capacities as tested in
.Film Loading                                         accordance with Fuji's battery testlng procedure.
Fuji easy-load system; automatic firsfframe  posi-      oExposure Counter
taonrng.                                               Automatic reset, additive type; interlocked with film
oFilm Advance & Rewind                                rewinder (counts back as the film rewinds).
Electric-motor drive; automatic film advance  (inter-       oSelf-timer
locked with shutter release); automatic rewind (end-       Activated by depressing shutter release; about 10-
of-film sensor activates rewind mechanism);  pro-        sec. interval
vided with film advance and rewind confirmation      oOther Feature
lamo.                                                       Film conf irmation window.
oBuilt-in Flash                                     oDimensions
Guide number 14 (ASA 100/meter); 1 - 4 meters      137 Smm W x 79.5mm H x 56.5mm  T.
flash range with ASA l00 film, 1 - 6 meters with      .Weight
ASA 400 film; about 9 sec. recycle time with new      4309 (without batteries).
batteries; 60" angle of coverage;  fully automatic op-       Notice:
eration (flashmatic).                                            Specifications  are subject to change without notice.
View original page 23
Related documents and language editions
From the M. Butkus archive. Original publisher and archive notices are retained.
Check the model and edition against your equipment.
PDF verified 2026-10-10.