Film cameras
Fujica Auto Strobo AZ User manual
User manual for Fujica Auto Strobo AZ. 15 pages in English. Read the original PDF, download or print a copy without registration.
15 pagesEnglish1.7 MB PDF
Loading your manual…Open PDF directly
Document details
- Brand
- Fujica
- Model / document
- Fujica Auto Strobo AZ
- Document type
- User manual
- Language
- English
- Pages
- 15
- File size
- 1.7 MB
- Category
- Film cameras
- Document date
- Not specified in catalog
Search available document text
Find a term, then jump to its page in the original PDF. Image-only pages may not be searchable; check the PDF for exact wording and diagrams.
Page 1 · Read text
www.butkus.us

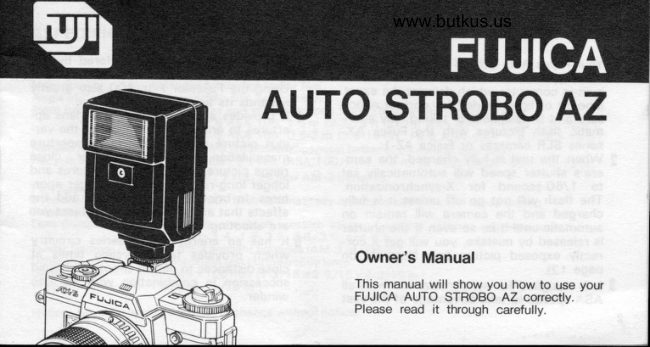
AUTO STROBO AZ


           Owner's Manual
               This manual will show you how to use your
             FUJICA AUTO STROBO AZ correctlv.
              Please read it through carefully.
View original page 1Page 2 · Read text
ISPECIAL FEATURES
I Your Fujica Auto Strobo AZ is an entirely        photographic  possibilities offered by the  new type of electronic flash. lt has a          ultra-high speed Fujicolor F-il 4OO film.
   built-in computer which delivers the exact        Using the Fujicolor F-If 4OO also greatly
  arhount of light needed for correct expo-       expands its automatic flash range.
  sure and is designed for taking fully auto-       {  lt provides automatic flash at all lens ap-
  matic flash pictures with the Fujica AX-         ertures to enable you to produce the var-
  series SLR cameras or Fujica AZ-1.             ious picture effects possible by aperture
I When the unit is fully charged, the cam-        manipulation, including sharper close
  era's shutter speed will automatically set       range pictures with smaller apertures and
  to 1/60-second for  X-synchronization.         longer long-range shots with larger aper-
  The flash will not go off unless it is fully         tures. In brief, it lets you freely add the
  charged and the camera will remain on         effects that are suitable to the subject you
  automatic until it is, so even if the shutter        are shooting.
   is released by mistake, you will get a cor-     $ lt has an energy-saving series circuitry
  rectly exposed picture (see Note (1) on       which provides fast recycling times at
  page 1 2).                                         close distances to permit shooting in rapid
3 tt is designed for synchronization with all        succession in combination with an auto
  ASA speeds to take advantage of the vast         winder.
View original page 2Page 3 · Read text
www.butkus.us    ISPECIFICATIONS                                                                                 il


       Synchronization                   """ASA 25-8OO  ; flash automatically adjusts to camera's film speed setting.il      Film Speed       Interchangeable
      Lens Compatibility                                                        selector engraved with


       Notice  : Specifications  are subject to change without notice.
View original page 3Page 6 · Read text
www.butkus.usTLOADING THE BATTERIES

Your Auto Strobo AZ oper-    o Recycle time will be longer
ates on four penlight bat-        in cold weather because
teries (AA size). Atkaline-       low temperatures will re-
manganese (AM-3) batteries      duce battery efficiency.
are recommended because       Try to keep the batteries
they last longer than others.     warm in cold weather by
                                      carrying them in your coat
                           pocket until they are
                                   needed.
                                        .  lf the flash is not being      I Remove the Battery Com-                             used for a long interval,       partment Cover by press-
                            remove the batteries be-       ing down the knurled part
                               fore putting it away be-       of the cover and pushing
                            cause old batteries can          it out in the direction of
                                 develop ldaks and damage      the arrow.
                                                                     it.
View original page 6Page 7 · Read text
{ After checking the bat-
                                                                                       teries, be sure to turn off
                                                                         the Power Switch because
                                                                    the batteries willwear out
                                                                                       in a short time if the Pow-
                                                                       er Switch is left on Manu
                                                                            or Auto even if the flash is
www.butkusus                                                         not discharged.
                                                 o Though very rarely, the
   2 Insert four penlight bat-    3 StiOe the Power Switch to        flash may discharge when
     teries, plus and minus      Manu or Auto.  lf the Read-     the Power Switch  isMends correctly as illus-       y Lamp (located just above       switched from- AUTO or
      trated in the Battery Com-       the switch) turns on in a     MANU to OFF, but this is
     partment, then replace       few seconds, the batteries       not a sign of malfunction
     the cover by sliding  it in.        are properly loaded.         and can be ignored ;  it
                                                        merely means that the
                                                                         trigger circuit was stimu-
View original page 7Page 8 · Read text
www.butkus.us

lated in the process by    (Battery Life)              o After you are through tak-
chance.                 o On manual flash, a new     ing pictures, always turn
                                   set of AM-3 batteries will      the Power Switch off to
                                 provide about 3OO flashes    save battery.
                            but it is always best to
                            change them as soon as
                             they start to show wear.
                                                   lf the recycle time lags to            :-.,.--
                             3O-seconds or more, the
                                  batteries should be con-
                               sidered exhausted.
                     a Be sure to change the four
                                  batteries all at once and
                         make sure all four are of
                           the same brand and are
                             new.
                                                                                           5t
View original page 8Page 9 · Read text
IMOUNTING THE FLASH ON THE CAMERA

                                        ! Loosen the Wheel Lock     3 To dismount the flash,
                                  by turning it counterclock-         loosen the Wheel Lock by
                                    wise. grip the bottom part       turning it  counterclock-
                               of the flash and clip the       wise then grip the bottom
                                Strobo Foot into the cam-         part of the flash and slide
                            era's accessory shoe.        the Strobo Foot out.
                          Make sure the foot goes
                                                  all the way in because the
                                   flash might not function
I Turn the Power Switch       properly if it is only part   off.                           of the way in, then turn
                                    the Wheel Lock clockwise
                               to lock the flash securely
                                    in place.
View original page 9Page 12 · Read text
www.butkus.us
ISHOOTING PROCEDURE J (fuily automatic  ftash
  photography with Fujica AX-series cameras and AZ_1)
                           LED light in the viewfinder    Notes
                                    will move from opposite    €) lf the shutter speed selec-
                              the shutter speed which        tor of the Fujica AX-S or
                                 has been set (automatically      AX-3 is set to AE or AEL,
                          or manually) to opposite       the camera is capable of
                             1/6O sec. (X-sync).             automatic exposure until
                            3 Select the aperture by       the flash is fully charged,
                                     referring to the automatic      so even if you trip the
                                       flash range chart on page        shutter by mistake before
1 Switcfr the power Switch      1O and set the camera's             it is fully charged, you will
 from OFF to AUTO.            aperture ring accordingly.       get a correctly exposed
2 As soon as the flash is fully     4 Compose your picture,         picture.
 charged, the  camera's       focus the lens and squeeze       Caution is required, how-  shutter speed will auto-      the shutter release gently       ever, because the bright-
  matically switch to 1/60-       down.                        ness of the light and the
 second for X-synchroniza-                                         film speed and aperture
  tion. At the same time, the                                         settings may not be ad-
View original page 12Page 13 · Read text
equate for bringing the         will occasionallY turn on    @ lf you want to take high-
   subject within the range         instantly (the LED light in           key (slightly overexposed)                                                                                                  un-   of the camera's automat-       the viewfinder will also         or low-key (slightly                                                                                                                                                                                                                           f lash pic-   ic exposure system,  in      come opposite the num-          derexposed)
  which case your picture        ber "6O") after the flash            tures, use the camera's
   will not turn out properly           is fired. This is known as             fractional exposure con-
   exposed.                       "quick-charging" and is             trol. Follow the instruc-
@After the flash is fired,      a perfectly normal reac-           tions on exposure com-  the recycle time (if the          tion at close range so You           pensation of your cam-
   batteries are new) will      can iust go ahead and              era.
  be anywhere between        take another flash Picture   @ lf you are using this flash
  0.1 and 7 seconds de-         immediately.                        with the Fujica AX-5, care
   pending on the shooting   @ lf you are not using the         must be taken because  it                                                                                             take  distance and aperture         flash in quick succession,         does not allow to
  and film speed settings.          turn the Power Switch off            flash pictures on the pro-
@ When taking close-range         to prevent batterY waste.         grammed or shutter-pre-                                                                     ferred mode. Be sure to .^pictures, the Ready Lamp tz
View original page 13
Page 15 · Read text
,    .]
  that for ASA 1OO film. ln    (Using the flash on other    Note  :
  other words, the correct   cameras)              o !f you are using the cam-
  aperture is t/11 because   lf the camera you are using      era's self-timer to take
 34+3+11.                   is not a Fujica AX-series    your flash picture, make
  Note:                   camera or a Fujica AZ-1 ,         sure the Ready Lamp is on
    lf your answer is a number  your Auto Strobo AZ is used      before pressing the self-
  that falls between the t-    as a manual-operation flash      timer start button.
  numbers given on your lens,  having a guide number of
   set the aperture ring to the   17. The instructions to fol-
   smaller (larger aperture) of   low in this case are given
  the two adjacent numbers.  under "shooting procedure
                                   (manual flash exposure)".    t Slide the Power Switch    II    from Off to Manu. In a
   few seconds the ReadY
    Lamp will turn on to tell
    you the flash is readY for
             f iring.
t4
View original page 15Related documents and language editions
From the M. Butkus archive. Original publisher and archive notices are retained.
Check the model and edition against your equipment.
PDF verified 2026-10-10.