Film cameras
Fujica AX-5 direct User manual
User manual for Fujica AX-5 direct. 69 pages in English. Read the original PDF, download or print a copy without registration.
69 pagesEnglish15.3 MB PDF
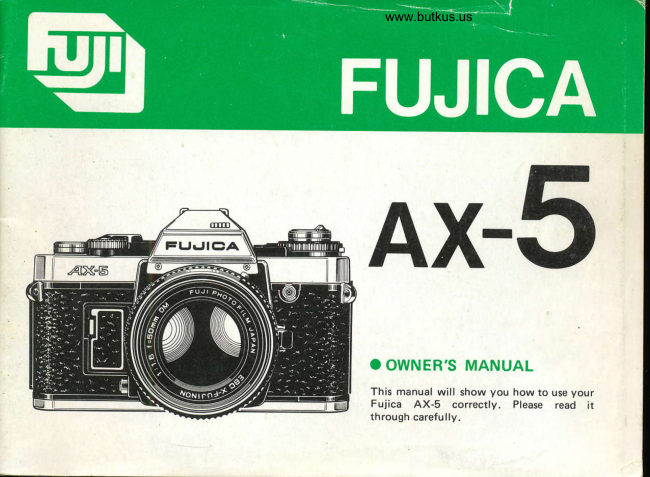
Loading your manual…Open PDF directly
Document details
- Brand
- Fujica
- Model / document
- Fujica AX-5 direct
- Document type
- User manual
- Language
- English
- Pages
- 69
- File size
- 15.3 MB
- Category
- Film cameras
- Document date
- Not specified in catalog
Search available document text
Find a term, then jump to its page in the original PDF. Image-only pages may not be searchable; check the PDF for exact wording and diagrams.
Page 1 · Read text
www.butkus.us

AX-5


This manual will show you how to use your
 Futica AX 5  corr-. y.  Plods€ r-dd    I
through carefLr y.
View original page 1
Page 2 · Read text
__-J

Speciaffeatures                          ..,..    4     Camerafunctions                .......34
                                                                                                          '  1. Light metering range               . . . . .34
Namesof parts                             ......      5        2. AE lock (exposurememory| . . . . . . . .35
                                                      3. Stopped-downautomaticexposure  . . . . 36
Gettingreadytotakepictures        .....    8        4. Manualexposure              ...39
   1. Attaching the strap and putting                    5. Exposurecompensation    .....41
     thecamerainitscase          ......     8        6. Multipleexposure        ........43
   2. Mounting and dismounting the lens . . . . 9         7. Self-timer                   .......44
   3. Loading and checking the battery . . . . . 10        8. Controllingthedepthof  field. . . . . . .  . 46
   4. Loadingthefilm                ...13          9. Infraredphotography      ......47
   5. Settingthefilmspeedselector   . . . . . . . 17        10. Takingflashpictures        ......    .48   6. Aimingthecamera         . .....    ..18
                                                       X-Fujinon lens operation and mount adapters . 54
Takingautomaticexposurepictures . . . . . - . . fg         1. Changing the lens                       . . .54   1. Numbers and letters on the shutter                  2. Types of X-Fujinon interchangeable
     speedselector                .....19            lenses                          ...56   2. Choosingtheexposuremode   . . . . . . .2O         3. Using praktica screw-mount Fujinon
   3. Viewfinderinformation      .....21            lenses                      ........57   4. Programmedautomaticexposure  . .,  . . . 22
   5. Aperture-preferred  automatic exposure  . 25     Systemaccessories                 ....59   6. Shutter-preferred automatic exposure  . 27
   7. Focusing the lens                        . . . 30     Cameracare ..                     ........66   8. Rewindingthefilm       ........32
                                             Specifications                       ....67

                                                                                 3./
View original page 2Page 3 · Read text
www.butkus.us

               ti_: -   ::_     '
    ISPECIAL FEATURES                                                                                                              I


                                                      -switchover multi-mode exposure (shutter-preferred, aperture-
                                                   preferred, programmed, stoppeddown, and flash automatic exposure
                                                   olus manual.)
                                                         rol-center viewfinder with 23 LEDs to indicate shutter speeds and   o                                               apertures plus exposure-mode indicator for making exposure settings
                                                while watching your subject through the viewf inder.
                                             Soft-touch electromagnetic shutter release; auto film winding and   o                                             continuous shooting at 2  f ps with optional Fujica Auto Winder X.
;                                             Provision for expanded-scope photography with optional "system   o                                                  accessories"  including Fujica Auto Strobo 300X (G. No. 3O), Fuiica
                                        Auto Strobo AZ, and Fuiica Photo Recorser (data back).
                                                 Fuiica X "short turn" (65"1 lens mount permits quick lens changing   o                                     and accepts the entire line of new X-Fujinon interchangeable  lenses
                                     from wideangle to telephoto as well as other lenses to take fullH                                             advantage of the SLR system.
K
ffi
H
)i:f
View original page 3Page 4 · Read text
@Distance Scale
                                    @ Depth of Field Scale@ Infrared Setting Mark
@ safety Lock                               @ Aperture/Distance  Setting Mark
@ Auto Mark                                @ Aperture Ring
@ Olt/Otr/Setr-timer    I ndicator                      @ Shutter Speed Selector Lock
  Window (Main Switch Window)            www.butkus.us                  Meter Button
@ Fractional Exposure Contro                                                    @shutter Release

                                                                                       Exposu re
@ Film Speed Selector                                                                    Counter
                                                                                            Shutter Speed
@Film Speed                                                                                     Selector
   Selector Lock                                    @ Rewind Button
@ Rewind Cr
@ On/Ott/Selt-timer Lever                          @ Film Advance Lever
  (Main Switch)                                 @ shutter Speed Setting Mark
@ Film Speed Setting Mark                         @ Shutter Speed Window
@ Hotshoe (X-contactl                               @special Contacts (for Auto Strobo AZ and 3OOX)
 * Be sure to keep this page open while consulting this manual
View original page 4Page 6 · Read text
QO Film Rewind Spindle
      Eyepiece Shutter Lever
      @ Eyepiece
               @Film Guide Rail
               @Film Rail
                 @Sprocket Wheel
             @ Take-up Spool
                       @Camera-Back Hinge Pin


           @ Auto-Winder Positioning Hole
@Tripod Socket        Auto-Winder Coupling     @ Film Conf irmation
@ Self -timer Signal Unit                           Window
@ Auto-Winder Contact
@ Pitm Chamber


                                                                                                                                                                                               't"'
View original page 6Page 7 · Read text
www.butkus.usGettittg reody  to tcrke Picfures
                             purnruc rne cAMERA lN lrs CASE    RrrRcHlruc rHe stRRp RruoI r.


Attaching the straP
O Stioe back the strap-end hoop
    as snown.
€) HotO the clamp between your
    fingers as shown and Pull out
   the metal clip.
   (The clamp maY be tight when
     it's new. lf you  f ind it diff icult
   to pull out the cliP, oPen the
   clamp with Your  f ingers and
    oull it out.)
€) Hook the clip to the camera's
   Strap Eyelet and push the
   clamp forward to lock the cliP.
O  Slide back the strap-end hooP
    tightly against the clamP.
Putting the carnera in its case
@ Put the camera in its case and
   secure the case to the strap
   with  the flaps Provided on
   both sides of  the case bY
    closing the snaPs. Next, Put on
    the case cover.
 .  To take the camera out of its
    case, repeat @ in reverse.
View original page 7Page 8 · Read text
2. MOUNTING AND DISMOUNTING THE LENS

Mounting                                      Dismounting


Position the red dot on the lens rear opposite the red      While pressing in the Lens Lock toward the camera
dot on the Lens Mount, then push the Lens in and       body, turn the Lens to the left (counter-clockwise)
turn  it 65' to the right (clockwise). lt will lock into       as far as it will go, then pull it out toward the front.
position with a click.
                                                    Using the Rubber Lens Hood
                                         When shooting against the light, fit the accessory
                                                 Rubber Lens Hood on to the lens to prevent flare
                                                   and ghost caused by the light falling directly on the
                                                                  lens surface.
View original page 8Page 9 · Read text
www.butkus.us
                               BATTERY   5. LOADING AND CHECKING THE

   Choosing the Righf Battery                        Loading the Battery
   You can use any one of the fo.llowing batteries but
    be sure to use a new batterv.
    6-volt silver oxide battery (4SR44).
    6-volt alkaline manganese battery (4LR44).
    6-volt   I ith ium battery.
    Notes: 1. One new silver-oxide battery and lithium
              battery will normally last about 6 months,
          and one new alcaline-manganese battery
            about 4 months.
           2. Before loading, wipe both ends of the
              battery clean with a dry piece of cloth.
           3. lf you are not taking pictures for a long
              while, remove the battery before putting
             tne camera away.
           4. lt  is recommended to use a silver oxide   O Remove the Battery Compartment Cover by                                                        pushing the Cover Lock in toward the Lens              battery for shooting in cold weather.                                                               with your  f ingernail and lifting  it up.


10
View original page 9Page 10 · Read text
5. LOAp|NG AND CHECKTNG THE BATTERY                                                                                                                             I I

                                                Checking the Battery


     www.butkus.us
@ Insert the battery, plus (+) and minus (-) ends           lf the battery is not up to the required strength, you
    correcily, as shown in the Battery compartment.         will not get properly exposed pictures because your
@ The battery will load easier rf you insert the        Fu.iica AX-l's shutter is electronically controlled
   minus (-) end first.                                         regardless of the exposure mode employed. Make it
O To unload, press down and pull out the plus (+)     a habit, therefore, to check the battery before you
                                                                     f ingernail.                     start taking pictures._ end of the battery with yourO Replace the Battery Compartment Cover by                          O Turn on the Main Switch.
    sliding in the inner edge and pressing the cover   @ Look through the Viewfinder and press the
   down.                                                    Shutter Release halfway down.


                                                                                                                          l1
View original page 10Page 12 · Read text
LOAD ING

Film Format                                    Load ing


Use cartridge-packed 35mm rollf ilm.          O Open the Camera Back by pulling the Filin.  Always load and unload  f ilm in subdued  light            Rewind Knob all the way out. (lt will not open
                                                                  unless the knob is fully pulled out.)
                      @ Drop the film cartridge into the Film Chamber
                                                     with the spool head (prorruding portion oi the
                                                                 cartrtdge) pointing to the camera bottom, then
                                                       push the Film Rewind Knob down to its oriqinal
                                                                        posrtro n.


                                                                                                       13
View original page 12Page 13 · Read text
www.butkus.us


@ Pull out the film tip and insert  it deeply into the   O Wind the film with a stroke or two of the Film
   slot of the Take-up Spool, but make sure it        Advance Lever and make sure the Sprocket
    doesn't go through the spool hub.                         Teeth catch the film perforations.
View original page 13Page 14 · Read text
@ Erect the Film Rewind Crank and turn it in the   @ Wnite watching the Exposure Counter. wind the
   direction of the arrow to take up any slack in the          film with the Film Advance Lever and press
   film, make sure the film is properly positioned       down the Shutter Release. ReDeat until the
   between the guide rails, then close the Camera          second white dot from the letter ,,S,, (f irst white   Back.                                               dot from the red "0") appears in the center of
                                                      the Exposure Counter. The film has now been
                                                                 positioned for the first shot.
                                    o The film is advancing properly  if the Film
                                             Rewind Knob turns while the Film Advance
                                                            Lever is winding.
                                                                        .  The white dots between the numbers in the
                                                        Exposure Counter represent odd numbers.
                                                                        .  You can position the film faster by setting the
                                                            Shutter Speed Selector. to 1000 and movinq the
                                                       Aperture Ring off auto (orange | ) mark bedause
                                                            the shutter will trip faster.
                                                                                                       15
View original page 14Page 15 · Read text
www.butkus.us
   I +. LOADING THE                    FILM                                                              l
                                                 Loading Film with the Fujica Auto
                                               Winder Attached


                                                                                                                                                                                                                                                                                                 (.1 ) to @ Film identif ication                            The procedure is the same as that described in                                                                                                  Back, switch     The Film Confirmation Window in the camera     (!. To wind the film, close the Camera
      back will tell you at a glance whether there is     the auto winder switch to SINGLE or CONT. and
       film in the camera or not. lf you have Fuj i  f ilm       press down the Shutter Release.
        in your camera, it will also tell you the film type    o   lf the film does not advance, turn off the auto
       and the number of exposures it will yield.              winder and switch it once again to SINGLE or
                                                   CONT.
                                       o  For further information. read the Auto Winder
                                                                        instruction manual.


16
View original page 15Page 16 · Read text
T.t{iE::'lFl.t,M

                                          250_----'+_l--160
                                        320-      --__\                                                                                          \     /                                         5oo                                                                                             8o                                       ---_\--      \J:L/  --125/-


                           www.butkus.us
After loading the film, be sure to set the Film Speed   O lne lines etched between the numbers on the
Selector because your pictures will not be properly         Film Speed Selector represent the ASA speedsexposed if  it is not set for the speed of the film         shown above.loaded in the camera. The speed of the film you areusing is printed on the film oox.                     G) The corresponding ASA and DIN film speeds are
O Wnite pressing in the Film Speed Selector Lock           as follows:
   (a white button at the side of the Film Speed
   Selector), turn the selector dial and set it for the
   speed of the film you are using, that is, if you are
   using an ASA 100 film, set the number 100
   opposite the Film Speed Setting Mark.
r  The marks labeled + and -1 on each side of the   Film Speed Setting mark are used for making
   exposure compensation. Be sure to use the
   center mark for setting the Film Speed Selector.

                                                                                                               17
View original page 16Page 17 · Read text
www.butkus.us
  L6. AIMING THE CAMERA                           ___J


                                            1\                                                                 \)
                                                                              \"\   )
  O ttotO the camera with your left hand as shown,   O Wfren shooting with the camera held vertically,
       press the left elbow against the slde of your           try to keep it extra steady because  it will be less
        chest, relax your right hand and press the Shutter            stable in that position.
        Release gently down.                           G) tfre film is advanced with the right thumb and
                                                         the Shutter Release is depressed with the right
                                                                               foref inger.

18
View original page 17Page 19 · Read text
www.butkus.us
   2. CHOOSING THE EXPOSURE MODE


   The Shutter Speed Selector and Aperture Ring settings for automatic exposure are as follows:
                                    Aperture Ring             Shutter Speed        Exposure Mode Indicator
                                             Setting                 Selector Setting                 in Viewfinder
      Programmed AE            Orange auto mark (o)    AE                                 P
       Aperture-preferred AE      Manual setting  f rom     AE or AEL                            F
                                   max.-min. aperture
        Shutter-preferred AE        Orange auto mark (o)     Manual setting from             T
                                                       1/1000 - 112 sec.
   Not$: 1. To move the Aperture Ring to the orange               through the Viewfinder when the Shutter
           auto mark and from there back to the                Release is depressed halfway will remain
              apertures for manual setting, turn the ring                locked until you take your finger off the
             while pressing down the Safety Lock Pin              Shutter Release. In other words, the
              provided on it.                                           shutter speed will remain the same even
             2. When the Shutter Speed Selector is set                        if there are changes in the subiect bright-
           to AEL for aperture-preferred automatic                ness (aperture values). (Refer to the para-
           exposure, the exposure setting seen                graph entitled "AE Lock" on page 35.)


20
View original page 19Page 20 · Read text
5. VIEWFINDER INFORMATION


The information providbd in the Viewf inder of your
AX-5 is as follows:
 lf an f-number which falls between the numbers
etched on the viewfinder aperture scale has been
selected, the LED opposite the number nearest to it
willturn on.
Example: lf you are using an F1.6 lens and have
             set the aperture at 1.6, the LED opposite
          F1.4 will turn on, and if you are using an
         F1.8 lens and have set the aperture at
           F1 .8, the LED opposite F2 will turn on,
             etc.
          Sometimes, however, it may not be the
       LED opposite the nearest number that
           will turn on. For example, the LED
          opposite              F2 may turn                           on although                                                  the                               O Reo exposure mode indrcator           selected aperture                                                                                           is                              is F1.6,                               but this
          extremely rare and can be ignored.                           @ Aperture scale
                                                        (O Vello* LED aperture indicator
                                                  Q) nea LED shutter speed andicator
                                                        6) Shutter speed scale


                                                                                                              21
View original page 20Page 21 · Read text
www.butkus.us


   Programmed automatic exposure permits the camera
   to automatically set both aperture and shutter speed
    for optimum exposure. Unlike the aperture-preferred
   or shutter-preferred mode, it rarely requires you to
   check whether the selected aperture or shutter speed
    is useable and is therefore suitable for taking quick
   shots. lt  is usually best, therefore, to carry your
   camera around with  it set for programmed AE.


                           Q Set the orange auto mark (a) on the Aperture
                                                              Ring opposite the Aperture Setting Mark and set
                                                                    the Shutter Speed Selector to AE.
                                                    Note: lf the Shutter Speed Selector is in AEL posi'
                                                                         tion, turn and set it to AE while pressing in
                                                                        the Shutter Speed Selector Lock.


22
View original page 21Page 22 · Read text
Op          .. Programmed AE
                   (exposure mode indicator)
            ,6\  125 ..... Shutter speed

                  AlJ' 11  ..... Aperture value       @

@ The LEDs in the viewf inder will turn on to show     G) lt the LED opposite ',1000,, btinks (at the rate  you the camera-selected shutter speed and          of I times a second),  it means your picture will
   aperture combination when the Meter Button  is         be overexposed; and if the LED opposite ,,2S,,
   depressed or the Shutter Release is pressed           blinks (also at the rate of g times a second).  it
   halfway down.                                       means your picture will be underexoosed.o  lf the reading is as shown above, exposure will be
  made with an aperture of F] 1 and a shutter
   speed of 1 /125 sec.


                                                                                                23
View original page 22Page 23 · Read text
www.butkus.us
   4. PROGRAMMED AUTOMATIC EXPOSURE

   () Chirt showing the exposure
     combinations of  the  pro-      o8
     grammed mode                                                ol
     The shutter speed and aPer-     >7
     ture combinations in  the
      Viewfinder will vary as shown         o^
      along the thick diagonal line,
      but they may sometimes differ               q)
     from the actual values that                (tfJ
       will be used. For example, a       subject having a light value of           oXuJ4
    9 will actually be exposed at                                                                  (a.e, t/20)      F4.8. 1l2O sec. although the             3.5. 6
      viewfinder indication will be
      F4, 1/30 sec.                                                                             (4.  | /30)      With an F1.4 lens or F2.8 lens
    on the camera, the shutter
      speed alone will slow down by
     an initial speed of 112 or 1/8
        sec. respectively.
                                                                                         t.4,l
                                                                                         ol:l                   t/4  t/8   t/ts  t/30 t/60 t/125 t/250 l/500 l/1000
                                                  6                                   +(9)        Shutter Speeds                                  €r<
                                     o Exposure combinations of programmed automatic exposure (ASA 10Ol
24
View original page 23Related documents and language editions
From the M. Butkus archive. Original publisher and archive notices are retained.
Check the model and edition against your equipment.
PDF verified 2026-10-10.