Film cameras
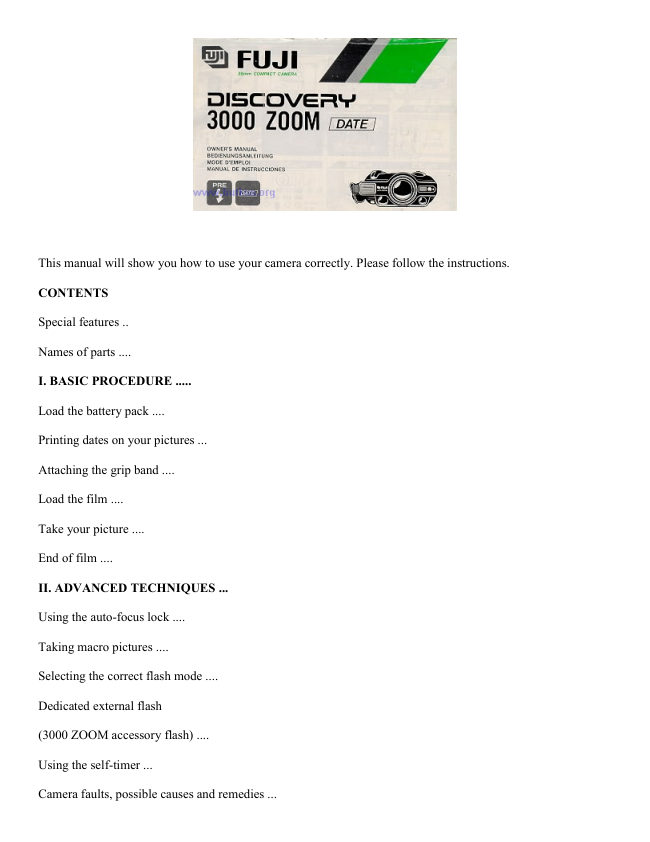
Fujica Discovery 3000 Zoom User manual
User manual for Fujica Discovery 3000 Zoom. 19 pages in English. Read the original PDF, download or print a copy without registration.
19 pagesEnglish0.9 MB PDF
Loading your manual…Open PDF directly
Document details
- Brand
- Fujica
- Model / document
- Fujica Discovery 3000 Zoom
- Document type
- User manual
- Language
- English
- Pages
- 19
- File size
- 0.9 MB
- Category
- Film cameras
- Document date
- Not specified in catalog
Search available document text
Find a term, then jump to its page in the original PDF. Image-only pages may not be searchable; check the PDF for exact wording and diagrams.
Page 2 · Read text
This manual will show you how to use your camera correctly. Please follow the instructions.

CONTENTS

Special features ..

Names of parts ....

I. BASIC PROCEDURE .....

Load the battery pack ....

Printing dates on your pictures ...

Attaching the grip band ....

Load the film ....

Take your picture ....

End of film ....

II. ADVANCED TECHNIQUES ...

Using the auto-focus lock ....

Taking macro pictures ....

Selecting the correct flash mode ....

Dedicated external flash

(3000 ZOOM accessory flash) ....

Using the self-timer ...

Camera faults, possible causes and remedies ...
View original page 2
Page 3 · Read text
Print faults, possible causes, and remedies ....

Camera care and cautions ....

Specifications ....


                                                                                Digitally signed by Mike Butkus
                                                            DN: cn=Mike Butkus, o=Butkus camera manuals,
                                                                   ou=butkus.org, email=mike@butkus.org, c=US    Mike Butkus  Date: 2022.12.13 14:17:46 -05'00'
View original page 3Page 4 · Read text
www.butksu.su


SPECIAL FEATURES

· A fully automatic 35mm compact camera with...
1. High magnification (38--115mm) power zoom with provision for 3-step quick zoom.
2. High magnification real-image zoom finder with provision for parallax correction in macro mode and
eyesight adjustment.
3. 0.8m macro capability.
4. Active type auto focusing with provision for auto focus lock and landscape-mode setting.
5. Automatic film threading, film prewind system.
6. Programmed shutter for automatic exposure control.
7. Automatic film speed setting (ISO 25--1600).
8. Four exposure modes including backlight compensation mode.
9. Screw-on dedicated external flash for extended shooting up to 10 meters (with ISO 400 film), incorporates
pre-flash for reducing "red eye" effect.
10. Electronically controlled self-timer with provision for taking up to three rapid-sequence shots.
11. Large LCD shows dates and other camera settings.
12.Automatic date printing.
13.Powered by a high performance lithium battery pack.
View original page 4
Page 5 · Read text
NAMES OF PARTS


(1) Flash Mounting-stage Cover                   (19) Auto focus-beam Projecting Window

(2) Flash Positioning Hole                        (20) Grip Band Lug

(3) Flash Discharge Signal Window               (21) Flash Lamp face

(4) Charging Completed Sensor                   (22) Auto focus-beam Receiving Window

(5) Flash Mounting Sensor                        (23) Zoom Lens

(6) Flash Mounting Socket                        (24) Auto focus Lamp

(7) Semi-tele Quick-zoom Button                 (25) Finder Eyepiece

(8) Tele Quick-zoom Button                      (26) Liquid-crystal Display

(9) Normal Quick-zoom Button                   (27) Landscape Button

(10) Zoom Lever                                 (28) Mid-roll Rewind Button

(11) Shutter Release                              (29) Power Switch

(12) Grip Band Lug                               (30) Date Select Button

(13) Camera Back Lock                           (31) Date Set Button

(14) Grip band                                    (32) Date Mode Button

(15) Eyesight Adjustment Dial                    (33) Tripod Socket

(16) Self-timer Lamp                             (34) Mode Select Button

(17) AE Light Sensor                             (35) Self-timer Button

(18) Finder Window                              (36) Battery Compartment Cover

                                                  (37) Macro Button
View original page 5Page 6 · Read text
· LCD INFORMATION


(38) Flash Mode Sign
                                                  (43) Battery Checker
(39) Exposure Counter
                                                  (44) Backlight Compensation Mode Sign
(40) Self-timer
                                                  (45) Macro-Mode Sign Date Indicator Film
(41) Mode Sign                              Loaded/Advancing Indicator Date Printed Sign
                                                 Cartridge Loaded/Unloaded Sign
(42) Landscape Mode Sign


1. BASIC PROCEDURE

LOAD THE BATTERY PACK

· Use one of the following battery packs: Panasonic CR-P2P 6V National CR-P2N 6V

· A new lithium battery pack will provide about 1000 shots, including 50% with flash (as tested according to
Fuji's battery testing procedure).


1) Open the battery compartment cover (Fig.1)
To open, push the Battery Compartment Cover outward.

· Always load the battery pack before loading the film.

· Once you load the battery pack, do not unload it unless you are changing it with a new pack. When changing
battery, be sure to insert the new pack as quickly as possible (within 5 minutes from the time the used pack Is
unloaded).

2) Load the battery pack (Fig.2)
1. Drop the battery pack, contact side down, into the Battery Compartment.

2. Replace the Battery Compartment Cover by sliding it in while pressing it firmly down.

3) Check the battery pack (Fig.3)
As soon as you load the battery pack, all the signs and indicators in the LCD will turn on at once, then a second
later the Dating Unit Off Sign (-- -- --) will appear in the part where the date will be displayed. Now turn on the
Power Switch. If the Exposure Counter Frame shows in the LCD, the battery pack is loaded correctly and in
good condition.
View original page 6Page 7 · Read text
· If the battery power is low, the    sign will turn on in the LCD, all the signs and indicators will blink, and the
shutter won't trip. It means you'll have to change the battery pack with a new one.

· If you are leaving exposure entirely to the camera's automatic exposure system, be sure to shoot with the parts
marked (A) and (B) (see illustration) clear of any sign or mark. (See "Advanced Techniques" starting from page
14).

PRINTING DATES ON YOUR PICTURES
·After changing the battery pack, always reset the date.

1) Changing the order of the date numbers (Fig.4)

Year, Month, Day

Day, Hour, Minute,

Month, Day, Year

Day, Month, Year


While watching the LCD, press in the Date Mode Button (1) to arrange the numbers representing day, month,
                                                                             and year in the
                                                                                        order you want.
                                                                        The date in the
                                                        LCD will be
                                                                                            printed in the
                                                                              bottom right of
                                                                                 your picture.


2) Setting the date (or time) (Fig.5)

M : Stands for month (Fig.5-A)
-- : Printing mark (Fig.5-B)

Press in the Date Select Button (2) to make the number you want to change blink, then press in the Date Set
Button (3) to bring out the number you want. After changing the time numbers press in the Button (2) until the
mark ":" blinks then press in the Button (3). The dating unit clock will now start from 0 second. Finally, press
in the Button (2) once again to show the Printing Mark in the LCD.

· If any one of the date numbers is blinking and the Printing Mark in the LCD is not on, the date will not be
printed on your picture.
View original page 7Page 8 · Read text
· If the background in the bottom right of your picture is too bright, the date will not show up clearly.

· If the Dating Unit Off Sign (-- -- --) is showing in the LCD, you won't have any dates on your pictures.

· Only the last two digits of the year will appear in the LCD and on the picture.

· When you press down the Shutter Release to take your picture, the Printing Mark (-) in the LCD will blink a
few times. It means the date has been printed on your picture.

                   ATTACHING THE GRIP BAND

(1) Attach one end to the back grip band lug (Fig.6)
Pass the band end through the back Grip Band Lug then secure it in the band buckle.

(2) Attach the other end to the front grip band lug (Fig.7)

Mass the other end of the grip band through the Front Grip Band Lug <p, then fasten it on the Cleave fasteners
and hold it firmly in place with The band clamps.

LOAD THE FILM

1) Open the camera back (Fig.8)
To open, push the Camera Back Lock down toward the camera bottom, then swing the Camera Back all the way
out.

2) Insert the film (Fig.9)
Insert the bottom end of the film cartridge into the Film Chamber then push the top side in.

· Be sure to use DX film (film marked DX on the box and cartridge).

· Make sure the inner surface of the Lens is free of dust and debris.


                                             www.butkus.us


3) Position the film tip (Fig.10)

Film Tip Mark (Fig.10-A)

Pull the film tip all the way up to the Film Tip Mark (red line in the far end of the camera's film track).

· Before closing the Camera Back, make sure the parts of the film enclosed with circles (see illustration) are in
intimate contact with the film track (not floating up).

4) Close the camera back (Fig.11)
View original page 8Page 9 · Read text
Close the Camera Back and press it firmly against the camera body so that it locks with a click. As soon as you
close the Camera Back, the Film Advancing Indicator in the LCD will move, the film will prewind itself up to
the very end in about 16 seconds (in the case of a 24-exposure roll), and the Exposure Counter (in the LCD) will
show the number of exposures it contains.

TAKE YOUR PICTURE

1) Adjust the finder to your vision (Fig.12)
Turn the Eyesight Adjustment Dial and set it so that the view through the Finder appears sharp.

2) Zoom the lens (Fig.13)
To zoom in to telephoto, press down the inner side of the Zoom Lever; to zoom out to normal press down the
outer side. As you zoom, the size of the image in the Finder will change.

· If the Lens is set to telephoto and left in that position for five minutes, it will automatically zoom back to
normal.

· You can more or less guess the focal length of the lens by just looking at the position of the Lens barrel.

· Be sure to reset the lens to normal before you put on the lens cap. If you put it on deeply with the lens set to
telephoto (lens front end protruding) and then zoom the lens back to normal, you may hear a clattering noise.


3) Quick-zoom (Fig.14)
·To quick-zoom to tele (115mm), press in the Tele Quick-zoom Buttoned.(1)

· To quick-zoom to semi-tele (70mm), press in the Semi-tele Quick-zoom Button (2)

· To quick-zoom to normal (38mm), press in the Normal Quick-zoom Button Hi).(3)

4) Compose your picture (Fig.15)
You'll get in your picture everything you see through the Finder. But if you are shooting your subject from 1.8m
away or less, you'll get in your picture only the area seen within the parallax correction marks.

Parallax Correction Marks (Fig.15-A)

5) Hold the camera still (Fig.16)
Hold the camera still with both hands. If you are shooting with the camera held vertically, position the Flash
side up.
View original page 9
Page 10 · Read text
6) Focus the lens (Fig.17)
To focus, aim the Auto-focus Spot (circle in the center of the Finder) at your subject. That's all. But make sure
the Auto focus Spot is completely covered by your subject. For instance, if you are taking photographs of
people, it might be best to aim the Auto-focus Spot at your subject's upper body area as illustrated.

· Camera shake is easier to occur when taking telephoto shots. To avoid it, spread your legs slightly with one
foot ahead of the other, relax your body and arms, and squeeze the Shutter Release gently down.

· Keep your fingers and hair away from the Lens, Auto-focus Windows, and flash Lamp face.

7) Press the shutter release about halfway down (Fig.18)
If the Auto-focus Lamp (green lamp next to the Finder Eyepiece) turns on when the Shutter Release is pressed
about halfway down, your subject is in sharp focus. If it blinks, you are too close to your subject (your picture
will turn out fuzzy). If you move even closer to your subject, it won't blink to warn you any more.

8) Press the shutter release all the way down (Fig.18)
To take your picture, press the Shutter Release slowly and gently all the way down. As soon as the shutter trips,
the film will automatically advance into position for the next shot.

· In the following situations, you'll have to use the Auto-focus Lock or the Landscape Button because the Lens,
though rarely, may not be able to focus itself correctly.

(1) If your subject is illuminated directly from the back if it is illuminated by a very bright light source located
close to it; or if it is illuminated by strong reflected light such as light reflected from the windshield of a car.

(2) If the subject cannot reflect enough light, such as black hair.

(3) If you are shooting your subject through a window pane.

(4) If the Auto-focus Spot is aimed at a strongly reflecting object such as a mirror or metal surface.


END OF FILM

· Your camera will Expose the film frames in descending order, starting from the highest numbered frame, and
rewind each frame into the cartridge as soon as it is exposed.

·You can unload the film as soon as the last frame (frame No.1) is exposed and the camera motor comes to a
halt because there is no need to rewind it.

· If the Camera Back is accidentally opened In mid-roll, all of the exposed frames, except the last will be safe
View original page 10
Page 11 · Read text
from light.

· Take the exposed film to your photofinisher for processing and printing as soon as possible.

· Be sure to use your film before the expiration date printed on the film box.

1) After exposing the last frame (Fig.19)
As soon as the last frame (frame No.1) is exposed, the Film Advancing Indicator in the LCD will move toward
the left and the Exposure Counter will return to "O" then switch to "E" and come to halt.


2) Unload the exposed tom (Flg.20)
Make sure the Exposure Counter is showing the "E" sign then open the Camera Back and take the film out.

3) Unloading the film in mid-roll (Fig.21)
To unload the film in mid-roll, turn on the Power Switch, press in the Mid-roll Rewind Button (with a fine-
pointed implement), wait until the film has wound back into its cartridge completely, then unload it.

· If the Camera Back is accidentally opened in mid-roll, close it quickly. As soon as the Camera Back is closed,
the film will automatically wind back into its cartridge.

· If the film is unloaded before the "E" sign appears in the Exposure Counter, the next roll of film you load will
not prewind but will immediately return back into its cartridge when the Camera Back is closed.


11. ADVANCED TECHNIQUES

USING THE AUTO-FOCUS LOCK

1) It the Auto-focus spot is off your subject
If the Auto-focus Spot is aimed at an empty space in your subject, the Lens will not be able bring it into sharp
focus. To focus the Lens properly, proceed as explained in the next paragraph.

2) Move the camera slightly (Fig.23)
Move the camera slightly to aim the Auto-focus Spot at some object near the center of your subject (if you are
taking pictures of people, aim the Auto-focus Spot at the center of a person's upper body area as illustrated).
Next, press the Shutter Release about halfway down to lock the focus, hold it there, then check to make sure the
Auto-focus Lamp has turned on.

· You can lock the focus then release it as many times as you want before tripping the shutter.

3) Take your picture
While holding the Shutter Release about halfway down to keep the focus locked, move the camera back to
recompose your picture, then take it by pressing the Shutter Release all the way down.
View original page 11
Page 12 · Read text
· USING THE LANDSCAPE BUTTON (Fig.24)
The Landscape Button is used to take distant scenes outdoor scenes through a window pane, and nighttime
scenes that are beyond reach of the camera's flash.
To take your picture, press in the Landscape Button [the Landscape Mode Sign ( ~ ) in the LCD and Auto Focus
Lamp will turn on] then press down the Shutter Release.

· The Landscape Mode Setting will switch off by itself in one minute. If you want to switch it off sooner, just
press in the Landscape Button a second time.

·As long as the camera is set to the Landscape Mode, the Flash will remain off and cannot fire. To take
nighttime scenes, mount the camera on a tripod because the shutter will be slow.

TAKING MACRO PICTURES


1) Press In the macro button (Fig.25)
As soon as you press in the Macro Button, the Macro Mode Sign (flower) will turn on in the LCD and the Lens
will adjust itself to let you shoot your subject at 0.8-- 1.3m away.

2) Take your macro picture (Fig.26)
The Finder Frame will adjust itself so that you will get in your picture everything you see within the Parallax
Correction Marks. To take your picture aim the Auto-focus Spot squarely at your subject check to make sure the
Auto-focus Lamp is on, then press the Shutter Release gently down.

· If the camera-to-subject distance is not within macro range (0.8 -- 1.3m), the Auto-focus Lamp will blink.

· To switch the camera off the Macro Mode, just zoom the Lens or press in the Macro Button a second time.

· The 3000 Zoom Accessory Flash will not fire as long as the camera is set to the Macro Mode.

               SELECTING THE CORRECT FLASH MODE

1) Automatic flash mode (Fig.27)
If you don't see any sign or mark in the upper part of the LCD and the light is low, the Flash will automatically
fire when you press down the Shutter Release to take your picture. And as soon as the Flash Mode Sign (5) in
the upper left of the LCD stops blinking, you are ready to take your next picture.

2) Fill-in flash mode (Fig.28)
Pictures of people standing in front of a window against the light or in the shade of a tree will normally turn out
dark if they are taken without fill-in light. To use the camera's flash as fill-in light, press in the Mode Select
Button once to turn on the Flash Mode Sign ( S. ) in the upper left corner of the LCD then take your picture.
The flash will now fire even in bright daylight.

3) Flash off mode (Fig.29)
View original page 12Page 13 · Read text
If you don't want to use flash, press in the Mode Select Button twice so that the Flash Off Sign (my) turns on in
the upper left corner of the LCD, then take your picture. The Flash won't fire even if the light is dim.

4) Backlight compensation mode (Fig.30)
Press in the Flash Mode Button three times so that the Backlight Compensation Mode Sign (by) turns on in the
left side of the LCD, then take your picture. This will increase exposure by two F-stops, and if the light is dim,
the flash will fire automatically. As soon as you take your picture or press in the Flash Mode Button, the camera
will reset itself to the Automatic Flash Mode.

· If you are taking stage scenes or indoor sports events that are beyond reach of the camera's flash, shoot with
the Flash switched off, but be sure to mount the camera on a tripod to prevent camera shake (camera shake will
result in fuzzy pictures).


DEDICATED EXTERNAL FLASH (3000 Zoom Accessory Flash)

· FUNCTIONS OF THE EXTERNAL FLASH

(1) Extending the flash shooting range
When set to "EXTEND" or to "PRE-FLASH" for taking telephoto shots, it lets you take clearly exposed
pictures of distant subjects.

(2) Reducing the "red-eye" effect
When set to "PRE-FLASH" for taking portraits, it reduces "red-eye" to give you eyes that are nice and natural-
looking.

<<Red-Eye>>
In dim light, a person's pupils will expand. If the flash is fired when the pupils are expanded, the light may
strike the retinas then bounce back through the pupils and make the eyes in your picture appear red. However,
you can reduce "red-eyes" by taking your flash picture with the Dedicated External Flash set to "PRE-FLASH"
so that it will first fire a short burst of light to contract your subject's pupils before releasing the main picture-
taking light.

· Effective flash range (meters)


· In the PRE-FLASH mode, the flash that emits pre-flash light will change at the focal length of 70mm. On the
normal side (focal lengths shorter than 70mm), the external flash will fee pre-flash while on the telephoto side
(focal lengths of 70mm or longer), the built-in flash will fire it.
View original page 13
Page 14 · Read text
· When taking distant subjects in low light or indoors, press in the Shutter Release halfway down to make sure
the Auto-focus Lamp turns on before taking your picture. If the Auto-focus Lamp blinks, check the distance by
referring to the above chart. Remember, however, that under the conditions shown by the shaded areas of the
chart, the Auto-focus Lamp will not blink even if the subject is too far for correct exposure.

1) Load the batteries (two penlight batteries) (Fig.31)
Open the External Flash's battery compartment cover by pushing it toward the back. Insert the batteries plus (+)
and minus (-) ends correctly into the battery compartment as shown, then close the battery compartment cover.


2) Mount the flash (Fig.32)
(First, remove the Flash Mounting-stage Cover and put it away in the slot provided in the back of the Flash
lamp head by pressing it in).
To mount, insert the Flash's bottom pin into the Flash Positioning Hole then screw the Flash onto the camera
top by turning the Mounting Wheel. Next, erect the Flash Lamp head.


  Flash Mounting-stage Cover (Fig.32-A)
If you want your subject's eyes to look nice and natural.....

3) Set the flash to the prewash mode (Fig. 33) Set the External Flash's flash mode switch to PRE-FLASH so
that the Flash will fire a short burst of light before releasing the main picture taking light. Do not move the
camera until you have finished taking your picture.

If you want to include faraway objects in your picture.....

4) Set the flash to the extend mode (Fig.34)
Set the flash mode switch to EXTEND, check to make sure the READY Lamp is on, then take your picture by
pressing down the Shutter Release.

· If the Flash is set to PRE-FLASH but the Flash Lamp head is folded down or if the Flash is not fully charged,
the Flash Mode Sign in the LCD will keep blinking and the shutter won't trip.

· If the Flash is set to the EXTEND mode, you can trip the shutter regardless of the Flash's condition. Therefore,
make sure the READY Lamp is on before tripping the shutter.

USING THE SELF-TIMER

1) Set the self-timer (Fig.35)

You can take up to three Self-timer pictures in succession. To do so, press in the Self-timer


Button three times. The Self-timer Mode Sign     and the number "3" will appear in the LCD.
View original page 14
Page 15 · Read text
2) Start the self-timer (Fig. 36)
To start it, press down the Shutter Release. The Lens will simultaneously focus on the object at which the Auto-
focus Spot is aimed.

· Do not stand in front of the camera when you press down the Shutter Release to start the Self-timer because
the Lens may not be able to focus itself properly if you do.


3) Wait for 10 seconds
As soon as the Self-timer starts, the red Self timer Lamp will turn on for seven seconds then blink for three
seconds, at the end of which the shutter will trip to take your first picture. It will trip two more times at some
intervals to deliver the three pictures you called for. In the case of flash pictures, the Self-timer Lamp will blink
for three seconds after the flash is fully charged, then the shutter will trip.

· In the PRE-FLASH mode, the external flash may take a little longer time to recharge itself and, if it has not
been fully charged within 30 seconds, the self-timer mode will be automatically canceled.

· To turn off the Self-timer after it has been set, press in the Self-timer Button until the Self timer Mode Sign in
the LCD turns off or just turn off the Power Switch.

CAMERA FAULTS, POSSIBLE CAUSES, AND REMEDIES

     FAULTS       POSSIBLE CAUSES      REMEDIES            PAGE

                          (1) The battery pack is
                         nearly spent (the

                                                     (1) Change the battery
                        Battery Checker (    )                                            pack with a new one.    9
                               is showing in the LCD
1. The shutter won't     and all the signs and                                                     (2) Erect the Flash
trip.                      indicators in it are                                   Lamp head or set the
                          blinking).                                     mode switch to either   17
                          (2) The External Flash                                  OFF or EXTEND.
                               is set to PRE-FLASH
                     and the Flash Lamp
                      head is folded down.

                                                     (1) Close the Camera
                          (1) You unloaded a     Back and press in the    13, 14
                          partly used roll of film   Midroll Rewind Button
2. The number in the
                        without winding the      (the camera motor will
LCD Exposure Counter
                           entire roll back into its   run for five seconds).
is blinking. (The film
                           cartridge.              Repeat several times
winds directly back into
                                                        until the "E" sign
its cartridge when it is
                          (2) You loaded the film  appears in the LCD and
loaded).
                        before you loaded the    blinks, then open the
                          battery pack.          Camera Back. The      9
                                           camera will now
View original page 15Page 17 · Read text
abruptly right after
                                                    tripping the shutter.

                          (1) You took your
                          picture against the        (1) Take your picture
                              light.                  with the camera set to   16
                                                   the fill-in flash mode.
2. The picture looks
                          (2) Your subject was
dark.
                     beyond reach of the      (2) Take your flash
                        camera's flash.           pictures within the      17
                                                          flash's effective range.


                          (1) You took your
                                                     (1) A Turn on the date-
                          picture with the date-
                                                    printing unit and set the
                          printing unit switched
                                                 date so that it shows in
                          off (the "-- -- --" sign                        10
                                                   the LCD before taking
                    was showing in the
3. The date is not                              your picture.
                  LCD) .
printed on the picture,
or it does not show up                              (2) Compose your
                          (2) A white, yellow,
very clearly.                                       picture so that it does
                        orange, or other bright-
                                                not include any bright-
                        colored object was                          10
                                                colored object in the
                        included in the area of
                                           bottom right where the
                         the picture where the
                                                 date will he printed.
                         date is printed.


CAMERA CARE AND CAUTIONS

1. Your camera is a precision instrument which requires careful handling. Avoid shock and do not get it wet or
drop it on the floor.

2. If you are not using your camera for a long interval, keep it where it will be safe from heat, dust, and
moisture.

3. Remove soil and dust from the lens glass, auto-focus windows, and viewfinder window with an air blower
and by wiping lightly with a piece of soft, lint-free cloth. If that is not enough, wipe off gently with Fuji Lens
Cleaning Paper moistened with a small amount of Fuji Lens Cleaning Fluid.

4. In hot weather, do not leave your camera in a closed compartment of your car or on an ocean beach, and do
not leave it in moist places except temporarily for a very short time.

5. In case of malfunction, do not try to repair the camera yourself because it is equipped with high-tension
circuits.

6. Never dismantle the lithium battery pack, heat it, throw it into a fire, charge it, or cause it to short circuit.


SPECIFICATIONS

· Film
View original page 17Page 18 · Read text
135 DX roll film.

· Picture Size
24 X 36mm

· Lens
Fujinon Zoom Lens, f = 38-- 115mm, 1:4.4-- 8.9, 10 components, 13 elements.

· Zooming
Full-range zooming plus 3-point quick zooming to 38, 70, and 115mm.


· Finder
Real-image zoom finder, 0.4-- 1.14X magnification, 83% field of view (3m), parallax correction marks, auto-
focus spot, automatic field adjustment for macrophotography, auto-focus lamp (turns on when the shutter
release is pressed halfway down to signal that the subject is within shooting range, and blinks to warn you that
the shooting distance needs watching), provision for eye-sight adjustment.

· Focusing
Active type auto focusing, 1.3m --ox focusing range, 0.8 -- 1.3m macro-mode range, auto focus lock (by
pressing the shutter release halfway down), landscape mode button (sets the lens for taking distant shots, turns
off the flash, and slows down the shutter speed when taking nighttime pictures), provided with auto-focus lamp.

· Shutter
Programmed electronic shutter (1/4--1/350 sec. )

· Exposure Control
Automatic, EV 10 (6.5*) -- 17 (normal) and EV 13.3 (8.5*) -- 17.5 (telephoto) coupling ranges with ISO 100
film (* = flash off values), provision for backlight compensation (2 EV).

· Film Speed Setting
Automatic with ISO 25, 50, 100, 200, 400, 800, and 1600 DX films.

· Film Threading
Automatic

· Film Advance
Automatic (motorized), prewind system, rewinding unnecessary, provision for mid-roll rewinding.

· LCD
Exposure counter (shows number of frames remaining), film loaded/advancing indicator, cartridge
loaded/unloaded sign, dates (year, month day; day, hour, minute; month, year, day; day, month, year, and off (--
-- --) flash charging sign, fill-in flash mode sign, flash off sign, back light compensation mode sign, macro
mode sign, self-timer mode sign, self-timer sequence-shot number, landscape mode sign, battery low sign.

· Date-printing Unit
Quartz watch for 4-mode date printing (year, month, day; day, hour, minute; month, year, day; and day, month,
year), date-printing unit off mode, effective up to the year 2019, provision for changing and correcting dates,
date display panel, powered by the camera's battery pack.

· Built-in Flash
View original page 18
Page 19 · Read text
Light distribution adjustment interlocked with zooming operation, auto-flash mode, fill-in flash mode, flash off
mode, electronically controlled flashmatic exposure, about 3-sec. recycle time.

· External Flash
(3000 Zoom Accessory Flash)
Operates in combination with the camera's built-in flash, provision for firing pre-flash light (for preventing
"red-eye" effect), about 9 sec. recycle time, about 140 flashes with new alkaline-manganese batteries (as tested
according to Fuji's battery testing procedure), operates on two penlight batteries (LR6 or R6).

· Flash Range


· Self-timer Electronically controlled operation, capable of 3 rapid-sequence exposures, about 10-sec. delay,
can be stopped in mid-run, self-timer countdown lamp.

· Battery Pack Two lithium batteries encased in a slip-in pack (Panasonic CR-P2P 6V, National CR-P2N 6V).

· Others
Tripod socket, grip band, lens cap.

· Dimensions & Weight
134.5 X 62.7 X 96mm, 60Og. (without battery pack).

Notice: Specifications are subject to change without notice.
View original page 19
Related documents and language editions
From the M. Butkus archive. Original publisher and archive notices are retained.
Check the model and edition against your equipment.
PDF verified 2026-10-10.