Film cameras
Fujica Fuji ST705 User manual
User manual for Fujica Fuji ST705. 52 pages in German, French. Read the original PDF, download or print a copy without registration.
52 pagesGerman, French3.8 MB PDF

Loading your manual…Open PDF directly
Document details
- Brand
- Fujica
- Model / document
- Fujica Fuji ST705
- Document type
- User manual
- Language
- German, French
- Pages
- 52
- File size
- 3.8 MB
- Category
- Film cameras
- Document date
- Not specified in catalog
Search available document text
Find a term, then jump to its page in the original PDF. Image-only pages may not be searchable; check the PDF for exact wording and diagrams.
Page 2 · Read text
www.orphancameras.com
    FUJICASTTOS


Owner's Manual                                       Mode d'emploi
This booklet has been prepared to show you how  to use the   Le but Je ce livret est de vous initier d l'emploi correct de votre
FUJICA ST705 correctly. Pleaseread it over carefully.          FUJICA ST705. Lisez le attentivement.
Gebrauchsnleitung                                         Manual de instruccion€s
Diese Anleitung soll lhnen helfen, lhre neue FUJICA ST705   Se ha preparado este folleto  para ensefrarle c6mo  utilizar  la
kennenzulernen,damit Sie alle Vorteile dieser Kamera ausnutzen  FUJICA ST705 correctamente. Sirvase leerlo atentamente.
k6nnen. Lesen Sie sich diese Anweisung sorgfiiltig durch.
View original page 2Page 3 · Read text
www.orphancameras.com
CONTENTS                         INHALT
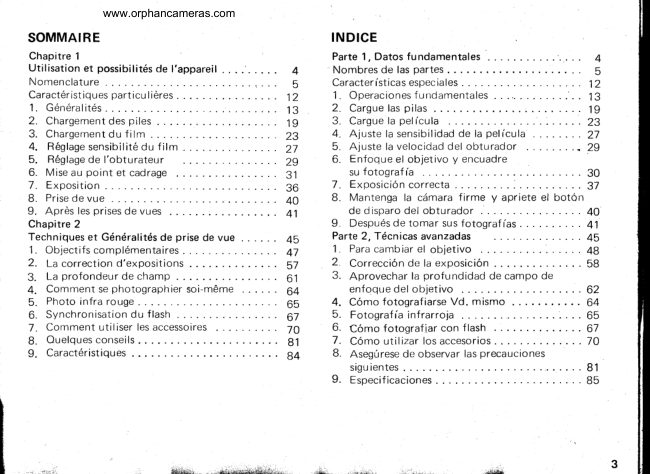
P a r t 1 ,F u n d a m e n t a l s . .                           i . . .      . . . .   4        Teil 1 - Grundanweisung .
Namesand Functionsof Parts                   n      Bezeichnungder Teile und ihre Funktionen
Special Features                               1 1     BesonderetechnischeMerkmale
1. BasicSteps                                                                                                                  I J       1 . K a m e r a b e d i e n u n g
2. Battery Insertion                       1 9       2. Einlegender Batterien . . . .
3 . F i l m L o a d i n g. . .                     22       3. Einlegendes Films
4. Setting the Film Speed                  zo      4 . E i n s t e l l u n gd e r F i l m e m p f i n d l i c h k e i .t . .
5. Setting the Shutter Speed                28       5. Einstellungder Verschlusszeit
6. Focus the Lensand Frame Your Picture . . . .  JU        6. Scharfeinstellungund Bildausschnitt... .
7. Correct Exposure                                        7. Korrekte Belichtung
B. Holding the Cameraand Releasing                    B. Kameraruhig halten und auf den
   the shutter                                                     JtJ         Ausloseknopf drticken
L  R e . w i n d i n Fg i l m a n d U n l o a d i n gF i l m  .       4 1       9. Nach der Belichtunglhres Filmes  . . . . .
Part 2, Advanced Techn iques               45       Teil 2 - Technik fiir Fortgeschrittene
 1   C h r n n i n n         f h o,_  I_-,tso r                       46        1. Auswechselndes Objektives.
2. ExposureCorrection                   54       2.  Belichtungskorrektur
3 . U t i l i z i n gt h e L e n s D e p t h o f F i e l d          59       3.  Die Vorteile der Tiefenschdrfe
4. Usingthe Self Timer                   63       4. Wie Sie sich selbstfotografieren konnen
5 .   l n f r a r e dP h o t o g r a p h y. . .                                 5.  Infrarot-Fotografie
6 . F l a s hS y n c h r o n i z a t i o Sn h o o t i n g           66       6. Aufnahmen mit Blitzlichtsynchronisation
7 . Accessoriesfor the F UJ ICA ST705        70       7. Der Gebrauchdes Zubehors
B. Careand Storageof your FUJICA ST7O5, . . . 80       B. BeachtenSie bitte folgende
9 . S p e c i f i c a t i o n s . . .                   82         Vorsichtsmassregeln
                                                                 9. TechnischeDaten


                                                                                                                                                      -.,  ,";.:,,,..    .   . -- ,.."tj",*
View original page 3Page 4 · Read text
www.orphancameras.com

PART     ,.',
TEIL  ", ,:','i,
CHAP ITR E
PARTE

F U N D A M E N T A L S
Part  1  Explains  the  basic operati6ns  of  the  camera. The  reader  is
recommended to master the basics before proceeding to Part 2 which deals
with the more advanced techniques of photography
G R U N D A N W E I S U N G                                                                                                                             Lu
Teil 1 erlautert die Grundhandhabungder Kamera. Man sollte sich zundchst
rnrt dreser Grundanweisung beschiiftigen und nicht eher zu Teil 2 -  der sichmit  der  fortgeschrittenen Technik  befaBt  *  Libergehen, bevor man  die                                        -q
Gru ndhandhabu ng beherrscht.
M A N I P U L A T I O N D E B A S E
Le  chapitre  1  explique  les op6rations de base de  cet  appareil.   ll  est
recommand6 au  lecteur de se iamiliariser avec ces principes avant de
poursuivre Ia lecture du chapitre 2 qui traite des techniques les plus avanc6es
de la photographle.
D A T O S F U N D A M E  $LES
La  parte  1  explica  las     aCiones fundamentales    de   la  cdmara.   Se
recomienda    al  lector  quc   mrne estos      bdsicos antes de proceder a
lectura de  la parte 2                    mds  adelantadas   t6cnicas   d
fotograf ia.


                                                                                                         "ffi*t'--%
                 4    W
View original page 4Page 7 · Read text
www.orphancameras.com
e Film Advance Lever               @  Battery Chamber / lnsert two silver oxide batteries
@ Shutter Speed Selector Dial                                   for powering the camera Electric Eye System
@ Film ASA SpeedWinoow                           -                          @ G u i d e R a i l , @ F i l m R a i l / T h e f i l m  i s p a s s e do v e r
@ Combination Shutter Release Button  - Exoosure       the Film Rail and the edgesgo betweenthe Guide
   Meter Switch / Provided with  lock and cable re-     R a il .
    leasesocket                   @ F i l m R e w i n d S p i n d l e
@ Film Counter / Additive type, automatically resets @ F i l m C h a m b e r
@o NeckstrapShutter SpeedEyeletMark (red dot)           @6nv   TripodF i l m R eSocketw i n d B u t t o n
@ Self-timer Start Button, @ Self-timer Set Lever /  @ Sprocket Wheel / The f ilm perforations are engaged
   The shutter is activated in B^,1 O seconds.                with the sorocket teeth to advancethe f ilm.
@ Depth  of  Field Preview Button  / Provided with  @ Take-up Spool
    lock                      @ Camera Back
@  Lens Safety Lock ReleaseButton          @ PressurePlate
@ Taking Lens
@ Accessory (hot) Shoe
@  Hot Shoe for X Contact
@  Combination Rewind Crank-Camera Back Lock
@  F i l m P l a n eM a r k
@  Lens Mounting Screw / Praktica screw mounr
@  Aperture Selector Ring
@  Aperture Distance Mark
@  Depth of Field Indicator
@  DistanceScale
@ FP Contact Socket
@ X Contact Socket
@  FocusingRing
@  Viewf inder Eyepiece / Designed for attaching the
   Eye Cup, etc.


                                                                                                                                                                                       rh-.,i.tc;'rs.             '
View original page 7Page 8 · Read text
www.orphancameras.com
SPECIALFEATURES               BESONDERETECHNISCHEMERKMALE
1. lmproved Through-The-LensExposure Meter          1 . Verbesserte TT L Bel ichtu ngsmessung
The exoosure meter of the FUJICA ST705 consists     Der Belichtungsmesserder FUJICA ST705 besteht
of 2  Silicon photocell light receptors located on      aus zwei Silizium Fotozellen, die das Licht emp-
either side of the viewfinder eyepiece,which are      fangen; je eine dieser Fotozellen bef indet sich auf
connected to  an FET  (Field Effect Transistor)      jeder Seite des Sucherokulars.Sie sind an eine FET
circuit and are coupled with the shutter and dia-      "F ield Effect Transistor" Schaltung angeschlossen
phragm. lt measuresthe averagelight intensitywhich      und sind mit VerschluB und Blende gekuppelt. Die
falls on the entire surfaceof the focusing glass.The     Messung erfolgt auf der Basis der Durchschnitts-
light is measuredthrough the lensat full apertureto       Lichtintensitdt,die auf die Gesamtfldcheder Sucher-
ensurethat the view through the viewfinder is always     Mattscheibefdllt. Das Licht wird durch das Objektiv
bright.                                                   bei voller Offnung gemessen,um lhnen ein immer
Its special features are: high sensitivity, complete      hellesSucherbildzu gewdhrleisten.
accuracy, instantaneous response, and  a spectral     Besondere Merkmale sind: hohe Empfindlichkeit,
sensitivityclose to that of color film. Other merits     auBergewohnlicheGenauigkeit, sofortige Reaktion
are  its compatibility with any lens that can be     und  eine Spektral-Empfindlichkeit, die  der des
mounted on the camera. and elimination of the      Farbfilmessehr iihnlich ist. WeitereVorteile sind die
necessityof making exposure corrections in taking      Moglichkeit der VerwendungjedesObjektives,das in
close-upsand in shooting with a filter on the lens      die Kamera paBt und der Wegfall jeglicher Belich-
becausethe light that has passedthrough the lens is      tungskorrektur bei Nahaufnahmen und  bei  der
the light that is measured.                         B e n u t z u n g v o n F i l t e r n . N u r d i e L i c h t m e n g e ,d i e
2. World Renowned FUJINON Lens                  durch das Objektiv fdllt, wird effektiv gemessen.
The inrerchangeablelensesof the FUJICA ST705 are       2. Weltbekannte FUJINON Objektive
widely known for their superb color definition and      Die Wechselobjektiveder FUJICA ST705 sind be-
perfect  corner-to-corner picture  sharpness and      kannt fLlr ihre groBartigeFarbwiedergabeund die bis
clarity.                                     zum Bildrand gestocheneSchiirfeund Brillanz.
3. A Complete Camera System in ltself                     3.  Ein vollstdndigesKamera-System
A wide range of interchangeablelenses,accessories,    Zubehor, sowie die verbesserteTTL  Lichtmessung,
and  its improved through-the-lens exposure meter     machen die FUJICA ST705 zu einem vollsteindigen
make the FUJICA ST705 a complete camerasystem     Kamera-System, mit dem  so gut  wie  alle  foto-
in  itself capable of  handling any  picture-taking      grafischen Aufgaben  u nd  Situationen gemeistert
situationand subject.                             werden konnen.


                                                                                            1 1
  .r-,    , ,-x-   :  iL *,-   -  '-tm.u***"grur*:                                 ..i&&i{iffii!il*.,
View original page 8Page 9 · Read text
www.orphancameras.com
BASIC STEPS             GENERAL ITES
1. Load the Film                             1. Mise en place du chargeur
P u l l  t h e C o m b i n a t i o n F i l m R e w i n d      Tirer sur le bouton jusqu'd ce que le
Crank -  Back Cover Lock fullY until      dos de  l'appareil s'ouvre. Placer le
the Camera Back automaticallysnaps     chargeur dans le logement pr6vu d cet
open. Next, load the film cartridge      effet et introduire I'amorce du film
into the Film Chamberand insert the     dans la fente de l'axe de r6ceptiondu
film  into the  slot of  the Take-up           f i l m .
Spool.                                          2. S6lection de la sensibilit6 du film
2. Set the Film Speed                S i  v o u s u t i l i s e z u n F U J I C H R O M E
 lf you are usinga FUJICOLOR F-II or     R 1 0 0 o u  F U J I C O L O R F - t r   ( 1 0 0
F I J I C H R O M ER l O O ( A S A 1 O O f) i I m ,     ASA)  tirer simplement sur la partie
pull up the top of the Shutter Speed     sup6rieure du cadran de vitesse et
Selector Dial and turn  it  until the      tourner jusqu'd ce que le nombre 100
number'l 00 appearsin the center of      apparaissedans le centre de la fenOtre
the  ASA   Film  Speed  Indicator     d e s e n s i b i l i t d6 u f i l m .
Window.
                      OPERACIONES
KAMERABEDIENUNG        FUNDAMENTALES
1. Einlegendes Films                       1. Cargue la pelfcula
Ziehen Sie den Rtlckspulhebel ganz     Levante la combinaci6n palanca de
heraus, bis sich die Kamerarilckwand     rebobinado de la oel icula - cierre de
automatisch offnet. Sodann legen Sie       la tapa  posterior totalmente hasta
d e n F i l m  i n d i e F i l m k a m m e re i n u n d     que salte automdticamente la tapa
stecken Sie die Filmzunge in den      posterior de  la cdmara. A continua-
Schlitz der Aufwickelspule.                                           ci6n, cargue el cartucho de la pelicula en la cdmara de pelfcula e
2.  Einstellen der Filmempfindlich-keit     introduzcala pelfculaen la ranurade la bobina de bobinado.
    keit                                        2. Ajuste la sensibilidadde la pelicula
Wenn Sie FUJICOLOR  F-tr oder     S i u t i l i z aV d . u n a p e l i c u l aF U J I C O L O R F - t r o F U J I C H R O M E R 1 0 0
F U J I C H R O M E R l O O ( A S A 1 O O I 2 1    (ASA 100), simplemente levante la parte superior del dial selector
DIN) benutzen, heben Sie die Ver-     de velocidadde obturador y dele vueltashastaque el n0mero 100 se
schluBzeiten-Wahlscheibeleicht an     encuentraen el centro de la ventanilla indicadorade la sensibilidad
und drehen sie bis die Nummer lOO    ASA de la pelfcula.
sich in der Mitte des FilmemPfind-
 I ich keitsfensters bef i ndet.                                                                                            1 3
                                                                                                                                    ,*i+.                                                                            .a*bloi-l,
View original page 9Page 10 · Read text
www.orphancameras.com
                                     3. Set the Frame Counter to  1 (the         3. Stellen Sie das Bildzdhlwerk auf 1
                                               first white dot before the number           (der erste weiBe Punkt  vor der
                                          2l                              Nummer 2).
                          The odd numbersof the frame count-       Die weiBen Punkte auf dem Zdhlwerk
                                   er  are represented by  white  dots.       sind die ungeraden Zahlen. Betdtigen
                          Wind the Film Advance Lever and       Sie den Filmaufzughebelund drLlcken
                             pressthe Shutter ReleaseButton. Do       Sie auf den Ausloseknoof.Sie mL]ssen
                                    this twice, and on the 3rd winding,       2 Blindbelichtungenmachen,bei dem
                                the f irst white dot on the film count-        dritten  Aufzug  des  Filmtransport-
                                  er (frame No. 1) will move opposite      hebels liegen der erste weiBe Punkt
                                                               t h e t r i a n g u l a rm a r k .                       a u f d e m B i l d z d h l w e r k( B i l d N r . 1 )
                                                               und  die  Dreiecksmarke nebenein-
                                       4. Set the Shutter Speed Selector Dial       ander.
                             Turn the Shutter SpeedSelectorDial
                                     to  the speed desired.  lf  you  are        4.  Einstellung der VerschluBzeit
                              shooting out  of doors, the shutter       Stellen  Sie  die  VerschluBzeiten-
                           speed will be either 11125 sec. or     Wah lscheibe auf  die von   I h nen ge-
                            1/25O sec.  lf you are shooting in-       wLlnschte VerschluBzeit. FLlr AuBen-
                               doors, it will be 1/30 sec.or 1/60 sec.     aufnahmen wird die Belichtungszeit
                                                                                         in den meisten Fdllen 1/125 Sek.
                                     5. Focus the Lens and Frame Your         oder 1/250 Sek. sein, wdhrend sie frir
                                    Picture                           Innenaufnahmen      je  nach den
                      O  Look  through  the  Viewfinder       LichtverhSltnissen-  1l30 Sek. oder
                               Eyepiece and turn the Focusing       i/60 Sek. betragenwird.
                           R ing  to  focus and frame your
                                  o ictu re.                                      5.  Scharfeinstellung  und   Bildaus-
                 @ to  focus, turn the Focusing Ring         schnitt
                                        to make the upper and  lower      C Schauen Sie durch den Sucner
                             segmentsof the split image in the         und stellenSie das Objektiv scharf
                                 microprism center spot converge          e i n . D a n n w d h l e n S i e d e n B i l d -
                              and form a perfect fit.                      ausschnitt.
                                        @ Zur Scharfeinstellungdrehen Sie
                                                                  den  Einstellring, bis die oberen
                                                                  und  unteren Teile des Schnitt-
                                                                              bildes im  Mikroorismakreis ein
                                                                          einzigesBild werden.

1 4
        ,**:t*x    r*ut&     ,&ris*q*;        .3d;eM8#BeSB.'        ;*                      **;r*xir*iiii&i,&i@x,,,...*ara*i    &kGM'                ,
View original page 10Page 11 · Read text
www.orphancameras.com
                                     6. Set the Exposure                           6.  Einstellung der Belichtung
                            Press the Combination Shutter Re-      Nun drucken Sie den kombinierten
                               lease Button     Exposure Meter       VerschluBausloser    Belichtungs-                              Switch partway down to activate the                                                                messerknopf  ungefdhr  halbwegs                             exposure meter needle in the view-
                                  finder, and turn the Aperture Selec-       nieder, um  die  Belichtungsmesser-
                                    tor Ring until the needle moves into       nadel im Sucher zu aktivieren und
                               the center of the indentation. You         betiitigen  dabei   gleichzeitig  den
                            can also set the aperture first then       Blendenring. Sobald sich die MeB-
                               adjust the  needle by  turning the       werknadel in der Mitte des Rahmen-
                              Shutter SpeedSelectorDial.                einschnittesbefindet, ist die richtige
                                                                 Blende eingestellt.Sie konnen jedoch
                                     7. Pressthe Shutter ReleaseButton        auch die Blende zuerst einstellen, um
                             Hold camera steady to prevent shake      du rch Drehen der VerschluBzeiten-
                           and gently pressthe Shutter Release     Wahlscheibedie korrekte Belichtunq
                              Button-                                zu erhalten.
                /,(,!                                                                          7. Ausliisen des Verschlusses
                                                                 Beachten Sie bitte, daB die Kamera               lz1:    \x+   l"/
                    ' - l                                                                 ruhig gehaltenwerden muB, wenn Sie
                        / . . . r )                                                                fotografieren.Drricken Sie nur leicht
             t t t                                                      und  ruh ig auf  den Ausloseknopf,
                                                                    damit die Gefahr einer Verwackluno   ry                                          ausgeschlossenwird.


1 6
                                    ..d1"'      ,"tBi.,   - -                                                                        '*d?ildd-,,1r:5*:&*r#              i     .*@,,          .-*.          .*;&-- . ,**r-J
View original page 11Page 12 · Read text
www.orphancameras.com

                                    8. Rewind the Film                            8. R6embobinage
                                   After  you  have exposed the entire      Aprds avoir expos6 tout  le film aP-
                                                     r o l l o f   f i l m , p r e s st h e F i l m R e w i n d      puyer sur le bouton de r6embobinage
                               Butto n,  erect  th e  F ilm  R ewind       oui  libdre I'axe d'entrainement du
                             Crank, and turn  it  in the direction        film, ensuite ddgagerla manivellede
                                pointed by the arrow and wind the      r6embobinage et  la tourner dans la
                                    film back into the cartridge, until       direction indiqu6e par la f ldche pour
                            vou feel tension released.Next,  lift       renvover le film dans son chargeur
                                the Back Cover Lock fully up until       jusqu'd ce que vous sentiezune l69dre
                                 the camera back snaps open. Now,       tension. Vous pouvez ensuite ouvrir
                            remove the cartridge.                       l'appareilpour d6gagerle chargeur.

                                     8. Riickspulung des Films                    8. Rebobine la pelfcula
                        Nachdem Sie einen Film vollstiindig     Despu6sde haber utilizado un carrete
                                   belichtet haben, dr[icken Sie auf den      comp leto  de  pel fcu la,  apriete  el
                                Filmrrickspulknopf,stellen den Film-      bot6n de rebobinado, levante la Pa-
                              ruckspulhebelhoch und drehen ihn in       lanca de reboblnadode la pel'fculay
                               der Pfeilrichtung,bis Sie einen leich-      dele vueltas en la direcci6n indicada
                                 tbn Widerstand spriren. Nun  ist der       por  la flecha y  enrolle la pelfcula
                               Film  in die Kassettezuruckgespult.     hacia atrds dentro del cartucho, hasta
                           Sodann   off nen  S ie  d ie  Kamera-     que sienta una ligera tensi6n. A con-
                        R u c k w a n d . i n d e m S i e d e n F i l m r u c k -      tinuaci6n levante el cierre de la tapa
                              spulhebelanhebenund nehmen lhren       posterior totalmente, hasta que se
                                belichtetenFilm aus der Kamera.          abra dicha tapa. Entonces saque el
                                                                             cartuch o.


18      ai*;r*.i*;r*r:*                 .. ,dr-            .: ^;           ,  ;#Sdj**.             -  ji.;16;fu,                   ,&erd*t                                                             "*    l" L *   * d*&&"           ,-
View original page 12Page 13 · Read text
www.orphancameras.com
        BATTERY INSERTION       CHARGEMENTDES PILES
                 1. Open the Cover                            1. Ouverture du logement
               lnsert a coin  into the  slot of the               I n t r o d u i r eu n e p i d c ed e m o n n a i ed a n s
              Battery Chamber Cover €D located        la fente du couvercle @ et tourner
             on the upper rear side of the body      dans le sens contraire des aiouilles
            and turn it counter-clockwise.            d'une montre.
                 2. Load the Batteries                         2. Mise en place des piles
                lnsert two silver oxide batteries, one        Introduire 2  piles d oxyde d'argent
             on top of the other, into the battery      dans le logement - l'une sur I'autre le
            chamberwith the plus sides(+) facing      signe (+) 6tant tourn6 vers l'ext6rieur
             outward (toward the batterv chamber       (du c6t6 du couvercledu logement)-
              cover) and close the cover.                    et refermer le couvercle.

        EINLEGENDER BATTERIEN   CARGUE LAS PILAS
                 1. Offnen' des Batteriegehdusedek-      1. Abra la tapa
                   kels                                 lntroduzca una moneda en la ranura
              Entfernen Sie den Deckel des Bat-      de la tapa del orificio de ubicaci6nde
             teriegehduses@ ,  indem Sie eine       las pilas @, situado en la parte tra-
            Mdnze in den Schlitz oben an der      sera superior del cuerpo de la mdqui-
           R t i c k s e i t e   d e s  K a m e r a g e h d u s e s   na y dele vuelta en sentido contrario
             stecken und gegendie Uhrzeigerrich-     a las agujasdel reloj.
              tung drehen.                                  2. Cargue las pilas
                 2.  Einlegen der Batterien                lntroduzca dos  oilas de 6xido de
                                                            plata, una encima de  otra, en  la             Legen Sie zwei Silberoxydbatterien
             und zwar hintereinanderin die Bat-     cdmara de pilas con el lado del polo
                                                          positivo (+) hacia afuera (hacia la             teriekammerein. BeachtenSie dabei,
            daB der Pluspol (+) bei beiden Bat-      tapa de la cdmara de pilas) y cierre la
                terien nach auBen(gegenden Batterie-      tapa.
             kammerdeckel) zeigt. Nun befestigen
               Sie den Deckel wieder.
                                                                                 1 9
           *.,i"g'-...-     .  , ..*d&
View original page 13Page 14 · Read text
www.orphancameras.com
                                          3. Check the Batteries                        3.  Batteriepriif ung
                                Turn the Shutter SpeedSelectorDial       Stellen  Sie  die  VerschluBzeiten-
                   @ to B and set the Aperture selector     Wdhlscheibe @  auf  B  und  den
                           R i n g @   t o w i d e o p e n ( 1 . 8 ) . N o w ,       Blendenring @  auf  die  weiteste
                                     point the camera toward light, look     O f f n u n g  ( 1 . 8 ) . N u n d r e h e n S i e d i e
                                 through the  viewfinder and press     Kamera zum Licht und drLlckenSie
                                        slightly the Shutter ReleaseButton        leicht  auf  den  Ausloseknopf @.
                            @.  tt the needleswings upward, the     Wenn  die Nadel nach oben aus-
                                      batteries have been inserted properly       schliigt, sind d ie Batterien korrekt
                              and are f unctioningcorrectly.                 eingelegtund funktionieren.

                                The  silver oxide  batteries will          Die Silberoxydbatterien haben ge-
                                   normafly last for 1 year.                 wohnlich eine Lebensdauervon
                                                                    lf you are not using the camera        einem Jahr.ftt                                      for  a  long while, remove the        Wenn Sie die Kamera ldngereZeit
                                         batteries and keep them where it           nicht benutzen, nehmen Sie die
                                                  is dry.                                     Batterien heraus und bewahren sie
                                Be sure to wioe both ends of the         an einem trockenen Platz auf.
                                         batteries clean with  a piece of          Die  Batterien  sollten vor dem
                                          cloth before loading. Poor contact         Einlegenin die Kameramit einem
                              may result if the ends are unclean.         sauberen,trockenen Tuch abgerie-
                                                                    lf you are buying new batteries,        ben werden, damit guter Kontakt
                                   be sure to specify 1.5V Eveready          gewdhrleistetist.
                                   S-76E, Mallory MS-76H or UCAR        Wenn Sie sich neue Batterien kau-
                                      5 - 7 6 E ( i n E u r o p eo n l y ) .                     fen,  bitte  verlangen Sie  1 ,5V
                                                                        Eveready S-76E, Mallory MS-76H
                                                                          oder UCAR S-76E (nur in Europa).


   20
                                                                                         r."-**dil:*d!fu;-,-.,.*"&"            -"- ."'-****
View original page 14Page 15 · Read text
www.orphancameras.com
                           FI LM LOADING              E I N L E G E ND E S F I L M S
                                     1. Open the Camera Back                    1. Offnen der Kamera-Ri,ickwand
                                L i f t   t h e C o m b i n a t i o n F i l m R e w i n d      Z i e h e n   S i e   d e n   k o m b i n i e r t e n
                           Crank - Camera Back Lock @ fully        Riickspulhebel    KamerarLlckwand-
                            up  until the Camera Back @ auto-       verschluB @ soweit heraus, bis sich
                                matically snapsopen.                        die Rrickwand @ offnet.

                                     2. Load the Film                             2. Einlegendes Films
                                  Insert the  cartridge into the Film      Legen Sie die Filmkassette in die
                         Chamber @  with  the spool head      F i l m k a m m e r @ e i n u n d z w a r s o , d a B
                                 (projection) pointing to the bottom       der sichtbareSpulenkern nach unten
                                    of the camera,push down the Combi-        zeigt. Nun  drtlcken Sie den  Ri.ick-
                                n a t i o n F i l m R e w i n d C r a n k - C a m e r a      spulhebel @ herunter, bis die Film-
                           Back Lock @  to engage the Film       rticksoulachse @  einrastet. Sodann
                        R e w i n d S p i n d l e @  w i t h   t h e  f i l m       ziehen Sie die Filmzunge aus der
                                spool. Pull out the trimmed end of       Kassette und stecken den Film bis
                                the film and insert it down to the     zum untersten Ende in den Schlitz
                             bottom end  into  the  slot  of  the       der Aufwickelspule@.
                             T a k e - u pS p o o l @ .


22
                          "d$& i:&$; s 6;L4&                 @s:+tt*litb[ib                      ,*lo***e**dflhu-          -" 4so$f Aesi                      ,,***efu;*gr.*
View original page 15Page 16 · Read text
www.orphancameras.com
                                     3. Close the Camera Back                    3. SchlieBen der Kamerariickwand
                        w i n d  t h e  f i l m a   l i t t l e w i t h  t h e F i l m       TransportierenSie den Film mit dem
                           Advance Lever O  and engage the       FilmaufzughebelC  bis beide Seiten                                                                           der Perforation in die Zahnrader ein-                                  perf orations on both edges of  the                                                                          gerastetsind. Beachten Sie bitte, daB
                                   film with the sprocket teeth. Be sure       der Film sich zwischenden Fuhrungs-
                                the  f ilm is properly inserted between      schienen @  befindet. Nun klaPPen
                                                              t h e G u i d e B a i l @ . N o w , P r e s sd o w n       Sie die Kameraritckwandzu, bis sie
                               the Camera Back until  it closestight-       horbar einschnappt.
                                                                              l y w i t h a c l i c k .                            o  Wenn   die   FilmrticksPulkurbel
                                                    r       l f  t h e F i l m R e w i n d C r a n k t u r n s i n         beim Drehen des Filmaufzughe-
                                    the opposite direction of the ar-           bels @  sich entgegen der Pfeil-
                              row as you wind the Film Ad-           richtung bewegt, bedeutet dies,
                               vance Lever @,  it means the fi lm         daB der  Film  richtig eingelegt
                                  \         has been loaded proPerlY.                wurde und ordnungsgemiiBtrans-
                                                    r  The odd numbers of  the Film            portiert.
                                    \       Counter @  are rePresented bY            r   Die ungeraden Zahlen des Bild-
                                   white dots.                               zZihlwerks@ werden durch weiBe
                                                    r  To allow vou to take quick shots         Punkte angezeigt.
                                          in succession,the Film Advance             .  Um schnellesAufnehmen zu er-
                                Lever @ will be back with a slight         moglichen,kehrt der Filmaufzugs-
                                      latitude. Pressit all the waY back          hebel O  nicht in seine Normal-
                                       after you have finished shooting.           stellung zuriick.  Er  sollte aber
                                                                    nach Beendigungder letzten Auf-
                                     4. Set the Frame Counter @  to   t         nahme zurtickgeschobenwerden.
                                      (the first white dot before the           4.  Einstellung Uei eitUzahlwerks @
                             number 2)                                 auf 1 (der erste Punkt vor Num-
                          Wind the Film Advance Lever O  all         mer 2)
                                 the way  to  the  right and press the        Betiitigen Sie den Filmaufzughebel
                               Shutter Release Button @  . Do this        bis zum Anschlag nach rechts und
                                twice, and on the third winding, the        drticken Sie auf den AusloseknoPf
                                           first white dot before the number 2      @. Sie mrissen2 Blindbelichtungen                                                                machen, bei dem dritten Aufzug des
                                       will  move opposite the  triangular       Filmtransporthebels  erscheint  der
                              mark. You are now ready to take the        erste weiBe Punkt  vor  Nr.  2  im
                                           first picture.                              Fenster des Bildzdhlwerks neben der
                                                                     Dreiecksmarke. Die Kamera ist nun
                                                                               fUr die erste Aufnahme schuBbereit.
24                                                                                                                                   .r$u*r.s+**&nil&ia.l:l-                 --,,
View original page 16Page 17 · Read text
www.orphancameras.com
  SETTINGTHE FILt\4SPEED             EINSTELLUNGDER
      Lift the top of the Shutter Speed Selector Dial @     F I L M E M P F I N D L I C H K E I T
    and turn  it to the left or right until the film speed                                                 Heben Sie die VerschluBzeiten-Wahlscheibe@ an,   number you want appearsin the center of the ASA                                                   und drehen Sie sie nach rechts oder links, bis die
    F i l m S p e e dI n d i c a t o rW i n d o w @ .                                                       gewtinschte Zahl der  Filmempfindlichkeit in der
    The calibrations between the ASA numbers repre-                                                             Mitte des Filmemofindlichkeitsfensters@ erscheint.    sent the following numbers: (I)                                                        Die einzelnen Striche zwischen den bezeichneten
    o    lf you are using a film marked for DIN speed,    ASA Nummern bedeuten folgende Empfindlich-
        refer to the f ollowing conversiontable. (II)              keiten: (I)
    o  Be sure to set the  f ilm ASA speed before setting      o  FLir die DIN-Empfindlichkeit gilt folgende Um-
        the shutter speed, otherwise the selected shutter         rechnungstabelle: (II)
      speed will move out of position while you are      o  Beachten Sie, daB Sie die Filmempfindlichkeit
        turn ing the d ial.                                                     immer zuerst einstellen, da sich beim Drehen der
                                                      Wahlscheibeauch die von lhnen gewiihlte Ver-
                                                           schluBzeit iindert.
                                                 (r)
                                                                        g2 Q    64 80   125lm   250320  5m 640 10m1250 20m25m
                                                               r    |       |       ll      .1.1.
                                                                           50     100   m    M     8OO   1600 32OO

                                                                              (II)
                                                   A S A  25 3 2  40  50 80  100 m   2fi  3n  zl00
                                                       D I N   1 5 1 6 1 7 1 8 20  2 1 24  25  26 27


26
     n*elee&a*-                i,:*r--r..'-.r;raii;*l##.                                                                                                                              .*;*kis-ed;*'q^,i*                                       "    j  ir' e*                .
View original page 17Page 18 · Read text
www.orphancameras.com
  SETTINGTHE SHUTTERSPEED         EINSTELLUNGDER VERSCHLUSSZEIT
   T h e  l e t t e r B a n d t h e n u m b e r s 1 , 2 , . . . . 1 5 0 0 o n  t h e      Der BuchstabeB auf der VerschluBzeitenwahlscheibe
    Shutter Speed SelectorDial represent"bulb", 1 sec.,     bedeutet "Ball"   (fir Zeitaufnahmen) und die Num-
    1/2 sec. etc. up to 111500 sec. They indicate the    m e r n 1 , 2 . . . . 1 5 0 0 s i n d d i e V e r s c h l u 8 z e i t e n1: S e k . ,
    length of time the f ilm will be exposedto light.           1 / 2 S e k . u s w . b i s 1 / 1 5 0 0 S e k .
    This camera allows you to set exposureeither by the      Die Belichtungszeitsetzt sich immer aus der Ver-
    shutter speed or by the size of the lens opening.     schluBzeitund der Blendenoffnung zusammen.Es ist
   However, it is best to set the shutter speed first. For      jedoch ratsam,als erstesdie VerschluRzeiteinzustel-
   example, the shutter speedwould be f rom 11125to       len. FLlrAuBenaufnahmensind die gebrduchlichsten
    1/25O sec. if you are shooting outdoors, or from      VerschluBzeiten11125 Sek. und 1/25O Sek., wiih-
    1/30 sec.to 1/60 sec.,if you are shooting indoors.        rend frjr Innenaufnahmen,je nach Lichtverhdltnissen
   To set the shutter speed,f irst turn the Shutter Speed      u n d F i l m e m p f i n d l i c h k e i t ,l d n g e r e V e r s c h l u B z e i t e n
    Selector Dial while pressingdown on  it slightly and      benotigt werden.
    set the number you want oppositethe red dot on the    Um die VerschluBzeiteinzustellen,muB die Wahl-
   camera bodv.                                         scheibe @   -  leicht nach unten gedruckt- gedreht
    o  Use B (bulb) if the exposurewill take 2 seconds     werden und sich die von lhnen gewunschteZeit dem
        or longer.                                          roten Punkt gegenuberbefinden.
    o  There are no intermediate settings between the      o   Frlr VerschluBzeitenldnger als 1 Sekunde muB
      numbersindicatedon the dial.                             "8"  (Ball) eingestelltwerden.
    o  60  is marked in red to remind you that  it is the      o  Nur  die angegebenenVerschluBzeitenkonnen
      speedusedf or shootingwith electronicf lash.           verwendet werden, Zwischenzeiten sind  nicht
    o  Excepting 1/1500 second, each shutter speed is       mo glich.
        either one-half or twice the speed of the shutter      o  60  ist in Rot markiert, um darauf hinzuweisen,
      speed next to   i t.                                daB diese VerschluBzeitfLlr Elektronenblitz be-
                                                                   nutzt werden muB.
                                                           o  Mit Ausnahme von 1/1500 Sek., ist jede Ver-
                                                               schluBzeit entweder die Hdlfte oder das Doppelte
                                                              der danebenliegendenZeit.


28        ,bfu**e-s*-     .       :&rc;;^.,  . *;;*-,.."-dairaftKd?*&i&sie,.                 .x,lu-g**fu.                                                                           , M f
View original page 18Page 19 · Read text
www.orphancameras.com
                 FOCUSTHE LENS AND       SCHARFEINSTELLUNGUND
                 FRAME YOUR PICTURE      BILDAUSSCHNITT
                                     1. Focus the Lens                          1. Scharfeinstellung
                                                     ( 1 ) L o o k   t h r o u g h t h e V i e w f i n d e r a n d    (1 ) SchauenSie durch den Sucher,und
                                    point the camera so that the main           . richten Sie lhre Kamera auf das
                                   subject is seen through the small       Motiv, so daB der Hauptbildgegen-
                                                                      stand sich im Mikroprismakreisim                                microprism center spot.                                                                   Zentrum des Mattscheibenbildesbe-
                                    (2) Spl it-imageFocusing                                     fi ndet.
                                Turn  the Focusirig Ring @  until    (2)Scharfeinstellung durch  Schnitt-
                                     the upper and lower segments of         bi ldentfern u ngsmesser
                                   the split image in the microprism      Drehen Sie den Scharfeinstellungs-
                                   center spot converge to  form  a       ring  bis die oberen und unteren
                                    singleimage.                            Teile  des  Schnittbildes in  dem
                                    (3) M icroprism Focusing                   Mikroprismakreisein einziges Bild
                                                                   weroen.
                                T u r n   t h e F o c u s i n g R i n g u n t i l  t h e    (3) M ik roprismatische  Scharfeinstel-
                              image in the microprismcenter spot                                                                                                                                                                                           l u n g
                               appearssharp.                      Drehen Sie den Scharfeinstellringso
                                    (4) You can also focus with any part of        weit,  bis das Mikroprisma scharf
                                   the  area surrounding the  micro-      und klar erscheint.
                                  prism center spot. This method  is    (4) Sie konnen auch mit dem Gesamten
                                   especially useful when  shooting    M a t t s c h e i b e n - B i l d f e l d e s  e i n e
                                                                            Scharfeinstellung erzielen.  Diese                                     with aperture stopped far down.                                                                 Methode  ist besondersdann anzu-                                    (5) The white numberson the Focusing                                                                wenden, wenn man Aufnahmen mit
                                 Ring are for meters and the green      geringerBlendenoffnungmacht.
                             numbers are tor feet. The distance    (5) Die weiBen Zahlen auf dem Scharf-
                               can also be set by visualjudgement       einstellringsind Angaben in Meter,
                                                                      f or qu ick shooting.                     wiihrend die grrinen Zahlen Anga-
                          When shooting extreme close-ups.     ben in FUB sind. Frir schnelleAuf-
                                    the distance from subject to Film     nahmen kann die Entfernung auch
                                Plane Mark @ must be p;ecisely     nach AugenmaB eingestellt werden.                                                                               Falls Sie extreme Nahaufnahmen                              measuredwith a tape measure.                                                           machen wollen, so muB die Ent-
                                                                      fernung zwischen Motiv und der
30                                                                  Filmebene genau gemessenwerden.
       .*xsik**i$&i&i!'               .*:i,...,    .ku;lJfifuisd$**Sear-                                   '"igiik;.          b.          " *@r
View original page 19Page 20 · Read text
www.orphancameras.com
     2. Frame Your Picture                                         2. Cadrage
    The Viewfinder will  let you see 92%oof the entire      Le viseur vous permet de voir 92l1OO de l'image
    view that will registeron your film so that you can      enregistr6esur le  fi lm. Vous pouvez donc utiliser
    go ahead and use the whole length and width of the      sans crainte toute la longueur et largeur de votre
    area in the Viewf inder to f rame your picture.             viseurpour cadrervotre image.
    o  Eyesight Adjustment Lens                            o   Lentille' edes t correction d votre vue
    The Viewfinder is provided with an eyepiece for       L ' a p p a r e i l            l i v r 6 a v e c u n  o c u l a i r e p o u r u n e
    those with normal vision. lf you are near sighted or      personneayant une vue normale. Si votre vue n'est
     far sighted, be sure to use an EyesightAdjustment      pas parfaite, il faut utiliser la lentille de correction
    Lens, otherwise it will be extremely diff icult for you      autrement il vous sera difficile de faire une bonne
     to focus the lens precisely.Four different Eyesight     mise au point. ll ex iste 4 lentilles:+2, +O,5,-2,5 -4
    Adjustment Lenses are supplied as optional acces-      dioptries.
     sories:+2,+O"5, -2.5 and -4 dioptor.

     2. Wahl des Bildausschnittes                                 2. Encuadre su fotograffa
         f m Sucher sehen Sie 92% des Bildes, das auf lhrem       El visor le permitird ver el 92o/ode toda la visi6n que
    Film registriertwird. Sie konnen also getrost lhr Bild       registrardsu pelfcula de forma que puede utilizar
     bis in die duRersteriWinkel hinein komponieren.          toda  la anchura y  profund idad de  la zona que
    o  Sqhschdrfenadapter                               observaen su visor para encuadrarsu fotograffa.
    Der Sucher  ist  mit  einem Okular  ftir normale      o  Lente de ajuste para correcci6n de la visi6n
    Sehschdrfe ausgestattet.Wenn Sie kurz- oder weit-       Al visor se le proporciona un ocular para los que
     sichtig sind, sollten Sie unbedingt von dem als      tienen vision normal. Si es Vd. de vista corta o de
    Zubehor erhSltlichen AusgleichsadapterGebrauch      vista lejana, asegIresede utilizar una lente con aj uste
    machen,da die Scharfeinstellung sonst schwierigsein      o correcci6n de visi6n, ya que si no  le serd muy
    kann. Diese Adapter sind in 4 Dioptrien erhdltlich:        dificil  enfocar con  precisi6n el  objetivo. Como
     +2, +O,5, -2,5 und -4.                                  accesoriosa opci6n se suministran cuatro lentes de
                                                         correcci6nde visi6n. +2, +O,5, -2,5 V -4  dioptrias.


32
                        *:"*;ia+lta.ixA                                                   . ,s$J**.-..aiai;..                                 : -;iiili!,iiixoggsadg*ir                                         dii".-.     ,-.:,rdba*,        -,              -io,ti                      -,.";,"         -   .;..-d
View original page 20Page 21 · Read text
www.orphancameras.com
CORRECTEXPOSURE
1. Pressslightly the Shutter ReleaseButton              exposure meter  is that   it covers a wide range of
P o i n t  t h e  c a m e r a a t  y o u r s u b j e c t w h i l e   l o o k i n g     exposure valu'es.lf you are shooting with Fujicolor
through the viewfinderand pressslightly the Shutter      F l l   ( A S A 1 0 0 )  f i l m u s i n g a S O n r m F 1 . 4  l e n s ,f o r
ReleaseButton @ partway down. The meter needle     example, the rangecoveredwould be EV1 - EV1B.5
on the right hand side of the viewf inder will move up             f f / 1 . 4 1 s e c .- f  1 1 6 1 1 1 5 0 0s e c . ) .l f  t h e l e n si s 5 5 m m
f r o m t h e ( - ) p o s i t i o n .                               F 1 . 8 . t h e r a n g e i s f r o m E V 1 . 7 -  E V 1 B . 5 ( f / 1 . 8 1
2. Turn the Aperture Selector Ring                  S € c -.   f / 1 6 1 / 15 O Os e c . ) .
Pressslightly the Shutter ReleaseButton and turn        ln addition, the full aperturemeteringsystem of the
the Aperture Selector Ring @ until the needlein the       Fujica ST705 lets you focus with the lenswide open
viewfinder moves into the center of the indentation.     so that the viewing image through the viewfinder
You now have the correct exoosure.                   remains always bright. lt also enablesyou to check
3.   lf the Needle does not move into the Center of       the depth of field for the apertureyou haveselected
   the Indentation                                   by pressingthe Depth of Field PreviewButton. (See
lf the meter needledoes not move into the center of       p a g e5 9 , " U t i l i z i n g t h e l e n sd e p t h o f f i e l d " . )
the Indentation by turning the Aperture Selector     The chart on page 53 shows the light measuring
R ing, you will have to changethe shutter speed.         range of  the Fujica ST7O5's exposure meter. A
o    lf the needle is near the (+) side, increasethe      bu ilt-in safety device holds the operation of the
   shutter speed. (Example: lf the shutter speed is      Shutter SpeedSelectorDial within the rangegiven in
   1 1 1 2 5s e c . ,t u r n t h e d i a l t o 1 / 2 5 0 s e c . ) .               the chart.
o    lf  the needle is near tfre (-)  side, reduce the
   shutter speed. (Example: lf the shutter speed is
   11125sec..reduce it to 1/60 sec.).
4. Wide MeasuringRange
Since the light that is measuredis the averagelight
 i n t e n s i t yf a l l i n g o n  t h e  f o c u s i n gg l a s s ,t h e r a n g eo f
measurementmust differ dependingon the speedsof
the lens and film. A  noteworthv feature of  this


                                                                                       33
                                  ,;gs&atu.-
View original page 21Page 23 · Read text
www.orphancameras.com
   EXPOSITION
     1. Mise en circuit du posemitre                    FUJICOLOR F-tr (100 ASA) et un obiectif 50mm
    Dirigez l'appareil vers le sujet tout en regardantdans      F1 ,4, la gamme couverte par  le posemdtre est de
          l e v i s e u r e t  a p p u y e z d  d e m i  s u r   l e b o u t o n d u      E V 1 d E V 1 B , 5 ( f / 1 , 4 - 1 s e c . - f  1 1 6 1 / 1 5 0 0 d s e c . ) .
    d6clencheur@ trds l6gdrement.L'aiguille du pose-     Pour un objectif 55mm F'l,B la gamme est de EV1,7
    mdtre, qui se trouve dans la partie droite de votre     -EV1B,5  ff11,8 1 sec.-f /161/1500d sec.).
    viseurse d$olaceravers le haut.                      En outre, le systdmede mesured pleine ouverturedu
     2. R6glagedu diaphragme                         FUJICA ST705 vous permettra d'effectuer la mise
    En appuyant ldgdrementsur le bouton du d6clen-     au point avecundiaphragmegrandouvert pour que
    cheur et en tournant la bague de diaphragme @       votre image dans le viseur reste toujours claire. ll
     l'aiguille se d6placeradans la zone de mouvement.     donne 6galement la possibilit6de contrdler la pro-
    Lorsqu'elles'arrdteradans le centre l'expositionsera     fondeur de champ pour le diaphragmes6lectionn6en
    oonne.                                           appuyant sur le bouton de v6rification de la pro-          l'
     3. Casextr€mes                                    fondeur de champ @.  (Voir page 61 , "La  pro-
     Si l'aiguillen'arrive pas d se stabiliserdans le centre      fondeur de champ").
    de la zone de mouvement, il faudra changer la vitesse     Le tableau sur page 53 montre la plage de mesure du
    d'obturation.                                     posemdtredu FUJICA ST705. Un cran de s6curit6
    o  Si l'aiguille est prds du  (+) augmenlezla vitesse     maintient le fonctionnement du cadran de s6lection
       (Exemple: si la vitesseest 1/'l 25 sec, tournez le      des vitessesen relation avec la gamme donn6e par ce
       cadrand 1/250 sec.).                                tableau.
    o  Si l'aiguille est prds du  (-)  r6duisez la vitesse
       (Exemple: si la vitesseest 1/125 sec,r6duisez-lad
        1 /60 sec.).
     4. Grande plage de mesure
    Etant donn6 que  la lumidre mesur6e repr6sente
     l'intensit6moyenne de lumidre tombant sur le verre
    de mise au point, la plage de mesure varie selon la
     sensibilitddu film utilis6 et la vitessed'obturation.
    Un des avantagesde ce posemdtreest qu'il a une trds
    grande sensibilit6. Par exemple: vous utilisez un                                   l36
               ..Jd*q*.;*ss;r.!i,,,",*ilidk@i,..                       :,;i*&;;;:-;';s*acit&*a;               .*ro*,*!*lail**L**                                                      ',"41&i**              ;4.         kibr    ^.                                                                                                                                                                                                                 "'                                                            "-J
View original page 23Page 25 · Read text
www.orphancameras.com
                R E W I N D I N GF I L M A N D       APRES LES PRISESDE
              UNLOADINGFILM           VUES
                            After vou havef inisheda roll of f ilm,      Votre  film  termin6, suivez bien les
                        rewind it back into the cartridgeand      recommandations suivantes.-v                          take it out of the camera.                     1. D6brayage du systime d'entraine-
                               1. Press the Film Rewind Button           ment
                               First, press down  ttre Film Rewind             ll faut d'abord appuyer sur le bouton
                         Button @  located on the underside   @  situ6 sur la partie inf6rieure de
                               of the camera. Once you have pressed       I'appareil. Rel6chez imm6diatement
                     down this button, you can let  it go       votre  doigt, ce bouton  restera en-
                      because it  will stay depressed.The      clench6, et l'axe d'entrainement du
                         Sprocket Wheels @ are now f ree.            film @ sera llbre.

              NACH DER BELICHTUNG     DESPUESDE TOMAR SUS
                                         I H R E SF I L M S             FOTOGRAF I AS
                    Nachdem Sie lhren Film  belichtet     Una vez que ha terminado un carrete
                        haben, wird er in die Kassettezurtick-      de pel icula, vuelvaa rebobinarloen el
                         gespult und aus der Kamera genom-      cartucho y sdquelode la cdmara.
                      men.                                            1. Apriete el bot6n de rebobinado
                               1. Driicken Sie auf den  Riickspul-         de la pelicula
                            knopf                                                        En primer lugar apriete el bot6n de
                       Zu ndchst  drticken  Sie  auf  den      rebobinadode pelfcula @ situado en
                       Ruckspulknopf Q), der sich an der         la parte inferior de la cdmara. Una
                          Unterseiteder Kamera befindet. Ein      vez que ha apretado este bot6n,
                         einmaliger kurzer Druck gentigt,der      puede soltarlo porque permanecerd       I
                       Knopf bleibt in der Positionund gibt      en esta posici6n. El eje dpntado 33
                           die Transportzahnrader3$ frei.            estdahora libre.


                                                                                           4 1

                                                                                                                                          *6lM!Lc                    . ,..   .  ..*pr*:*FieL.;.*i*:,4,-                                                                                                   ; / : - r - -    - :   - . ! i                                                                            ll
View original page 25Related documents and language editions
From the M. Butkus archive. Original publisher and archive notices are retained.
Check the model and edition against your equipment.
PDF verified 2026-10-10.