Film cameras
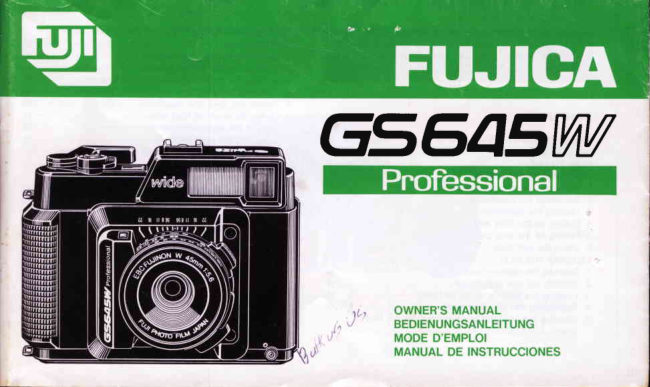
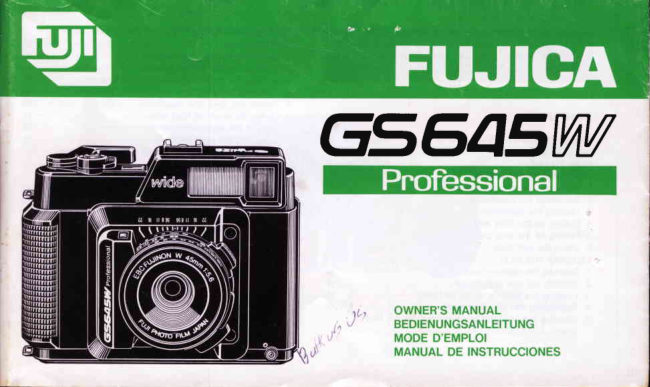
Fujica Fujifilm GS645W User manual
User manual for Fujica Fujifilm GS645W. 25 pages in German, French, English. Read the original PDF, download or print a copy without registration.
25 pagesGerman, French, English2.0 MB PDF
Loading your manual…Open PDF directly
Document details
- Brand
- Fujica
- Model / document
- Fujica Fujifilm GS645W
- Document type
- User manual
- Language
- German, French, English
- Pages
- 25
- File size
- 2.0 MB
- Category
- Film cameras
- Document date
- Not specified in catalog
Search available document text
Find a term, then jump to its page in the original PDF. Image-only pages may not be searchable; check the PDF for exact wording and diagrams.
Page 3 · Read text
English(Pages10-221
See illustrationswhile you read this manual.

Deutsch(Seite23-36)
OrientierenSie sich beim DurchlesendieserAnleitungbitte an den Abbildungen.
Frangais(Pages37 -491
Se reporteraux illustrationsen lisant le mode d'emploi.

Espafrol(Pdgina50-62)
Consultelas ilustracionesmientraslee este manual.


                           www.orphancameras.com
View original page 3Page 14 · Read text
NAMES OF PARTS                    @ Film Wind Sensing Roller                                                                                                                       -a                              @ Pressure Plate
@ Shutter Speed Setting Mark                @ Spool PressureSpring                                                                                                                                                                                                                   (,=@ ShutterSpeed Ring                   @ Spool Knob Release Button                          UJ
@ ApertureRing                      @ Take-up Spool
@ DistanceRing                                  SPECIFICATIONS
@ T(Time) Button
@ Shutter Release             \                               o  Classification
@ Accessory Shoe                                         6 X 4.5cm format, interlens shutter camera.
@ ExposureCounter                                     o  Film
@ Shutter Release Lock                                  120 (15 exp.) and 22O (3O exp.) roll film.
@ Film Advance Lever                                   o  Lens
@ Take-up Spool Knob                             EBC Fujinon W 45mm, f /5.6,5 components,6 elements,
@ Battery Compartment Cover Screw                              76' angle of view, 49 d mm screw-in filter.
@ Battery CompartmentCover                             o  Shutter
@ Tripod Socket                                         Copal No.00 mechanical interlens shutter; T, 1 - 1/SOO
@ Film Loading Knob                                              sec., X synchronization;provided with self-timer.
@ Strap Lug                                            o  Viewfinder
@ Depth of Field Scale                                    Reverse Galilean bright frame with parallax correction
@ ViewfinderWindow                                       mark; 0.45x magnificationi90o/ofield of view at 1 meter,
@ Camera Back Lock                                       87o/oat infinity; 3 LED exposure indicators.
@ Sync Socket                                         o  Exposure Control
@ ViewfinderEyepiece-                                        External light metering (by manually adjusting 3 LEDs);
@ Film Selector                                       ISO/ASA 25  - 1600 film-speed setting with 1/3-step
@ Film ReminderSlot                                                  click stops; EV 5  - 18 coupled range with ISO/ASA
@ PressurePlate Indicator                                100 film; GPD photocell (incorporated in vieMinder);
@ Focal Plane Rail                                         two LR44 1.5V alkaline-manganesebatteries; pressing@ Film Start Mark
View original page 14
Page 15 · Read text
II
m            the shutter release halfway down turns on power switch.  HOW TO USE        o  Film Advancezotr           Film advance lever on camera top, single stroke winding,   READYINGTHE CAMERA@
I          184' winding angle, 28' stand off, self-cockingshutter,
         12O/22Oroll film switchover.
        o  Others                                                         1. Attaching the shoulder strap
        1m - co visual focusing, click stops at 2 and 5 meters,        (Fig.1) A. Buckle
           provided with palm grip, switchable pressure plate for               B. Hoop                      'f           20 and 22O roll film with 12O.22O indicator in camera    Pass one end of the strap through the camera's strap lug,
           back.                                              pass it back through the hoop and buckle and adjust the
        o  Dimensions                                               strap length with the buckle. Do the same with the other
        147mmW x 114mmH X 76mm D                      end of the strao.
        o  Weight                                              o Move the hoop when you pass the strap end through it.
          680 g. (without batteries).                            The strap will pass through it easier if you do.
        o  Accessories (included)
            Soft case, lens hood, shoulder strap.                          2. Attaching the viewfinder eyepiece (Fig. 2)
        Notice:                                          ,                        The viewfinder eyepiece is screwed into the eyepiece
         Specifications are subject to change without notice.            socket.
                                                              o The viewfinder eyepiece that comes with your camera
                                                                                          is designedfor people with normaleyesight.lf you can-
                                                                        not see clearly through it, use an eyepiece that fits your
                                                                      eyesight.
                                                                                                                                  lf you are nearsighted, use an eyepiece with a minus
                                                                          diopter,and if you are farsighted,use one with a plus
                                                                             diopter.
                                                              o The eyepiece socket of your GS645W has a 19mm
                                                                 diameterand a O.75mm-pitchscrew thread. lt will take
                                                             any commerciallyavailablediopter-adjustableeyepiece,
                             www.orphancameras.com12
View original page 15Page 16 · Read text
ji
   rightanglefinder,etc.                                           4. Putting on the filter and lens hood                                 Ea
    Fuji does not supply these accessories.                          (Fig. 6)  A. Lens hooo
                                                                      B. Filter3. Loading the batteries (FiS.g)                          To mount the filter or the lens hood, just screw it into the          ozUJ
With a coin, loosen the battery compartment cover screw      front of the lens banel. (Fig. 6)
and remove the battery compartment cover. Insert the two      o  Filters are commerciallyavailable.Be sure to ask for
batteries that come with your camera in the battery com-      49mm filters.
partment,plus and minus ends correctly as illustratedin      o Use the lens hood that comes with your camera.
the battery compartment,then replace the cover and tight-
en the screw. (Figs.3, 4, & 5.)                                    5. Putting on the lens cap
 o Be sure to use either two LR44 alkaline-manganeseor          (Fig 7)  A. Lens cap
   two SR44 silver oxide batteries.                                                       o The lens cap is fitted into the lens hood. Just press in
 r The battery power required to operate your camera's        the two projections on the lens cap, fit the cap into
   exposuresystem correctly is 2.4 volts or more. lf the LEDs         the lens hood, then release the projections.That's all.
   in the viewfinderturn on, the batteriesare producingsuf-       To prevent accumulating dust and debris on the lens
   ficient voltage,but if they do not turn on, you'll have to         glass, make it a habit to put the lens cap on as soon
  change the batteries.                                     as you are through taking pictures. (Fig. 7)
a Do not use an alkaline-manganesewith a silver oxide,        Tiny abrasion marks will develop on the lens surface
   or an old with a new battery because such pairingcan                if you are not careful when you wipe off dust and debris
   result in battery leakage or ruptured battery casing and        from  it with a silicon cloth or other similar material.
  cause irreparabledamage to your camera.                    Caution is required because abrasion marks and con-Caution:                                                          taminantson the lens glass will reduce the sharpness
o The batteries can be extremely dangerous if swallowed.         of the lens by an appreciableamount.
  Do not leave them within reach of little children.           o YoUrcamera is designedfor taking pictureswith the lens
o Discarded batteries should be disposed of as incom-       hood on. The lens cap is therefore made for fitting into
   bustibles.                                                  the lens hood.
                                                 Be careful when you clip the lens cap directly into the
                                                                lens barrel front because it can easily fall off.
                                                                              13
View original page 16Page 17 · Read text
6. Using the soft case                                     (Pressure Plate)
        o The camera is olaced in the soft case with the lens         lf you are using 120 film, press down the pressure plate EtzotrCN        hood on. and the case is closed with its zip and stick.    with your fingers, slide  it and  fit the hole on the side
            fasteners.(Fig. 8)                                  marked "'120"to the center peg, and  if you are using 220
       Use it when carrying the camera about or when putting it     film, fit the other hole to the center peg.
       away because it is a good protectionagainst dust, abrasion,   The pressure plate indicator in the camera back (below
         nicks,and dents.                                          the film reminder slot) will show you which side of the
        o The camera will fit easier into the soft case if the lens     pressureplate you have set. (Figs.12, 13)
          hood is folded back toward the camera bodv as shown     {Film Selector>
              in Fig. 9.                                  22Orollf i |m"....'.................30exposures
                                                              1 2 0r o l lf i l m. . . . ' . . . . . ' ."...' . . . . . . 51 e x p o s u r e s
     LOADTNGTHE F|LM                       i                       120 half-lengthroll fi|m.........7exposures                                                                     i                                                              a Be sure to move the pressure plate to the correct side                                                                       I            u'
          1. Openingthe camera back (Fig.10)                       because the film  will not move into the exact focal                           ,iw       To open the camera back, erect the camera back lock       plane if you don't. (120roll film is attachedto an opaque
       and press it down toward the camera bottom.                  backing paper over its entire length but such paper is
       To close  it, keep the lock erect, press the camera back       used only on the ends of 22O roll film as leader. The
        againstthe body, then snap the lock down (Fig.1O).            thickness of the backing paper causes a shift in the
        o The camera back won't close unless the camera back        position of the focal plane and the pressure plate adjusts
            lock is erect.                                                      for this difference while keeping the film flat on the
                                                                             focal plane at one and the same time).
          2. 12O/22Oroll film switchover (Fig. 11)                    o Your film box says your 120 roll will yield 16 exposures,
        a Be sure to set the Pressure Plate and Film Selector       but this is merely an indicationthat the film length is
              for the type of roll film (120or 22O)you are using.           capable of accomodating that number of 6  x 4.5cm
         {Film  Selector>                                           frames.On accountof improvedfilm flatnessand clipping
                lf you are using 120 film, move'the film selector so that        of the film end during processing,however,there is a
                it uncoversthe number"120"and if you are using 220 film,      chance of losing the last frame. Your camera is therefore
       move it so that it uncovers the number "220" (Fig. 11).          guoted as a 1S-exposurecamera when using 120 roll
14                            www.orphancameras.comfilm.                                      I
View original page 17Page 19 · Read text
m
      SETTINGAND ADJUSTINGTHE CAMERA
      CONTROLS,ETC.                                        25      50     100    200    400    800    1600 zotr
                                                                        32 40   64 B0        l 25 I 60  ?503?0  500640     I 000I 280 U,-       1. Unlockingthe shutterrelease
              (Fig. tg)   Locked
            (Fig.zo)  Unlocked
         To unlock the shutter release to take  pictures, push the      3. Setting the shutter speed and aperture rings
           shutter release lock to the front. To lock  it, push  it back         (Fig. 22)  A.  Aperture ring
          so that  it uncovers the letter "L" (Lock) (Figs. 19, 2O).                         B.  Shutter sPeed ring
                                                                                      C.  Setting mark (index mark)
            2. Setting the film speed selector  (Fig. 21)                     Shutter speed and aperture are set by turning the shutter
              (Fig. 21)  A. Film speed selector                         speed and aperture rings. Use the small knobs on the rings
        The underside of the apefture ring  is engraved with  film      to turn them.
         speeds in ISO (ASA) numbers                                  o  Both the shutter speed and aperture rings are provided
        To set the camera for the speed of the film you are using,         with  click  stops  at each  step and are set  to the red
           turn the film speed selector (thin ring located between the        marks on the lens barrel (Fig. 22).
           shutter speed and aperture rings) and set the red spot on       You cannot use intermediate shutter speeds.
          the selector opposite the number that matches the speed
           of the film in the camera. (To turn the film speed selector,      4. Focusing the lens
           insert your fingernail in the dent provided on the ring and        (Fig. 23)   A. Distance ring knob
           turn  it while holding the aperture ring still to prevent both                   B. Setting mark
           rings from moving together.) (Fig. 21)                           a  Estimate the distance from camera to subject with your
          o The film speed selector has click-stop settings for ISO/        eye and set the distance ring to that distance (Fig. 23).
         ASA 25 to 1600 in 1/3-step increments. The scale shown        The setting mark is the red line on the lens barrel.
           below represents the numbers and white dots inscribed
           on the film speed selector.                                        5. VieMinder  field and parallax
                                                                                         (Flg. 24)   A. Bright frame
1 6                            www.orphancameras.com B. Parallax correction mark
View original page 19Page 20 · Read text
lf your subject is 5 meters or more away from the camera,        the infraredmark (locatednext to the index mark).This    @
frame it within the bright frame, and  if  it is 2 meters from           will make up for the slightly nearerpoint on which you'll
 the camera or nearer,frame it within the parallax correction        have to focus. Mark.                                                                                                                                                                    ozUJ
Since the field of view is 90o/oat 1 meter and87o/oat infinity
and there is hardly any parallax, with a  litfle care you                                                                                    '#'I   ll
should be able to get properlycentered pictures every time.                                                                                                                                                                                                                          ' . t
                                                                                                                                                                                                         "'$
 6. Using the depth of field table (Fig. 25)
    (Fig. 25)  A. Infraredmark
Depth of field  is the zone of sharpness in front of and
behindthe point on which the lens is focused and it varies
with the lens focal length, aperture and shooting distance.
Your camera is provided with a depth of field scale on the
lens top on both sides of the lens setting mark, but for
more detailed readings,refer to the accompanyingdepth of
field table.
Example: lf you are shooting with your camera's 45mm
          lens from a distance of 5 meters with an aperture
           of t/8, everything between 2.58 meters from the
        camera and infinitywill come into sharp focus.
a Your camera is provided with a wideangle, wide depth
   of field lens and a distance ring having click stops at
   2 and 5 meters so that you can snap focus in an
   instant for sharp pictures at near to far disrances.
o To take infrared pictures, measure the distance of the
  subject with the focusing ring and set that distance to

                                                                                      17
View original page 20Page 21 · Read text
m
 zotr     DEPTH---------OF FIELDTABLE FOR rcUR EBC FUJINON W 45MM F/5.6 LENS             Permissible circle of confusion :O.OSmmU'                    ---ClT'8':?:,Ts1         1.2        1.5        2          3          5        10              CO I         Aperture
                  5.6        0.90-1.13 1.05-1.40 1.27-1.85  1.60-2.70 2.16-5.00 3.00.*15.76 4.24-,:":   7.24-,n
                 8           0.86--1.20 1.00-1.51 1.19-2.05  1.48-3.16 1.94-6.95 2.58-oo      3.44-cn     5.14- co
                  11         0.82--1.310.94-1.70  1j0 -2.42  1.U-419   1.69-15.77 2.16- r c      2.72- r c     3.66-oo
               16          0.76.-1.51 o.a6-2.o7 1.00-3.28 1.18-7.92   1.44-cn     1.76 - co               , 2iO-st* 1         2.62-q
               22         0.69-1.94 o.78-3.O2 o.88-6.77   1.01.-OO     1.20 .*co    1.4%-jpKL   1.60 -oo     1.88-oo

          7. Setting the aperture selector                                  the bright frame.
            (FiS.26)  A.  o O and  *  LEDs turn on at the same        Next, turn the aperture ring and adjust it so that you'll
                         time: 1/3 - 1 stoo over.                      leave only the circularcenter LED on.
                      a +LED  barely on : About 1/3 stop over     (Reading the LEDs)  (FiS.26)
                     B. o Only O LED on ; Correct exposure            (1) Only O LED on: Correctexposure
                   C. oO and - LEDs on at the same time: 'll3       (2) O LED on but + LED barelyon: About 1/3 stop over.
                         1 stoo under.                                 (3) O and * LEDs on at the same time but O LED barely
                                 r- LED barely on: About 1/3 stop under.       on or just off: About 1 stop over.
       QSet the film speed selector, then set the shutter speed      (4) Only + LED on: 1 stop or more over dependingon how
              for the type of picture you are taking.                               far the aperture ring is turned.
    @ Unlock the shutter release, look through the viewfinder      (5) O LED on but - LED barely on: About 1/3 stop under.
          and press the shutter release about halfway down to       (6) O and - LEDs on at the same time but O LED barely
            turn on the LEDs on the right hand side just outside of        on or just off: About 1 stop under.
                            www.orphancameras.com
18
View original page 21Page 22 · Read text
(7) Only - LED on: 1 stop or more under dependingon how      10. Taking long-exposurepictures (using the T bufton)                 (t
    far the aperturering is turned.                                 (Fis.29)  A. T(Time)button
                                                  To take long-exposurepictures,open the shutter by pressing 8. Checkingthe light angle                                                down the T button (the shutter speed ring can be set            ozUJYourcamera is equippedwith a GPD light-meteringphoto-                                                        anywhere).
cell in the viewfinder. lt measures the  light which  is     To close the shutter, press down the shutter release.reflected by a semi-transparentmirror after  it enters the                                                       o The T button will not operate unless the shutter hasvieMinder's objective lens. lt  is highly effective against                                                      been cocked (by winding the film advance lever).Whendiagonalbacklightingand does not requireexposurecom-
pensationwhen taking diagonallybacklightedsubjects,etc.         the shutter is cocked, the top of the T button will be                                                                       level with the top edge of its socket.However,it must be shielded in directly backlightedand                                                       o The top of the T button is kept level with the top ofbrightly top-lightedsituations.                                                                                       its socket to prevent pressing it down inadvertently.
9. Winding the film and pressing down thq shutter release       The T button is activated by pressing it down. You can
  lFas.27)  vertical position                                use the front end of your cable release if you wish (Fig.
 lf the number "1" is showing in the exposure counter, the        2sl.
shutter blades will open and close when you press in the     Caution:
shutter release.                                                                               lf you turn the shutter speed ring while the shutter blades
A single stroke of the film advance lever will wind the     are open during time exposure,it will get stuck in the mid-
required length of film, cock the shutter, and advance the     way. Do not operate the shutter speed ring or self-timer                                                          during time exposurebecause malfunctionmay result.exposure counter at one and the same time.
(FiS.28 )  Horizontalposition
The main cause of fuzzy pictures is camera shake. Be      11. Using the self-timer
sure to hold the camera still and press the shutter release        (FiS.30) A.  Self-timer lever
gently down (Figs. 27, 28).                             Push the self-timer lever all the way down then press down
  Using a tripod>                                            the shutter release. The shutter will trip in 8 or 9 seconds
 lf you are shooting indoors or nighttime pictures with a      (Fis.30).                'll3O-secondshutter speed of              or slower, use a triood and a
cable release.
                                                                                     i                                                           19
View original page 22Page 23 · Read text
m      12. Taking flash pictures (Fig. 31)                             picture dimension.lf you are using a small size flash, be
         Small, clip-on type flashes are clipped into the accessory    sure it  is a wide-panel unit that is compatible with an zatr      shoe on the camera top (Fig.31)                                                    f :28mm on a 35mm format. But if it has a different vertical@
 I       Your camera has an X-contact (Fig. 32), that is, electronic    and horizontal covering angle, the picture frame must be
         flasheswill synchronizewith all shutterspeeds.               positioned to  fit  into that angle, otherwise light fall off
         o  lf you are using a flash bulb, use an M-class bulb with     along the edges will result.(Fig. 33)
          a shutter speed of 1/3O-secondor slower. lf the shutter
          speed is 1/60-secondor faster, the flash will discharge    13. Unloadingthe film
            but it will not synchronize properly and a large part of      After you complate exposing a roll of film, wind it up to
           the light will be lost.                                      the very end with the film advance lever. A sudden release
        Note1:                                                           of tensionwill tell you that the trailingend has left its spool
        Your camera is equipped with a hotshoe and a sync socket    and that winding has been completed.lt will take about
        and they are made shock proof,that is, when you are using     five strokes of the film advance lever to wind the film
        one contact, the current is prevented from flowing into the     completely.
         other. For this reason it will not accept those commercially    Next, open the camera back, take out the exposed roll of
         available electronic flashes which, though rarely, are     film and seal the end to preventthe roll from unwinding.
         provided with opposite polarity.                                             r The empty spool is transferredto the take-up side for
       The polarities of your camera's flash contacts are: Hot-       taking up the next roll of film.
        shoe ... Positive(*) center spot, negative(-) shoe. Sync
        Socket .. Positive(*) center, negative(-)  periphery.    CAMERACAREAND MAINTENANCE
          (Fig. 33)  A.  Lisht fall off
                   B. Flash covering angle (flashes with different          l.  checking  the camera  before shooting  O*kub"t>
                         vertical and horizontalcovering angles)           Before loading film in the camera, make  it a habit to perform
                  C. 6 x 4.5cm format (63.8' for longer and 50'       the following checks.
                          for shorter picture dimensions)              G  fitm advance unit
        Note 2:                                                 Open the camera back and, while watching the take-up
        Your camera requires a flash with a 63.8' coverage for the          spool, wind the  film advance  lever to make sure the
         longer picture dimension and a 50" coveragewww.orphancameras.comfor the shorter          lever and the spool holder are operating smoothly.20
View original page 23Page 24 · Read text
i
@ Camera back interior                             i                       lmportant:                                                                                                                                                         -o   Open         the           camera                  back                      and                                turn                                   the                                       three                                                   rollers                                               (one    Camera                                                                       trouble can cost you dearly both materially and   on       the         camera                back                    and                          two                            on                                     the                                     body)                                                    to make                                                            otherwise.   sure they are properlyattached and are working smooth_                                                                                                         ozUJ
     ly. Also, check the film pressuresprings in the take_up     2. Cleaning the lens
   and supply chambers to make sure they are properly     Scratches on the lens surface can reduce its sharpnessfar
   attached and can exert sufficient pressureon the film.     more than you would think. lf the contrast of your picture
@ Strutter                                      seems somehow insufficient and  it doesn't look crisp
   Check the various shutter speeds through the camera     enough, the cause is usually scratches on the lens surface.
   back. You can more or less tell whether the shutter is   @ First, blow off dust from the lens surface completely
   operating at the right speed or not by the amount of        with an air blower.
    light it passes through and by the sound it makes.     @ Next, moisten a sheet of lens cleaning paper with a small
@ Aperture                                         amount of Fuji lens cleaningfluid and wipe the lens gen_
  Open the camera back and turn the aperture ring to           tly with it in a circular motion.Always start from the cen_
 ^ make sure the apertureblades open and close smoothly.         ter then gradually move out to the edges.
'O Flash synchronization                  @ Finally, after  all contaminants have been removed.
   Clip on the flash, open the camera back, open up the       wipe off the remaining lens cleaning fluid with a dry
   aperture fully, set the shutter speed ring to the speed        sheet of lens cleaning paper. Again, start from the
   you want, then press down the shutter release. lf light        center in a circular motion then move out to the edges.
  comes in through the lens, flash and shutter speed are     Caution:
   correctly synchronized.                                                         Breathing                                                              a mist                                                                 on the                                                                                   lens                                                                                     surface then                                                                                                wiping                                                                                                                                                                                                it                                                                                                                                     off with@ Exposure indicators                                         silicon                                                                    cloth                                                                          or other                                                                                   similar                                                                                    material                                                                                                                      is the                                                                                              you                                                                                             worst                                                                                                           thing
  Look through the vieMinder, press the shutter release    can do. Never do it because this is one of the main causes
   about halfway down, then turn the shutter speed and      of scratches on camera lenses.
   aperture rings as well as the film speed selector to
  make sure the LEDs respond correctly.                      3. Precautions
   Better still if you can use a place of fixed brightnessas     o Always load and unload film in subdued light.
   a criterionfor checking the consistency of the response.    o  In hot weather, do not leave your camera in a closed
                                                                                    21
View original page 24Page 25 · Read text
m         car or in moist places except temporarily for a very
           short time.zotr      o Always clean your camera before and  after taking
@          pictures. Clean the interior with an air blower, and wipe
              off exterior with silicon cloth.
        o Put your camera away where it is cool, dry, and free of
           dust.
        o  Always check your camera before taking pictures to
         make sure that all your pictures will turn out right.


                             www.orphancameras.com
 22
View original page 25Related documents and language editions
From the M. Butkus archive. Original publisher and archive notices are retained.
Check the model and edition against your equipment.
PDF verified 2026-10-10.