Film cameras
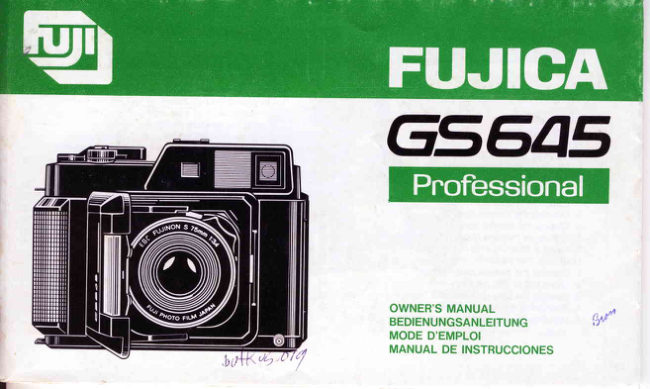
Fujica GS645 PRO User manual
User manual for Fujica GS645 PRO. 22 pages in German, French, English. Read the original PDF, download or print a copy without registration.
22 pagesGerman, French, English2.5 MB PDF
Loading your manual…Open PDF directly
Document details
- Brand
- Fujica
- Model / document
- Fujica GS645 PRO
- Document type
- User manual
- Language
- German, French, English
- Pages
- 22
- File size
- 2.5 MB
- Category
- Film cameras
- Document date
- Not specified in catalog
Search available document text
Find a term, then jump to its page in the original PDF. Image-only pages may not be searchable; check the PDF for exact wording and diagrams.
Page 3 · Read text
English (Pages 10 - 21)
     See illustrationswhile you read this manual.

     Deutsch (Seite 22-  36)
      OrientierenSie sich beim Durchlesen dieser Anleitung bitte an den Abbildungen.

      Frangais (Pages 37 - 49)
     Se reporteraux illustrationsen lisant le mode d'emploi.

      Espafrol (Pagina 50-63)
     Consulte las ilustraciones mientras lee este manual.


  3
                               www.orphancameras.com
- -
View original page 3Page 5 · Read text
NAMESOF PARTS                   @ PressurePlate Indicator                                                   rU'                              @ Focal Plane Rail
                (lndex                                                               Film                                                                           Start Mark    Setting Mark                    Mark)                 @@
   Shutter                                                       Wind        Speed               Ring@                              @ Film                                                                SensingRoller                                                  (5zIJJ
@ Aperture Ring                      @ PressurePlate
@ Self-timer Lever                     @ Spool PressureSpring
@ DistanceRing                      @ Spool Knob Release Button
@ Bellows                         @ Take-up Spool
@ T (time) Button
@ Shutter Release
@ Accessory Shoe                          SPECIFICATIONS
@ ExposureCounter
@ Shutter Release Lock                                   o Classification
@ Film Advance Lever                                      6 x 4.5cm format,collapsible-mountbellowstype range-
@ Take-up spool Knob                                             finder camera.
@ Battery Compartment Cover Screw                        o Film
@ Battery Compartment Cover                              120 (15exp.) and 22O(3Oexp.) roll fitm.                                                       a                                                       Lens   Tripod         Socket@                                           EBC                                                                 FujinonS 75mm tig.q, q components,5 elements,   Film Loading            Knob@
@ Strap Lug                                                 50- angle of view.
@ VieMinderWindow                                    o Shutter
@ Camera Back Lock                                     Copal No. 0O mechanical interlens shutter; T, l-jlsoo
@ Camera Front                                                  sec., X synchronization;providedwith self-timer.
@ Camera Front Lock                                     o Viewfinder
@ Sync Socket                                             Double-image, coupled range-viewfinder; 1m - oo fo-
@ Viewfinder Eyepiece                                        cusing range; bright frame with automatic parallax cor-
@ Film Selector                                                   rection ; 92olofield of view at 1 meter, 9Oo/oat infinity ;
                                                       0.63X  magnification; 39.Smm base  line, 24.9mm@ Film ReminderSlot
                                                                      effective base line ; 3 LED exposure indicators.
                             www.orphancameras.com
View original page 5Page 7 · Read text
Digitally signed by mike butkusmike         DN: cn=mike butkus,
                                o=orphancameras, ou=29,
                                 email=mike@butkus.org, c=US
                                    Date: 2017.12.06 12:03:37 -05'00'butkus


        www.orphancameras.com
View original page 7Page 13 · Read text
m     a Exposure Control                                HOW TO USE           External light metering (by adjusting 3 LEDs); ISO/ASA zotr       25 - 1600film-speedsettingwith 1/3-stepclick stops; EV    READYINGTHE CAMERAo          3.5 - 18 coupled range with ISO/ASA100 film; GPD pho-
            tocell (incorporatedin viewfinder);two LR44'1.5Valka-
          line-manganese batteries; pressing the shutter release       1. Attaching the shoulder strap
          halfway down turns on power switch.                              (Fig. 1) A. Buckle
       o Film Advance                                                       B. Hoop
          Film advance lever on camera top, 184' winding angle,     Pass one end of the strap through the camera's strap lug,
          28" stand  off, self-cocking shutter; 12Ol22O roll film      pass it back through the hoop and buckle and adjust the
           switchover.                                               strap length with the buckle. Do the same with the other
        o Others                                            end of the strap.
          Collapsible-mountbellows expands when camera front             . Move the hoop when you pass the strap end through it.
              is opened sideways;providedwith palm grip; switchable       The strap will pass through it easier if you do.
          pressure plate for 120 and 22O roll film with 12O,22O in-
           dicator in camera back.                                          2. Attaching the viewfinder eyepiece (Fig. 2)
        o Dimensions                                       The viewfinder eyepiece is screwed into the eyepiece
        Folded:147mmW x 114mmH X 56mm D.                  socket.
        E x o a n d e d : 1 4 7 mHm x 1 1 4 m m H x 1 2 2 m m D .              o The viewfinder eyepiece that comes with your camera
        o Weight                                                                     is designedfor people with normal eyesight.lf you can-
         820 g. (without batteries).                                      not see clearly through it, use an eyepiece that fits your
        a Accessories                                                 eyesight.
           Soft case, shoulder strap, lens hood (optional).                              lf you are nearsighted,use an eyepiece with a minus
                                                                           diopter, and if you are farsighted,use one with a plus
        Notice:                                                              diopter.
         Specifications are subject to change without notice.            o The eyepiece socket of your GS645 is provided with a
                                                             19mm-diameter,O.75mm-pitchscrew thread. lt will take
                                                              any commerciallyavailable eyepiece, rightanglefinder,
                                                                       magnifier,etc. (Fuji does not supply these accessories).
12                             www.orphancameras.com

                                                                                                                                       :{*:s       ltrd(                                     .    -*a;
View original page 13Page 14 · Read text
3. Using the camera case (Fig. 3)                           o Discarded batteries should be disoosed of as incom-         I     Your camera's soft case is wrapped around and fastened         bustibles.
                                                       (Fig.      to        the          camera                    with its                                        fasteners.                             zip and                                       stick                                                         3)                                                             b trf(us.eq            (Jz                                                       putting                                                                                                                                                                                                                     IIJ    Use                  it         when carrying                          the                         camera                                   about                                              or when                                                                                                            it       5. Opening the camera front (Fig. 7)
    away because it is a good protectionagainst dust, abrasion,      Pull the camera front lock toward the arrow and swing the
      nicks,and dents.                                      camera front all the way out so that it locks in place with a
                                                                             click. This will set the lens into positionfor taking pictures.
      4. Loading the batteries (Fig. 4)                                    (Fig. 7)
                                                            o Be sure to open the camera front gently. lf you do  itt  With a coin, loosen the battery compartment cover screw
     and remove the battery compartment cover. Insert the two         quickly and abruptly,the bellows may deform.
      batteries that come with your camera in the battery com-
     partment,plus and minus ends correctly as illustratedin       6. Closing the camera front (Fig. 8)
     the battery compartment,then replace the cover and tight-    Q Retract the lens by setting the distance ring to oo.
     en the screw. (Figs.4. 5. & 6.)                @ Wind the film advance lever to cock the shutter.
          .  Be sure to use either two SR44 silver oxide or two LR44   @ Press down the two small knobs on the latch marked
          alkaline-manganesebatteries.                          "CLOSE" (located on the inner side of the camera front
     o The battery power required to operate your camera's               t i p ) . ( F i g s . 8 & 9 ) .
       exposuresystem correctly is 2.4 volts or more. lf the LEDs   @ Then fold the camera front against the camera body.
          in the vieMinder turn on, the batteriesare producingsuf-      Notes :
         ficient voltage,but if they do not turn on, you'll have to      o To protect the lens front edge against damage from the
       change the batteries.                                  camera front, your camera is designed so that the
     a Do not use an alkaline-manganesewith a silver oxide,       camera front will not close unless the lens is fully
         or an old with a new battery because such pairing can          retracted by setting the distance ring to oo.
         result in battery leakage or ruptured battery casing and      a To make the camera slim and easy to carry about, it
       cause irreparabledamage to your camera.                            is providedwith a collapsiblebellows mount and made
     Caution:                                                         foldable; and to simplify operationand prevent double
     o The batteries can be extremely dangerous if swallowed.        exposure, it  is provided with a self-cocking shutter.
      Do not leave them within reach of little children.                     Its internal construction is sophisticated and intricate:-
                                                                                 13
View original page 14Page 15 · Read text
H M        When the camera front is closed, the body mechanisms     The filter is screwed into the camera's exclusive lens hood$i  z
* l o          disengage themselves from the shutter mechanisms,       (Fig. 11).lt accepts 40.5mm-diameterfilters.
iLl      l-         and when the camera front is opened, they interlock      The lens barrel is not threaded to accept filters because
                                                                           the overall length of the lens with the filter on will preventa.:1. nI          again.
                         lf, in such construction,the camera front can be closed       closing of the lens front.
               without cocking the shutter and the film can be advanced
                 after the camera front has been closed, the body mech-     LOADING THE FILM
             anisms will operate independentlyand will not interlockdffi#            with the shutter mechanisms when the camera front        1. Opening the camera back (Fig. 12)
[j                 is opened again. The result could be a complete break-      To open the camera back, erect the camera back lockw            down of the camera mechanisms.                       and press it down toward the camera bottom.
              That is why your camera is designed so that the camera      To close  it, keep the lock erect, press the camera back
                 front will not close unless the film advance lever has       against the body, then snap the lock down (Fig" 12).
             been wound to cock the shutter. And to prevent damage      o The camera back won't close unless the camera back
                 to the mechanisms, the film advance lever and shutter          lock is erect.
               release will automatically lock when the camera front
                   is closed.                                                        2. Using 12O or 22O roll film (Fig. 13)
           o Unless there is film in the camera, however, the film        You'll have to set the film selector and pressure olate for
             advance lever will wind even  if the camera front is       the film you are using.
               closed.                                                      {Film  Selectorp
                                                                                                                                       lf you are using 120 film, move the film selector so that
              7. Putting on the lens hood (Fig. 10)                                                 it uncoversthe number"120"and if you are using 220 film,
          Face the notched side of the lens hood toward the ooened     move it so that it uncovers the number "220" (Fig. 13).
          camera front and fit  it on the lens barrel as shown in Fig.       {Pressure  Plate}
            10. (The lens hood is an optional accessory).                                 lf you are using 120 film, press down the pressureplate
                                                                          with your fingers, slide  it and  fit the hole on the side
              8. Using a filter                                       marked "120" to the center peg, and  if you are using 220
                (Fig. 11) A.  Filter                                                 film, fit the other hole to the center peg.
                       B. Lens hood                               The pressure plate indicator in the camera back (below   14                           www.orphancameras.com
                                                     ,.-;*al.
View original page 15Page 16 · Read text
the film reminderslot) will show you which side of the       a After exposing 7 frames, wind the film and press down        To
pressureplate you have set. (Figs. 14, 15)                          the shutter release. Repeat until you wind up the entire
{Film  Selector}                                                                  roll and the exposure counter stops. Be sure to keep an                                                                                                                                            oz                                                                                                                                                                                                                                                                 I!22Orollf i lm.. ......................30exposures                   eye on the exposurecounter while taking pictures.
120rollfilm...'.....'.....'...'....15 exposures
120 half-lengthroll fi|m.........7exposures                        3. Loading the take-up spool and film
o Be sure to move the pressure plate to the conect side          (Fig. 16)  A. Press
  because the film  will not move into the exact focal     O Pop out the spool knobs by pressingin the spool knob
  plane if you don't. (120 roll film is attached to an opaque         release buttons (small red buttons in the supply and
  backing paper over its entire length but such paper is         take-up sides). (Fig. 16)
  used only on the ends of 22O roll film as leader. The   @ Take out the empty spool, fit it into the take-up chamber
  thickness of the backing paper causes a shift in the          (located on the same side as the film advance lever),
   positionof the focal plane and the pressure plate adjusts         then press in the take-up spool knob.
   for this difference while keeping the film flat on the   @ Load the film in the film chamber (located on the same
   focal plane at one and the same time).                         side as the viewfindereyepiece),then press in the film
a Yourfilm box says your 120 roll will yield 16 exposures,        loading knob (Fig.17).
  but this is merely an indicationthat the film length is       o The take-up spool and film roll can be loaded easier
  capable of accomodating that number of 6  x 4.5cm         by fitting in the top (camera top) side first.
  frames.On account of improvedfilm flatness and clipping
   of the film end during processing,however,there is a        4. Positioningthe film start mark (Fig. 18)
  chance of losing the last frame. Your camera is therefore       Pull out the film leader paper, pass  it through the film
  quoted as a 1S-exposurecamera when using 120 roll       channel, insert the tip into the slot of the take-up spool,
   film.                                                    then wind the paper leader around the spool with the film
o  lf you are using 120 half- length rolls of Fujicolor Pro-      advance lever.
   fessional Type S and Type L films, be sure to move      Stop winding the film advance lever as soon as the film
  the pressureplate to the 120 side. You can take 7 frames        start mark on the paper leader lines up with the arrow near
  but the film advance lever will not become free even      the top side center of the film channel (Fig.18),then close
   after you expose the 8th frame.                             the camera back.
                                                                                      15
                                                                               I                                                                                      n#*;r,*d*aaxxi*,lli.+,o**qt;r*}+.x*ii",ri:ih@;'..;**:i$l!!;1n,,..,;*:diti.. *& i               f.,il&'*.'.
View original page 16Page 17 · Read text
o Remember, the camera back won't close unless the         cover closed and wind the film advance lever until the
         camera back lock is erect.                             number"1" shows in the exoosurecounter. 1llzotr      o You can oosition the film start mark with the camera            .  Tear off the top of your film box and insert it in the film
@-          front either open or closed.                                reminder slot in the camera back.  lt will remind you
         {Avoiding  film slack}                                      which film you are using (Fig.19).
         Insert the paper leader deep into the slot of the take-up
        spool but make sure it doesn't protrudefrom the opposite-    SETTINGAND ADJUSTINGTHE CAMERA
        side slot.                             CONTROLS,ETC.
        While winding the paper leaderon the take-up spool, press
                it down lightly against the camera body with your finger       1. Unlocking the shutter release
       and wind it firmly on the spool.                                       (Fig. 20)  Locked
       To preventthe film from slackening,keep it taut with the         (Fig. 21)  Unlockec
          film advance lever until you close the camera back.           To unlock the shutter release to take pictures, push the
                                                                         shutter release lock to the front. To lock  it, push it back
          5. Winding the film and positioning it for the first shot          so that it uncovers the letter "L" (Lock) (Figs. 20, 21).
         After loading the film, wind the film advance lever as far
        as  it will go five or six times. The exposurecounter will       2. Setting the shutter speed and aperture rings
        switch from "S" to "1" (first frame) and the shutter will cock          (Fig.22l  A. Setting mark (index mark)
        by itself.                                                                 B. Shutter speed ring
        o The film advance lever can be wound with the camera                 G. Aperture ring
             front either open or closed.                                 Shutter speed and aperture are set by turning the shutter
        o  lf you have loaded the film with the front cover open,     speed and aperture rings. Use the small knobs on the rings
           the shutter release can be depressed even when the       to turn them.
          exposurecounter is between "S" and "1".lf it isdepressed      o The shutter speed ring is stepped and sets to each
           with the exposure counter between "S" and "1",however,       speed with a click. You cannot use intermediatespeeds.
           the film may be exposed before the first frame is in      o The aperture ring is stepless and permits precise setting.
            oosition.
          There is no problem if vou load the film with the front      o The setting mark (index mark) is the red line on the                                                                        transparentplastic tab (Fig. 22).
16                           www.orphancameras.com
                                                                                                                               k;    ,.
View original page 17Page 18 · Read text
3. Sefting the film speed selector                                  finder eyepiece because the double-image focusing   @I
  (Fig. 23)  A. Film speed selector                              spot will move off center of the vieMinder and prevent
The film speed selector is the thin ring between the shutter         precise fo_cusingif you don't.
                                      window                           speed                                        indicator                    rings;                        the filmspeed     and aperture                                                                    bo'l/<                      JozUJ                                                                     5. Composing your picture                                       mark is                                    ring;                                    the                                          setting           niche in                   the apeftureis the small                                                                        (Fig. 25)  A. Moving top and left frame linesthe short white line above the window; and the film speed                                               Composeyour picture within the bright frame. As you focus,is indicated in ISO,zASAnumbers.                                                             the top and left sides of the bright frame will automaticallyo Insert your fingernail in the notch on the film speed                                               move to correct for parallax. There is hardly any parallax,   selector and, while holding down the aperture ring to                                                        however,and you'll get properly centered pictures beoause   prevent it from moving, turn and set  it for the speed of                                                              the field of view at nearest focusing distance (1 meter) is   the film you are using (Fig. 23).
o The film speed selector has click-stop settings for ISO/      92o/oand 9Oo/oat infinity (co).
  ASA 25 to 1600 in 1/3-step increments.The scale shown       6. Using the depth of field table (Fig. 26)
  below reoresentsthe numbers and white dots inscribed     Depth of field  is the zone of sharpness in front of and
  on the film speed selector.                              behindthe point on which the lens is focused and it varies
                                                               with the lens focal length, aperture and shooting distance.
                                                                                    t                  Your camera is provided with a depth of field scale on the
   25      50      roo     2oo    aoo    eoo    1600       lens top on both sides of the lens setting mark, but for
      32 40   64 80       | 25 | 60  250320  500640     | 000| 280        more detailed readings, refer to the accompanying depth of
                                                                           field table (Fig. 26).
                                                      Example:  lf you are shooting with your camera's 75mm
 4. Focusing the lens                                                   lens from a distance of 5 meters with an aperture
    (Fig. 24)  A.  Bright frame                                                 of f/8, everything between 3.87 and 7.06 meters
             B. Double-imagefocusing spot                           from the camera will come into sharp focus.
 Look through the viewfinder eyepiece, center your subject     a To take infrared pictures, measure the distance of the
  in the viewfinder,and turn the distancering until the double       subject with the focusing ring and set that distance to
 image in the yellow double-image focusing spot correctly       the infrared mark (located next to the index mark). This
 coincides(Fig.24l.                                                       will make up for the slightly nearerpoint on which you'll
 o Be sure to align your eye with the center of the view-       have to focus.
View original page 18Page 20 · Read text
(6) O and - LEDs on at the same time but O LED barely      shutter speed of 1/3O-secondor slower, use a tripod and a    o
         on or just off: About 1 stop under.                          cable release.
         (7) Only - LED on: 1 stop or more under depending on how                                                                     10. Taking long-exposurepictures (using the T button)             far the aperture ring is turned.                                                                                                                                                   ozUJ                                                                                 (Fig. 30)  A. T button
         8. Checking the light angle                             To take long-exposurepictures,open the shutter by pressing
       Your camera is equipped with a GPD light-meteringphoto-     down the T button (the shutter speed ring can be set
         cell  in the vieMinder. lt measures the  light which  is      anywhere).
        reflected by a semi-transparentmirror after  it enters the     To close the shutter, press down the shutter release (Fig.
       vieMinder's objective lens.  lt  is highly effective against       30).
       diagonal backlighting and does not require exposure com-      o The T button pops up when the shutter is cocked. You
       pensationwhen taking diagonally backlighted portraits,etc.        can tell when  it is in popped up position because the
      However,it must be shielded in directly backlightedand         button sides are red.
        brightlytop-lightedsituations.                               Caution:
                                                    Do not turn the shutter speed ring while the shutter is open
         9. Winding the film and pressing down the shutter release      duringtime exposure,becauseit will stop in the midwayand
           (Fig. 28)  Vertical position                         may cause malfunction.i$
              lf the number "1" is showing in the exposurecounter,the      11. Using the self-timer
        shutter blades will open and close when you press in the          (Fig. 31)  A.  Self-timer lever
        shutter release.                                      Push the self-timer lever all the way down then press down
      A single stroke of the film advance lever will wind the      the shutter release. The shutter will trip in 8 or 9 seconds
        required length of film, cock the shutter, and advance the      (Fig.31).
       exposure counter at one and the same time.
         (Fig. 29)  Horizontalposition                                 12. Taking flash pictures (FIg. 32)
       The main cause of fuzzy pictures is camera shake. Be      Small, clip-on type flashes are clipped into the accessory
        sure to hold the camera still and press the shutter release     shoe on the camera top (Fig. 32)
        gently down (Figs; 28, 29).                               Your camera has an X-contact (Fig. 33), that is, electronic
        (Using a tripod)                                           flashes will synchronizewith all shutterspeeds.
               lf you are shooting indoors or nighttime pictures with a      o  lf you are using a flash bulb, use an M-class bulb with
                                                                                           19
View original page 20Page 21 · Read text
I
I' m           a shutter speed of 1/3O-secondor slower. lf the shutter       the following checks.
           speed is 1/60-second or faster, the flash will discharge                                              O  Pitm advance unit     zatr        but it will not synchronize properly and a large part of        Open the camera back and, while watching the take-up
   @-        the light will be lost.                                          spool, wind the film advance lever to make sure the
         Note:                                                               lever and the spool holder are operating smoothly.
         Your camera is equipped with a hotshoe and a sync socket   @ Camera back interior
        and they are made shock proof,that is, when you are using       Open the camera back and turn the three rollers (one
        one contact, the current is prevented from flowing into the        on the camera back and two on the body) to make
           other. For this reason it will not accept those commercially         sure they are properlyattached and are working smooth-
          available electronic flashes which, though rarely, are            ly. Also, check the film pressuresprings in the take-up
          provided with opposite polarity.                             and supply chambers to make sure they are properly
        The polarities of your camera's flash contacts are: Hot-         attached and can exert sufficient oressureon the film.
        shoe ... Positive (*) center spot, negative(-) shoe. Sync                                   @ Rangefinder
         Socket ... Positive(+)center, negative(-)  periphery.            While watching the double-image focusing spot  in
          13. Unloadingthe film                                            the viewfinder, focus the lens at infinity and at nearest
           After you complate exposing a  roll of film, wind  it up to         focusing distance to make sure the distance ring is
          the very end with the film advance lever. A sudden release         operating properly.
           of tension will tell you that the trailing end has left its spool   @ Shutter
        and that winding has been completed. lt will take about        Check the various shutter speeds through the camera
            five strokes of the film advance lever to wind the film          back. You can more or less tell whether the shutter is
         completely.                                                    operating at the right speed or not by the amount of
          Next, open the camera back, take out the exposed roll of            light it passes through and by the sound it makes.
            film and seal the end to prevent the roll from unwinding.    @ Aperture
         o The empty spool is transferredto the take-up side for        Open the camera back and turn the aperture ring to
             taking up the next roll of film.                           make sure the apertureblades open and close smoothly.
                                   @ Flash synchronization
     CAMERACAREAND MAINTENANCE                     Clip on the flash, open the camera back, open up the
           1. Checking the camera before shooting                          aperture fully, set the shutter speed ring to the speed
         Before loading film in the camera, make it a habit to perform        you want, then press down the shutter release. lf light 20                             www.orphancameras.com
View original page 21Page 22 · Read text
tfi
                                                                                                                                                                  r ! 1
   comes in through the lens, flash and shutter speed are         sheet of  lens cleaning paper. Again, start from the             (f,       ,
    correctly synchronized.                                       center in a circular motion then move out to the edges.       !(J r i
O Exposure indicators                                     Caution:                                     z :
   Look through the viewfinder, press the shutter release      Breathing a mist on the lens surface then wiping it off with           IIJ
   about halfway down, then turn the shutter speed and       silicon cloth or other similar material is the worst thing you
   aperture rings as well as the film speed selector to      can do. Never do it becausethis is one of the main causes
   make sure the LEDs respond correctly.                        of scratches on camera lenses.    Better still if you can use a place of fixed brightnessas                            yolttue,q
   a criterionfor checking the consistency of the response.      3. Precautions
lmportant:                                              o Always load and unload film in subduedlight.
Camera trouble can cost you dearly both materially and      a  In hot weather, do not leave your camera in a closed
otherwise.Always check your camera before use and have                                                                car or  in moist places except temporarily for a very it overhauledperiodicallyso that you can be sure of yourself                                                                  short time.at all times.                                                       o Always clean your camera before and  after taking
                                                                 pictures.Clean the interiorwith an air blower,and wipe2. Cleaning the lens                                                                               off exterior with silicon cloth.
Scratches on the lens surface can reduce its sharonessfar      o Put your camera away where it is cool, dry, and free ofmore than you would think. lf the contrast of your picture                                                                dust.
seems somehow insufficient and  it doesn't look criso     o Uuless the front cover is fully open, it is impossibleto
enough,the cause is usually scratches on the lens surface.      move the distance ring from oo. Though the shutter
O First, blow off dust from the lens surface completely        release can be depressed in this condition, the shutter   with an air blower.                                                         blades will not open and the film will not be exposed.
@ Next, moisten a sheet of lens cleaning paper with plenty        Especially in cold weather, the bellows may become
   of Fuji lens cleaningfluid and wipe the lens gently with            stiff and the front cover may not operate smoothly.
      it  in a circular motion. Always start from the center       Caution is required, therefore, because the film will
   then gradually move out to the edges.                         not be exposed if you take pictures inadvertently with
@ Finally, after  all contaminants have been removed,        the front cover shorl of being fully open.   wipe off the remaining lens cleaning fluid with a dry
                                                                                      21
                                              ;;';*gx:];*-                                                                                        ,-*
View original page 22Related documents and language editions
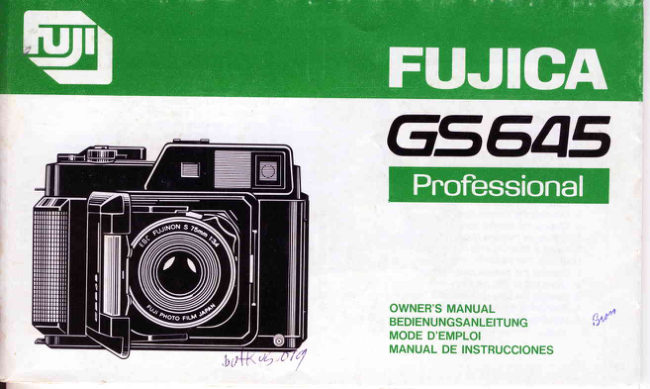
From the M. Butkus archive. Original publisher and archive notices are retained.
Check the model and edition against your equipment.
PDF verified 2026-10-10.