Film cameras
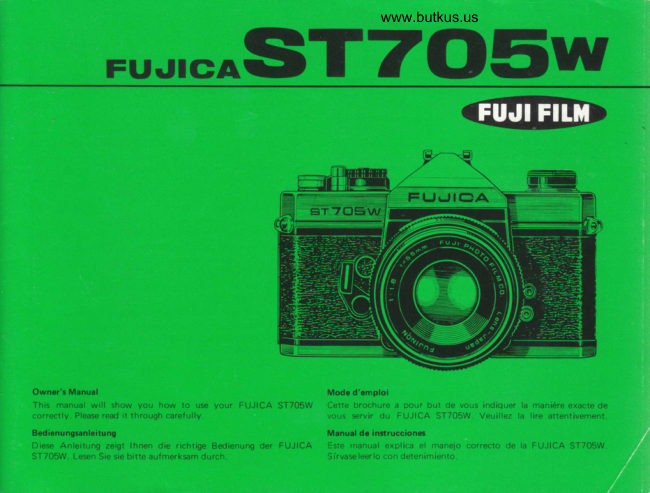
Fujica ST705W User manual
User manual for Fujica ST705W. 51 pages in German. Read the original PDF, download or print a copy without registration.
51 pagesGerman4.8 MB PDF
Loading your manual…Open PDF directly
Document details
- Brand
- Fujica
- Model / document
- Fujica ST705W
- Document type
- User manual
- Language
- German
- Pages
- 51
- File size
- 4.8 MB
- Category
- Film cameras
- Document date
- Not specified in catalog
Search available document text
Find a term, then jump to its page in the original PDF. Image-only pages may not be searchable; check the PDF for exact wording and diagrams.
Page 1 · Read text
Fur,rcASTTOEiwwww.butkus.us


Owner's Manual                                          Mod6 d'omploi
This manual will show you how to use your FUJICA ST705W   Cette brochure a pour but de vous indiquer la manidre exacte de
correctly. Please read it through carefully.                         vous €rvir du FUJICA ST705W. Veuillez la lire attentivement
Bodionungsnleitung                                             Manual do instrucciqn6
Diese Anleitung zeigt lhnen die richtige Bedienung der FUJICA   Este fnanual explica el manejo correcto de la FUJICA ST705W.
ST705W. Lesn Sie sie bitte aufmerkgm durch.                          S irvase leerlo con detenimiento
View original page 1
Page 2 · Read text
CONTENTS                             INHALT
Part 1, Fundamentals    .                        4        Teil 1 -Grundanweisung  ..                          A
Names and Functions of Parts                    5       Bezeichnung der Teile r"d i;;" frnt tion"n    .       5
Special Features  . -....                                  Besondere technische Merkmale                     11
 1. Basic Steps   .                                                                       IJ           i.  Kamerabedienung        .                                                        IJ
2. Battery   I nsertion                           19      2. Einlegen der Batterien                         19
3. Film Loading                             23      3. Einlpgcn des Films                                            IJ
4. Setting the film Speed    .                   28      4. Einstellung der Filmempfindlichkeit          28
5. Setting the Shutter Speed    .                 30      5. Einstellung der Verschlusszeit - . .   .                  JI
6. Focus the Lens and Frame Your Picture  . . .   .  34      6. Scharfeinstellung und Bildausschnitt          34
7. Correct Exposure                                             JI      7. Korrekte Belichlung                       38B. Holding the Camera and Releasing                  8. Kamera ruhig halten und auf den
    the Shutter                              44         Ausloseknopf drricken                      AE
9. Rewinding Film and Unloading Film  . .. ...    .  A1      9. Nach der Belichtung lhres Filmes            47
Part 2, Advanced Techniques                       51        Teil 2 - Technik fiir Fortgeschrittene                  3l
1. Changing the Lens                        52          i. Auswechseln des Objekt ives                  32
2. Exposure Correction                         59      2. Belichtungskorrektur                        593. Utilizing the Lens Depth of Field ..         62      3. Die Vorteile der Trefenschdrfe  . . . .   .         63
4. Using the Self Timer    .                     66      4. Wie Sie sich selbst fotograf ieren konnen  . . .   . 665.   I nfrared Photography                        68      5. lnfrarot-Fotografie                          68
6. Flash Synchronized Shooting                69      6. Auf nahmen mit Blitzlichtsynchronisation   . .  .  69
                                                                                                                                                   -747. Accessories for the FLJJICA ST7O5W  . . . . .   .  74      7. Der Cebrauch desZubehors.  . ...      .
8. Care and Storage of your FUJICA ST7OSW  .   .  84      8. Beachten Sie bitte folgende
9. Specifications....                       86          Vorsichtsmassregeln  .  _                     84
                                                9. TechnischeDaten  ....                      87
View original page 2Page 3 · Read text
www.butkus.us
PART  1
TE IL
CHAPITR E
PARTE

FUNDAMENTALS
 Parr'l    Explains  the  basic  ()pcrali(rils  of  the camera. The  reader  is
recornmencled to master the basics before proceeding to Part 2 which deals
 ,rrth  tlre rnore advanced lechniqUes of photography.
GRUNDANWEISUNG
Teil 1 erlautert dre Grundhandhabung  der Kamera. Man sollte sich zunachst
 rnlt dieser Grundanweisung  besch:if tigen und nicht eher zu Teil 2 * der sich
mit  der  f()rtqeschrittenen Technik  befa[3t    ubergehen, bevor man die
Gru ndhanrlhatru{rg beherrscht.
MANIPULATION DE BASE
 l.'  chapitre  1  t:xplrqLrt-. 1es op6rations de  trase de cet appareil.   ll  est
r,'c;onrrnirrri6:lu   lrtt€rur de se larrrrliariser avec ces ortncipes avant de
iroLrrsLlvre l,r lir(;trrre du chapitre 2 qLri traite-'Li€rs techniques  les plus avanc6es
  j', l,r [)1,/)ti)(]r,rpir   rIl
DATOS FUNDAMENTALES
 I d  parte    'l  r:rplrr.a  las opFrF ronps    f rindatnentales de  la cdntara. Se
 r,{:orrrtntj,r   irl ltcl()r  r1,,e rloi}hI   estos (jdtos l)dsr(os antes cje proceder a la
  , iiltrrd   {i.r  l(l parte  2, rluqJtrata  de  l.ls rnas adelanladas  t6cnicas de  la tctro  tr;rf ia                                                  -\-.-.---,'


                                                                                           {:                 (f'7
View original page 3Page 7 · Read text
'n
    Film Advance Lever                   @  Battery Chamber / Insert two nickel-zinc batteries'-1,)o  Shutter Soeed Selector Dial                                  for powering the camera Electric Eye System.
@  Film ASA Speed Window                                @  Guide Rail, @ Fitm Rail / The fitm is passed over
@  Combination Shutter Release Button - Exoosure        the Film Rail and the edges go between the Guide   Meter Switch / Provided with cable release socket          Rail.
@ Frame Counter  / Additive type, automaticallV resets  @  Film Rewind Soindle
@  Shutter Speed Mark (red dot)              @  Film Chamber
@  Safety Lock                       @  Film Rewind Button
@o  Self-timerNeckstrap StartEyeletButton, @ Self-timer Set Lever /   @@  TripodSprocketSocketWheel  / The  f ilm perforations are engaged
   The shutter is activated in B-10 seconds.                with the sprocket teeth to advance the  f ilm.
@ Depth of Field Preview Button / Provided with  @  Take-up Spool
    lock                           @  Camera Back
@ Lens Safety Lock Release Button            @  Pressure Plate
@ Taking Lens                                                6D  Auto Winder Connecter
@ Accessory (hot) Shoe
@ Hot Shoe for X Contact
@ Combination Rewind Crank-Camera Back Lock
@ Film Ptane Mark
@ Lens Mounting Screw / Praktica screw mount
@ Aperture Selector Ring
@ Aperture Distance Mark
@ Depth of Field Indicator
@ Distance Scale
@ FP Contact Socket
@ X contact Socket
@ Focusing R ing
@ Viewf inder Eyepiece / Designed for attaching the
    Eye Cup, etc.
View original page 7Page 8 · Read text
www.butkus.us
SPECIAL FEATURES                   BESONDERE TECHNISCHE MERKMALE
1. lmproved Through-The-Lens Exposure Meter         1. Verbesserte TTL Belichtungsmessung
The exposure meter of the FUJICA ST705W consists      Der Belichtungsmesser der FUJICA ST705W besteht
of 2 Silicon photocell light receptors located on      aus zwei Silizium Fotozellen, die das Licht emp-
either side of the viewf inder eyepiece, which are       fangen; je eine dieser Fotozellen bef indet sich auf
connected to an FET (Field Effect Transistor)       jeder Seite des Sucherokulars. Sie sind an eine FET
circuit and are coupled with the shutter and dia-      "Field Effect Transistor" Schaltung angeschlossen
phragm.  lt measures the average light intensity which      und sind mit VerschluB und Blende gekuppelt. Die
falls on the entire surface of the focusing glass. The      Messung erfolgt auf der Basis der Durchschnitts-
light is measured through the lens at full aperture to        Lichtintensitdt, die auf die Gesamtf lache der Sucher-
ensure that the view through the viewf inder is always       Mattscheibe  fallt. Das Licht wird durch das Objektiv
brigh t.                                                  bei voller Offnung gemessen, um lhnen ein immer
Its special features are: high sensitivity, complete         helles Sucherbild zu gewdhrleisten.
accuracy, Instantaneous response, and a spectral      Besondere Merkmale sind: hohe Empfindlichkeit,
sensitivity close to that of color film. Other merits      auBergewohnliche Genauigkeit, sofortige Reaktion
are its compatibility with any lens that can be    und eine Spektral-Empfindlichkeit, die der des
mounted on the camera. and elimination of the       Farbfilmes sehr dhnlich ist. Weitere Vorteile sind die
necessity of making exposure corrections in taking       Moglichkeit der Verwendung jedes Objektives, das in
close-ups and in shooting with a filter on the lens      die Kamera paBt und der Wegfall jeglicher Belich-
because the light that has passed through the lens  is      tungskorrektur bei Nahaufnahmen und bei der
the light that is measured.                             Benutzung von Filtern. Nur die Lichtmenge. die
2. World Renowned FUJINON Lens                     durch das Objektiv fdllt, wird effektiv gemessen.
The interchangeable lenses of the FUJICA ST705W      2. Weltbekannte FUJINON Objektive
are widely known for their superb color definition       Die Wechselobjektive der FUJICA ST705W sind be-
and perfect corner-to-corner picture sharpness and       kannt ftlr ihre groRartige Farbwiedergabe und die bis
c larity.                                       zum Bildrand gestochene Schiirfe und Brillanz.
3. Motorized Film Winder                           3. Automatischer Filmtransport
Accessory motorized winder (Fujica Auto Winder)      Der motorische Schnellaufzug mit dem Fujica Auto
automatically winds the film to let you shoot at a     Winder (Zubehor) gestattet den automatischen
rate of about 2 frames a second.                          Filmtransport mit einer Geschwindigkeit von ca. 2
4. A Complete Camera System in ltself                    B ildern/sek.
A wide range of interchangeable lenses, accessories,      4. Ein vollstdndiges Kamera-System
and its improved through-the-lens exposure meter      Zubehor, sowie die verbesserte TTL Lichtmessung,
make the FUJICA ST7O5W a complete camera sys-      machen die FUJICA ST705W zu einem vollstdndigen
tem in itself capable of handling any picture-taking       Kamera-System, mit dem so gut wie alle foto-
situation and subiect.                                   grafischen Aufgaben und Situationen gemeistert
                                                   werden konnen..
                                                                                                                          11
View original page 8Page 9 · Read text
BASIC STEPS                 GEN ERALITES
1. Load the Film                        1. Mise en place du chargeur
Pull the Combination Film Rewind       Tirer sur le bouton jusqu'd ce que le
                                                                                                                          leCrank - Back Cover Lock  f ully until      dos de l'appareil s'ouvre. Placerthe Camera Back automatically snaps       chargeur dans le logement pr6vu d cet
open. Next, load the film cartridge       effet et introduire l'amorce du film
 into the Film Chamber and insert the      dans la fente de l'axe de r6ceotion du
film into the slot of the Take-uo        film.
Soool.                                2. S6lection de la sensibitit6 du film
2. Set the Film Speed                 Si vous utilisez un FUJICHRON/E
 lf you are using a F UJ  I CO LO R F-tr or      R'100 ou FUJICOLOR F-II (100
FIJICHROME R100 (ASA 100) film,     ASA) tirer simplement sur la partie
 pull up the top of the Shutter Speed       sup6rieure du cadran de vitesse et
Selector Dial and turn it until the       tourner jusqu'd ce que le nombre 100         www.butkus.us
number 1OO appears in the center of       apparaisse dans le centre de la fen6tre
the ASA Film Speed Indicator      de sensibilit6 du film.
Window.
                             OPE RACION ES
KAMERABEDI ENUNG                               FU N DAMENTAL ES
1. Einlegen des Films                                     1. Cargue la peliculaZiehen Sie den Ruckspulhebel ganz      Levante la combinaci6n palanca de
heraus, bis sich die Kamerartlckwand      rebobinado de la pel fcula - cierre de
automatisch offnet. Sodann legen Sie      la tapa posterior totalmente hasta
den Film in die Filmkammer ein und     que salte automSticamente la tapastecken Sie die Filmzunge in den       posterior de la cdmara. A continua-Sch litz der Aufwickelspu  le.                                           ci6n, cargue el cartucho de la pelicula en la cdmara de oelicula e
2. Einstellen der Filmempfindlichkeit       introduzca la pelfcula en la ranura de la bobina de bobinado.
Wenn Sie FUJICOLOR F tr oder     2. Ajuste la sensibilidad de la pelicula
FUJICHROME RlOO (ASA 1OOI21      Si utiliza Vd. una pelfcula FUJICOLOR F-tr o FUJICHROME R100
DIN) benutzen, heben Sie die Ver-     (ASA 1OO), simplemente levante la parte superior del dial selector
schluBzeiten-Wahlscheibe leicht an     de velocidad de obturador y dele vueltas hasta que el n0mero 100 se
und drehen sie bis die Nummer 100      encuentra en el centro de la ventanilla indicadora de la sensibilidad
sich in der Mitte des Filmempfind-    ASA de la pelfcula.
 lich keitsfensters bef indet.
                                                                                                         13
View original page 9Page 10 · Read text
www.butkus.us
                             3. Set the Frame Counter to 1 (the       3. Stellen Sie das Bildzdhlwerk auf 1
                                                 first white dot before the number          (der erste weiBe Punkt vor der
                                              2l                              Nummer 2).
                            The odd numbers of the frame count-        Die weiBen Punkte auf dem Zzihlwerk
                          er are represented bY white dots-        sind die ungeraden Zahlen. Betdtigen            l   Wind the Film Advance Lever and         Sie den Filmaufzughebel und drticken
                                    press the Shutter Release Button. Do        Sie auf den Ausloseknopf.  Sie mrjssen
                                   this twice, and on the 3rd winding,       2 Blindbelichtungen machen, bei dem
                                 the  f irst white dot on the  f ilm count-        dritten Aufzug des Filmtransport-
                               er (frame No.  'l ) will moveopposite       hebels liegen der erste weiBe Punkt
                                   the triangular mark.                     auf dem Bildziihlwerk (Bild Nr. 1)
                                                und die Dreiecksmarke nebenei n-
                                        4. Set the Shutter Speed Selector Dial         ander.
                            Turn the Shutter Speed Selector Dial
                            to the speed desired. lf you are      4. Einstellung der VerschluBzeit
                               shooting out of doors, the shutter       Stellen Sie die  VerschluBzeiten-
                              speed will be either 11125 sec. or       Wahlscheibe auf die von lhnen ge-
                            1125O sec. lf you are shooting in-       wrinschte VerschluBzeit. Frir AuBen-
                                   doors,  it will be 1/30 sec. or 1/60 sec.      aufnahmen wird die Belichtungszeit
                                                                     in den meisten Fdllen  1i 125 Sek.                            5. Focus the Lens and Frame Your         oder 1/250 Sek. sein, wdhrend sie fLlr
                                         Picture                       lnnenaufnahmen  je nach den
                          (1)Look through the Viewfinder        Lichtverhdltnissen   1/3O Sek. oder                                                                                                    -                                   Eyepiece and turn the Focusing        1/60 Sek. betragen                                                                                                        wird.                                  R ing to focus and frame your
                                            o   i ctu re.                             5. Scharfeinstellung und  Bildaus-
                                        (2) To focus, turn the Focusing Ring            schnitt
                               to make the uooer and lower           (1 ) Schauen Sie durch den Sucher
                                    segments of the split image in the          und stellen Sie das Objektiv scharf
                                 microprism center spot converge           ein. Dann wdhlen Sie den Bild-
                                and form a oerfect  fit.                         ausschnitt.
                                                                                                 \2) Zur Scharfeinstellung drehen Sie
                                                        den Einstel lring, bis die oberen
                                                        und unteren Teile des Schnitt-
                                                                           bildes im Mikroprismakreis  ein
                                                                                                                              ei nziges Bild werden.

't4
View original page 10Page 11 · Read text
=
                              6. Set the Exposure                   6. Einstettuns der Betichtuns f                                 Press the Comb ination Shutter Re-     Nun drucken Sie den kombinierten                             lease Button    Exposure Meter      VerschluBausloser  Belichtunos-                                Switch partway down to activate the                                                          messerknopf ungefahr halbwegs                              exposure meter needle in the view-                                     finder, and turn the Aperture Selec-        nieder, um die Belichtungsmesser-
                                  tor Ring until the needle moves into       nadel im Sucher zu aktivieren und
                              the center of the indentation. You       betdtigen dabei gleichzeitig den
                             can also set the aperture first then        Blendenring. Sobald sich die MeB-
                               adjust the needle by turning the       werknadel in der Mitte des Rahmen-
                                  Shutter Speed Selector Dial.                  einschnittes befindet, ist die richtige
                                                                         Blende eingestellt. Sie konnen jedoch
                            7. Press the Shutter Release Button         auch die Blende zuerst einstel len, um
                              Hold camera steady to prevent shake      durch Drehen der VerschluBzeiten-
                            and gently press the Shutter Release        Wahlscheibe die korrekte Belichtuno                                  Bu tto n.                                                                        zu erhalten.

                                                                    7. Ausliisen des Verschlusses
                                                                   Beachten Sie bitte, daB die Kamera
                                                                                ruhig gehalten werden muB. wenn Sie
                                                                                    fotografieren. Dnicken Sie nur leicht
                                                   und ruhig auf den Ausloseknopf,
                                                                    damit die Gefahr einer Verwacklung
                                                                                  ausgesch lossen wird.


16
View original page 11Page 12 · Read text
www.butkus.us
                            8. Rewind the Film                    8. R6embobinage
                               After you have exposed the entire       Aprds avoir expos6 tout le film aP-
                                       roll of film, press the Film Rewind       puyer sur le bouton de r6embobinage
                           Button, erect the Film Rewind      oui libdre l'axe d'entrainement du     {
                             Crank, and turn it in the direction        film, ensuite ddgager la manivel le de
                               pointed by the arrow and wind the       r6embobinage et la tourner dans la        il
                              film back into the cartridge, until        direction indiqu6e par la  f ldche pour
                         you feel tension released. Next, lift       renvoyer le film dans son chargeur
                              the Back Cover Lock fully up until        jusqu'd ce que vous sentiez une l69dre
                              the camera back snaps open. Now,        tension. Vous pouvez ensuite ouvrir
                              remove the cartridge.                           l'appareil pour d6gager le chargeur.
                            8. Riickspulung des Films               8. Rebobine la pelicula
                         Nachdem Sie einen Film vollstdndig       Desou6s de haber utilizado u n carrete
                                   belichtet haben, drL.icken Sie auf den      completo de  pel fcula, apriete  el
                                   Filmrrickspulknopf, stellen den Film-       bot6n de rebobinado, levante la Pa-
                                  rUckspulhebel hoch und drehen ihn in        lanca de rebobinado de la pel fcula y
                              der Pfeilrichtung. bis Sie einen leich-       dele vueltas en la direcci6n indicada
                             ten Widerstand souren. Nun ist der      por la  f lecha y enrolle la pelfcula
                           Film in die Kassette zurr.ickgespult.        hacia atrds dentro del cartucho, hasta
                        Sodann offnen Sie die Kamera-      que sienta una ligera tensi6n. A con-
                            Ruckwand, indem Sie den Filmruck-       tinuaci6n levante el cierre de la tapa
                                  spulhebel anheben und nehmen lhren        posterior totalmente, hasta que se
                                   belichteten Film aus der Kamera.          abra dicha tapa. Entonces saque  el
                                                                                          cartu cn o.


18
View original page 12Page 13 · Read text
BATTERY INSERTION         CHARGEMENT DES PILES
                       1. Open the Cover                      1. Ouverture du logement
                              lnsert a coin into the slot of the Bat-      Introduire une pidce de monnaie dans
                           tery Chamber Cover @ located on the      la fente du couvercle @ et tourner                        upper back side of the body and turn    dans le sens contraire des aiguilles
                                           it counter-clockwise.                       d'une montre.
                      2. Load the Batteries                   2. Mise en place des piles
                               Insert two nickle-zinc batteries, one on      Introduire 2 piles du type nickel-zinc
                    top of the other, into the battery     dans le logement    l'une sur l'autre  le                                                                                           -                       chamber with the plus sides (+) facing      signe (+) 6tant tournd                                                                                                     vers l'extdrieur                                                                                                               -                        outward and close the cover.                  et ref ermer le couvercle.
                 o   lf you are buying new batteries, be   o  Si vous achetez de nouvelles piles,
www.butkus.us             sure to specify 1 .5V silver oxide           spdcif iez blen des piles d l'oxyde
                                                                                                             (E veready S-7 6E   ,                                batteries (Eveready S-76E, Mallory         d 'argent 1 ,5V
                     MS 76H or UCAR S-76E).                  Mallory MS-76H ou UCAR S 76E).
                EINLEGEN DER BATTERIEN    CARGUE LAS PILAS
                        1. Offnen des Batteriegehdusedeckels       1. Abra la tapa
                        Entfernen Sie den Deckel des Bat-     Introduzca una moneda en la ranura
                             teriegehduses @, indem Sie eine Milnze    de la tapa del orif icio de ubicaci6n de
                            in den Schlitz oben an der RLlckseite       las pilas @ situado en la parte superior
                        des Kameragehduses stecken und gegen      trasera del cuerpo de la miiquina y
                           die U hrzeigerrichtung drehen.              dele vuelta en sentido contrario a las                      2. Einlegen der Batterien                    agujasdelreloj.
                      Legen Sie zwei Nickel-Zink-Batterien     2. Cargue las pilas
                   und zwar hintereinander in die Bat-     Introduzca dos pilas de nfquel y cinc,
                        teriekammer ein. Beachten Sie dabel,    una encima de otra, en la cdmara de
                   daB der Pluspol (+) bei beiden Bat-      pilas con el lado del polo positivo (+)
                            terien nach auBen zeight. Nun befesti-      hacia af uera y cierre la tapa.
                         gen Sie den Deckel wieder.           o Si compra pilas nuevas, asegIrese
                 o Wenn Sie sich neue Batterien      de especificar pilas de 6xido de
                            kaufen, bitte verlangen Sie 1,5V        plata de 1 ,5V (Eveready S-76E,
                             Silberoxyd-Batterien (Eveready S-        Mallory MS-76H or UCAR S 76E).
                         76E, Mallory MS-76H oder UCAR
                              s-76E  ).

                                                                                                               19
View original page 13Page 14 · Read text
www.butkus.us
                              3. Check the Batteries                  3. Batteriepri.if ung
                                                     (i )Set the ASA Speed Selector @ to                 ( 1 ) Stellen Sie den F ilmempf ind-
                                 i0O, the Aperture Selector @            lichkeitswiihler €r auf 100 ASA
                               to F1.8, and the shutter Speed         121 DIN), den Blendenring @
                                     Selector @ to 60.                          auf F1.8, und die VerschluBzeiten-
                                         (2) Point the camera toward bright          Wahlscheibe €) auf 60.
                                            light (flourescent light, etc.), look          (2) Halten Sie die Kamera gegen helles
                                 through the viewfinder and press         Licht lz.B. Leuchtstoff lampen-
                               the Shutter Release Button D            licht), blicken Sie durch den
                                  about halfway down.                    Sucher und driicken Sie den Aus-
                                      (3) lf the meter needle in the view-             losek nopf @ halbwegs nach unten.
       Batteries properly loaded          finder moves from the plus side       (3)Schldgt die Me8werknadel im
      Die Batterien sind richtio        down to the minus side when the         Sucher von der Plus-Seite zur
       eing elegt                     camera is faced toward dim light           Minus-Seite hin aus. wenn die
     Les oiles              sont correcte-           (you can block out the light with         Kamera gegen geddmpftes Licht            chargees     ment                           your hand  ) , the batteries are          gerichtet wird, (verwehren Sie     Las pilas estan debida-
     mente colocadas                   loaded correctly.                dem Licht den Zutritt, indem
                                       (4) lf the needle remains stationary         Sie die Hand vor die Kamera      Bright                  Dim light            light                                 on the plus side or minus side when            halten), so sind die Batterien rich-      Helles           Licht    Geddmofes
                            Licht-                                                                            is faced                                                    from                                                                    bright                                                                           to                                     the camera                                                                                                         tig eingelegt.    Lumidre
                                                           batteries                                                              are                                                                            either                                                  Iight, the      brillante          atteLumlere                                  nu ee        dim                                                                                             (4) Sollte                                                                                    die Nadel sich von der Plus-
      Luz brillante   Luz tenue        exhausted or improperly loaded,        oder Minusseite nicht bewegen,
                               and have to be chanqed or reloaded             selbst wenn die Kamera vom hellen
                                   propeny.                      zum gedzimpften Licht gehalten
                                                                          wird, so sind die Batterien ent-
                                                            weder erschopft oder unrichtig
                                                                                     eingelegt. Das heiBt, daB Sie die
                                                                              Batterien auyuechseln oder diese
                                                                          nochmals richtig einlegen mlissen. I-)

20
View original page 14Page 15 · Read text
3. V6rif ication des piles                  3. Compruebe las pilas                      Batteries weak or improp-
(1) R69ler le sdlecteur de sensibilit6       (1)Coloque el selector de sensibilidad      erlv loaded
  ASA @ sur 100, la bague de sdlec-        ASA de la pelfcula @ en 100, el     oderDie Batterienunrichtigsindeingelegtschwach
   tion diaphragme @ sur F1.8,            anillo selector de apertura @ en     Les oiles sont us6es ou
   et le selecteur de vitesse d'obtura-           Fi.B, y el selector de velocidad de     mal chargees
   tion aO sur 60.                            obturador @ en 60.                   malLas colocadaspilas estan gastadas o
(2) Pointer l'appareil vers une lumidre          (2) Ponga la cdmara de frente a una
   brillante (lumidre   f luorescente,         luz brillante (luz  f luorescente,      In bright and dim light
    etc.) , regarder dans le viseur et ap-            etc.), mire a travds del visor y      BeiLrc hthellem und geddmpftem
   puyer d mi-course sur le d6clen-           apriete el bot6n disparador del      En,lumi6re brillante et att6-
         (D   .   cheur                                          obturador                       @ hasta la mitad de su      nueeCon luz brillante y tenue        l'aiguille(3) Si           du posemdtre dans le                                                        recorr ido.
   viseur passe du c6t6 (+) au cotc3          (3) Si la aguja medidora que se halla
   (-)  lorsque l'appareil est dirig6          en el visor se mueve desde el lado
   vers une lumiereatt6nu6e  (bloquer        de mds hacia el lado de menos
   la lumidre avec la main).les piles         cuando se dirige la cdmara hacia
   sont correctement  chargdes.              una luz tenue (se puede tapar la
(4) Si l'aiguille ne se ddplace pas du          luz por medio de la mano), las
  cdte (+) ou (-) meme quand                pi las estiin debidamente co locadas.
    l'appareil est tourn6 d'une lumidre        (4)Si la aguja se queda en el lado de
   brillante d une lumiere att6nu6e,         mds o menos aun cuando se dirija     Bright light     Dim lighr
    les piles sont soit 6puis6es, soit mal           la cd mara desde la luz br  il la nte    Helles Licht      Gediimpfes
   chargees.  ll  faut donc ou  les           hacia la tenue, las pilas o estdn    Lumi6rebrillante            LichtLumidre   changer ou les recharger correcte-           gastadas o no se han bien colocado.    Luz brillante      attenu6e
   ment.                        O sea, tendrd que cambiar las pilas                    Luz tenue
                                         o co locarlas debidamente.
             T-T

                                                                                                                          21
View original page 15Page 16 · Read text
www.butkus.us
                       The nickel-zinc batteries and          Les piles au nickel-zinc ainsi que
                                            silver oxide batteries will normal-             les piles d l'oxyde d'argent durent
                                             ly last for 1 year.                         en g6n6ral 1 an.
                                                     lf you are not using the camera        Si vous n'utilisez paS l'appareil
                                  for a long wh ile, remove the         pendant un certain temps, il est
                                        batteries and keeo them where it           pr6f6rable d'enlever les piles et de                                                                                                               il                                                           is dry.                                              les conserver dans un endroit sec.
                            Be sure to wipe both ends of the                 ll est recommand6 de bien net-
                                      batteries clean with a oiece of          toyer les faces des pi les avant de
                                         cloth before loading. Poor contact            les placer pour obtenir un mei l-                             mav result  if the ends are unclean.             leur contact.            t

                                Die Nickel-Zink- und Silberoxyd-          Las pilas de niquel y cinc y las
                                    Batterien haben gewohnlich eine           pilas de 6xido de plata durardn
                                     Lebensdauer von einem Jahr.              normalmente un affo
                            Wenn Sie die Kamera ldngere Zeit          Si no utiliza la cdmara por alg0n
                                  nicht benutzen, nehmen Sie die          tiempo, saque las pilas y mant6n-
                                         Batterien heraus und bewahren sie           galas en un lugar seco.
                                   an einem trockenen Platz auf.               Aseg0rese de limpiar ambos extre-
                            Die Batterien sollten vor dem         mos de las pilas con un pafro antes
                                      Einlegen in die Kamera mit einem       de colocarlas en la cSmara. Si
                                        sauberen, trockenen Tuch abgerie-        ambos lados estdn manchados no
                                 ben werden, damit guter Kontakt          hardn buen contacto-
                                        gewdhrleistet  ist.


22
View original page 16Page 17 · Read text
FI LM LOADING               EINLEGEN DES FILMS
1. Open the Camera Back                1. Offnen der Kamera-Riickwand
Lift the Combination Film Rewind       Ziehe n  Sie den  kombinierten
Crank - Camera Back Lock (D fully        Ruckspu lhebel   KamerarLlckwand-
up until the Camera Back 36 auto-       verschluB @ soweit heraus, bis sich
matically snaps open.                        die Rrickwand €3 off net.
2. Load the Film                      2. Einlegen des Films
Insert the cartridge into the Film       Legen Sie die Filmkassette in die
Chamber @ witfr the sPool head       Filmkammer @ ein und zwar so, daB
(protection) pointing to the bottom        der sichtbare Spulenkern nach unten
of the camera, push down the Combi-        zeigt. Nun drLlcken Sie den Ruck-
nation Film Rewind Crank - Camera        spulhebel (D herunter, bis die Film-
Back Lock @ to engage the Film        rrickspulachse @ einrastet. Sodann
Rewind Spindle @ with the film       ziehen Sie die Filmzunge aus der
spool. Pull out the trimmed end of       Kassette und stecken den Film bis
the  f ilm and insert it down to the     zum untersten Ende in den Schlitz
bottom end into the slot of the        der Aufwickelspule  @).
Take-up Spool @.


                                                                              23
View original page 17Page 18 · Read text
www.butkus.us
                  3. Close the Camera Back                3. SchlieBen der Kamerari.ickwand
                 wind the  f ilm a little with the Film        Transportieren Sie den Film mit dem
                                                                                                         Seiten                Advance Lever C and engage the       Filmaufzughebel O bis beide
                          perf ora tions on both edges of the       der Perforation in die Zahnrdder ein-
                                                   f ilm with the sorocket teeth. Be sure        gerastet sind. Beachten Sie bitte, daB                                                          der Film sich zwischen den Frlhrunos-                     the film is properly inserted between                                                           schienen @, befindet. Nun klappLn                    the Guide Rail @. Now, press down       Sie die Kameraruckwand  zu, bis sie        /',
                     the Camera Back until  it closes tight-        horbar einschnappt.
                           ly with a click.                               r Wenn die  Filmrrickspulkurbel             o   lf the Film Rewind Crank turns in        beim Drehen des Filmaufzuohe-
                     the opposite direction of the ar-          bels (f  sich entgegen der PTeil-
                 row as you wind the Film Ad-          richtung bewegt, bedeutet dies,
                                                                                                           eingelegtwww.butkus.us           vance Lever O,  it means the  f ilm        daB der Film richtig                                                      wurde und ordnungsgemdB trans-                          has been loaded properly.
                      r  The odd numbers of the Frame        r   portiert.Die ungeraden Zahlen des Bild-
                   Counter @ are represented by          zahlwerks @ werden durch weiBe
                        white dots.                               Punkte angezeigt.
                      r  To allow you to take quick shots        r Um schnelles Aufnehmen zu er-
                       in succession, the Film Advance           moglichen, kehrt der Filmaufzugs-
                    Lever O  will be back with a          hebel @ nicht in seine Normal-                                                                    stellung zurr-ick. Er sollte aber                            slight latitude. Press it all the way
                  back after you have finished          nach Beendigung der letzten Auf-                                                   nahme zurLickgeschoben werden.
                          shooti ng.                           4. Einstellung des Bildzdhlwerks @                 4. Set the Frame Counter (il to t           auf 1 (der erste Punkt vor Num-
                        (the first white dot befor-e the           mer 2l
                   number 2)                                Betiitigen Sie den F ilmaufzughebel
                Wind the Film Advance Lever C  all        bis zum Anschlag nach rechts und                  the way to the right and press the        drricken Sie auf den Ausloseknopf
                                                                                       Blindbelichtungen                   Shutter Release Button @ . Do this     @. Sie mtissen 2
                     twice, and on the third winding, the       machen, bei dem dritten Aufzug des                                                            Filmtransporthebels erscheint der                          first white dot before the number 2                                                           erste weiBe Punkt vor Nr. 2 im                    will move opposite the triangular         Fenster des Bildzdhlwerks neben der
                   mark. You are now readv to take the        Dreiecksmarke. Die Kamera ist nun
                           first picture.                                                     fi.ir die erste Aufnahme schuBbereit.                                                                                           25
View original page 18Page 19 · Read text
5. Loading film with the  Fuiica    5. Charger le film avec le Fujica Auto
                      Auto Winder attached                    Winder adapt6 i l'appareil
                    Just follow the foregoing instructions     Suivre les instructions de 1 d 3 qui It                from 1 to 3 then turn on the Auto     pr6cddent, et ouvrir l'interrupteur de
    ON           Winder switch. You won't have to     l'Auto Winder. Vous n'avez plus besoin
                  use the Film Advance Lever because     d'employer le levier d'armement, car le
                      the  f ilm will advance by itself.               film avancera de lui-meme.
             o   lf the  f ilm does not advance auto-   o Si le film n'avance pas automati-It                     matically when the Auto Winder      quement lorsque l'interrupteur est
   OFF              switch is turned on, just switch  it      tourn6 sur ON, simplement  le

                                                                                          I                       off and turn it immediately on                     f ermer u n instant et l'ouvrir de
                            again.                                 nouveau imm6d iatement.
                          .  Other detailed instructions are   o  D'autres instructions d6taill6es sont
                      packed with the Auto Winder.               fournies avec l'Auto Winder.

                 5. E inlegen des Films mit angesetz-     5. Colocaci6n de la pelfcula con el
                    tem Auto Winder                           Fujica Auto Winder montado en la
              Folgen Sie den  vorauEehenden        cSmara
                  Anweisungen 1 bis 3 und schalten Sie     Sfganse las instrucciones  anteriores de
                den Auto Winder ein. Nun brauchen    1 a 3 y dbrase el interruptor del Auto
                   Sie den Filmaufzugshebel  nicht zu be-    Winder. Ya no serd necesario usar la
                           tiitigen, weil der Film selbsttdtig  trans-      palanca de avance de pelfcula porque  la
                        portiert wird.                                oelfcula avanza oor si misma.
             o Wenn der Film beim Einschalten   o Si la pelfcula no avanza automdti-
                       des Auto Winder nicht automatisch       camente cuando el interruotor del
                          transportiert wird, schalten Sie den       Auto Winder estd abierto, simple-
                     Schalter zuerst aus und dann      mente ci6rrese el interruptor y
                       schalten Sie ihn sofort wieder ein.         vu6lvase a abrir inmed iatamente.
             o Andere, ins einzelne gehende   o Otras instrucciones detalladas se
                    A nweisu ngen liegen dem Auto        hallan en el paquete del Auto
                      Winder bei.                                Winder.


                                                                                                 27
View original page 19Page 21 · Read text
SETTING THE SHUTTER SPEED
    The letter B and the numbers 1,2,.... 1500 on the       Caution:
     Shutter Speed Selector Dial represent "bulb", 1 sec.,     Beyond B and 1500 (see illustration), the Shutter
    112 sec. etc. up to 1l15OO sec. They indicate the      Speed Selector Dial will turn lightly (there won't be
      length of time the  f ilm will be exposed to light.         any click stops) and the Shutter Speed Indicator
     This camera allows you to set exposure either by the     Needle in the Viewfinder will point anywhere
     shutter speed or by the size of the lens opening.     between B and 1500. The actual shutter speed,
     However,  it is best to set the shutter speed first. For       however. will be either B or 1/1500-sec.
     example, the shutter speed would be from 1l125to
     1/25O sec. if you are shooting outdoors, or from    To set the shutter speed, look through the view-
     1/30 sec. to 1/60 sec.,  if you are shooting indoors.          finder, turn the Shutter Speed Selector Dial and set
    To set the shutter speed, first turn the Shutter Speed          it accurately at one of the click stops (not between                     .TI
     Selector Dial while pressing down on it slightly and      them ).                                                                        I
      set the number you want opposite the red dot on the
     camera bodv.

                                                                                                                                                                                                                                                                                                                                                                                                                                                                                                                                       f,   o The shutter soeed numbers are also visible in the                               [-'                                    {        viewfinder (left side edge). The shutter speed  is
        set by moving the green indicator needle into                         l\.1
           posit io n.
   o Use        B (bulb) if the exposure will take 2 seconds                              \,,         or longer.
       There are no intermediate settings between the
        numbers indicated on the dial.
      60 is marked in red to remind you that it is the
        speed used for shooting with electronic flash.
        Excepting 1/1500 second, each shutter speed is
         either one-half or twice the speed of the shutter
        soeed next to it.      @

30                                                                                    J
View original page 21Page 22 · Read text
www.butkus.us
FOCUS THE LENS AND        SCHARFEINSTELLUNG UND
F RAM E YOU R PICTU R E        BILDAUSSCHN ITT
1. Focus the Lens                     1. Scharfeinstellung
 (1) Look through the Viewfinder and          ( 1 ) Schauen Sie durch den Sucher, und
   point the camera so that the main       richten Sie lhre Kamera auf das
     su bject is seen th rough the small       Motiv, so daB der Hauptbildgegen-                                          stand sich im Mikroorismakreis im   microprism center spot.                                       Zentrum des Mattscheibenbildes  be-
 (2) Split-image Focusing                                              fi ndet.
   Turn the Focusing Ring 2i until      (2) Scharfeinstellung durch Schnitt-
   the upper and lower segments of         b ildentfern u ngsmesser
   the split image in the microPrism       Drehen Sie den Scharfeinstellungs-
   center spot converge to form a       ring bis d ie oberen u nd u nteren
    single image.                         Teile des Schnittbildes in dem
 (3) Microprism Focusing                      Mikroprismakreis ein einziges Bild
   Turn the Focusing R ing until the     (3) weroen.M ik roprismatische Scharfeinstel-
    image in the microprism center spot            lu ng
    appears sharp.                          Drehen Sie den Scharfeinstellring  so
 (4) You can also focus with anv part of       weit, bis das Mikroprisma scharf
   the area surrounding the micro-      und klar erscheint.
   orism center soot. This method is      (4) Sie konnen auch mit dem Gesamten
    especially useful when shooting      Mattscheiben-Bildfeldes  eine                                           Scharfeinstellung erzielen. Diese    with aperture stopped far down.                                   Methode ist besonders dann anzu- (5) The white numbers on the Focusing                                         wenden. wenn man Aufnahmen mit
    Ring are for meters and the green        geringer Blendenoffnung macht.
   numbers are for feet. The distance     (5) Die weiBen Zahlen auf dem Scharf-
   can also be set by visual judgement         einstellring sind Angaben in Meter,
          f or qu ick shooting.                    wdhrend die grLinen Zahlen Anga-
  When shooting extreme closeuPs,      ben in FuB sind. FLlr schnelle Auf-
   the distance from subject to Film      nahmen kann die Entfernung auch
   Plane Mark (? must be PreciselY       nach AugenmaB eingestellt werden.                                            Falls Sie extreme Nahaufnahmen    measured with a tape measure.                                   machen wollen, so muB die Ent-
                                      fernung zwischen Motiv und der
                                           Filmebene genau gemessen werden.
                                          J
View original page 22Page 23 · Read text
2. Frame Your Picture                                2. Cadrage
The Viewfinder will let you see 92o/o of the entire      Le viseur vous permet de voir 92/1OO de l'image
view that will register on your film so that you can        enregistr6e sur le film. Vous pouvez donc utiliser
go ahead and use the whole length and width of the       sans crainte toute la longueur et largeur de votre
area in the Viewf inder to  f rame your picture.                  viseu r pour cadrer votre image.
o  Eyesight Adjustment Lens                   o  Lentille de correction d votre vue
The Viewfinder  is provided with an eyepiece for        L'appareil est livr6 avec un oculaire pour une
those with normal vision. lf you are near sighted or       personne ayant une vue normale. Si votre vue n'est
far sighted, be sure to use an Eyesight Adjustment       pas parfaite, il faut utiliser la lentille de correction
Lens, otherwise it will be extremely diff icult for you      autrement il vous sera difficile de faire une bonne
to focus the lens precisely. Four different Eyesight       mise au point.  ll existe 4 lentilles: *2, +O,5, -2,5 -4
Adjustment Lenses are supplied as optional acces-         diootries.
sories: +2,+O.5, -2.5 and -4 dioptor.
2. Wahl des Bildausschnittes                          2. Encuadre su fotograffa
lm Sucher sehen Sie 92% des Bildes. das auf lhrem        El visor le permitirti ver el 9?o/o de toda la visi6n que
Film registriert wird. Sie konnen also getrost lhr Bild        registrard su pelfcula de forma que puede utilizar
bis in die duBersten Winkel hinein komponieren.          toda la anchura y  profund idad de la zona que
o  Sehschdrfenadapter                                     observa en su visor para encuadrar su fotograffa.
Der Sucher ist mit einem Okular fLir normale     o  Lente de ajuste para correcci6n de la visi6n
Sehschdrfe ausgestattet. Wenn Sie kurz- oder weit-      Al visor se le proporciona un ocular para los que
sichtig sind, sollten Sie unbedingt von dem als       tienen visi6n normal. Si es Vd. de vista corta o de
Zubehor erhaltlichen Ausgleichsadapter Gebrauch        vista lejana, aseg0rese de utilizar una lente con aj uste
machen, da die Scharfeinstel lung sonst schwierig sein     o correcci6n de visi6n. ya que si no le serd muy
kann. Diese Adapter sind in 4 Dioptrien erhdltlich:        diffcil enfocar con precisi6n el objetivo. Como
                                                                                                    de+2,+O,5, -2,5 und -4.                                    accesorios a opci6n se suministran cuatro lentes
                                                         correcci6n de visi6n . +2, +O,5, -2,5 V -4 dioptrias.

                                                                                                                                                                                      ,$
                                    J
View original page 23Page 24 · Read text
www.butkus.us

CORRECT EXPOSURE
                                                                                                             lens is 55mm1. Press slightly the Shutter Release Button                 ff11.4 1sec. -f 1161/1500 sec.). lf thePoint the camera at your subject while looking       F1.8, the range is from EV1.J   EV1B.5 (f/1.8  1                                                                                              -through the viewf inder and press the Shutter Release         S€c. ru f/16 1/1 5OO sec.).
Button @ partway down. The meter needle on the       Further, the camera's full aperture metering system
right hand side of the viewf inder will move up from         lets you set the exposure with the lens wide open
the (-) position.                                  so that the viewing image through the viewfinder
2. Turn the Aperture Selector Ring                      remains always bright. lt also enables you to check
Press the Shutter Release Button partway down and       the depth of  f ield for the aperture you have selected
turn the Aperture Selector Fing @ until the needle      by pressing the Depth of Field Preview Button. (See
in the viewf inder moves into the center of the inden-      page62, "Utilizing the lens depth of  f ield".)
tation. You now have the correct exposure.            The chart on page 58 shows the light measuring
3. lf the Needle does not move into the Center of      range of the FUJICA ST705W's exposure meter.
   the Indentation                            The Shutter Speed Selector Dial can be set over
lf the meter needle does not move into the center of       every ASA speed and shutter speed combination on
the Indentation by turning the Aperture Selector      the dial, but the exposure meter will operate only
Ring, you will have to change the shutter speed.            within the range shown in the chart.
o   lf the needle is near the (+) side, increase the    o When using a full aperture metering lens, it  is
   shutter speed. (Example:  lf the shutter speed is          impossible to measure the light with the aperture
   11125 sec., turn the dial to 1/250 sec.).                    stopped down.
o  lf the needle is near the (-)  side. reduce the      5. Your FUJICA ST705W  is designed for full aper-
   shutter speed. (Example:  lf the shutter speed is        ture metering with FUJINON interchangeable
   11125 sec., reduce it to 1/60 sec.).                             lenses which are made for full aperture metering
4. Wide Measuring Range                                  and stopped-down metering with interchangeable
Since the light that is measured is the average light           lenses made for stopped-down metering (includ-
intensity falling on the focusing glass, the range of          ing Praktica screw mount lenses of other makes)   .
measurement must differ depending on the speeds of          Also, the aperture is stopped down to measure
the lens and film. A noteworthv feature of this        the light when shooting through an extension
exposure meter is that it covers a wide range of           bellows, extension tube, microscope, etc.
exposure values.  lf you are shooting with Fujicolor       To measure the light with the aperture stopped
Fll (ASA 100) film using a 50mm F1.4 lens, for        down ,   f irst press down the Depth of  F ield
example, the range covered would be EV1   EV18.5          Preview Button and lock it by turning it to the                                           -
                                                                                                 37
View original page 24Related documents and language editions
From the M. Butkus archive. Original publisher and archive notices are retained.
Check the model and edition against your equipment.
PDF verified 2026-10-10.