Film cameras
Fujica ST801 User manual
User manual for Fujica ST801. 24 pages in English. Read the original PDF, download or print a copy without registration.
24 pagesEnglish4.9 MB PDF
Loading your manual…Open PDF directly
Document details
- Brand
- Fujica
- Model / document
- Fujica ST801
- Document type
- User manual
- Language
- English
- Pages
- 24
- File size
- 4.9 MB
- Category
- Film cameras
- Document date
- Not specified in catalog
Search available document text
Find a term, then jump to its page in the original PDF. Image-only pages may not be searchable; check the PDF for exact wording and diagrams.
Page 2 · Read text
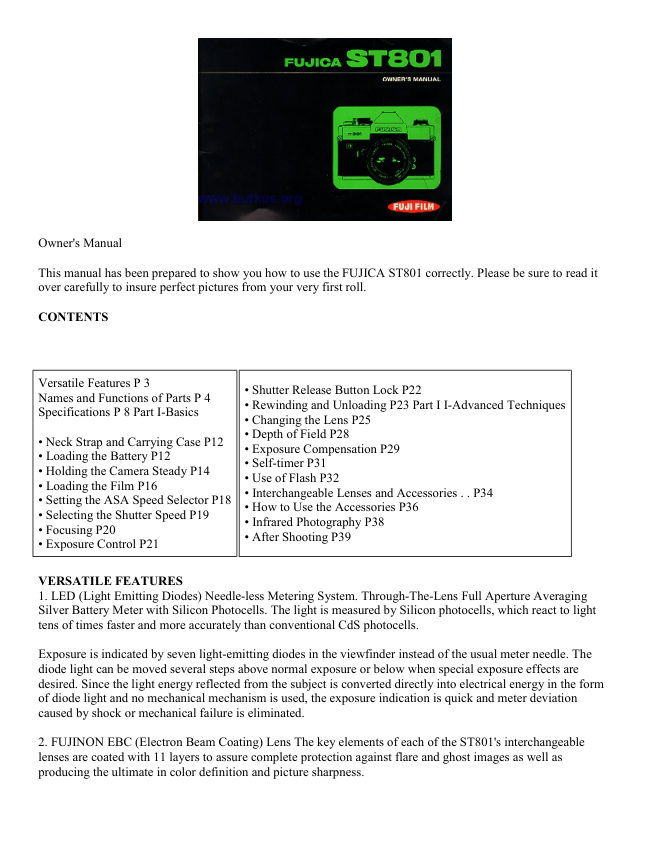
Owner's Manual

This manual has been prepared to show you how to use the FUJICA ST801 correctly. Please be sure to read it
over carefully to insure perfect pictures from your very first roll.

CONTENTS


Versatile Features P 3
                                              • Shutter Release Button Lock P22
Names and Functions of Parts P 4
                                              • Rewinding and Unloading P23 Part I I-Advanced Techniques
Specifications P 8 Part I-Basics
                                              • Changing the Lens P25
                                              • Depth of Field P28
• Neck Strap and Carrying Case P12
                                              • Exposure Compensation P29
• Loading the Battery P12
                                              • Self-timer P31
• Holding the Camera Steady P14
                                              • Use of Flash P32
• Loading the Film P16
                                              • Interchangeable Lenses and Accessories . . P34
• Setting the ASA Speed Selector P18
                                              • How to Use the Accessories P36
• Selecting the Shutter Speed P19
                                              • Infrared Photography P38
• Focusing P20
                                              • After Shooting P39
• Exposure Control P21


VERSATILE FEATURES
1. LED (Light Emitting Diodes) Needle-less Metering System. Through-The-Lens Full Aperture Averaging
Silver Battery Meter with Silicon Photocells. The light is measured by Silicon photocells, which react to light
tens of times faster and more accurately than conventional CdS photocells.

Exposure is indicated by seven light-emitting diodes in the viewfinder instead of the usual meter needle. The
diode light can be moved several steps above normal exposure or below when special exposure effects are
desired. Since the light energy reflected from the subject is converted directly into electrical energy in the form
of diode light and no mechanical mechanism is used, the exposure indication is quick and meter deviation
caused by shock or mechanical failure is eliminated.

2. FUJINON EBC (Electron Beam Coating) Lens The key elements of each of the ST801's interchangeable
lenses are coated with 11 layers to assure complete protection against flare and ghost images as well as
producing the ultimate in color definition and picture sharpness.
View original page 2Page 3 · Read text
www.butkus.us


3. The FUJICA ST801 Complete Photographic System
A wide selection of interchangeable lenses ranging all the way from 28mm wide angle to 1000mm ultra
telephoto plus two zoom lenses and a complete set of carefully engineered accessories bring every picture-
taking situation within easy reach of everyone.

Part 1 Explains the basic operations of the camera. The reader is recommended to master the basics before
proceeding to:
Part 2 which deals with the more advanced techniques of photography.


                         www.butkus.us


1• Film Advance Lever                               14. Accessory (hot) Shoe

2• Shutter Speed Selector Dial                    15 Hot-shoe for X Contact

3. Film Speed Window                          16 Film Rewind Crank

4• Exposure Counter (automatic reset, additive)      17 Film Rewind/Back Cover Lock

5• Combination Shutter Release/Exposure Meter       18, Film Plane Indicator

6. Activating Button (provided with lock and cable    19 Aperture Scale

release socket)                                 20 Distance/Aperture Indicator
View original page 3Page 4 · Read text
7• Shutter Speed/ASA Speed Selector 71) Shutter     21• Depth of Field Scale
Speed Mark (red dot)
                                                     22. Aperture Selector Ring
8• Neck Strap Ring
                                                     23. Distance Scale
9. Depth of Field Button (provided with lock)
                                                 24• Focusing Ring
10• Self-timer Start Button
                                                 25• FP Contact Socket
11• Self-timer
                                                     26. X Contact Socket
12• Lens Safety Lock Release Button

13. Standard Lens


                                                                                                                Digitally signed by Mike Butkus
                                                                                    DN: cn=Mike Butkus, o=Butkus camera manuals,
                                                                                              ou=butkus.org, email=mike@butkus.org, c=US          Mike Butkus  Date: 2022.12.13 12:26:11 -05'00'

27. Viewfinder Eyepiece
28• Battery Compartment
28• Film Guide Rail
30. Film Rail                               36. Sprocket Wheel
31. Film Rewind Spindle                    37. Film Take-up Spool
                                            38. Film Pressure Roller
32. Film Cartridge Chamber                 39. Film Pressure Plate
33. Film Rewind Button
34. Tripod Socket
35. Shutter Curtain
View original page 4Page 6 · Read text
Exposure Control:                      TTL silicon photocell and light emitting diode
                                               metering system, averaging light measurement
                                               through full aperture and stopped down aperture,
                                                   aperture and shutter speed interlocked with
                                              exposure meter, switch-on switch-off with shutter
                                                     release button, built in large scale intergraded
                                                            circuit. .EV 1-19 light measuring range, adjustable
                                                             to.
                               ASA 25-3,200.

Silver battery power source (one 6-volt battery.
Malory PX28, Eveready No. 544).

                            Single-stroke lever action, 193 winding angle, winding latitude
Film Advance:
                          provided by lever


Dimensions & Weight:

5 ¼ (L) x 3 7/8 (H) x 3 1/2(D) in.133) L) x 91)H) x 88)D) mm (with 1:1.8, 55mm normal lens) 1.83 lb.
(830g) (with 1:1.8, 55mm normal lens) 1.401b. (635g) (body alone)

Accessories

Carrying Case, Neck Strap.

Optional Extras

Leather Case, Eye Cup, Eyesight Adjustment

Lens, Lens Hood, Right angle Finder, Close-up Lens, Extension Tubes, Microscope Adapter,

Leica Mount Adapter, Reverse Adapter, Bellows Extension, Macrocinecopy.
View original page 6Page 7 · Read text
www.butkus.us


1. Pull up the Combination Film
                                          2. Wind the Film Advance Lever and press and release
Rewind Crank/Back Cover Lock.
                                       the Shutter Release Button until you see 1 (white dot) in
Open the Camera Back Cover and
                                       the Frame Counter
Load the film.


                                             www.butkus.us


3. Set the ASA Film Speed.           4. Select the Shutter Speed.
View original page 7Page 9 · Read text
www.butkus.us


NECK STRAP AND CARRING CASE


                                ADDING THE BATTERY
The Neck Strap is attached to the Neck Strap
Ring.                                                (1) The battery you need is a 6V silver battery
                                              (Eveready No. 544 or Malory PX28).
The camera is fixed to the Carrying Case with
the screw provided in the bottom of the case.       (2) Under normal conditions, silver battery lasts
                                                      for about one year.
Note: The camera is taken out of the case for
film loading and unloading.                         (3) If the battery is exhausted, the red diode
                                                         light in the Viewfinder will not turn on.


(4) Wipe the battery clean with a piece of cloth before loading.

(5) Always remove the battery from the camera if you do not use it for a long time.

(6) Do not try to disassemble, short-circuit, or discard into a fire.

(7) Always lock the Shutter Release Button when you do not use the camera, otherwise the Battery Life will
become very short. (See instructions in shutter release section.)
View original page 9Page 10 · Read text
www.butkus.us


                                                                                    3. Look through the Viewfinder
                                                                 and touch the Shutter Release
1. Open the Battery Compartment    2. Load the battery and replace the     Button very lightly. If you see a
Cover.                              cover.                                red diode light on the right hand
                                                                                    side, the battery is properly is
                                                                          properly inserted.


Before going into the mechanics of picture-taking, remember that holding the camera steady is
an important basic of good photography. Camera movement results in blurred pictures.
View original page 10Page 11 · Read text
www.butkus.us

LOADING THE FILM

Be sure to load and unload the film in the shade avoiding direct sunlight.


                                                     (2) Load the cartridge and press down the(1) Open the Back Cover by lifting up the Film
                                         Film Rewind/Back Cover Lock.Rewind/Back Cover Lock.


                                      (4) Pull the film taut with the Film
(3) Pull out the film and insert it                                              (5) Be sure the film rests between
                             Advance Lever and make sure that
deeply into one of the slots                                                 the Guide Rails and then close the
                                     the sprocket teeth catch the
provided on the Take-up Spool.                                   Back Cover.
                                     perforations of the film.
View original page 11Page 12 · Read text
2. FILM ADVANCE


                                Wind the Film Advance Lever and press down the
                                           Shutter Release Button. Repeat once or twice until the
                                                       first white dot on the Exposure Counter moves directly
                                          opposite the start mark. 1. To advance the film, just
                                    wind the Film Advance

                                      Lever as far as it will go and release it. It will return by
                                                       itself.

                                               2. The film is properly loaded if the Film Rewind/ Back
                                    Cover Lock turns in the direction opposite that pointed
                                   by the arrow on the lock when the Film Advance Lever
                                                     is wound.

                                               3. The Exposure Counter tells you the number of
                                        exposures you have made.

                                               4. The Film Advance Lever is provided with enough
                                         play to allow instant action.


SETTING THE ASA SPEED


                           1 . Lift up the outer ring of the Shutter Speed/ ASA Speed Selector
                            and turn it until the number you want appears in the Film Speed
                         Window. The film speed is printed on the film box. (FUJICOLOR
                           N100, FUJICHROME R100 and FUJIPAN SS are ASA 100 films).

                                   2. The details of the ASA Speed Selector are illustrated below.
View original page 12Page 13 · Read text
www.butkus.us

SELECTING THE SHUTTER SPEED


                                       1. The numbers 1, 2, 4, etc. to 2000 on the Shutter Speed
                                    Selector stand for 1 sec., 1/2 sec., 1/4 sec. etc. to 1/2000 sec. B
                                   stands for bulb. It means that the shutter will remain open for as
                                 long as the Shutter Release Button is depressed. It is used for
                                  shooting with a shutter speed of 2 seconds or slower. The X
                                   opposite the number 60 means that the Shutter Speed Selector
                                  Dial must be set at this speed when shooting with electronic
                                        flash.


2. The exposure meter is controlled by the shutter speed and lens aperture.
Exposure determination is always easier when the Shutter Speed Selector is set first. The recommended
shutter speeds for shooting in bright daylight and under a cloudy sky are from 1/60 sec. to 1/250 sec.
respectively. The respective symbols ( sunshine - cloud icons ) are engraved opposite the numbers as a
reminder.

3. To set the shutter speed, just turn the Shutter Speed Selector until the number you want click-stops opposite
the Shutter Speed Mark (red dot on the camera body).

4. Since different combinations of lens aperture and shutter speed can give equivalent exposures, best results are
obtained by using the combination that is ideal for the picture you are taking. For example, if you are shooting a
fast-moving subject, use a fast shutter speed with a large lens aperture and if you are shooting a subject having
considerable depth, use a slow shutter speed and stop the aperture far down.

Equivalent Exposures Example


Shutter speed  1/500  1/250  1/125   1/60    1/30    1/15     1/8

Exposure      1.4    2      2.8     4       5.6    8      11


5. To avoid camera movement, use a tripod and a cable release for shooting with a shutter speed of 1/30 sec. or
slower.
A cable release with stopper is available for shooting with the Shutter Speed Selector set at B. The stopper will
keep the shutter open for as long as you wish.
View original page 13Page 14 · Read text
FOCUS THE LENS


    www.butkus.us


The Viewfinder is provided with an eyepiece for those with normal vision. If you are near-sighted or far
sighted, be sure to use an Eyesight Adjustment Lens, otherwise it will be extremely difficult for you to focus the
lens precisely. Four different Eyesight Adjustment Lenses are supplied as optional accessories: +2, +0.5, -2.5
and -4 dioptor.


(1) Look through the Viewfinder and point the camera so that the main subject is seen through the small
microprism center spot. (2)Split-image Focusing

Turn the Focusing Ring until the upper and lower segments of the split image in the microprism center
spot converge to form a single image.

(3) Microprism Focusing
Turn the Focusing Ring until the image in the microprism center spot appears sharp.

(4) You can also focus with any part of the area surrounding the microprism center spot. This method is
especially useful when shooting with aperture stopped far down.

(5) The white numbers on the Focusing Ring are for meters and the green numbers are for feet. The distance can
also be set by visual judgment for quick shooting. When shooting extreme close-ups, the distance from subject
to Film Plane Indicator must be precisely measured with a tape measure.
View original page 14Page 15 · Read text
www.butkus.us

EXPOSURE CONTROL


                                                                    1. Look through the Viewfinder and touch
                                                               the Shutter Release Button very lightly. You
                                                                  will see 1 or 2 diode lights in the right hand
                                                                     side.

                                                                    2. Turn the Aperture Selector Ring until the
                                                          diode light opposite the center of the
                                                      Exposure Indicator is turned on. Even if you
                                                            see 2 diode lights, center and above center or
                                                               center and below center, you will have the
                                                                correct exposure if the brightest one is the
                                                               center light.

                                                                    3. You will occasionally see 3 diode lights at
                                                               the same time (especially when shooting
                                                        under fluorescent light, or when shooting
                                                     wide open scenes in bright sunlight), but the
                                                                  brightest light is always the main light.
                                           When the brightest light is brought into the
                                                               center of the Exposure Indicator, you have
                                                               the correct exposure.


                       4. If the diode light is seen above center (+ side) of the Exposure Indicator and you
                    cannot move it to the center (opposite the bottom of the V), by turning Aperture
                     Selector Ring, the shutter speed will have to be increased. If the diode light is seen
                  below center (- side) and you cannot move it to the center with the Aperture Selector
                    Ring, the shutter speed will have to be reduced.


                                                                  5. If you are using a lens other than one of
                                                             the Fujinon interchangeable lenses
                                                        designed for the ST801, the light is
                                                    measured through the stopped down
                                                                aperture.

                                                                    First press down the Depth of Field Button
                                                    and lock it by turning it to the left. Next,
                                                        touch the Shutter Release Button very
                                                                  lightly and turn on the diode light located
                                                                in the center of the Exposure Indicator by
                                                            turning the Aperture Selector Ring. (The
                                                        diode light will not move unless the Depth
                                                            of Field Button is depressed).


Note: The diode light will not change unless the camera lens is properly mounted and locked.
View original page 15Page 16 · Read text
SUTTER RELEASE BUTTON LOCK


                                                The Shutter Release Button can be
                                                        locked by pulling it up and turning it
                                                               to the right. This . is a safety against
                                                            turning on the battery and releasing the
                                                               shutter inadvertently. The shutter can
                                                    be released with a cable release with
                                                             the button locked.


REWIND AND UNLOADING THE FILM


                                                                                                                        www.butkus.us


                                            2. Unfold the Film Rewind Crank       3. Next, lift the crank up to
                                  and turn it in the direction of the       open the Camera Back, unload
1. Press in the Film Rewind Button.     arrow. The crank will suddenly feel     the cartridge and send it to a
                                             light when the entire roll of film has    processing laboratory as soon
                                   been rewound.                         as possible.


NOTES:
1. Do not open the Camera Back until the film has been completely wound back into the cartridge.

2. If the end of the film is reached when the Film Advance Lever is wound only halfway around, do not force it
through, because the film might break. Just push it back to its normal position, and rewind the film into the
cartridge.
View original page 16Page 17 · Read text
www.butkus.us


Your FUJICA ST801 takes a complete series
of FUJINON interchangeable lenses
specially designed for this camera. It will
also take the interchangeable lenses for the
FUJICA ST701 as well as any other lens
with a Praktica thread mount. With an
adaptor on, it will also take lenses with a
Leica mount. However, with lenses other
than those designed especially for the
camera, the light is measured through the
stopped down aperture.

Using Fujinon Interchangeable Lenses.

1. To remove a lens, push back the Lens
Safety Lock Release Button in the direction
of the arrow and turn the lens barrel to the
left (counterclockwise). Just 2 1/2 complete
turns will release the lens.

2. To mount, just screw the lens in turning it
clockwise until it stops with a click.

OTHER LENSES
1. To mount, screw the lens in until it feels
tight and the Distance/Aperture Indicator on
the lens comes directly on top. About 2'/z-3
complete turns should be enough. If the
Indicator on the lens is not directly on top,
the aperture might not operate.

2. To remove, just turn it to the left.
(counterclockwise)

NOTES:

(1) Do not press in the Depth of Field Button
when changing lenses.

(2) Avoid touching the lens glass and camera
mirror with your fingers when changing
lenses.
View original page 17
Page 19 · Read text
www.butkus.us

DEPTH OF FIELD


1. WHAT IS MEANT BY DEPTH OF FIELD
To check the effects of a selected aperture-how well the background is blurred out or how wide the depth of
sharpness is-just look through the Viewfinder and press in the Depth of Field Button. The sharpness of a picture
extends over a considerable distance both in front of and behind the point on which the lens is focused. This
zone of sharpness is referred to as the depth of field. The depth of the zone of sharpness varies depending on the
lens focal length, subject-to-lens distance, and lens aperture-opening.

1. The smaller the aperture, the wider the depth of field and the larger the aperture, the narrower it becomes.

2. The longer the lens focal length, the narrower the depth of field and the shorter the focal length, the wider it
becomes.

3. The farther the distance the lens is focused on, the wider the depth of field.

4. The zone of sharpness in front of the point of sharpest focus is narrower than the zone of sharpness behind
the same point.


2. HOW TO USE THE DEPTH OF FIELD INDICATOR
All the interchangeable lenses of the FUJICA ST801 are provided with a depth of field indicator on the lens
barrel. For example, if you are using an F1.8 55mm standard lens and have set the distance at 16.4ft.(5m),
everything from about 11.5ft.(3.5m) to 28.5ft.(8.7m) will be in sharp focus.

The colors of the ST801's depth of field indicator are matched with those of the aperture numbers to simplify
checking of the depth of field.


EXPOSURE COMPENSATION
View original page 19
Page 20 · Read text
2. PHOTOCOPYING
                                                      Printed matter on white paper will turn out
1. BACKLIGHTED PORTRAITS                    underexposed unless some exposure
1. Shoot with the diode light one stop above the center   compensation is made.
indicator.
                                                                  1. Shoot with the diode light one stop above
2. Move the diode light to the center of the Exposure         center.
Indicator, open up the aperture by '/-stop or 1 full stop
and shoot.                                                       2. Move the diode light to the center of the
                                                    Exposure Indicator, open up the aperture by 1 full
3. Move up close to the subject until it fills up the           stop and shoot.
viewfinder and bring the diode light into the center of the
Exposure Indicator. Next, step back to the right shooting     3. Use an 18% reflectance gray card to measure
distance and shoot.                                          the light reflected from the subject.


2. SPOT-LIGHTED SUBJECTS AND DARK                                                                3. Move up close to the subject, bring the diode
BACKGROUNDS                                                                 light into the center of the Exposure Indicator, step
1. Shoot with the diode light one step below center.                                                   back and shoot.
2. Move the diode light to the center of the Exposure     NOTE: (1) To achieve special effects with backlighted and
Indicator, close down the aperture by 1/2-stop or 1 full     other specially lighted subjects, the picture is often taken
stop and shoot.                                              without exposure compensation.
View original page 20Page 21 · Read text
www.butkus.us


4. SHOOTING BEYOND THE RANGE OF THE EXPOSURE METER (CLICK TO ENLARGE IMAGE)


1. Although the ST801's light measuring range is exceptionally wide EV1-19 (F1.4, 1 sec. to F16, 1/2000 sec.
ASA 100 ), the diodes will not respond if the light is too dim or if an extra-high speed film is exposed with a
slow shutter speed. (Example: ASA 800 film, 1 sec. shutter speed). If the light is too dim, use supplementary
lighting, and if you are using an extra-high-speed film, use the proper shutter speed.

SELF-TIMER


                             TO PICTURE YOURSELF
                                                       1. Mount the camera on a tripod, focus the lens,
                                                        set the exposure and wind the lever.

                                                       2. Wind the Self-timer Lever to the left as far
                                               as it will go. (The shutter might not operate if
                                                                    it is wound only halfway around).

                                                       3. Press the Self-timer Start Button and get back
                                                     into the picture. In 10 seconds, the shutter will
                                            be automatically released. Note

                                                     (1) Do not depress the Shutter Release Button.
                                        The shutter will be released and the Self-timer
                                                     will not start.
View original page 21Page 22 · Read text
USE OF FLASH

                                    You can use a flash for shooting indoors and
                                                   night pictures as well as for supplementary
                                                     lighting in outdoor photography.

                                                       1. Electronic Flash

                                                       1. With a cordless, hot-shoe type electronic
                                                         flash, all that is necessary is to mount it on the
                                                camera's hot-shoe.

                                                       2. With other types of electronic flash, the flash
                                                     unit is mounted on the camera's hot-shoe and the
                                               cord is plugged into the camera's X-contact
                                                    socket.

                                                       3. With large-size electronic flash, the flash unit
                                                              is mounted on the camera with the accessory
                                                  bracket Mount the camera on a tripod, focus the
                                                        lens, set racket and the cord is plugged into the
                                                camera's X-contact socket.
                                                       4. In each case, the shutter speed is set at 1/60
                                                      sec. (marked with an X on the Shutter Speed
                                                     Scale).


2. Flash gun
1. The flash cord is plugged into the camera's FP-contact socket.

2. An FP-class bulb is used on the firing unit.

3. Synchronizing Ranges


4. Exposure
View original page 22Page 23 · Read text
www.butkus.us

1. Electronic Flash

Flash guide number divided by subject-to-film distance equals aperture.

Example: Electronic Flash (Guide No. m18/ ft. 60) FUJICOLOR N100, FUJICHROME R100, FUJIPAN SS
Subject-to-film distance=3m/10ft:


2. FP Flash Bulb

Since the flash guide number varies with the shutter speed, the recommended procedure for determining the
aperture is to follow the instructions packed with the flash.

INTERCHANGEABLE LENSES AND ACCESSORIES

                                         13. Lens hood for 100 and 135mm
ACCESSORIES                          lenses

1. FUJINON•T 1:8 f=1000mm           14. Lens hood for 50 and 55mm
                                          lenses
2. EBC FUJINON•Z 1:4.5 f=54-.-
270mm                                  15. Lens hood for 35mm lens

3 EBC FUJINON•Z 1:4.5 f=75-150mm   16. Lens hood for 28mm lens

4. EBC FUJINON•T 1:4.5 f=200mm      17. Eyesight adjustment lens

5. EBC FUJINON-T 1:3.5 f=135mm      18. Lens cap (Front)

6 • EBC FUJINON•T 1:2.8 f=100mm     19. Lens cap (Back)

7. EBC FUJINON 1:1.4 f=50mm        20• Body mount cap

8• EBC FUJINON 1:1.8 f=55mm        21• Case

9. EBC FUJINON 1:1.9 f=55mm         22. Microscope adapter

10• EBC FUJINON•W 1:2.8 f=35mm     23. Macrocinecopy

11. EBC FUJINON-W 1:3.5 f=28mm    24• Extension bellows

12• EBC FUJINON 1:2.8 f=45mm       25• Q Setter
View original page 23Related documents and language editions
From the M. Butkus archive. Original publisher and archive notices are retained.
Check the model and edition against your equipment.
PDF verified 2026-10-10.