Film cameras
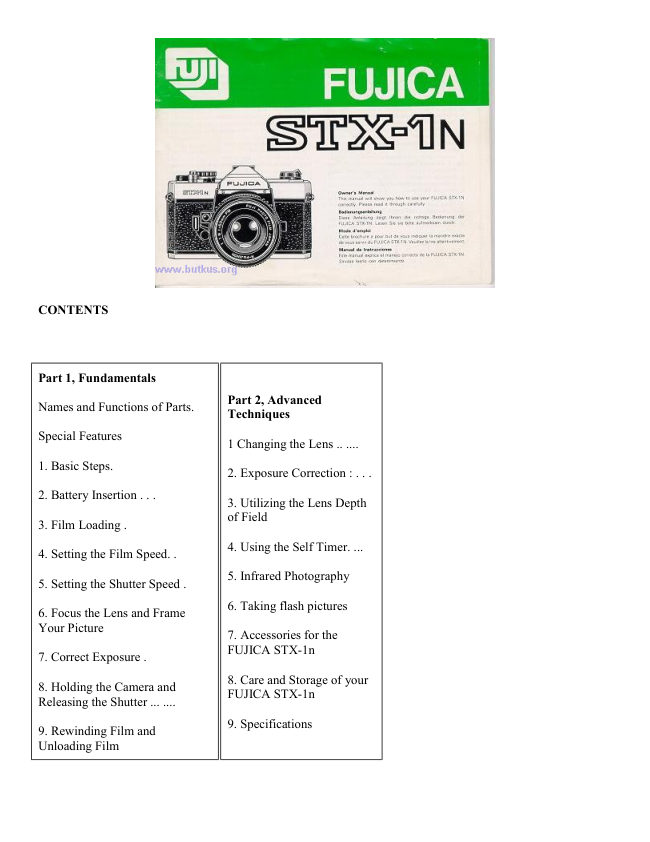
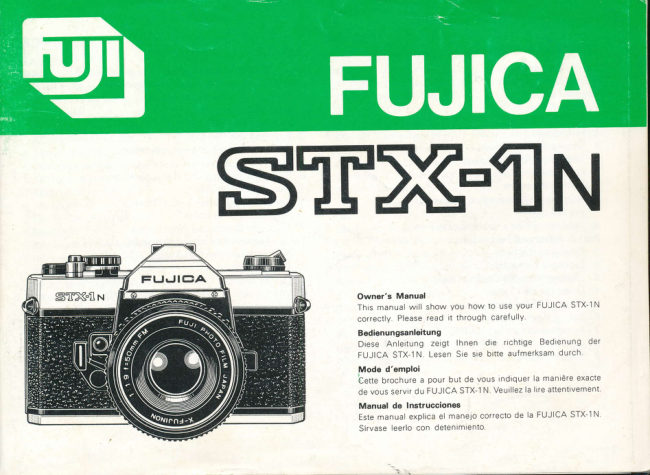
FUJICA STX-1n User manual
User manual for FUJICA STX-1n. 28 pages in English. Read the original PDF, download or print a copy without registration.
28 pagesEnglish1.8 MB PDF
Loading your manual…Open PDF directly
Document details
- Brand
- Fujica
- Model / document
- FUJICA STX-1n
- Document type
- User manual
- Language
- English
- Pages
- 28
- File size
- 1.8 MB
- Category
- Film cameras
- Document date
- Not specified in catalog
Search available document text
Find a term, then jump to its page in the original PDF. Image-only pages may not be searchable; check the PDF for exact wording and diagrams.
Page 2 · Read text
CONTENTS


Part 1, Fundamentals

                                Part 2, AdvancedNames and Functions of Parts.
                              Techniques

Special Features
                              1 Changing the Lens .. ....

1. Basic Steps.
                                        2. Exposure Correction : . . .

2. Battery Insertion . . .
                                        3. Utilizing the Lens Depth
                                    of Field
3. Film Loading .

                                        4. Using the Self Timer. ...
4. Setting the Film Speed. .

                                        5. Infrared Photography
5. Setting the Shutter Speed .

                                        6. Taking flash pictures
6. Focus the Lens and Frame
Your Picture
                                        7. Accessories for the
                          FUJICA STX-1n
7. Correct Exposure .

                                        8. Care and Storage of your
8. Holding the Camera and
                          FUJICA STX-1n
Releasing the Shutter ... ....

                                        9. Specifications
9. Rewinding Film and
Unloading Film
View original page 2Page 3 · Read text
www.butkus.us

Names and functions of the parts

1. Film Advance Lever

2. Shutter Speed Selector Dial/ASA film speed selector

3. Film ASA Speed Window

4. Shutter Release Button provided with socket for

5. Frame Counter (Additive type automatically resets)

6. Shutter Speed Mark (red dot)


                           Mike Butkus                     Digitally                                                                                                                                                                                        DN:email=mike@butkus.org,Date:cn=Mike2023.05.16signedButkus,by21:43:32Mikeo=ButkusButkusc=US-04'00'camera manuals, ou=butkus.org,


7. Shutter Release. Lock

8. Neck strap Eyelet

9. Self-timer Start Button.

10. Self-timer Set Lever (The shutter is activated in 8 - 10seconds)

11. Depth of Field Preview Button

12. Taking Lens

13. Accessory (hot) Shoe

14. Hot Shoe for X Contact

15. Combination Rewind Crank/Camera Back Lock

16. Battery Chamber / Insert two alkaline-manganese batteries (LR44) for powering the camera's electric
Metering system (mercury batteries (HR44) or silver-oxide batteries (SR44) can also be used)
View original page 3Page 4 · Read text
17. Lens Mount

18. Aperture Selector Ring

19. Aperture / Distance Mark

20. Depth of Field Indicator

21. Distance Scale


22. Focusing Ring

23. Lens Safety Lock

24. Film Rewind Spindle

25. Film Rail

26. Guide Rail (the film is passed over the film rail and the edges go between the Guide Rail)

27. Viewfinder Eyepiece designed for attaching the Eye Cup. etc.

28. Battery Chamber / Insert two alkaline-manganese batteries (LR44) for powering the camera's electric
  Metering system (mercury batteries (HR44) or silver-oxide batteries (SR44) can also be used).

29. Sprocket Wheel ( The film perforations are engaged with the sprocket teeth to advance the film. )

30. Take-up Spool

31. Pressure Plate

32. Camera Back
View original page 4
Page 5 · Read text
www.butkus.us

33. Film Chamber

34. Tripod Socket

35. Film Rewind Button

SPECIAL FEATURES

1. Improved Through-The-Lens Exposure Meter

The exposure meter of the FUJICA STX-1n consists of 2 Silicon photocell light receptors located on
either side of the viewfinder eyepiece. which are connected to an FET (Field Effect Transistor) circuit
and are coupled with the shutter and diaphragm. It measures the average light intensity which falls on
the entire surface of the focusing glass In other words, it measures the light that has passed through the
lens and will actually reach the film.


Special features of this camera are: the new Fujica X bayonet
mount which permits quick interchanging of the lenses, a full
aperture metering system. and three-way focusing with split
image, microprism and ground glass It is also provided with a
shutter speed indicator scale in the viewfinder to enable you to set
the shutter speed while looking through the viewfinder

2. World Renowned X-FUJINON Lens
The interchangeable lenses of the FUJICA STX-1n are widely known for their superb color definition
and perfect corner-to-corner picture sharpness and clarity.

3. A Complete Camera System in Itself
A wide range of interchangeable lenses, accessories. and its Improved TTL full-aperture exposure meter
make the FUJICA STX-1n
a complete camera system in itself capable of handling any picture-taking situation and subject.

BASIC STEPS

1. Load the Film

Pull the Combination Film Rewind Crank/Back Cover Lock fully until the Camera Back automatically
snaps open Next, load the 35mm film cartridge into the Film Chamber and insert the film into the slot of
the Take-up Spool.
View original page 5
Page 6 · Read text
2. Set the Film Speed

To set the camera for the speed of the film you are using, pull up the top of the Shutter Speed Selector
Dial and turn it until the number you want appears in the center of the ASA Film Speed Indicator
Window

3. Set the Frame Counter to 1 (the first white dot before the number 2)

The odd numbers of the frame counter are represented by white dots. Wind the Film Advance Lever and
press the Shutter Release Button Do this twice. and on the 3rd winding. the first white dot on the film
counter (frame No 1 ) will move opposite the triangular mark.
View original page 6
Page 7 · Read text
www.butkus.us

4. Set the Shutter Speed Selector Dial

Turn the Shutter Speed Selector Dial to the speed desired If you are shooting outdoors. the shutter speed
will be either 1/125 sec or 1/250 see If you are shooting indoors it will be 1/30 sec or 1/60 sec The shutter
speed can also be set with the shutter speed scale and green indicator needle in the viewfinder (left side
edge) The needle is set by turning the Shutter Speed Selector

5. Focus the Lens and Frame Your Picture

(1) Look through the Viewfinder Eyepiece and turn the Focusing Ring to focus and frame your picture

(2) To focus turn the focusing ring to make the upper and lower segments of the split image in the
microprism center spot converge and form a perfect fit

6. Set the exposure


To set the camera for correct exposure, press the Shutter Release Button halfway down. Look through
the Viewfinder and, while watching the exposure meter needle, turn the Aperture Selector Ring to bring
the needle into the center of the indentation

7. Press the Shutter Release Button

Hold camera steady to prevent shake and gently press the Shutter Release Button
View original page 7
Page 8 · Read text
8. Rewind the Film


After you have exposed the entire roll of film, press the Film Rewind Button, erect the Film Rewind
Crank. and turn it in the direction pointed by the arrow and wind the film back into the cartridge, until
you feel tension released Next, lift the Back Cover Lock fully up until the camera back snaps open Now,
remove the cartridge.

BATTERY INSERTION

1. Open the Cover

Open the Battery Chamber Cover (16) by sliding it in the direction of the arrow.

2. Load the Batteries

Insert two alkaline-manganese batteries. One on top of the other into the Battery Chamber with the plus
sides (+) facing outward and close the cover

· If you are buying new batteries. be sure to specify LR44-type alkaline-manganese batteries.
HR44-type mercury batteries (extremely hard to find - not worth it). or SR44-type silver oxide
batteries.
View original page 8
Page 9 · Read text
www.butkus.us

3. Check the batteries

(1 ) Set the ISO/ASA Speed Selector (2) to 100, the Shutter Speed Selector (2) to 60, and the
Aperture Selector (18) to the maximum aperture (F1.9)


(2) While pressing the Shutter Release Button (4) halfway down, look through the viewfinder
and point the camera toward bright light (fluorescent light, etc.)


(3) If the LED in the viewfinder moves from the plus side down to the minus side when the
camera is faced toward dim light (you can block out the light with your hand), the batteries are
loaded properly


(4) If the LED remains stationary on the plus side or minus side when the camera is faced from
bright to dim light. the batteries are either exhausted or improperly loaded and have to be
changed or reloaded properly
View original page 9
Page 10 · Read text
Precautions:  If you are not taking pictures immediately, lock the shutter release button to
prevent tripping the shutter or draining the batteries Inadvertently

* The alkaline-manganese batteries will normally last about 8 months, and mercury or silver-
oxide batteries about 1 year

* If you are not using the camera for a long while, remove the batteries and keep them where it
is dry

* Be sure to wipe both ends of the batteries clean with a piece of cloth before loading. Poor
contact may result if the ends are unclean


FILM LOADING

1. Open the Camera Back

Lift the Combination Film Rewind Crank - Camera Back Lock ~ fully up until the Camera Back
~ automatically snaps open.
View original page 10
Page 11 · Read text
www.butkus.us


2. Load the Film

Insert the cartridge into the Film Chamber ~ with the spool head (projection) pointing to the
bottom of the camera. push down the Combination Film Rewind Crank - Camera Back Lock ~
to engage the Film Rewind Spindle ~ with the film spool Pull out the trimmed end of the film
and insert it down to the bottom end into the slot of the Take-up Spool by

3. Close the Camera Back

Wind the film a little with the Film Advance Lever Expand engage the perforations on both
edges of the film with the sprocket teeth Be sure the film is properly inserted between the
Guide Rail ~ Now, press down the Camera Back until it closes tightly with a click
 * If the Film Rewind Crank turns in the opposite direction of the arrow as you wind the Film
Advance Lever

* it means the film has been loaded properly,

* The odd numbers of the Film Counter (hi) are represented by white dots

* To allow you to take quick shots in succession, the Film Advance Lever (A will be back with
a slight latitude Press it all the way back after you have finished shooting
View original page 11
Page 12 · Read text
4. Set the Frame Counter (5) to 1 (the first white dot before the number 2) Wind the Film
Advance Lever (1) all the way to the right and press the Shutter Release Button (4) Do this
twice, and on the third winding. the first white dot before the number 2 will move opposite the
triangular mark You are now ready to take the first picture

SETTING THE FILM SPEED

Lift the top of the Shutter Speed Selector Dial (2) and turn it to the left or right until the film
speed number you want appears in the center of the ASA Film Speed Indicator Window (3)


The film speed is printed on the film box. (FUJICOLOR Film FUJICHROME 100 and NEOPAN
SS are ASA 100 films FUJICHROME 400 FUJICOLOR 400 and NEOPAN 400 are ASA 400 films )

The calibrations between the ASA numbers represent the following numbers: ( I )

· If you are using a film marked for DIN speed refer to the following conversion table (11)
View original page 12
Page 13 · Read text
www.butkus.us

SETTING THE SHUTTER SPEED

The letter B and the numbers 2... 700 on the Shutter Speed Selector Dial represent ''bulb'' and
1/2 . ., 1/700 second They indicate the length of time the film will be exposed to light. The
shutter speed scale is also visible in the viewfinder (left side edge).


This camera allows you to set exposure either by the shutter speed or by the size of the lens
opening However, it is best to set the shutter speed first. For example, the shutter speed
would be from 1/125 to 1/250 sec if you are shooting outdoors, or from 1/30 sec to 1/60 sec . if
you are shooting indoors To set the shutter speed, first turn the Shutter Speed Selector Dial
while pressing down on it slightly and set the number you want opposite the red dot on the
camera body. To set the shutter speed with the scale and needle in the viewfinder. just move
the needle into position by turning the Shutter Speed Selector. * Use B (bulb) if the exposure
will take l second or longer.

* There are no intermediate settings between the numbers indicated on the dial.

* 60 is marked with a red X to remind you that it IS the speed used for shooting with electronic
flash.


Excepting l /700 second, each shutter speed is either l /2 or 2 times the speed of the shutter
speed next to it
View original page 13
Page 14 · Read text
FOCUS THE LENS AND FRAME YOUR PICTURE

1. Focus the Lens

(1 ) Look through the Viewfinder and point the camera so that the main subject is seen
through the small microprism center spot.


(2) Split-image Focusing

Turn the Focusing Ring (22) until the upper and lower segments of the split image in the
microprism center spot converge to form a single image

(3) Microprism Focusing

Turn the Focusing Ring until the image in the microprism center spot appears sharp

(4) You can also focus with any part of the area surrounding the microprism center spot This
method is especially useful when shooting with aperture stopped far down
View original page 14
Page 15 · Read text
www.butkus.us

(5) The white numbers on the Focusing Ring are for meters and the green numbers are for feet
The distance can also be set by visual judgment for quick shooting

When shooting extreme close-ups the distance from subject to Film Plane Mark (16) must be
precisely measured with a tape measure

2. Frame Your Picture

The Viewfinder will let you see 92% of the entire View that will register on your film so that you
can go ahead and use the whole length and width of the area in the Viewfinder to frame your
picture

* Eyesight Adjustment Lens

The Viewfinder is provided with an eyepiece for those with normal vision. If you are near
sighted or far sighted, be sure to use an Eyesight Adjustment Lens, otherwise it will be
extremely difficult for you to focus the lens precisely. Four different Eyesight Adjustment
Lenses are supplied as optional accessories: +2, +0.5, - 2.5 and ~4 dioptor.

CORRECT EXPOSURE

1. Press the Shutter Release Button halfway down

Point the camera at your subject while looking through the Viewfinder and press the Shutter
Release
Button (4) halfway down. You will see an LED turn on in the Viewfinder right side


                                          9
View original page 15Page 16 · Read text
2. Turn the Aperture Selector Ring

While pressing the Shutter Release Button halfway down, turn the Aperture Selector Ring (18)
until the LED in the viewfinder moves into the center of the Exposure Indicator. You now have
the correct exposure.

3. If the LED Does Not Turn on in the Center . . .

If the LED does not move into the center of the Exposure Indicator by turning the Aperture
Selector Ring, you will have to change the shutter speed · If the LED lights on the (+) side,
increase the shutter speed (Example: If the shutter speed is 1/125 see, turn the dial to 1/250
sec.)

· If the LED lights on the ( - ) side, reduce the shutter speed. (Example: If the shutter speed is
1/125 see, reduce it to 1/60 sec ).


4. Wide Measuring Range

Since the light that is measured is the average light intensity falling on the focusing glass, the
range of measurement must differ depending on the speeds of the lens and film A noteworthy
feature of this exposure meter is that it covers a wide range of exposure values If you are
shooting with FUJICOLOR HR100 (ISO/ASA 100) film using an F1 4 lens, for example, the
range covered would be EV2~EV17-2/3 (f /1.4 1/2 sec of /16 1/700 sec ). If the lens is 50mm F1
9, the range is from EV3~EV17-2/3 (f/1.9 1/2 sec ~f/16 1/700 sec.):

The chart on page 56 shows the light measuring range of the FUJICA STX-lN's exposure meter
The Shutter Speed Selector Dial can be set over every ISO/ASA speed and shutter speed
combination on the dial. but the exposure meter will operate only within the range shown in
the chart


Note: The aperture can also be set intermediately between the calibrations on the scale to
permit fine adjustments.
View original page 16
Page 17 · Read text
www.butkus.us

HOLDING THE CAMERA AND RELEASING THE SHUTTER


1. Hold the Camera Steady

If you don't hold the camera steady. your pictures will not turn out sharp because the camera
will shake Be sure to hold yourself in good balance with elbows close against your body and
the camera pressed lightly against your face. This is all the more necessary if you are
shooting with the camera held vertically. Practice a little and get used to these motions.

2. Press Down the Shutter Release Button

Be sure to press down the Shutter Release Button (hi) gently Any jerky motion can cause the
camera to shake and pictures to be unsharp.

3. When To Use a Tripod

If you are taking a close-up. telephoto shot, or if you are shooting at a shutter speed slower
than 1/30 sec., be sure to use a tripod and cable release to avoid camera shake

A cable release is also recommended for shooting long-exposure shots with the camera
placed on a table, against a tree. or on some other steady foundation. A cable release with a
stopper attachment is a very convenient item for shooting with the camera set at B (bulb) You
can press open the shutter. hold it in that position with the stopper for as long as you want,
then release the stopper to close the shutter
View original page 17
Page 18 · Read text
REWINDING FILM AND UNLOADING FILM


After you have finished a roll of film, rewind it back into the cartridge and take it out of the
camera

1. Press the Film Rewind Button

First, press down the Film Rewind Button (35) located on the underside of the camera Once
you have pressed down this button, you can let it go because it will stay depressed The
Sprocket Wheels (29) are now free

2. Turn the Film Rewind Crank


Erect the Film Rewind Crank (15) and wind it in the direction of the arrow to return the
exposed film back into the cartridge. Just before the end of the film is reached, you will feel a
slight tension released on the crane Give it 2 more turns and the film Is wound back into the
cartridge
If the film cannot be rewound (this will sometimes happen if the Film Advance Lever is not in
the correct position). just depress the Rewind Button and, while holding it down. wind the Film
Advance Lever all the way through Next, release the Rewind Button and rewind the film.

3. Open the Camera Back
Lift the Combination Film Rewind Crank - Camera Back Lock (15) until the Camera Back (32)
opens with a snap. Now take out the cartridge and send it to the processor - the sooner the
better.

Be sure to load and unload the cartridge in the shade and away from direct sunlight by all
means If the end of the film is reached when you have wound the Film Advance Lever half-way
around. do not force it because the film might break Simply press the Film Rewind Button and
wind the Film Advance Lever all the way back The shutter will be wound, but the film will
remain stationary Since you have already pressed the Film Rewind Button all you need do is
turn the Film Rewind Crank.
View original page 18
Page 19 · Read text
www.butkus.us

CHANGING THE LENS

A complete range of highly color-compatible. high resolution X-FUJINON interchangeable
lenses are available for shooting scenic,. portraits, snap-shots, news photos, and photo
records with the FUJICA STX-1n

1. Mounting

Fit the Lens into the camera's Lens Mount (17) so that the red dot on the Lens' mounting end
comes opposite the red dot on the Lens Mount (19) then turn the lens about 65 to the right
(clockwise). Ii will lock itself with a click.

You can also use the Aperture/Distance Mark on the lens barrel as your guide because it is
located on the same line as the red dot on the Lens' mounting end


2. Dismounting

While pressing in the Lens Lock (23) toward the camera body. turn the lens to the left
(counterclockwise) as far as it will go, then pull it out toward the front * When changing the
lens, be careful not to touch the lens glass or the mirror in the body with your fingers.
View original page 19
Page 20 · Read text
COUPLING RANGE OF THE FUJICA STX-1n'S EXPOSURE METER

The ASA film speed and shutter speed are coupled over the range shown In the chart on the
next page. To measure the exposure you can use the entire range of apertures provided on
the lens you are using

Example: With the ASA speed selector set to 100 you can use a shutter speed of from 1/2 to
1/700 sec. The aperture will automatically be coupled to the shutter speed being used


      Shutter speed that link with
ASA
      the meter
25    1/2 sec to 1/700
32    1/2 sec to 1/700
40    1/2 sec to 1/700
50    1/2 sec to 1/700
64    1/2 sec to 1/700
80    1/2 sec to 1/700
100   1/2 sec to 1/700
125   1/2 sec to 1/700
160   1/2 sec to 1/700
200   1/2 sec to 1/700
400    1/2 sec to 1/700
800    1/4 sec to 1/700
1600  1/8 sec to 1/700
3200 1/15 sec to 1/700

EXPOSURE CORRECTION

Any normal subject can be accurately exposed by following the meter reading. However, best
results are obtained under the following situations by correcting the exposure.

1. Back lighted Subjects, etc.

Back lighted subjects or ski scenes, which are dominated by white areas and strong
reflections, will turn out with the main subject underexposed. By opening the aperture by 1/2
or 1 full stop. or by approaching the main subject to measure the light intensity, it can be
correctly exposed
View original page 20Page 21 · Read text
www.butkus.us


2. Spot-lighted Subjects. etc.

A person standing before a black background or a spot-lighted subject in a stage play will be
influenced by the dark surroundings and turn out overexposed. The aperture should be
stopped down by 1/2 or 1 full stop below that indicated by the meter.

3. Copying Documents

The major portion of most documents are occupied by white areas. The situation calls for
opening the aperture by 1 full stop from that indicated by the meter.

If you want to be more precise. place an 18% standard reflectance card in front of the camera
and set the exposure with the exposure meter

For maximum corner-to-corner sharpness. the minimum practical aperture should be used for
copying work and for taking close-ups.

4. Taking Advantage of the Eye Cup

With the aperture stopped well down, the light reflected from your eye or spectacles (if you are
wearing them) will reach the focusing glass and slightly influence the meter reading. To avoid
this, use an Eye Cup over the Viewfinder eyepiece

USING THE MOUNT ADAPTER X-S

If you want to use your Praktica screw-mount Fujinon lenses on the Fujica STX-1n use the
Fujica Mount Adapter X-S (optional accessory).

(1) Screw the Mount Adapter X-S on the lens rear

(2) Place the red dot on the adapter s rear end against the red dot on the camera s Lens Mount
(17) and turn the lens 65 to the right (clockwise). It will lock into position with a click.
View original page 21
Related documents and language editions
From the M. Butkus Camera Manual Library. Original publisher and archive notices are retained.
Check the model and edition against your equipment.
PDF verified 2026-10-10.