Film cameras
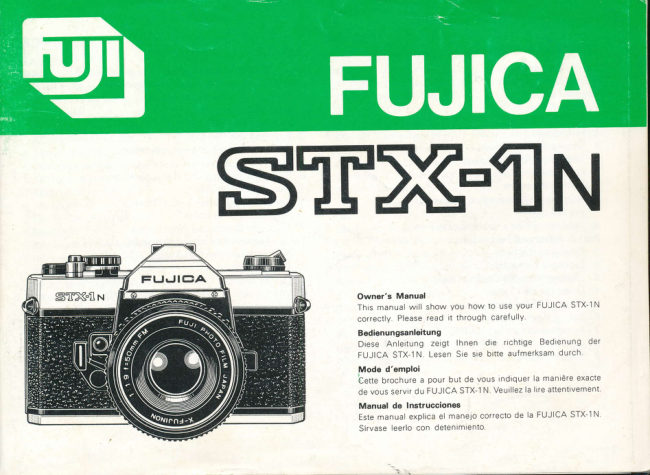
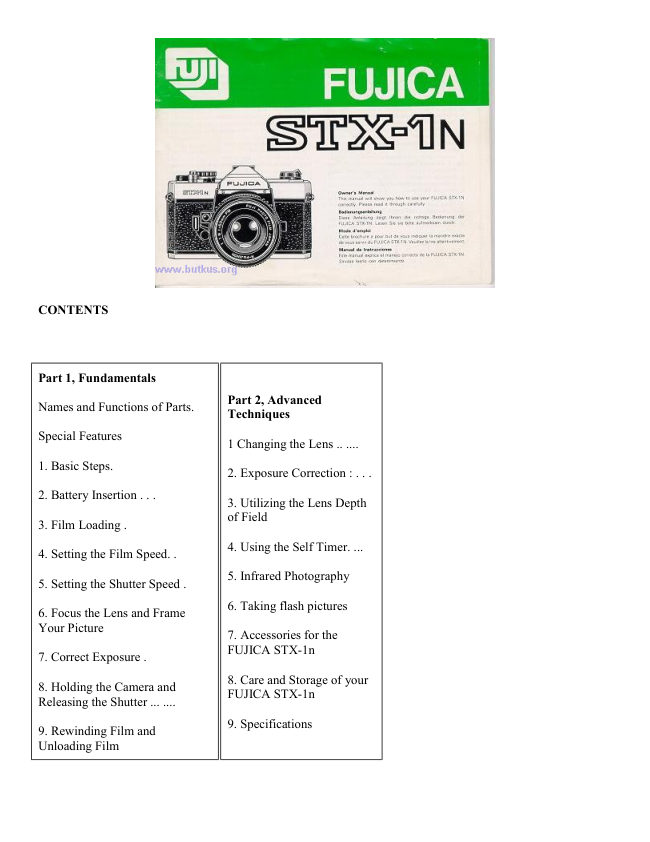
fujica stx 1n meter User manual
User manual for fujica stx 1n meter. 95 pages in German, French, Spanish. Read the original PDF, download or print a copy without registration.
95 pagesGerman, French, Spanish8.7 MB PDF
Loading your manual…Open PDF directly
Document details
- Brand
- Fujica
- Model / document
- fujica stx 1n meter
- Document type
- User manual
- Language
- German, French, Spanish
- Pages
- 95
- File size
- 8.7 MB
- Category
- Film cameras
- Document date
- Not specified in catalog
Search available document text
Find a term, then jump to its page in the original PDF. Image-only pages may not be searchable; check the PDF for exact wording and diagrams.
Page 6 · Read text
@ Filmtransporthebel                 @ Tiefenschiirfen skala
@ Wahlscherbe   f ir  dre Belrchtungszerten  /   Frlm_   @ Entfernungseinstellungsskala
   em pf rndlichkertswd h ler               @ Scharfernstellrrng
@ Fenster  fr.ir dre Ftlmempfrndlrchkeitseinstellung     @ VerschluBknopf zum Schutz des Oblektrves
@ AuslOseknopf mrt Gewinde fUr Drahtausloser      @ Frlmruckspulachse
@ Brldzrjhlwerk mrt automatischer RUckstellung      @ Frlmfuhrung ( Der Film laufr uber diese Fuhrung
@ Belrchtungszertmarkrerung (roter punkt)              und dre Kanten befinden  srch zwrschen den
@ Ausloser-Arretrerung                                      Fuhrungsschrenen  )
@ 0se  f i.rr Schulterriemen                         @ Fr.ihrungsschrene@ Knopf fijr Selbstausloser                         @ Sucherokular  ( vorgesehen  zur Anbrrngung von@ Aufzugshebel fUr Selbstausl6ser ( Der VerschluB
                                                                                                                                                                                                      )    lost nach crrca 8-10 Sekunden aus.  )                    Augenmuschel usw
                                                                                                   dre   Filmperf oratron unde Trefenscharfenkontrollknopf             @ Zahnrad  greift in
@ Oblektiv                                                           transportrert den Film.
                          @ Aufwrckelspule@ Zubenorschuh
@ X-M,nenkonrakt                   @ Frlmandtuckplatte
@ Rr.lckspulhebel -  glerchzertrg Kamerarijckwand-   @ Kameraruckwand
    versch   I u B                     @ Filmkammer
                                                   €9 Gewrnde fur Stativ@ Batterrekammer  / Durch Ernlegen von zwet Alkalr-                          @ Frlmruckspulknopf   Mangan-Battelen (LR44) wrrd der Belrchtungs-
 '  mechanrsmus aktrvrert (Mercury-Batterren (HR44)
   oder Srlberoxydbatterren  (SR44) konnen auch ver-
   wendet werden)
6  O b1 ektr vfass u n g
@ B lende n ring
6n) Markierung fUr Blenden- und  Entfernungs-
   einstellung
View original page 6Page 8 · Read text
@ Palanca de avance de la pelicula          @ Anrllo selector de apertura
 @ Cuadrante selector de la velocrdad del obturador  /   @ Marca de distancia y de apertura
     Selector de la sensibrlrdad ISO/ASA de la pelicula   @ Indrcador de prof undrdad de campo
  @Ventanrlla indrcadora de la sensrbrlrdad ISO/ASA   @ Escala de distancras
    de la pelicula                   @ Anrllo de enfoque
 @ BotOn drsparador del obturador  ( se proporoona   @ Seguro de la montura del objetrvo
    con rosca para cable de drsparo  )         @ Prvote para rebobinar la pelicula
 @ Contador de fotograf ias (del tipo sumador, con   @ Rart rle la pelicula
      aJUSte automStico    )               @ nait de guia (La pelicula pasa sobre el rarl de la   (4,    Marca de la velocidad del obturador (punto rolo)            pelicula y los extremos van entre el rail de gula  )    r'Vt   v-/ Seguro del drsparador              @ Ocular del visor  (drseiado para montar  el
 @ Olete para la correa                                     adaptador ocular, etc)
  6) Bot6n del drsparador automStico                         @ ele dentado ( Las perforaciones de la pelicula
 @ Palanca de aluste del disparador automdtico ( El       se enganchan en los drentes para que pueda
     obturador se actrva a los B/10 segundos  )               avanzar la pellcula  )    Bot6n  uv          para comprobar la prof undrdad de campo   @ Carrete de bobrnado   n?\     Obletrvo                         @ Ptaca de presi6n    /t-) 7ao ata porta-accesonos                         @ Parte postenor de la c5mara @ Contacto central para flash (contacto X)                         @ Ubrcacr6n del chasrs con la pelicula
  t9 Combrnaci6n palanca de rebobrnado - sequro de  @ Rosca para el tripode
      la tapa oostenor de la cSmara.           @ BotOn para rebobrnar la pelicula
 @ Ubrcacr6n de las prlas /  Introducir dos prlas de
    manganeso alcalrno (LR44) para dar energia  al
    srstema el6ctrrco de la camara (tambren pueden        www.butkus.us
    usarse las prlas de mercurro (HR44) o de 6xrdo
   de plata (SR44)
 @ Montura del obletrvo


t0                                                                                                                                                                                                                                                                                                                                                                                                                                                                                                                             I
View original page 8Page 10 · Read text
www.butkus.us
                          3. Check the batteries                3. Batterieprlifung
                                     (1r Sct the ISO ASA Speed Selector Q        (1) Stetten Sre den ISO/ASA'Frlmem-
                                   to 100, the Shutter Speed Selecror              pf rndlrchkertsw6hler @ auf 100,
             @ to 60. and the Aperture Selec-        den VerschluBzeitenwahler @ auf
                              tor @ to the maxrmum aperture         60, und den Blendenring @ auf
                                    (F1 s)                                      die groBte Off nung (f 1,9)   't)H(              (2)While pressrng the Shutter Release        (2) Weihrend der Ausloseknopf @
                                                                             look           lercht gedruckt wird, schauen Sre ,[                        Button @ halfway down,
                                through the viewfinder and point        durch den Sucher, und halten Sre
                                                                                                                                rlrnUlg  k'rmarrl\OlllElO  VtrVUl^^^^n   holloc    IL'urrLrnht  rz\..u.R  /   K\-\'              the camera toward brrght lrghl
                                    (fluorescent lrght. etc  ).                      Leuchtstof  f lam pen lrcht).
                                     (3) lf the LED rn the vrewfrnder moves       (3) Bewegt srch die Leuchtdrode im
  Batteries properly loaded          from the plus side down to the        Sucher von der Plus-Seite zur                           i
 Die Batterien sind richtig ein-      minus side when the camera  is          Mrnus-Serte hrn, wenn die Kamera  gelegt Les piles sont correctement       faced toward dim lrght (you can        gegen gedampftes Lrcht gelchtet            i
 charg6es                           block out the lrght wrth your hand).        wrrd, (halten Sre lhre Hand vor
 Las pilas est6n debidamente       the batterres are loaded properly.         dre Kamera), so sind dre Batterren
 colocadas                          (4) lf the LED remarns statronary on          ncntlg etngelegt
  Bright light     Dim light           fhe!,,v   nlrsvivv    srde or minus side when       (4) Sollte dre Leuchtdiode srch von  Helles Licht     Geddmpftes                      Licht             the camera is faced from brrght        der Plus- oder Minus-Seite nicht Lumidre brillante       Lumidre              to drm lrght, the batteries are either        bewegen. selbst wenn die Kamera
 Luz brillante    att6nu6e           exhausted or improperly loaded       vom hellen zum gedampften Lrcht
                     Luz tenue        and have to be changed or re-          gehalten wrrd, so srnd die Batterren                                                                              j                                 loaded properiy.                        entweder erschopft oder unrrchtrg                       ,l
                               Precautions                                eingelegt Das herBt, daB Sre die                                '{&
                                                lf you are not takrng prctures rmmedr-          Batterien auswechseln oder diese         H JJ                ately. lock the shutter release button to        nochmals richtrg ernlegen mussen.                     fl
                                prevent tnpptng the shutter or drarnrng     VorsichtsmaBnahme                                                   rnadvertently               W'enn Sre sofort kerne Aufnahmen         I     l:l +|:l         the batterres
                                                         machen. sollten Sre den Ausloser
                                                                                   arretreren. um zu verhrndern. daB dre
                                                                          Batterien unnotlg beansprucht wtrd.          I' I                                             und daB der Ausloser versehentlich
20                                                                        ausgelost wird
View original page 10Page 12 · Read text
www.butkus.us
                      The  alkaline-manganese batteries        Les piles alcalino-mangandse  durent
                                  wrll normally last about B months,        normalement B mois envtron; et les
                                 mercury                         and                                             or silver-oxide batterres                                                           ou d  l'oxyde                                                                     prles au.1 mercure                                 1 year.                            about                                                                               d'argent,                                                                      an envrron.
                                                   lf you are not using the camera for      Sr vous n'utilisez pas l'apparerl
                       a long whrle. remove the batteries       pendant un certain temps, il  est
                         and keep them where rt rs dry              pr6f6rable d'enlever les prles et de                      Be sure to wipe both ends of the          les conserver dans un endroit sec.
                                     batterres clean wlth a prece of cloth                ll est recommand6 de bien nettoyer
                            before loading Poor contact may          les faces des piles avant de les placer
                                     result lf the ends are unclean.              pour obtenir un merlleur contact.


                         Dre Alkalr-Mangan-Batterien  halten       Las pilas alcalinas duraran normal-
                              normalerweise etwa B Monate. und      mente unos B meses, y las de
                            die Mercury- oder Srlberoxydbat-       mercuno o de 6xrdo de plata aprox-
                             teren etwa 1 Jahr                      imadamente un ario
                      Wenn Sre die Kamera ldngere Zeit       Si no utiliza la c5mara por alg0n
                                             n rc ht  ben utze n.  ne h men S re  d re         trempo, saque las pilas y mant6ngalas
                                Batterien heraus und bewahren sie       en un lugar seco.
                        an ernem trockenen P,latz auf.          Aseg0rese de  limpiar ambos
                       Dre  Batterien sollten vor  dem        extremos de las pilas con un pafro
                             Einlegen rn dre Kamera mrt ernem        antes de colocarlas en la c5mara. Sl
                         sauberen,   trockenen    Tuch      ambos lados est6n manchados no
                          abgerreben werden, damit guter       hardn buen contacto.
                               Kontakt gewdhrlerstet  ist


                                                                                                                                                                                                                     {

22
View original page 12Page 13 · Read text
www.butkus.us
SPECIAL FEATURES                   BESONDERE TECHNISCHE MERKMALE
1. lmproved Through-The-Lens Exposure Meter          1. Verbesserte TTL Belichtungsmessung
The exposure meter of the FUJICA STX-1 consrsts      Der Belrchtungsmesser der FUJICA STX-'1 besteht
of 2 Srlrcon photocell ltght receptors located on     aus zwet Srlrzrum Fotozellen, dre das Ltcht emp-etther side of the viewfinder eyeprece. which are      fangen; 1e eine dieser Fotozellen befindet sich auf
                                                                                                      FETconnected to an FET (Freld  Ef f ect Tranststor)       jeder Seite des Sucherokulars Sre srnd an einecircuit and are coupled with the shutter and dta-       "Freld Effect Transistor" Schaltung angeschlossen
phragm. lt measures the average light intensity whtch      und sind mit VerschluB und Blende gekuppelt. Die
falls on the entire surface of the focusing glass. In      Messung erfolgt auf der Basis der Durchschnitts-
other words,  it measures the lrght that has passed         Lichtintensitdt, die auf die Gesamtfleiche der Sucher-through the lens and wrll actually reach the film.            Mattscheibe. fellt Mit anderen Worten. es wird
                                             genau dre Lichtmenge gemessen. dte durch das
   Snprr:lvvvvrvl      featrrres of this camera are. the new         Oblektrv auf den Film weitergelettet wird.
   Fujrca X bayonet mount which permlts qulck
   interchanging of the lenses, a full aperture          Besondere Merkmale dteser Kamera sind. das                                                                                                                ernen  meteilng system. and three-way focusing wtth        neue Fulrca X-Oblektrvbaionett, das
   split rmage, mrcroprism anrd ground glass. lt  ts          schnellen Oblektivwechsel ermOglicht. Offen-                                                   blendenmessung und Dreiwegscharfeinstellung   also provided wrth a shutter speed indrcator scale
   rn the vrewf inder to enable Vou to set the shutter           durch Schnrttbrld, Mikroprismen und Mattschetbe                                                             Sre rst auch mit einer VerschluBzeitenanzeigeskala   speed while looking through the viewf inder                                                            im Sucher ausgestattet, damrt Sie dre VerschluBzeit
 2. World Renowned X-FUJINON Lens                          einstellen konnen. wiihrend Sie durch den Sucher
 The interchangeable lenses of tne FUJICA STX-1 are         scha uen.
 widely known for therr superb color definrtion and
 perfect corner-to-corner picture sharpness and     2. Weltbekannte X-FUJINUN Ubjektive                                                                                                                            oe-  cla nty.                                             Die Wechseloblektrve der FUJICA SIX-i srn0
 3. A Complete Camera System in ltself                   kannt fUr ihre groBartige Farbwiedergabe und dte  Drs
 A wide range of interchangeable  lenses, accessories,     zum Brldrand gestochene Schdrfe und Brrllanz.
 and rts rmproved TTL full-aperture exposure meter     3. Ein vollstdndiges Kamera-System
 make the FUJICA STX-1 a complete camera system     Eine groBe Auswahl von Wechseloblektiven und
 in itself capable of handlrng any picture-taking      Zubehor, sowie die verbesserte TTL Offenblenden- situation and sublect.                            messung machen dre FUJICA STX-1 zu einem
                                                                vollstiindrgen Kamera-System. mit dem so gut wre
                                                    alle fotografischen Aufgaben und  Situationen
                                                             gemeistert werden konnen
                                                                                                                                                                         il
View original page 13Page 14 · Read text
CARACTERISTIOUES PARTICULTERES       CARACTERISTICAS ESPECIALES
 1. Posemdtre TTL de tr€s haute pr6cision                 1. Exposimetro TTL mejorado
 Le posemdtre du FUJICA STX-I esr composl de 2       El exposrmerro de la FUJICA STX_1 est6 formado
 cellules srlicrum situ6es de part et d'autre du viseur       por dos receptores de luz de c6lula fotoel6ctrrca  al
 tlles sont connect6es au circurt FET (Freld Effect          silrcio. srtuados uno a cada lado del ocular del vrsor.
 Transrstor) et coupl6es avec l'obturateur et le dia-     que est5n conectados a un circuito FET (transistor
 phragme. ll mesure l'intensit6 de lumidre moyenne      de efecto de campo) y que estAn acoplados con el
 qur tombe sur toute la surface du verre de mrse au       obturador y el diafragma Mide la rntensidad media point En d'autres mots. rl mesure la lumrere qui     de luz que llega a toda la superfrcre del crrstal de
 est pass6e par l'objectif et qui atteint le frlm          enfoque En otras palabras, mide la luz que ha
                                                     pasado a trav6s de la lente y que realmente llega a la
   Cet apparerl a des avantages survants.la nouvelle            oe lic u la
   monture d'oblectrf Fulca X d baionnette qur permet
    rin chanoement  ranrde  d'ohrectrfs   la  meSUre           Las principales caracteristicas de esta c5mara son
    d'expositron d plerne ouverture, et un triple systdme            las sigurentes la nueva montura Fulrca X en
  de mrse au point par strgmometre, microprismes            bayoneta que permrte intercambiar los obletivos
    et verre depolr ll est egalement muni d'une 6chelle        en forma rSprda. la medrcr6n de luz a plena
   d'indication des vitesses d'obturation dans le            abertura y el trrple sistema de enfoque por imagen
   viseur pour vous permettre de 16gler la vrtesse              partida, mrcroprsma y cristal esmerilado Tambr6n
   tout en reoardant dans le vrseur.                      est6 provrsta de una escala rndrcadora de
                                                          velocidades del obturador en el visor para 2. Objectifs X-FUJINON de renomm6e mondiale              permrtrrle aJustar la velocrdad del obturador Les oblectrfs rnterchangeables du FUJICA STX-l                                                            mrentras mrra a trav6s del visor sont renomm6s pour leur excellente defrnrtion des
 couleurs et la nettet6 est parfarte m0me dans les       2.  El mundialmente famoso objetivo X-FUJINON
 angles de l'rmage                                  Los obletrvos intercambrables de la FUJICA STX-1 3. Un appareil qui se suffit d lui-m6me               son amplramente conocrdos por su excelente de-
 Une grande varr6te d'oblectrfs rnterchangeables. des       finrci6n de color, perfecta nitrdez y claridad de la
 accessorres, un posemdtre TTL plerne ouverture font         fotografia. en toda su superfrcre
 du FUJICA STX-1 un apparerl extremement complet       3. Un sistema completo de c5mara en si mismo capable de vous donner toute sattsfactton dans     Una amplra gama de ob1etrvos rntercambrables.  acce- toutes circonstances                                                     sonos y su exposimetro TTL melorado. previsto para
                                                             la medrcr6n a plena abertura, hace de la FUJICA
                                                  STX-1 un srstema completo de cSmara, en si mismo,
                                            capaz de dominar cualqurer fotografia, tomando
t2                                                          cualquier srtuacr6n y tema.
View original page 14Page 15 · Read text
www.butkus.us
                 BASIC STEPS                GENERALITES
                        1. Load the Film                         1. Mise en place du chargeur
                           Pullthe Combination Film Rewind Crank-      Tirer sur le bouton lusqu'd ce que le dos
                       Back Cover Lock fully until the Camera    de l'appareil s'ouvre. Placer le chargeur
                     Back automatrcally snaps open Next,    3Smm dans le logement Pr6vu d cet
                         load the 35mm film cartrtdge Into the      effet et introduire l'amorce du  f ilm dans
                         Frlm Chamber and tnsert the film into       la fente de l'axe de r6ception du film
                        the slot of the Take-up Spool.            2. S6lection de la sensibilit6 du film
                       2. Set the Film Speed                   Pour r6gler l'apparerl sur la sensibtltt6
                    To set the camera for the speed of the     du  f rlm oue l'on utilise, tirer simplement
                              film you are using, pull up the top of the     sur la partte superreure du cadran de
                          Shutter Speed Selector Dral and turn      vrtesse et tourner JUSqu'a ce que le
                                    it untrl the number you want appears     nombre d6sr16 appararsse dans le centre
                           in the center of the ASA Film SPeed     de la fenOtre de sensibrlrt6 du frlm
                              Indicator Window
               KAMERABEDIENUNG            OPERACIONES FUN DAMENTALES
                        1. Einlegen des Films                     1. Cargue la pelicula
                      Ziehen Sre den Ruckspuihebel ganz    Levante la combinac16n Palanca de
                                                                                                                                                                   la                         heraus. bis srch die KamerarUckwand      rebobinado de la pelicula -  cierre de
                          automatisch offnet. Sodann legen Sie    taoa posterior totalmente hasta que
                    dre 35mm-Filmoatrone in die Frlm-      salte autom6ticamente la tapa posterlor
                  kammer ein und stecken Sre die    de la cSmara. A contrnuact6n, cargue
                   Filmzunge in  den  Schlitz der     el cartucho 35mm de Pelicula en  lawww.butkus.us       Aufwickelspule.                       cSmara de  pelicula e rntroduzca  la
                       2. Einstellen der Filmempfindlichkeit         oelicula en la ranura de la bobtna de
               Um dre Kamera auf dre Empfrndltchkett      bobrnado.
                  des verwendeten Films einzustellen,      2. Ajuste la sensibilidad de la pelicula
                   heben Sre dre VerschluBzettenwdhl-      Para colocar la cSmara en la sensrbrlrdad
                         scheibe leicht an und drehen sie bis dte    de la oelicula que Vd. emplea, simple-
                       gewunschte Zahl der ASA-Frlmempftnd-     mente levante la parte superior del dral
                               lrchkert in der N/itte des Frlmempfind-      selector de velocidad del obturador y
                              lichkeitsfensters erschetnt.                dele vueltas hasta que el  n0mero
                                                                 deseado se encuentra en el centro de la
                                                                          ventanilla indrcadora de la senstbilidad
                                                     de la pelicula.                          13
View original page 15Page 16 · Read text
3. Set the Frame Counter to 1 (the    3. Stellen Sie das Bildzdhlwerk auf  1
                                     first white dot before the number       (der erste weiBe Punkt vor der
                                     2l                             Nummer 2).                 \                     The odd numbers of the frame count-    Die weiBen Punkte auf dem Zeihlwerk
                      er are represented by white dots.    srnd dre ungeraden Zahlen. tsetetigen
                   Wind the Frlm Advance Lever and    Sie den Filmaufzughebel und drLicken
                          press the Shutter Release Button. Do     Sie auf den Ausloseknopf. Sre mussen
                            this twice, and on the 3rd wrndrng,   2 Blrndbelrchtungen machen, bei dem
                          the first white dot on the frlm counter     dritten Aufzug des Frlmtransporthebels
                         (frame No.1) wi.ll move opposite the     liegen der erste weiBe Punkt auf dem                                lI/\    triangular mark.                         Brldzdhlwerk (Bild Nr.1) und  die
                       4. Set the Shutter Speed Selector Dial     Dreiecksmarke nebeneinander.
                       Turn the Shutter Speed Selector Dial    4. Einstellung der VerschluBzeit
                       to the speed desired. lf you a re    Stellen Sre dre  VerschluBzeiten-
                          shootrng outdoors. the shutter speed    Wahlscherbe auf dre von lhnen ge-
                                  wrll be erther 1 /125 sec. or 'l1250 sec    wUnschte VerschluBzeit. Fur AuBen-
                                                     indoors.  rt wrll be    aufnahmen wird dre Belichtungszeit                                       lf you are shooting'1                                         1 /30 sec or  /60 sec The shutter speed    in den meisten Flillen 1 /125 Sek.
                        can also be set with the shutter speed    oder 1/250 Sek sein. wbhrend sre  f Ur
                             scale and green indicator needle tn the     Innenaufnahmen    1e nach den Lrcht-                               vrewf rnder (left srde edge) The needle  rs     verhdltnissen     -1 /30 Sek. oder J /60                               set by turnrng the Shutter Speed Selec-    Sek betragen -wrrd.
                                      tor                                  Die VerschluBzeit  ist auch einstellbar,                         5. Focus the Lens and Frame Your    indem Sie durch den Sucher blrcken
                                  Picture                        und die Wahlscheibe drehen, bis dre                                  (1) Look through the Viewfinder Eye-    grUne Anzeigenadel die entsprechende
                            piece and turn the Focusing Ring     VerschluBzeit anzeigt.
www.butkus.us            to focus and frame your picture.       5. Scharfeinstellung und     Bildaus-                      Q) fo focus, turn the focusing ring to         schnitt
                      make the upper and lower seg-     (1) Schauen Sie durch den Sucher und                         ments of the splrt image in the         stellen Sie das Oblektrv scharf ein.
                          mrcropnsm center spot converge       Dann wdhlen Sie den Bildausschnitt.
                          and form a oerfect  fit.                     (2) Zur Scharfeinstellung drehen Sie
                                                            den Einstellring, brs die oberen und
                                                                     unteren Terle des Schnrttbrldes rm
                                                                          Mrkroprismakrers ein ernziges Bild
                                                                      werden.
View original page 16Page 17 · Read text
www.butkus.us
         3. Compteur d'images (Le repdre de d6part est le     3. Ajuste el contador de fotograflas en 1 (primerr           premier point blanc avant le num6ro 2)                punto blanco antes del n0mero 2)
       Les num6ros rmpairs du compteur d'images sont    Los n0meros rmpares del contador de fotografias          repr6sent6s par des potnts blancs. Acttonner le levrer     est6n representados por puntos blancos Enrolle la
         d'avancement 2 fors. d la 3dme fors le premrer point     oalanca de avance de la pel(cula y apriete el bot6n
        blanc sur le compteur d'tmages (image n'1) se     de drsparo del obturador. HSgalo dos veces. y cuando
          trouvera en face de la marque trrangulatre                 enrolle por tercera vez, el primer punto blanco en el
        4. R6glage vitesse                                  contador de fotograflas (foto no.1) se pondrS en         Tourner le cadran pour placer la vitesse d6str6e      correspondencia con la marca trlangular'
         devant le repere. Pour les prises de vue d l'ext6rteur     4. Ajuste el dial selector de la velocidad de obturador
           la vrtesse est de 1/125 ou 1/250 sec., d l'int6rieur     D6 vueltas al dral selector de velocidad de obturador
            elle sera 1 /30 sec ou 1 /60 sec.                          hasta consegutr la velocidad que desee. Sr fotografia
       On peut 6galement 169ler la vltesse avec l'6chelle et    en el exterfor, la velocrdad del obturador ser5 de
              l'arguille d'indicatron dans le viseur (d gauche) Tourner     1/125 de segundo o 1/250 de segundo Si fotog,rafia
                                                                                                                    de           le i6lecteur de vitesse de fagon d farre coincrder      interiores serS de 1/30 de segundo o de 1/60
             l'arguille avec une vltesse destr€e                           seg u ndo
         5. Mise au point et cadrage                          Tambi6n puede aiustar la velocidad de obturador con
                      ('l ) Regarder dans le vtseur et tourner la bague de       la escala y la aguia indrcadora verde que se ven en el            mise au point pour mettre l'oblectrf au polnt.            visor. D6 vueltas al dlal selector hasta colocar la aguia
              Ensuite cadrez selon votre go0t l'image.                indrcadora en la velocrdad que desee.
           (2) Pour faire la mise au point. tourner la bague de     5. Enfoque el objetivo y encuadre su fotograffa
                                                                                                                                      al anillo de                                                                                                                visor,                                                                                     d6 vueltas                                                                                                del                                                                                                   el ocular                                                                  Mire por                                           les                      point                         ce que          mise            au                           lusqu'd                                                  segments       (1)'  '                                                                            para                                                                                              su fotografia                                                                              y                                                                                       encuadre                                                                                     enfocar                                                  dtvis6e                                                  convergent                                                                  enfoque                             de l'image                                           rnf 6rieur                          et              sup6rieur
           dans le centre du microprrsme pour ne former      (2) Para enfocar. d6 vueltas al anillo de enfoque hasta
            qu une seule tmage                               que los segmentos superlor e inferior de la tmagen
                                                                      oartrda en el centro del mlcroprlsma converjan
                                                                      hasta formar una sola lmagen.
View original page 17Page 18 · Read text
6. Set the exposure                    6. Einstellung der Belichtung
                           To set the camera   f or correct exposure,      DrUcken Sie den Ausloseknopf  halb
                                                                                                                                                                               vrnressvve   the!i    Shrrtter Release Button half-      durch und schauen Sre rn den Sucher
                        way down, look through the Vrewfrnder     Wahrend Sre dre Belichtungsmesser-
                         and. whrle watchrng the exposure     nadel beobachten, drehen Sre den
                            meter needle, turn the Aperture Selec-      Blendenring, bis sich dre Nadel in
                                 tor Rrng to bring the needle Into the     der Mitte des Rahmenernschnittes
                               center of the indentatron.                        bef indet. N un ist dre Kamera auf
                                   7 . Press the Shutter Release Button        rrchtrge Belrchtung erngestellt
                          Hold camera steady to prevent shake     7. Ausldsen des Verschlusses
                       and gently press the Shutter Release      Beachten Sre brtte, daB dre Kamera
                                B utton.                                     ruhig gehalten werden muB. wenn Sie
                                                                              fotografieren. Drucken Sre nur leicht
                                             und ruhrg auf den Ausloseknopf.
                                                               damit die Gefahr einer Verwackluno
                                                                    ausgeschlossen wrrd


r6
View original page 18Page 19 · Read text
www.butkus.us
6. Exposition                            6. Ajuste la exposici6n
Appuyer d moiti6 sur le d6clencheur      Aprrete el bot6n de disParo del
                                                                                    mtreet regarder dans le viseur Tout en      obturador a medro recorrrdo,
surverllant l'argurlle du  posemdtre,      a trav6s del vrsor, y mtentras observa
tourner la bague du diaphragme       la aguJa del exposimetro. d6 vuelta
jusqu'd ce que l'argurlle du posemdtre       al anillo selector de apertura hasta
vrenne se placer dans Ie centre du      que la aguJa se mueva hasta el centro
repdre On aura ainsi l'exposrtion     de la ranura rndicadora. Ahora ttene
correcte.                                Vd. la exposici6n correcta.
7. D6clenchement                     7. Apriete el bot6n de disparo del'
Si vous tenez l'appareil en main,          obturador
maintenez-le  f ermement pour 6viter      Si fotografia con la cSmara en sus
                                                                                                                                                                     f irmemente paratoutes secousses au moment du     manos mant6ngala                                             impedir que se mueva y apriete suave-d6clenchement.                                   mente el bot6n de disoaro del obtu-
                                                   rador.
View original page 19Page 20 · Read text
8. Rewind the Film                     8. R6embobinage
                             After you have exposed the entire      Aprds avoir expos6 tout le film ap-
                                   roll of frlm, press the Frlm Rewind       puyer sur le bouton de r6embobinage
                          Button. erect the Film Rewind      qui libdre l'axe d'entrainement du
                           Crank, and turn rt in the direction         film, ensuite d6gager la manivelle de
                             pornted by the arrow and wind the       r6embobinage et la tourner dans la
                           film back into the cartridge,  untrl        direction indrqu6e par la fldche pour
                       you  f eel tension released. Next.  lrft       renvoyer le film dans son chargeur
                        the Back Cover Lock fully up untrl        JUsqu'a ce que vous sentiez une l69dre
                           the camera back snaps open. Now,        tension. Vous pouvez ensuite ouvrir
                           remove the cartridge.                             l'appareil pour dSgager le chargeur
                         8. Ri.ickspulung des Films                8. Rebobine la pelicula
                       Nachdem Sie einen Frlm vollsteindig       Despu6s de haber utilizado un carrete
                                  belichtet haben. drucken Sre auf den       com pleto de  pelic u la.  a priete  el
                              Filmruckspulknopf, stellen den Frlm-       bot6n de rebobinado. levante la pa-
                               ruckspulhebel hoch und drehen ihn in       lanca de rebobinado de la oelicula v
                           der Pfeilrichtung. brs Sie einen leich-       dele vueltas en la drrecc16n rndrcada
                            ten Widerstand spriren Nun lst der      por la flecha y enrolle Ia pelicula
                          Frlm in dre Kassette zuruckgespult.        hacia atrSs dentro del cartucho. hasta
                     Sodann offnen Ste dre Kamera-      que sienta una ligera tensi6n. A con-
                          RUckwand. indem Sie den FilmrLick-        tinuaci6n levante el cierre de la tapa
                             spulhebel anheben und nehmen lhren       postenor totalmente, hasta que se
                                  belichteten Film aus der Kamera.           abra dicha tapa. Entonces saque el
                                                                                    cartucno.


r8
View original page 20Page 22 · Read text
3. Check the batteries                  3. Batterieprijfung
                                     (1) Set the ASA Speed Selector @ to       (1) Stellen Sre den Filmempfindlich-
                              100, the Aperture Selector @ to         keitswehler @ auf 100 ASA (21
                             F22, and the Shutter Speed Selec-         DIN). den Blendenring @ auf F2,2,
                                     tor @ to 60.                                       u nd die Verschl u Bzeiten-Wa hlschei-
                                       (2) While pressrng the Shutter Release        be @ auf 60.
                             Button @ halfway down. look      (2.)Wiihrend Sre halb auf den Ausl6-
                                through the Viewfinder and point         seknopf @ drucken, schauen Sie
                           the camera toward brtght Itght          in den Sucher und halten Sre dre
                                    (fluorescent lrght, etc.)                Kamera gegen helles Lrcht (2. B.
                                    (3) lf the meter needle in the view-          Le uchtstof  f lam pen licht)
                                        frnder: moves from the plus side       (3) Schlagt dre MeBwerknadel  im
 Batteries properly loaded         down to the minus side when the       Sucher von der Plus-Seite zur
 Die Batterien sind richtig ein-       camera is faced toward dim light        Minus-Serte hin aus. wenn dre gelegt                                (you can block out the light wrth       Kamera gegen gedeimpftes  Lrcht Les piles sont correctement charg6es                         your hand), the batteries are loaded        genchtet wrrd, (halten Sre lhre
 Las pilas est6n debidamente           correctly.                            Hand vor die Kamera), so sind die
 colocadas                          (4) lf the needle remains stationary on          Batterien rrchtrg eingelegt.
  Bright light     Dim light           the olus side or minus side when       (4) Sollte die Nadel sich von der Plus-
  Helles      Licht     Geddmpftes                      Licht              the camera rs faced from bright to       oder Minusseite nicht bewegen, Lumi6re brillante       Lumidre          drm lrght, the batteries are either        selbstwenn die Kamera vom hellen
  Luz brillante    att6nu6e            exhausted or improperly loaded and     zum gediimpften Licht gehalte n
                     Luz tenue         have to be chanqed or reloaded          wrrd. so srnd die Batterien entwe-
                                         properly.                              der erschdpft oder unrichtig ein-
                               Precautions                                  gelegt. Das herBt, daB Sie dre
                                               lf you are not taking pictures immedi-          Batterien auswechseln oder drese
                                        ately, lock the shutter release button to        nochmals richtig einlegen mussen.
                               prevent tnpprng the shutter or drarning     VorsichtsmaRnahme
                              the batteries inadvertentlv.           Wenn Sre sofort keine Aufnahmen
                                                         machen. sollten Sre den Ausl6ser
                                                                                   arretreren, um zu verhrndern, daB die
                                                                          Batterien unndtig beansprucht wird, td                                    und daB der Ausldser versehentlich
20                                                                        ausgelost wird.
View original page 22Page 24 · Read text
The mercury or silver-oxjde batteries       Les piles au mercure ou d l'oxyde
will normally last about 1 year, and         d'argent durent normalement 1 an
alkaline-manganese batterrbs about         envrron ;  et  les oiles alcalino-
8 months                              mangandse. 8 mois envrron.
lf you are not using the camera for      Si vous n'utilisez pas l'appareil
a long while, remove the batteries       pendant un certain temps. il  est
and keep them where  it is dry.               pr6fSrable d'enlever les piles et de
Be sure to wipe both ends of the         les conserver dans un endroit sec.
batteries clean with a prece of cloth               ll est recommand6 de bien nettover
bef ore loading. Poor contact may          les  f aces des prles avant de les placer
result if the ends are unclean.              pour obtentr un meilleur contact.


Die Mercury- oder Silberoxydbatte-        Las pilas de mercurio o de 6xido de
nen halten etwa 1Jahr, und die         plata durarSn normalmente un ano.
Alkah-Mangan-Battenen etwa  I      y las de manganeso alcalino 8
Monate.                                     meses.
Wenn Sie die Kamera kingere Zeit       Si no utiliza la cSmara por alg0n
nrcht benutzen, nehmen Sie die         tiempo, saque las pilas y mant6ngalas
B.atterien heraus und bewahren sie       en un rugar seco
an einem trockenen Platz auf.          Asegdrese de  limpiar ambos
Die Batterien sollten vor dem        extremos de las pilas con un pano
Einlegen in dre Kamera mrt einem        antes de colocarlas en la cSmara. Si
sauberen, trockenen  Tuch      ambos lados estSn manchados no
abgerreben werden. damit guter       hardn buen contacto.
Kontakt gewdhrlerstet  rst.
View original page 24
Page 25 · Read text
www.butkus.us
FILM LOADING               EINLEGEN DES FILMS
1. Open the Camera Back               1. Offnen der Kamera-Ri.ickwand
Lift the Combination  Film  Rewind     Ziehen Sre den   kombinierten
Crank - Camera Back Lock @ tutty       RU cksou lhebel   Kamera rUckwa ndver-                                                           -                                                              heraus. bis sich dieup until the Camera Back @ auto-       schluB @ soweit
matically snaps open                    RUckwand @ off net
2. Load the Film                      2. Einlegen des Films
Insert the cartrrdge into the Film     Legen Sie dre Frlmkassette in die
Chamber @ with the spool head      Filmkammer @ ein und zwar so, daB
(prolectron) pointing to the bottom      der sichtbare Spulenkern nach unten
of the camera, push down the Combr-       zeigt. Nun drucken Sre den RUck-
nation Film Rewrnd Crank - Camera      spulhebel @ herunter. brs dre Film-
Back Lock @ to engage the Frlm       ruckspulachse @ einrastet Sodann
Rewind Sprndle @ with the film      ziehen Sre die Filmzunge aus der
spool Pull out the trimmed end of       Kassette und stecken den Film bis
the frlm and insert it down to the    zum untersten Ende in den Schlitz
bottom end into the slot of  the       der Aufwickelspule @
Take-up Spool @
View original page 25
Page 26 · Read text
CHARGEMENT DU FILM      CARGA DE LA PELICULA
1. Ouverture de l'appareil                1. Abra la parte posterior de  la
D6gager le bouton @ entidrement.  le         cdmara
dos de l'appareil @ s'ouvrira.               Levante la combinaci6n: palanca re-
                                         bobrnadora de pelicula - crerre de la
2. Mise en place du film              tapa postenor de la c5mara @,
Introduire le chargeur dans son loge-       totalmente hasta que drcha tapa pos-
ment @ la tete de la bobrne drrrg6e         terior @ se abra automSticamente de
vers le bas de l'apparerl. repousser le      un salto.
bouton @ pour engager l'axe de
marntien @ dans le chargeur - tirer      2. Cargue la pelicula
I'amorce du  film et   l'introdurre       Introduzca el cartucho en la cSmara
d   f ond dans la   f ente de I'axe de     de la pelicula @, con la cabeza de la
r6ception du frlm @                           bcjbrna (proyeccr6n) apuntando hacia
                                               la parte inferior de la c5mara. apriete
                                               la combinaci6n, palanca de rebobina-
                               do de la pelicula - cierre de la tapa
                                                posterior @ hasta aga(rar el vEstago
                               de rebobinado de pelicula @ con la
                                        bobrna de la pelicula Saque el lado
                                         recortado de la pelicula e introd 0z-
                                             calo a fondo en la ranura de la bobrna
                                   de bbbrnado (Sr.
View original page 26Page 27 · Read text
www.butkus.us
                         3. Close the Camera Back               3. SchlieBen der Kamerariickwand
                      wrnd the film a linle with the Frlm      Transportreren Sie den Frlm mit dem
                     Advance Lever @ and engage the     Filmaufzughebel O brs beide Serten                               perforatrons on both edges of the film    der  perf oration rn dre Zahnrader
                         wrth the sprocket teeth Be sure the     eingerastet sind. Beachten Sre brtte,
                              frlm rs properly inserted between the   daB der Frlm sich zwrsche,n den
                        Gurde Rail @ Now, press down the     Fr-ihrungsschrenen @ befindet. Nun                        Camera Back until it closes trghtly wrth     klappen Sle dre Kameraruckwand  zu,
                         a clrck                                        bis sre horbar einschnaoot
                  a  lf the Frlm Rewind Crank turns rn the   o Wenn dre Filmruckspulkurbel beim
                              opposrte direction of the arrow as       Drehen des Frlmaufzughebels O                         you wrnd the Film Advance Lever       srch entgegen der  Pfeilrichtung
                          @. rt means the  f rlm has been loaded        bewegt. bedeutet dres, daB der Frlm
                                      properly.                                richtig eingelegt wurde  und                  a The odd numbers of the Film Counter         ordn ungsgemaB transportiert.
                @ are represented by white dots      o Dre  ungeraden Zahlen des
                  a To allow you to take qurck shots in        Brldzahlwerks @ werden durch                                 succession. the Frlm Advance Lever       weiBe Punkte angezergt
               @ wrll be back wrth a slight larrtude    o Um  schnelles Auf nehmen zu
                            Press it all the wav back after vou       ermoglrchen. kehrt der  Filmauf-
                           have frnrshed shootrng                    zugshebel @ nrcht rn seine Normal-                         4. Set the Frame Counter @ to 1 (the         stellung zuruck Er sollte aber nach                                     .  first white dot before the number 2)       Beendrgung der letzten Aufnahme
                       Wrnd the Film Advance Lever @ all the        zuruckgeschoben werden
                     way to the rrght and press the Shutter    4. Einstellung des Bildzdhlwerks @ auf
                          Release Button @ Do this twice. and     1 (der erste weiBe Punkt vorwww.butkus.us       on the third wrnding. the  f irst white dot      Nummer 2)
                             before the number 2 will move oooosite      Betatrgen Sre den Filmaufzughebel  brs
                              the trrangular mark You are now ready    zum Anschlag nach rechts und drUcken
                                 to take the first otcture                Sre auf den Ausloseknopf @   Sre                                                        mussen 2 Blrndbelrchtungen  machen,
                                                         ber dem drrtten Aufzug des Frlm-
                                                                  transporthebels erscheint der erste
                                                            weiBe Punkt vor Nr 2 im Fenster des
                                                                        Brldzdhlwerks neben der Dreiecksmarke
                                                      Dre Kamera tst nun fUr dre erste
                                                                          Auf nahme sch u Bberert
                                                                                                              Zs
View original page 27Page 28 · Read text
3. Fermeture de l'appareil                             3. Cierre la parte posterior de la cSmara
  Faire avancer le  f ilm d l'aide du levier @ et bien        Enrolle la pelicula un poco con la palanca de avance
  engager les perforatrons du film dans les dents de      de la pelicula @ e introduzca las perforaciones de
  l'axe d'entrainement.  V6rrfrer que le film soit bien      ambos lados de la pelicula en los dtentes del ele
  plac6 dans les rails du coulorr de l'appareil @ ensuite       dentado. Asegrirese de que la pelicula se ha intro-
  refermer l'appareil - vous entendrez un d6clrc de       ducrdo adecuadamente entre el rail de guia @. A     f ermeture.                                                continuaci6n vuelva a cerrar la cSmara y apriete la
 o Lorsque vous   f aites avancer votre  f rlm, si  la       tapa hasta que se cierre  f uertemente con un clik
     manivelle de r6embobinage du frlm tourne dans     a Si la palanca de rebobinado de la pellcula gira en
    la direction opposOe d la   f ldche, le   f rlm est          direcci6n opuesta a Ia flecha a medida que
     correctement charge.                                       acciona Vd la palanca de avance de la pelicula @
 a Les n um6ros impairs sont repr6sent6s suI  le        eso signrfica que la pelicula ha sido cargada
     compieur. d'images @ par des pornts blancs.             adecuadamente y se traslada correctamenre. a Pour prendre des photos d un rythme acc6l6r6,     o Los n0meros impares del contador de fotografia
    vous pouvez laisser le levier O dans la positiori     @ estSn representados por puntos blancos    un peu avant. mais ne pas oublier de le repousser          .  Para que pueda Vd. tomar fotografias rdpidas
     entidrement d la fin de ces orises de vue.                    sucesrvamente,  la palanca de avance de la pelicula
 4. Compteur de film (Le repdre de d6part est le     @ volver5 delando una latrtud Accione la misma
     premier point blanc avant le num6ro 2)                  todo su recorrido hasta atr5s despu6s que haya
  Faire avancer le levier d'avancement e du frlm et          terminado de hacer s'u fotografia
                                                                                                                                                                     (el  presser le d6clencheur @ Farre cette operation 2 fois       4. Ajuste el contador de fotografia @ en 1
  la 3dme fois le premier pornt blanc avant le n'2 se          primer punto blanco antes del n0mero 2)
  placera en  f ace de la marque triangulaire. Vous pouvez      Acoone la palanca de avance de pelrcula O en toda
  maintenant prendre votre premidre photographle.          su extensr6n hacia la derecha y aprete el bot6n de
                                                          disparo del obturador @ H5galo dos veces y a la
                                                             tercera vez el pnmer punto blanco antes del n0mero
                                              2 se pondrS enfrente de la marca triangular. Ya est6
                                                            usted listo para tomar la prrmera fotografia.


26
View original page 28Page 29 · Read text
www.butkus.us
SETTING THE FILM SPEED                EINSTELLUNG DER
                                      FILMEM PFIN DLICHKEIT I ift thp tnn(vP         v,nf thp  Shrrttpr   vyvvvSnecd  Selp.lor  Dr,al",e'    O)I
and turn rt to the left or ilght untrl the frlm speed      Heben Sie dre VerschluBzeiten-Wahlscherbe @ an,number you want appears In the center of the ASA      und drehen Sre sie nach rechts oder lrnks brs die
Frlm Speed Indtcator Wt ndow @                     gewunschte Zahl der Filmempfindlichkert in der
The frlm speed rs printed on the  f ilm box. (FUJICOLOR        Mrtte des Frlmempfrndlrchkertsfensters @ erschernt.
F-ll. FUJICHROME 100 and NEOPAN SS are ASA       Die Frlmempfrndlrchkert wrrd in ASA/DlN gemessen.
100 frlms FUJICHROME 400, FUJICOLOR 400 and       Sre rst auf leder Filmpackung vermerkt (FUJICOLOR
NEOPAN 400 are ASA 400 ftlms  )                                    F-ll, FUJICHROME 100 und NEOPAN SS haben 1e
The calrbratrons between the ASA numbers repre-     1OO ASA/21 DIN, FUJICHROME 4OO, FUJICOLOR
sent the followrng numbers : ( I  )                      400 und NEOPAN 400 haben 1e 400 ASA/27DlN  )
a  lf you are using a film marked for DIN speed,      Dre ernzelnen Strrche zwrschen den bezetchneten
    refer to the following conversron table (II)          ASA Nummern bedeuten folgende Empfrndlrchkerten       :
                                                                (I)
                                                                         .  Fur dre DIN-Empfrndlrchkert  gtlt folgende Um-
                                                           rechnungstabelle  (lI  )


                                                      (D
                                                                                                                           125 160 250 320 5C0 640 10m 1250 2m0 2500                                                                          32tttrlllllli40 M 80
                                                                                      25        50       100    2m      400    8m           1 600     3200

                                                                                 (rr)
                                                ASA   25  32  40  50  80  100 m 2n 320  400
                                                 DIN    15   l6   17  18  20  21  24  25  26  27


                                                                                                       27
View original page 29Page 31 · Read text
www.butkus.us
SETTING THE SHUTTER SPEED
The letter B and the numbers 2  ..... 7OO on the
Shutter Speed Selector Dral represent "bulb" and
1/2  ..... 1/7OO second. They rndicate the length of
time the frlm wrll be exposed to lrght. The shutter
speed scale is also vrsible in the viewfinder (left stde
edge).
This camera allows you to set exposure etther by the
shutter speed or by the size of the lens opening.
However. it is best to set the shutter speed frrst. For
example, the shutter speed would be from 1/125 to
1/250 sec if you are shooting outdoors, or  f rom
1/30 sec to 1 /60 sec . if you are shooting indoors
To set the shutter speed,  f irst turn the Shutter Speed
Selector Dral whrle pressing down on tt sltghtly and
set the number you want opposite the red dot on the
camera body.
To set the shutter soeed with the scale and needle in
the viewfinder, Just move the needle tnto positton by
turnrng the Shutter Speed Selector
 .  Use B (bulb)  if the exposure will take 'l second    or longer     @
a There are 'no intermedrate settings between the
   numbers indicated on the dial
o  6O is marked wrth a red X to remrnd you that rt rs the
   speed used for shooting with electronic   f lash.
o  Excepting 1/7OO second, each shutter speed is
    either 1/2 or 2 times the speed of the shutter
   soeed next to  it.


                                                                                                             29
View original page 31Related documents and language editions
From the M. Butkus Camera Manual Library. Original publisher and archive notices are retained.
Check the model and edition against your equipment.
PDF verified 2026-10-10.