Film cameras
Fujica V2 User manual
User manual for Fujica V2. 25 pages in English. Read the original PDF, download or print a copy without registration.
25 pagesEnglish6.1 MB PDF

Loading your manual…Open PDF directly
Document details
- Brand
- Fujica
- Model / document
- Fujica V2
- Document type
- User manual
- Language
- English
- Pages
- 25
- File size
- 6.1 MB
- Category
- Film cameras
- Document date
- Not specified in catalog
Search available document text
Find a term, then jump to its page in the original PDF. Image-only pages may not be searchable; check the PDF for exact wording and diagrams.
Page 3 · Read text
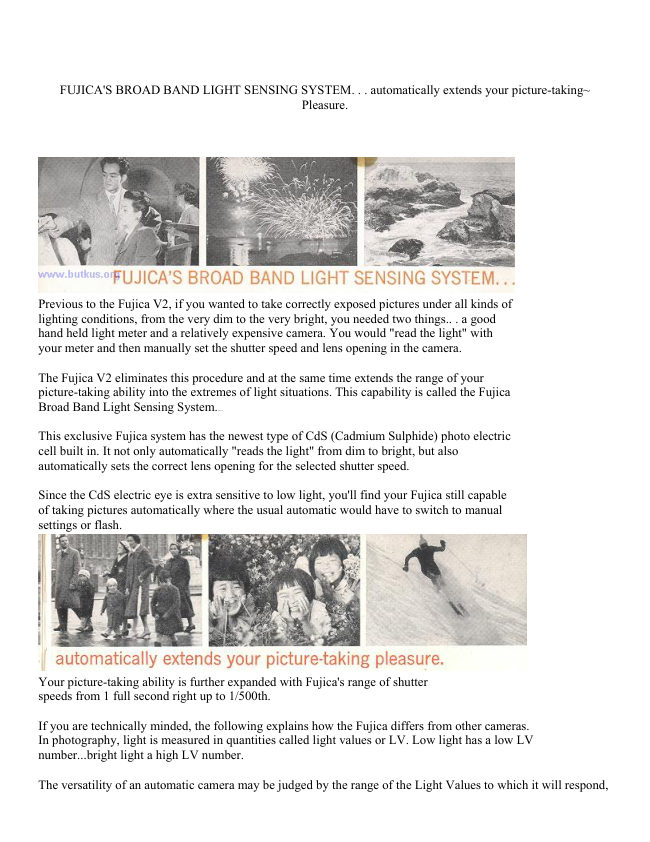
FUJ ICA'S BROAD BAND LIGHT SENSING SYSTEM.   .
  Previous to the Fujica V2, if  you      This exclusive Fujica system has the
wanted to take correctly exposed pictures     newest type of CdS (Cadmium Sulphide)
under all kinds of lighting conditions,     photo electric cell built in.  It not only
from the very dim to the very bright,     automatically "reads the light" from dim
you needed two things.  . . a good hand      to bright, but also automatically sets the
held light meter and a relatively expen-     correct lens opening for the selected
sive camera. You would "read the light"     shutter speed.
with your meter and then manually set                                              Since the CdS electric eye is extra sen-the shutter speed and lens opening in                                                    sitive to low light, you'll find your Fujica
the camera.                                               still capable of taking pictures automati-
 The Fujica Y2 eliminates this proce-     cally where the usual automatic would
dure and at the same time extends the    have to switch to manual settings or
range of your picture-taking ability into      flash.
the extremes of light situations. This                                     Your picture-taking ability is furthercapability is called the Fujica Broad                                        expanded with Fujica's range of shutterBand Light Sensing System.
View original page 3
Page 4 · Read text
www.butkus.us


automatically extends your picture-taking pleasure.
    speeds from I full second right up to    a Light Value band of LV 6 to LV 17.
     l/500th.                                  This is a good range, and covers most
                                                                                                                                                                       . .your Fujica V-2       If you are technically minded, the fol-     picture situations. But.
   lowing explains how the Fujica differs     covers a band of LV 2 to LV 18! That's   from other cameras.                 why its automatic exposure system is                                                    referred to as "Broad Band". In practical
     In photography, light is measured in     terms. this means a far greater range of
    quantities called light values or LV. Low     automatic picture-taking opportunities.
    light has a low LV number...bright light
   a high LV number.                         While most of your picture-taking will                                          probably not require the use of your
     The versatility of an automatic camera     Fujica's extreme capabilities, when the
   may be judged by the range of the Light     great picture opportunities happen under
   Values to which it will respond, since       difficult conditions,  it's wonderful to know
    this indicates the number of different    that your Fujica will respond. ..auto-
    lighting and picture situations it can     matically!
   handle. Many automatics operate within
View original page 4Page 5 · Read text
FUJICA'S VISIBLE CONTROL CENTER
               Simplifies Operation
  This unique Fujica feature shows        ing System as the black bar rises
you at a glance all of the factors       from the bottom when the shutterthat make up the picture when you        release button is pressed. See
look through the viewfinder.  It per-       page 10 for details.
mits you to make adjustments, if you    4. Focusing is adjusted by means of
wish, without removing the camera        the rear Focusing Wheel, and is
from your eye.                             indicated in the golden square in
Look through the viewfinder and      the center of the frame.  . . and
note:                                       parallax is corrected automatical-
1. You see your subject or scene        ly. See page 13 for details.   brightly and clearly, outlined in     In addition, if the light is too   a glowing golden frame.             bright or too dim for correct expo-
2. You see the shutter speed you     sure, a red warning flag appears   have selected as a small but    over the column of lens opening    easily read golden numeral in the    numbers at the right. This is your
   lower left corner. See page 10     signal not to shoot and to " dial " a
   for details.                             different shutter speed. See page 10
3. You see the lens opening set     for the simple details.   automatically for you by the
   Fujica's Broad Band Light Sens-
View original page 5Page 10 · Read text
www.butkus.us
4.SIMPLE STEPS snow you how easy your Fujica is to handte


     DO NOT FORGET TO PLACE THE MERCURY BATTERY ]N THE COMPARTMENT,
      (MERCURY BATTERY IS PACKED IN THE CORNER OF STYROFOAM PACKING)
         Set the ASA number of your film in the Film Speed Setting Ring (No. 5) by rotating the Ring          until the desired ASA number appears at the top, aligned with the red dot on the carnera body.o  ASA numbers are the large black numerals on the outside of the Ring. The small red numerals        on thc inside are DIN (European) equivalents. For example, set the Ring at ASA 64' as shown
          above.
@   SetSelectyoura shutterFujica speedfor fullyby turningautomaticthe operationShutter Speedby turningSelectortheRingSelector(No.4)Ringuntil(No.the desiredl)  to AUTO.speed          aligns with the Guide Mark (No.3). For example, set the Selector at"250" as shown above.
@    Iloldthumb.theRotatecameratheto Wheelyour ey€.untilThetheFocusinggoldcn squareWheel in(No.the10)centerwill fallof thenaturallyframe undershowsyoura singleright         image...sharp and clear. Further information on focusing is given on page 13.
@   Swingfilm to thean unexposedFilm AdvanceframeLeverand (No.sets 9)thefullyshutterout forand thepermitexposure.it to snapPressback.theThisShutteradvancesReleasethe        Button (No. 6) until slight resistance is felt. Note in the view finder how the black bar rises         from the bottom to point to the lens opening the camera has set for you. Now, press the Shutter
          Release Button all the way. The soft "click" tells you that you've taken a picture.
        At speeds of 1/l5th second or slower keep button depressed after click until no further shutter         sound is heard.
          Practice these simple steps a few times until you get the "feel" of your new Fujica.
                                                                                9'
                                                                                                                                                                                                                                                                                                                                                                                                                                                                                                                                                    I
View original page 10Page 11 · Read text
HOW TO USE THE FUJICA V2's
 AUTOMATICALLY CORRECT EXPOSURE CONTROL
     Set the CdS meter for the ASA number    second or slower (any shutter speeds  of the film you're using (ASA number is    slower than l/lsth second will be in-
  always indicated on the instruction sheet     dicated in the viewfinder as SLOW) keep
  packed with the film). Set the Fujica     button depressed after click until no fur-  for automatic operation bv turnins the     ther shutter sound is heard. For speeds   Selector Ring to AUTO position, boTh as     slower than I second, see " Time Expo-
  previously described.                       sures" on Page 15.
     Seiect a shutter speed by turning the      Hold the camera to your eye and press  Speed Selector Ring (No. 4) until the    the Shutter Release Button (No. 6). A   desired speed aligns with the Guide Mark     slight resistance will be felt and a black  (No. 3). You have an unusually broad    bar will rise from the bottom of the  range of speeds to choose from.  . .l second     viewfinder frame to indicate the lens  to l/500 second. Usually, the slower    opening which the Broad Band Light   speeds. from 1/60 to I second will be used     Sensing System has set for you. Press                                              l/125    the button all the way to take your  in dim light, and the fast speeds,^be  second to 1i500 second. will    uled in      picture.  bright light and for action shots...the   faster the action. the faster the shutter         If the red warnins sisnal appears in  speed needed.                                the right side of the viewfindeC this is
                                       an indication that proper exposure can-    For speeds slower than l/60 second, it    not be made with the-shuttei speed you  is advi6able to mount the camera on a     have selected. Adjustment can-be m-ade
  tripod or some other steadv supnort to     without removing the camera from your
  avoid blurring. For speeds ol^ t/tSth      eye.
l0
View original page 11Page 12 · Read text
www.butkus.us
   If the light is dim, release the Shutter
Release button and move the Shutter
Speed Selector Ring one position slower
(for elample, from 1/250 second to l/125second). The new speed will be seen inthe lower left corner of the viewfinder.Depress the Shutter Release button
a-g.ain. - If the red flag appears again,shift the speed from IIIZF;th to t/60th,and so on uhtil the red sisnal does not
appear when you press th-e button. Ifyou reach I second, and the red signal
still appears, this is your signal to sw-itch
to Flash (see page 19) or to Time Expo-
sure.
  If the lieht is extremelv brieht and         500
t-he red signal shows when ihe birtton is
depressed, increase the shutter speeds to
faster instead of slower lfor example,from l/125 second to 1/250 second or frbm11250 to 1/500). It would be an extremelvrare situation if  the red sisnal  stiil
showed att---)1/500 of a second.


                                          500
View original page 12Page 13 · Read text
HOW TO USE TH E FUJ ICA V2 CLOSE U P LIGHT LOCK
   This extremely useful feature lets you capture
 perfectly exposed pictures under unusual lighting
 situations. Most typical is the " backlighting " situ-
 ation as shown in the illustration on this page'
   Normally, the Fujica's Broad Band Light Sensing
 System takes into account ALL the light in the
 scene for best overall exposure. In this case, how-
 ever, better exposure will result from selectively     0ther Situations in which the
 exposing for the girl's face, because the brilliant      Close-up Light Lock ls Useful
 backlight could cause an underexposure of facial       Strong Frontlight-Dark  Background                                                                                 procedure                                                              same                                                                                      as de-                                                                  Follow                                                                             the detail.                                                                                                      at  left,                                                                            example                                                                                           in                                                                               the                                                                         seribed   Bring the camera to within a few inches of the       Strons Sidelighting
 important area of the subject. Look through the      Followholcl thetheeamerasamecloseprocedureto thebrightestexcept viewfinder, aim the camera at this area and press      area when shooting eolor, and the
 the Shutter Release Button until the black bar, rises      shadowwhit1.film.area when using black and
 to indicate a lens opening. Don't press the button
 all the way, or you'll make an accidental exposure.
   Hold the button in the partway-down position and
                                              and                                       focus                               Aim,                          position.           your shooting back          to     up                                                                                                                                                                                                                                                                                                                                                                                               ItttI                                             the pic-                        down                                     to take press          button      the                    all the way                                                                                                                 5a ture. The girl's features will be correctly exposed, and you'll get the lovely " halo " of backlight that                                                -tlta
                                                                                                                                                            22 makes this kind of picture so delightful.


12
View original page 13Page 15 · Read text
FOR MANUAL OPERATION
  Fujica's Broad Band Light Sensing     Shutter Release button partway down.                                        The black bar will rise anil indicate what  System can be a very helPful guide     lens openine will result in correct expo-
  for manual settings of shutter speeds    sure 6ased- on the shutter speed y.op                                                 some reason you wish  and lens openings.                        selected. If for                                       to deliberately overexpose or- under-                                              expose, the automatic system gives you   To set the Fujica for manual control    the coi"rect starting point foi making  of exposure, select a shutter speed in     your own settings.  the same manner as for automatic ex-      Note:  The black bar has limited movement when  Dosures. To select a lens opening, move             the camera is used manually, and does not  ttre Selector Rine (No. 21J off AUTO              indicate the lens opening you have set.  position to the Aesired lens opening                                         Use Broad Band Light Sensing for "brack-  number.
   You have a very broad range of set-      eting"
  tines: shutter speeds from I second to     Manv nhotographers prefer to " brack-  Usd() second, pl-us " B " for time expo-     et" th;ii' pict--ures to have a choice of  sures, and lens openings from f/1.8 to     effects. T6 do this, make the first expg-     f 122.                                       sure with the camera set for automatic
  Use the Broad Band Light Sensing System     exposure. Note the lens opening number                                                 indicated by the black bar in the view-
  as a check                                  finder. Th-en, set the camera manually
                                                                                 ano-                                                       make                                                         and                                                                  hisher,                                                    openins                                                    lens                                          one         you                   decided                     on             have                     a combina-    After                                                                           exposure                                                                                       - Ma-ke                                                     expoiure.                                                                       third                                           gpgnir-rg                                                a                                           ther                speed                           lens                    and      of          lhutter  tion  to be set manually, you can switch the     with the camera set manually one lens  Fuiica back to airtomatic operation if     oneninE number lower. Choose the slide
   yori wish to check your-subjectsettin-gs. Point     oi negltive that gives the most pleasing  ihe camera at your       and press the       effect.

14
View original page 15Page 16 · Read text
www.butkus.us
       THE SELF.TIMER
  To delay exposure, move the Self-Timer Lever (No. 13)
downwards before pressinE the Shutter Release Button.
Moved fully down. if will delay exposure approximately  10
seconds.
  This feature is useful two ways. First, with the camera
mounted on a tripod, it lets you get into the picture your-
self.
  Secondly. with lonE exposures when no tripod is avail-able, it gives you a-cha^nce to brace yourself steadily be-fore the shutter is released, adding greatly to picture
sharpness.

        TIME EXPOSURES
  For exposures longer than I second, move the Shutter
Speed Selector to "B'tposition. Set the.lens openinE Selec-
to]r Rine for the desir-ed lens openins or f/ st6p. anvwhere
off AUfO position. Mount the^cameia on'a triibd or other
support.
  Alter the Film Advanee Lever has been actuated, the
                                                  Releaseshutter will remain open-   as lons as the ShutterButton is depressed.-            It will cldse as soon as the Buttonis released.
(The use of a cable release is recommended with time ex-posures to avoid jarring the camera and blurrins the pic-
ture. The Fujica s Shutter Release Button is threadeil to
accept all standard cable releases.)
                                                                                              r5
View original page 16Page 18 · Read text
www.butkus.us                  TNSERT FILM ROLL @
Insert any standard 35mm cartridge into the film
chamber as shown, with the narrow leader of the
film at bottom.

                TNSERT END OF FILM G)
into the Take-Up Spool Slot until it is held securely.Be sure the spiocRet teeth of the smaller blacrk
wheel engage the perforations in the film.


                   ADVANCE F|LM G)
While gently holding down the film cartridge with
vour thumb. nress the shutter release and take one
iull stroke ot^ttre film advance trigger. This winds
the end of the film around the take-up spool. Close
the back.

           PRESS SHUTTER RELEASE @
and advance the film trigger. Repeat several times
until the number "1" appears in the exposure counter
rvindow.
View original page 18Page 19 · Read text
SPECIAL NOTE ABOUT THE LAST     HOW TO UNLOAD YOUR
     EXPOSURE ON THE ROLL                  FUJ ICA V2
   When you have made the last exposure      With the film lever still about halfway
  on any roll of film and then try to ad-     out, press the Rewind Release Button
  vance the fllm lever, you will find that it     (No. 19) which you will find on the bottom
  locks about halfway out. Do not force     of the camera. Keep this button pressed
   it any farther. This is your signal that     in. Swing out the Film Rewind Crank
   the last exposure has been made. Do not     (No. 12) and turn in the direction of the
  open camera back. The film should then    engraved arrow. You will feel some re-
  be rewound back into the original car-     sistance. Continue winding until no more
  tridge and unloaded from the camera.     resistance is felt. You can then open
  This is quite simple and done as follows.     the back by pulling down the back slide
                                            lock (No. 21) and lift out the film car-
                                         tridge. For best photographic results,
                                           have the film processed as soon as pos-
                                                     sible after exposure.


                                                               Fltt REwlltD 8uTT01{        Fttt BEwtilD cR^lil(

l8
View original page 19Page 24 · Read text
www.butkus.us
 HOW TO CARE FOR YOUR       CHANGI NG THE
        FUJICA V2           MERCURY BATTERY
  Avoid touching the lens or electric eye win-        Replace it with a Mallory
dow with your fingers. Fingermarks should be       PX13 or any other identical type.
removed promptly with a good lens tissue,      Be sure that the (+) plus mark
wiping the lens lightly. Should dust or parti-      on the battery is up facing the
cles get inside the camera, remove them with a        screw-in cover.
camel's hair brush or similarly soft hair brush.
Never blow into the camera or use a handker-
chief for cleaning. Keep camera in case when
not in use.
   HOW TO CHECK THE
   MERCURY BATTERY
  The mercury battery should last about a year.
A quick check is to set the camera on automatic,
and the ASA dial at 100. Point the camera at
a 75 watt or 100 watt lamp and press the shut-
ter button halfway down a 3 different speeds.
1 second, tllzlt}r and 1/500th. If the red flag.
appears at all three settings, the battery needs
replacement.

                                                                                                   23
View original page 24Page 25 · Read text
FUJI PHOTO FILM CO., LTD.
No. 3, 2-Chome, Ginza'Nishi, Chuo'ku,
          TokYo, JaPan.
View original page 25Related documents and language editions
From the M. Butkus archive. Original publisher and archive notices are retained.
Check the model and edition against your equipment.
PDF verified 2026-10-10.