Film cameras
Fujica V2 User manual
User manual for Fujica V2. 17 pages in English. Read the original PDF, download or print a copy without registration.
17 pagesEnglish1.2 MB PDF
Loading your manual…Open PDF directly
Document details
- Brand
- Fujica
- Model / document
- Fujica V2
- Document type
- User manual
- Language
- English
- Pages
- 17
- File size
- 1.2 MB
- Category
- Film cameras
- Document date
- Not specified in catalog
Search available document text
Find a term, then jump to its page in the original PDF. Image-only pages may not be searchable; check the PDF for exact wording and diagrams.
Page 2 · Read text
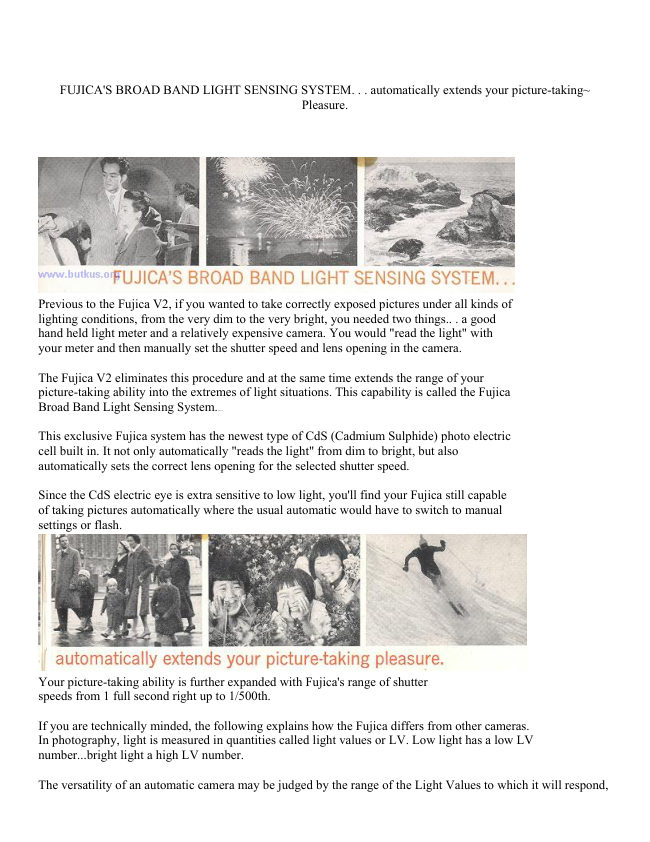
FUJICA'S BROAD BAND LIGHT SENSING SYSTEM. . . automatically extends your picture-taking~
                                                   Pleasure.


Previous to the Fujica V2, if you wanted to take correctly exposed pictures under all kinds of
lighting conditions, from the very dim to the very bright, you needed two things.. . a good
hand held light meter and a relatively expensive camera. You would "read the light" with
your meter and then manually set the shutter speed and lens opening in the camera.

The Fujica V2 eliminates this procedure and at the same time extends the range of your
picture-taking ability into the extremes of light situations. This capability is called the Fujica
Broad Band Light Sensing System.4.butkus.org

This exclusive Fujica system has the newest type of CdS (Cadmium Sulphide) photo electric
cell built in. It not only automatically "reads the light" from dim to bright, but also
automatically sets the correct lens opening for the selected shutter speed.

Since the CdS electric eye is extra sensitive to low light, you'll find your Fujica still capable
of taking pictures automatically where the usual automatic would have to switch to manual
settings or flash.


Your picture-taking ability is further expanded with Fujica's range of shutter
speeds from 1 full second right up to 1/500th.

If you are technically minded, the following explains how the Fujica differs from other cameras.
In photography, light is measured in quantities called light values or LV. Low light has a low LV
number...bright light a high LV number.

The versatility of an automatic camera may be judged by the range of the Light Values to which it will respond,
View original page 2Page 3 · Read text
since this indicates the number of different lighting and picture situations it can handle. Many automatics
operate within a Light Value band of LV 6 to LV 17. This is a good range, and covers most picture situations.4.butkus.org

 But. . .your Fujica V-2 covers a band of LV 2 to LV 18! That's why its automatic exposure system is referred to
as "Broad Band". In practical terms, this means a far greater range of automatic picture-taking opportunities.

While most of your picture-taking will probably not require the use of your Fujica's extreme capabilities, when
the great picture opportunities happen under difficult conditions, it's wonderful to know that your Fujica will
respond...automatically!


                        FUJICA'S VISIBLE CONTROL CENTER

                                             Simplifies Operation

This unique Fujica feature shows you at a glance all of the factors that make up the picture when you look
through the viewfinder. It permits you to make adjustments, if you wish, without removing the camera from
your eye.

Look through the viewfinder and note:

1. You see your subject or scene brightly and clearly, outlined in a glowing golden frame.

2. You see the shutter speed you have selected as a small but easily read golden numeral in the lower left
corner. See page 10 for details.

3. You see the lens opening set automatically for you by the Fujica's Broad Band Light Sensing System as the
black bar rises from the bottom when the shutter release button is pressed. See page 10 for details.

4. Focusing is adjusted by means of the rear Focusing Wheel, and is indicated in the golden square in the center
of the frame...and parallax is corrected automatically. See page 13 for details.

In addition, if the light is too bright or too dim for correct exposure, a red warning flag appears over the column
of lens opening numbers at the right. This is your signal not to shoot and to " dial " a different shutter speed. See
page 10 for the simple details
View original page 3Page 5 · Read text
THE PRECISION FEATURES OF YOUR FUJICA V2


1. Automatic or Manual Operation Lens opening selector ring Accessory Shoe


2. Red dot guide mark for automatic or manual operation


3. Shutter speed guide mark (black line)


4. Shutter speed selector ring


5. Film speed setting ring, ASA or DIN


6. Fujica's ultra sensitive electric eye is behind the small, round window on the front of this ring. Do not cover it with your fingers
when shooting.


7. Shutter release button and close-up light lock


8. Exposure counter. Resets itself to " S" (start) when camera back is opened
View original page 5
Page 6 · Read text
9. Distance scale in both feet and meters. Rotates as you rotate rear focusing wheel


10. Single stroke film advance  lever4.butkus.org
View original page 6
Page 8 · Read text
DO NOT FORGET TO PLACE THE MERCURY BATTERY IN THE COMPARTMENT. (MERCURY
BATTERY IS PACKED IN THE CORNER OF STYROFOAM PACKING) Webmaster: see my main
page (www.butkus.us) on replacement mercury batteries.


(1) Set the ASA number of your film in the Film Speed Setting Ring (No. 5) by rotating the Ring Am/ until the
desired ASA number appears at the top, aligned with the red dot on the camera body. ASA numbers are the
large black numerals on the outside of the Ring. The small red numerals on the inside are DIN (European)
equivalents. For example, set the Ring at ASA 64, as shown above.4.butkus.org


(2) Set your Fujica for fully automatic operation by turning the Selector Ring (No. 1) to AUTO. Select a shutter
speed by turning the Shutter Speed Selector Ring (No. 4) until the desired speed aligns with the Guide Mark
(No. 3). For example, set the Selector at "250" as shown above.


(3) Hold the camera to your eye. The Focusing Wheel (No. 10) will fall naturally under your right thumb.
Rotate the Wheel until the golden square in the center of the frame shows a single image...sharp and clear.
Further information on focusing is given on page 13.

(4) Swing the Film Advance Lever (No. 9) fully out and permit it to snap back. This advances the film to an
unexposed frame and sets the shutter for the exposure. Press the Shutter Release Button (No. 6) until slight
resistance is felt. Note in the view finder how the black bar rises from the bottom to point to the lens opening
the camera has set for you. Now, press the Shutter Release Button all the way. The soft "click" tells you that
you've taken u picture. At speeds of 1/l5th second or glower keep button depressed after click until no further
shutter sound is heard.

Practice these simple steps a few times until you get the "feel" of your new Fujica.


                   HOW TO USE THE FUJICA V2's

                AUTOMATICALLY CORRECT EXPOSURE CONTROL

Set the CdS meter for the ASA number of the film you're using (ASA number is always indicated on the
instruction sheet packed with the film). Set the Fujica for automatic operation by turning the Selector Ring to
AUTO position, both as previously described.

Select a shutter speed by turning the Speed Selector Ring (No. 4) until the desired speed aligns with the Guide
Mark (No. 3). You have an unusually broad range of speeds to choose from. . .1 second to 1/500 second.
Usually, the slower speeds, from 1/60 to 1 second will be used in dim light, and the fast speeds, 1/125 second to
1/500 second, will be used in bright light and for action shots...the faster the action, the faster the shutter speed
needed.

For speeds slower than 1/60 second, it is advisable to mount the camera on a tripod or some other steady
support to avoid blurring. For speeds of 1/15th second or slower (any shutter speeds slower than 1/15th second
will be indicated in the viewfinder as SLOW) keep button depressed after click until no further shutter sound is
heard. For speeds slower than 1 second, see "Time Exposures" on Page 15.
View original page 8Page 9 · Read text
Hold the camera to your eye and press the Shutter Release Button (No. 6). A slight resistance will be felt and a
black bar will rise from the bottom of the viewfinder frame to indicate the lens opening which the Broad Band
Light Sensing System has set for you. Press the button all the way to take your picture.

If the red warning signal appears in the right side of the viewfinder, this is an indication that proper exposure
cannot be made with the shutter speed you have selected. Adjustment can be made without removing the
camera from your eye.


If the light is dim, release the Shutter Release button
and move the Shutter Speed Selector Ring one position
slower (for example, from 1/250 second to 1/125
second). The new speed will be seen in the lower left
corner of the viewfinder. Depress the Shutter Release
button again. If the red flag appears again shift the
speed from 1/125th to 1/60th and so on until the red
signal does not appear when you press the button. If
you reach 1 second, and the red signal still appears, this
is your signal to switch to Flash (see page 19) or to
Time Exposure.

If the light is extremely bright and the red signal shows
when the button is depressed, increase the shutter
speeds to faster instead of slower (for example, from
1/125 second to 1/250 second or from 1/250 to 1/500).
It would be an extremely rare situation if the red signal
still showed at 1/500 of a second.


        HOW TO USE THE FUJICA V2 CLOSE-UP LIGHT LOCK

This extremely useful feature lets you capture perfectly
exposed pictures under unusual lighting situations. Most
typical is the " backlighting " situation as shown in the
illustration on this page.
Normally, the Fujica's Broad Band Light Sensing System
takes into account ALL the light in the scene for best
overall exposure. In this case, however, better exposure
will result from selectively exposing for the girl's face,
because the brilliant backlight could cause an
underexposure of facial detail.
                                               Other Situations in which the Close-up Light
View original page 9Page 10 · Read text
Lock Is Useful
Bring the camera to within a few inches of the important
area of the subject. Look through the viewfinder, aim the   Strong Front light-Dark Background
camera at this area and press the Shutter Release Button
until the black bar rises to indicate a lens opening. Don't   Follow the same procedure as described in the
press the button all the way, or you'll make an accidental   example at left.
exposure.


Hold the button in the partway-down position and back up
to your shooting position. Aim, focus and press the button
all the way down to take the picture. The girl's features
will be correctly exposed, and you'll get the lovely "halo"
of backlight that makes this kind of picture so delightful.4.butkus.org


                                                  Strong Side lighting
                                                   Follow the same procedure except hold the camera
                                                          close to the brightest area when shooting color, and
                                                           the shadow area when using black and white film.


                       FOCUSING IS SIMPLE


Parallax is corrected automatically.

When you look through the Fujica's viewfinder, you'll see a golden square in the center of the frame. You'll also
notice that the rear Focusing Wheel falls naturally under your right thumb.

When the camera is out-of-focus for a particular subject, a double image appears within the golden square. In
the out-of-focus illustration at the left, part of the mast of the boat appears as two images. To focus the camera,
rotate the Focusing Wheel with your thumb until the two images in the golden spot merge into one sharp, clear
image, as in the in-focus illustration.
View original page 10Page 11 · Read text
Rotating the Focusing Wheel also rotates the Distance Scale (No. 8) on the top of the camera. You'll find this
scale convenient should you wish to determine depth-of-field (see page 2L) or setting the camera for flash
exposures (see page 19).

Automatic Parallax Correction

When the Focusing Wheel is rotated, you can observe that the Golden Frame shifts downward and to the right
in the Viewfinder Window. Just keep your subject or scene within this Golden Frame and you'll Ret exactly
what you see in the finished picture. This feature eliminates chopped off heads or feet and is very helpful when
taking portraits or close-ups of objects.4.butkus.org


                       FOR MANUAL OPERATION

Fujica's Broad Band Light Sensing System can be a very helpful guide for manual settings of shutter speeds and
lens openings.

This feature is useful two ways. First, with the camera mounted on a tripod, it lets you get into the picture
yourself.

Secondly, with long exposures when no tripod is available, it gives you a chance to brace yourself steadily
before the shutter is released, adding greatly to picture sharpness.

To set the Fujica for manual control of exposure, select a shutter speed in the same manner as for automatic
exposures. To select a lens opening, move the Selector Ring (No. 21) off AUTO position to the desired lens
opening number.

You have a very broad range of settings: shutter speeds from 1 second to 1/500 second, plus " B " for time
exposures, and lens openings from f/1.8 to f/22.

Use the Broad Band Light Sensing System as a check

After you have decided on a combination of shutter speed and lens opening to be set manually, you can switch
the Fujica back to automatic operation if you wish to check your settings. Point the camera at your subject and
press the Shutter Release button partway down. The black bar will rise and indicate what lens opening will
result in correct exposure based on the shutter speed you selected. If for some reason you wish to deliberately
overexpose or underexpose, the automatic system gives you the correct starting point for making your own
settings.

Note: The black bar has limited movement when the camera is used manually, and does not indicate the lens
opening you have set.

Use Broad Band Light Sensing for "bracketing"

Many photographers prefer to "bracket" their pictures to have a choice of effects. To do this, make the first
exposure with the camera set for automatic exposure. Note the lens opening number indicated by the black bar
in the viewfinder. Then, set the camera manually one lens opening higher, and make another exposure. Make a
third exposure with the camera set manually one lens opening number lower. Choose the slide or negative that
gives the most pleasing effect.
View original page 11Page 12 · Read text
TIME EXPOSURES

For exposures longer than 1 second, move the Shutter Speed Selector to
"B" position. Set the lens opening Selector Ring for the desired lens
opening or f/ stop, anywhere off AUTO position. Mount the camera on a
tripod or other support.

After the Film Advance Lever has been actuated the shutter will remain
open as long as the Shutter Release Button is depressed. It will close as
soon as the Button is released.
(The use of a cable release is recommended with time exposures to
avoid jarring the camera and blurring the picture. The Fujica's Shutter
Release Button is threaded to accept all standard cable releases.)


HOW TO LOAD YOUR FUJICA V2


                                           SET FILM SPEED

                                         Rotate the Film Speed Indicator to match the film speed number on
                                            the instruction sheet packed with your film, and line it up with the
                                          red dot on top of your camera.

                                         OPEN BACK

                                            Pull down the Back Slide Lock. The camera back will spring open.
                                   Swing it open completely.

                                  ROTATE FILM TAKE-UP SPOOL

                                    With your thumb pushing in the direction of the arrow. rotate spool
                                                 until the slot is clearly visible.
View original page 12Page 13 · Read text
INSERT FILM ROLL

Insert any standard 35 mm cartridge into the film chamber as shown, with
the narrow leader of the film at bottom.

INSERT END OF FILM

into the Take-Up Spool Slot until it is held securely. Be sure the sprocket
teeth of the smaller black wheel engage the perforations in the film.

ADVANCE FILM

While gently holding down the film cartridge with your thumb, press the
shutter release and take one full stroke of the film advance trigger. This
winds the end of the film around the take-up spool. Close the back.

PRESS SHUTTER RELEASE

and advance the film trigger. Repeat several times until the number "1"
appears in the exposure counter window.


SPECIAL NOTE ABOUT THE LAST EXPOSURE HOW TO UNLOAD YOUR FUJICA V2
ON THE ROLL
                                             With the film lever still about halfway out, press the
When you have made the last exposure on any roll of  Rewind Release Button (No. 19) which you will find
film and then try to advance the film lever, you will    on the bottom of the camera. Keep this button pressed
find that it locks about halfway out. Do not force it any  in. Swing out the Film Rewind Crank (No. 12) and turn
farther. This is your signal that the last exposure has    in the direction of the engraved arrow. You will feel
been made. Do not open camera back. The film should some resistance. Continue winding until no more
then be rewound back into the original cartridge and    resistance is felt. You can then open the back by
unloaded from the camera. This is quite simple and     pulling down the back slide lock (No. 21) and lift out
done as follows.                                       the film cartridge. For best photographic results, have
                                                        the film processed as soon as possible after exposure.


                     FUJICA'S FLASH - SYNCHRONIZED SHUTTER

Your Fujica'a shutter is fully synchronized for flash bulbs and electronic flash at all shutter speeds
including 1/500th second.
View original page 13Page 14 · Read text
For Flash Bulb, set the Flash Selector Lever (No. 14) at "M".


For Electronic Flash, set the Flash Selector Lever at "X,'.

 On the instruction sheet packed with your
 film is its tungsten rating. Refer to the
 chart below for the guide number based
 on this film rating and the shutter speed
 you have selected and set on the shutter
 speed selector ring. Divide the guide
 number by the number of feet for meters)
 between your flash bulb and the subject
 and set the lens opening size closest to the
 number you get. If your flash unit is
 attached to your camera, the easiest way
 to determine the distance to your subjects
 is to focus on the subject and then look at
 the distance scale (No. 8) on top of the
 camera. the chart below shows the flash
 exposure guide numbers for black and
 white film and indoor color film based on
 using $5 or 425 flash bulbs in a 4-5"
 polished reflector. Set flash selector
 switch at "M" position.

 Electronic Flash equipment of all types
 can be used with the Fujica V2. See the
 instructions that come with the flash unit
 for recommended guide numbers.
View original page 14
Page 16 · Read text
LIGHT FILTERS FOR YOUR FUJICA V2

Filters are discs of colored glass that are attached in
front of the lens. They are used primarily to obtain
special effects such as accentuating clouds, lightening
the tonal value of foliage and for unusual pictures.

Since filters absorb part of the light, compensation
must be made to achieve correct exposure. Each filter
has a " filter factor " number assigned to it which
indicates the amount of light it absorbs. For example, a
medium yellow filter has a factor of 2, which means it
absorbs half the light. The easiest way to compensate is
to divide the ASA number of the film by the filter
factor, and set the resulting number in the ASA
                                                      In In color photography, two filters are commonlySelector Ring. (For example, if the ASA of the film
                                                      used: Type 85 conversion filter which lets you useyou are using is 200 and the filter factor is 2, 200
                                                     tungsten balanced indoor film outdoors, and ultra-violetdivided by 2 is 100. Set 100 in the ASA Selector Ring.)
                                           (UV) or skylight filters (1A) that cut through haze andBe sure to turn the ASA dial back to the original film
                                                   reduce the over blue effect of shooting in open shadespeed setting when you remove the filter.
                                             on a bright day.
                                                 For black and white photography, the chart below gives
                                             you information on four popular filters.
View original page 16Page 17 · Read text
HOW TO CARE FOR YOUR FUJICA V2

Avoid touching the lens or electric eye window with
your fingers. Finger marks should be removed
promptly with a good lens tissue wiping the lens
lightly. Should dust or particles get inside the camera
remove them with a camel's hair brush or similarly soft
hair brush. Never blow into the camera or use a
handkerchief for cleaning. Keep camera in case when
not in use.

 HOW TO CHECK THE MERCURY BATTERY

                                   CHANGING THE MERCURY BATTERYThe mercury battery should last about a year. A quick
check is to set the camera on automatic and the ASA
                                                 Replace it with a Mallory PX13 or any other identicaldial at 100. Point the camera at a 75 watt or 100 watt
                                                         type. Be sure that the (+) plus mark on the battery is uplamp and press the shutter button halfway down a 3
                                                      facing the screw-in cover.different speeds 1 second, 11125th and 1/500th. If the
                                                This camera needs a replacement Wein Air battery.red flag appears at all three settings, the battery needs
replacement.
View original page 17Related documents and language editions
From the M. Butkus archive. Original publisher and archive notices are retained.
Check the model and edition against your equipment.
PDF verified 2026-10-10.