Film cameras
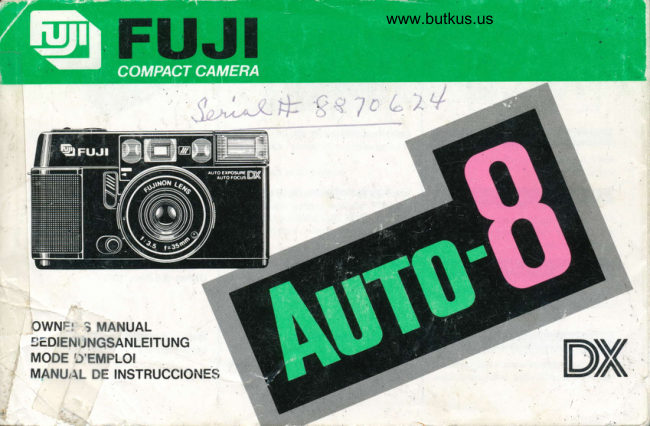
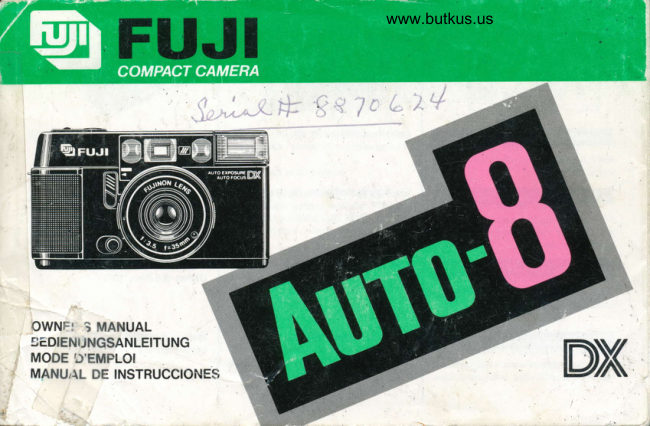
Fujifilm Fuji Auto 8 DX User manual
User manual for Fujifilm Fuji Auto 8 DX. 26 pages in German. Read the original PDF, download or print a copy without registration.
26 pagesGerman5.0 MB PDF
Loading your manual…Open PDF directly
Document details
- Brand
- Fujifilm
- Model / document
- Fujifilm Fuji Auto 8 DX
- Document type
- User manual
- Language
- German
- Pages
- 26
- File size
- 5.0 MB
- Category
- Film cameras
- Document date
- Not specified in catalog
Search available document text
Find a term, then jump to its page in the original PDF. Image-only pages may not be searchable; check the PDF for exact wording and diagrams.
Page 1 · Read text
www.butkus.us
   FUJI


OWN' ) lilAi\iUAL
ICOIEIi.I NGSANLEITUNG
MODE J.EM}3LOI
MANU iJ, t}E INSTRUCCIOI.JEI.;                 DX
View original page 1
Page 2 · Read text
"wffi

                                      Load the batteries (P. 15).                   Film to use (P. 16).ffi                                                                        Use Ox-coded film.
For full instructions,  refer to the pages
in parentheses.
                                           Die Batlerien einlegen. (S.27).             Filmtyp (S.28).@                                                            VeMenden Sie einen DX-Film
F0r ausf0hrliche  Erleuterungen muB auf
die Seiten in Klammern Bezug
genommen werden.
                                          Meftre les piles en place (P.4O).           Film a utiliser (P.41)@                                                                                                      Utiliser des tilms "DX".
Pour les ddtails, se reporter aux pages
indiquees entre parentheses.
                                       Cargue las pilas (Peg.53).                  Pelicula a ulilizer (Pa-g. 5a1Itffi                                                                                                Utilice pelicula codificada l)X
Para instrucciones  comDletas, consulte
las paginas indicadas entre par6ntesis.                                                                                                \
View original page 2Page 3 · Read text
www.butkus.us


Load the film (P. 16).                   Set the tilm tip to the film-tip setting    Open the lens cover (P. 17).
                               mark then close the camera back     Press the lens cover button.
                                                  (P. 17).
                                    A: Film tip setting mark
Den Film einlegen. (S.28)              Den Filmvorspann an die Filmvorspann-     Den Objektivdckel  ttftnen. (S. 29)
                                    Grenzmarke selzen und die Kamera-    Den Objektivdeckelknopf drocken.
                                          rijckwand schlieRen.  (S. 29)
                                   A : Filmvorspann-Grenzmarke

Charger le lilm (P.42)                       Faire coincider I'extremite du film avec     Ouvrir le cache d'objectil (P.42)
                                           le repCre de placement de I'extremite    Presser sur le bouton du cacne                         du film, puis refermer le dos de     d objectif.
                                                I'appareil (P.42)
                                    A: Repere de placement de I'extremit6
                                         du film
Cargue la pelicula (Peg.55)             Ponga la punta de la pelicula en la    Abra la tapa del objetivo (P:i9.55)
                                 marca de colocaci6n de la misma y    Oprima el bot6n de la tapa det obieti\o.
                                               cierre el respaldo de ta cAmara(P69.55)
                                  A: Marca de colocaci6n de la punta de
                                                      la oelicula

                                                                                                                                         l1
View original page 3Page 4 · Read text
YW
     Position the film for the first shot by    Aim the camera at your subiect (P. l8).    Press down the shutter release (P.18).
     pressing in the shutter lglgseg (P.17).    A: Auto-focus frame

    Durch Dribken des Auskisers das ersie    Die Kamera aul das Motiv richten.    Den Ausldser draicken. (S. 3l)
     Eld in Stellung kingen. (S.29)               (s.30)
                                          A: Autofokus-Feld

     Faire awncer le fih jusqu'a b premEre      Diriger l'appareil vers le sujet (P.43)       Appuyer sur le d6clencheur (P.44)
  we s  appuyant sr   le d€clencheur.     A : Cadre de mise au point automatique
     (P.421

    Coloque la pelicuh en h  primsa     Apunle la cemara a su sujeto (Pe9.56)    Oprima el disparador (Piig.57)
    exposici6n oprimiendo el disparador.    A : Punto de enfoque automatico
    (Peg.ss)


12
View original page 4Page 6 · Read text
oSee illustrations while vou read this manual.


rOrientieren Sie sich beim Durchlesen dieser Anleitunq bitte an den Abbildungen.


oSe reoorter aux illustrations en lisant le mode d'emoloi.


oConsulte; las ilustraciones mientras lee este manual.
View original page 6
Page 7 · Read text
www.butkus.us
NAMES OF PARTS
(When reading this manual, leave this page open for quick reference)
BEZEICHNUNG DER TEILE
(Wenn Sie diese Bedienungsanleitung lesen, diese Seite zwecks schneller Referenz aufgeschlagen las$en)
NOMENCLATURE
(Lors de la lecture de cette brochure, laisser cette page ouverte pour une rdf6rence rapide)
NOMENCLATURA
(puando lea este manual, deie esta p6gina abierta para que pueda consultarla con rapidez.)


                                                                                                                                   Digitally signed by Mike Butkus
                                                                                                   DN: cn=Mike Butkus, o=Butkus camera manuals,
                                                                                                              ou=butkus.org, email=mike@butkus.org, c=US             Mike Butkus Date: 2022.01.25 17:43:33 -05'00'
View original page 7Page 15 · Read text
I
                                                                                                                                                                                                                                                                                                                                                                                ,l                                        www.butkus.us
  This manual will show you now to use  your      SPECIAL FEATURES                              ]
  Fuji Auto-8 correctly.   Please   follow   the                                                             1. Automatic film speed setting                                                              I   instructions carefully.                                                       Just load the camera with a DX film and  it will auto-
                                                           matically set itself for the speed of the film loaded
                                                                                       ultra-high-speed ISO'1600                                                      in it - even if it is an
                                                                                film.
                                                                 2. Automatic focusing
                                           To focus, all you do is aim the camera at your sub-
                                                                     ject. That's all. lf you are too near to your subject,
                                      a green lamp will turn on and blink to tell you to
CONTENTS                                  move back.
                                                                 3. Automatic film threading
Abridged instructions                      10     Film loading is simple, and to position  it for the first
Special features                                         shot, you merely press in the shutter release.
Names of parts                                15      4. Automatic film winding
Using the camera strap and case                         1 5    Each time you press in the shutter release, the film
1. Loading the batteries                        5      will automatically advance into position for the next
2. Loading the film                             16      shot.
3. Taking pictures           --1             18      5. Automatic film rewindinS                              il4. Taking flash pictures               20   The camera's electric motor will automatically re-
5. Using the self-timer                21    wind the exposed film back into its cartridge.                                                                                             -6. End of film                     21     6. Automatic exposure control                        |
Camera faults, possible causes, and remedies-23   To get perfectly exposed pictures, you merely press
            possiblePrint faults,
Camera         care,                    causes,-14  and remedies    25  '   7.in theAutomaticshutter lens-coverrelease. Exposureopening setting is automatic.           etc.Specifications                    -24       To open the lens cover, you merely press in a but-
                                       -
View original page 15Page 16 · Read text
ton. To lock the shutter release, just close the lens   @ Camera Back Lock
 cover.                       @ Film Chamber
                         @ Film Speed Setting Pins
 NAMES OF PARTS               @ Sprocket Wheels
                         @ Film Tip Setting Mark
@ VieMinder                                  @9 Pressure Plate
@ Exposure Counter                @ Camera Back
6 Shutter Release
@ Strap Lug                              USING THE CAMERA STRAP AND CASE
@ Self-timer Lamp
@ Self-timer Lever                      O ATTACHING AND DETACHING THE STRAP
@ Lens Cover Button                                                   (Fig. 1)
@ Auto-focus Window                   @To attach, clip the strap end on the camera's
@ Flash Lampface (Lamphead)                              Strap Lug.
@ AE Light Sensor                      @To detach, push the strap end upward while pre-
@ Lens                                                     ssing  it slantwise against the camera body.
@ Lens-Cover Ring
@ Film Wind/Rewind Window               O USING THE CAMERA CASE (Flg. 2)
@ Flash Ready Lamp                             Pass the strap through the hoop on the camera
@ Flash Switch                                             case.
@ VieMinder Eyepiece
@ Film Rewind Switch E                                   1. LOADING THE BATTERIES
@ Film Rewind Switch E
@ Film Confirmation Window                        Use twe 1.5V alkaline-manganese penlight batteries
@ Tripod Socket                                        (LR 6).
@ Battery Compartment Cover                                 . Do not use nickel-cadmium (NiCd) batteries.
@ Film Guides                                 o Always change the two batteries together and
@ Take-up Spool                                  make sure they are of the same brand.
View original page 16Page 17 · Read text
T                                        www.butkus.usa Manganese  batteries are not recommended be-      press                                                      the Shutter Release about halfway down.  lf
  cause they don't last too long.                         the red lamp in the Viewfinder turns on, the batteries
                                                     are in good condition. But if it doesn't turn on, you'll
OOPEN THE BATTERY COMPARTMENT COVER      have to reload the batteries correctly or change them
    (Fig. 3)                                                with a new pair.
Open the Battery Compartment Cover by pushing  it     * After changing the batteries, or if you haven't
toward the arrow and lifting the outer end up.              used the camera for some time, be sure to check
 * Low temperatures can temporarily reduce bat-       the battery condition before you start taking
   tery efficiency.                                                     pictures.
    lf you are taking pictures in cold weather, keep         {< Turn on the Flash Switch and wait. lf the Flash
  the batteries in your pocket and take them out       Ready Lamp does not turn on in 15 seconds, the
   only when they are needed.                                   batteries are weak and need changing (see page
* lf you are not taking pictures for some time, re-              20l,.
  move the batteries because battery leakage can
  cause irreparable damage to your camera.          2.LOADING THE FILM
* lf the batteries are weak, the film will not ad-
  vance and you will hear a buzzing, vibrating     Use encartridged 35mm DX film.
  sound. But the film will advance again and the
   noise will vanish as soon as you change the bat-     AUTOMATIC FILM SPEED SETTING (Fig. 6)
   teries with a new set.                         The black-and-silver pattern on DX film will auto-
                                                           matically set the camera for the speed of the film
€) LOAD THE BATTERIES (Fig. a)                        loaded in it. Your Auto-8 is built to accept film rang-
Insert the batteries in the Battery                       ing in speed from ISO 100 to 1600.
plus and minus ends correctly.                       * lf a non-DX film is loaded in the camera,  it will
                                                               automatically set to ISO 100.
OCHECK THE BATTERIES (Fig. 5)                            *. Do not use special purpose films because the
Push down the Flash Lamphead (Fig. 5-A)                 camera may not be able to expose and transport
Block the AE Light Sensor with your finger and        them properly.
View original page 17Page 18 · Read text
lF THE FILM TIP lS BENT... (Fig. 7)                 @)CLOSE THE CAMERA BACK (Fig. 10)
Straighten it with your fingernail before loading the     Make sure the cartridge's film outlet is facing side-
film in the camera.                             ways toward the Take-up Spool (not straight up)
                                             and the film is lying flat between the Film Guides,
OOPEN THE CAMERA BACK (Fig.8)                    then close the Camera Back.
Open the Camera Back by pushing the Camera         Film Guides (Fig. 1O-C)
Back Lock toward the camera bottom.                 * Before closing the Camera Back, make sure
                                                              there is no slack in the film.
OLOAD THE FILM (Fig. 9)
Insert the film cartridge slantwise into the Film     €)OPEN THE LENS COVER (Fig. 11)
Chamber.                                     To open, just press in the Lens Cover Button.
* Always load and unload film in subdued light.
                                                             o) POSTTTON THE FILM FOR THE F|RST SHOT
O PULL OUT THE FILM TIP (Fig. 10)                               (Fig. 12)
Pull the film tip out as far as the Film Tip Setting     Just press down the Shutter Release and the film
Mark.                                                           will automatically advance into position for the first
  Sprocket Wheels (Fig. 1O-A)                                 shot.
   Film Tip Setting Mark (Fig. 1O-B)                Make sure the stripes in the Film Wind/Rewind
 *< Do not force the Sprocket Wheels around be-     Window move when the Shutter Release is de-
  cause the camera motor might start running  if      pressed.
  you oo.                                       *  lf they don't, you'll have to reload the film
*c Do not pull the film tip farther out than the Film           correctly.
  Tip Setting Mark because the camera will not
  be able to advance the film properly if it is pulled    ocHEcK THE F|LM CONFTRMATTON WTNDOW
  too far out.                                                            (Fie. 13)
                                         The Film Confirmation Window will show you at a
                                                       glance the type of film that is loaded in the camera,
                                                   the number of exposures  it contains, as well as its
View original page 18Page 19 · Read text
www.butkus.us
 ISO speed.                                                Close-up Correction Marks (Fig. 15-A)
 * lf the strips do not move, you'll have to reload    o But if your subject is between 0.9 and 1.5 meters
   the film correctly.                                          .   from the camera, you will get in your picture only                                                the area seen within the Close-up Correction
3.TAKING PICTURES                                Marks. (Your camera won't focus on anything
                                                                 closer than 0,9 meter from  it.)
To take perfectly exposed pictures with your Fuji
Auto-8, you merely aim the camera at your subject    O FOCUS THE LENS (Fig. 16)
and press down the Shutter Release. That's  all.       Auto-focus Spot (Fig. 16-4)
Exposure setting, focusing, and film winding are      Just aim the Auto-focus Spot in the center of the
automatic.                                        VieMinder at your subject. The Lens will auto-
                                                           matically focus itself on the part of your subject
OOPEN THE LENS COVER (Fis. 11)                        that is seen within the Auto-focus Spot.
e To open the Lens Cover, just press in the Lens
   Cover Button.                                          @) HOLD THE CAMERA STILL (Fig. 17)
@ To close it, turn the Lens Cover Ring to the right      Hold the camera still with both hands. lf you are
   (clockwise) until you hear a click.                     shooting with the camera held vertically, position
* Closing the Lens Cover will automatically lock the      the Flash side uo.
   Shutter Release.  lf you are not taking pictures      * Keep your fingers and camera strap away from
   immediately, always keep the Lens Cover closed         the Lens front and Flash Lampface.
   so that you won't trip the shutter accidentally.
o LooK THROUGH THE VTEWFTNDER AND COM-
  POSE YOUR PICTURE (Fi9.14, 15)
   Bright Frame (Fig. 14-A)
o lf your subject is 1.5 meters or more away from
  the camera, evefihing seen within the Bright
   Frame will register on the film.
View original page 19Page 20 · Read text
]     at least 0.9 meter away from it.                   \            glass window. lf  x f the red lamp in the bottom of the Viewfinder                                                                 \   @ lf the auto-focus spot is aimed at a strongly      turns on, you'll have to use flash (see page20).      I        reflecting object such as a mirror or a shiny
                                                                  piece of metal..r- x The green lamp will stop blinking  if you move /
      the camera to within 50cm of your subject        I    To handle the situations just mentioned, focus
                                                         the Lens on some other object located about                                        -y'  @PRESS                                                                           your          THE SHUTTER RELEASE ALL lnE                                                 same distance                                 WnY        the                                                                                                             the                                                                                               subject,                                                              as                                                                               use                     "-7    DOWN (Fig.19)                                                            "Auto-focus                                                                    Memory,"                                                                                                   return                                                                              then                                                                                                       sub-                                                                                                 to your
   Make sure the green auto-focus lamp is on then          ject and shoot (see page20).
   take your picture by pressing the Shutter Release      N The Lens cannot focus itself properly  if
    gently all the way down. As soon as you take your           your finger or hair is blocking the Auto-focus
    finger off the Shutter Release, the film will auto-         Window or if there are fingermarks and dust
    matically advance into position for the next shot.         on it.

                                                                                                                           I
     NOTICE                                                                                                                                                                                                        II O USlttC THE AUTO-FOCUS MEMORY (Fig. 20,211
     Though rarely, the Lens may not be able to             lf the object on which you want to focus the lens
     focus itself properly in the following situa-          is not in the center of the Viewfinder and the Auto-
       tions  :                                           focus Spot cannot be aimed at it, just use the
       (rlf the subject is illuminated direcfly from the         "Auto-focus Memory". This is the way to do it:
       back or if it is illuminated by a very bright    @ First, compose your picture. (The Lens is not
          light source or very strong reflected  light.           focused on any object in your picture).
       such as light reflected from the front glass       @Next, move your camera slightly so that the Auto-
         of a car.                                           focus Spot is aimed at some object in your pic-
   @ lf the subject is a tuft of black human hair             ture, then press the Shutter Release about half-
       or any other black object that cannot re-        way down to turn on the green Auto-focus Lamp,
          flect enough light.                                and hold  it there.
    @lf you are taking your picture through a    @ Finally, without taking your finger off the Shutter
View original page 20Page 21 · Read text
www.butkus.us   ' Release, move the camera back to recompose    OAFTER YOU ARE THROUGH TAKING FLASHtI
   your picture, then take it by pressing the Shutter       PICTURES (Fig. 2s)
   Release all the way down.                               After you finish taking your flash pictures, be sure
 t< You can use the Auto-focus Memory as many       to press down the Flash Lamphead.
   trmes as you want before you trip the shutter.        x lf you leave the Flash Lamphead in popped up
                                                                     position, the batteries will be completely drained
4.TAKING FLASH PICTURES                              in about 1O hours.

OIF THE RED LAMP TURNS ON...(Fig. 22)            USING THE FLASH AS FILL.IN LIGHT
Look through the Viewfinder and press the Shutter     Taken without flash (Fig. 26)
Release abut halfway down.  lf the red lamp (under-      Taken with flash (Fig.27)
exposure wtarning lamp) in the bottom of the View-     The faces of people standing against a window or
finder turns on, you'll have to use flash.                 under the shade of a tree will turn out dark if your
                                                           picture is taken without fill-in light. But the same
€) TURN ON THE FLASH (Fig. 23)                         picture will turn out beautifully if it is taken with
To turn on the Flash, just pop up the Flash Lamp-        flash.
head by pushing the Flash Switch to the left.
You can take your flash picture as soon as the       5. USING THE SELF.TIMER
Flash Ready Lamp turns on.
                                                                                          lf you want to take a picture with yourself in it, use
O FLASH SHOOTING RANGE (Fig. 241                   the Self-timer.
Correct exposure (Fig. 2a-A)                                                                                                                                                                                                                                                                                                                                                                  ')
Underexposure  (Fig. 24-B)                   O SET THE SELF-TIMER LEVER (Fig. 28)        $The shooting range of your camera's built-in flash     Push the Self-timer Lever to the side so that it ,n-
differs with the speed of the film being used the      covers the Self-timer Lamp as shown.
faster the film, the longer the flash shooting range.
                               O START THE SELF-TIMER (Fis. 29)        ts
View original page 21Page 22 · Read text
o Aim the camera at your subject then start the    ocHEcK THE F|LM W|ND/REW|ND WTNDOW
   Selftimer by pressing down the Shutter Release.      The stripes in the Film Wind/Rewind Window will
 . The Self-timer Lamp will start blinking as soon     keep racing as long as the film is winding back.
   as the Self-timer starts and the shutter will trip in       After the stripes come to a halt, stop the film rewind
   about 10 seconds. (Fig. 3O)                          motor as follows:
 *  lf you want to stop the Self-timer in mid-run, just
   close the Lens Cover and return the Self-timer   O SLIDE BACK THE FILM REWIND SWITCH (Fig. 33)
   Lever to its original position. Be sure to close the     Stop the film rewind motor by pushing Film Rewind
  Lens Cover first, because the shutter will trip  if     Switch E back to its original position. Be sure to
  you move the Lever first.                         push it all the way back so that it hides the red
 :t< lf you are taking flash pictures with the Self-timer,     mark underneath it completely.
  always wait until the Flash Ready Lamp turns on     x The Exposure Counter may count forward a few
   before pressing down the Shutter Release.               frames when Film Rewind Switch @ is returned to
                                                                               its original position but you can just ignore it be-
6.END OF FILM                                cause it doesn't mean there is anything wrong
                                                           with the camera.
OCHECK THE EXPOSURE COUNTER (Fig. 31)                 *. You won't be able to trio the shutter unless Film
Check the Exposure Counter to make sure you have       Rewind Switch p  is pushed all the way back to
completed exposing the entire roll of film then wind           its original position.
it back into its cartridge as follows:
                              O UNLOAD THE FILM (Fig. 34)
O USE THE FILM REWIND SWITCHES (Fig. 32)        Open the Camera Back, unload the exposed film,
While pressing in Film Rewind Switch E, push Film     and take it to your photofinisher as soon as pos-
Rewind Switch E to the left. The film will now auto-        sible.
matically wind back into its cartridge.
*. lt may be possible to squeeze in an extra picture    <USING FILTERS> (Fig. 3s)
   into your roll of film but the trouble is that your    Use commercially available 46mm screw-in  filters.
   photofinisher may not print  it.
View original page 22Page 23 · Read text
www.butkus.us
CAMERA FAULTS, POSSIBLE CAUSES, AND REMEDIES

                                                                                       See
          Faults                    Possible Causes                     Remediee              Page
  l. The  shutter won't    (; The batteries are worn out.     $Change the batteries.              16
      trip.            @The batteries are incorregtly  @ Reload the batteries correct-        't6
                                 loaded.                                             ly.
              @ The Lens Cover is closed.     @Open the Lens Cover.               17
                          @; Film Rewind Switch P is not  @ Push Film Rewind Switch H all      21
                          back in its original position.         the way back so that it hides
                                                  the red mark underneath  it
                                                                    completely.
  2. The film won't ad-   o The film tip is not up to the    r Pull the film tip out as far as      17
    vance.                     Film Tip Setting Mark.              the Film Tip setting Mark.
  3. The film won't ad-   (i)The batteries are weak.        CChange the batteries.              16
   vance and the Flash    (z,,Low temperature has reduced  @Warm the batteries. (ln cold     16
   Ready Lamp takes       battery efficiency.                   weather, keep the batteries in
    too long to turn on.                                   your pocket and take them
                                                                    out only when they are needed.
  4. The batteries wear     (-f You are using manganese bat-  QAlways use alkaline-manga-      15
    out quickly although       teries. (R6)                       nese batteries. {LRO)
   they are not used    €, You forgot to push down the  @ After you are through taking     20
    very much.                Flash Lamphead.                     flash pictures, be sure to push
                                                     down the Flash Lamphead.
View original page 23Page 24 · Read text
PRINT FAULTS, POSSIBLE CAUSES, AND REMEDIES

           Faults                     Possible Causes                     Remedies              See                                                                                        Page
 1. The picture looks  f)You didn't aim the camera  $Aim the Auto-focus Spot at   18.19.20
    luzzy.                         correctly.                           your subject.  lf that is difficult,
                                                          use the Auto-focus Memory.
                      Q)The Lens is dusty.        @ Keep your camera lens clean      24
                                                                      at all times.
 2. The picture looks   13 You took the picture against  @ Use flash when taking  pic-     20
    dark.                     the light.                              tures against the light.
                   @Your subject was beyond the  @ Always shoot within   the     ZU
                          range of your camera's flash.       flash's covering range.
View original page 24Page 25 · Read text
www.butkus.us
CAMERA CARE, ETC.                      SPECIFICATIONS
 1. Your camera is a precision instrument which re-     o Film   quires careful handling. Avoid shock and do not        DX-coded 135 roll film.           l
   wet  it or droo it on the floor.                    o Picture Size
2. lf you are not using your camera for a long time,       24 X 36mm
   remove the batteries and keep it away from heat,     o Lens
   dust, and moisture.                                        Fujinon 1 :3.5, 35mm, 4 components, 4 elements.
3. Remove soil and dust from the lens glass, auto-     o Viewfinder
   focus windows, and viewfinder with an air blower       Albada bright frame, 0.45X magnification, 83o/o
  and by wiping lightly with a piece of soft, lint-         field of view, close-up correction marks, auto-
   free cloth. For a more thorough job, wipe off gen-       focus spot, auto-focus lamp  (it also warns you  if
   tly with lens cleaning paper moistened slightly        camera-subject distance is too close), under-
   with lens cleaning fluid.                                exposure warning lamp (it also serves as battery
4. In hot weather, do not leave your camera in a       check lamp).
  closed car or on an ocean beach and do not     o Focusing
   leave it in moist places except temporarily for a        Active type autofocusing from 0.9m - oo ; pro-
   very short time.                                          vided with auto-focus memory.
5. In case of malfunction, do not try to repair the     o Shutter
  camera yourself because  it is equipped with high-        Programmed electronic shutter, 1/40 - 1/500 sec.
   tension circuits.                            o Exposure Control
6. Always use your film before the expiration date      CdS light sensor, automatic exposure from EV
   orinted on the film box.                              9-17.
7. Take your exposed film to your photofinisher for     o Film Speed Setting
  processing and printing as soon as possible.              Automatic with DX films from ISO 100 - 1600.
                                        o Film Threading
                                                        Automatic; pressing down shutter release auto-
                                                                 matically positions film for first shot.
View original page 25Page 26 · Read text
o Film Winding/Rewinding                        o Dimensions & Weight
  Automatic (motorized).                                    .126.5mm W X 72mm H X 48.5mm T; 2659.
o Exposure Counter                                          without batteries.
  Additive; automatic reset when camera back is
  ooened.                                                   Notice: Specifications are subject to change without
o Built-in Flash                                                             notice.
   0.9 - 3.5m flash range with ISO 100 film.
   0.9 - 4.5m with ISO 200 and 400 film,
   0.9 - 5m with ISO 1600 film: about S-sec.
  recycle time (with new batteries); flashmatic ope-
   ration.
o Self-timer
  Electronic operation, activated by depressing
' shutter release, about 1O-sec. interval, provided
  with signal lamp, provision for stopping in mid-
   run.
r Batteries
  Two alkaline-manganese penlight batteries (LR 6),
  (do not use NiCd batteries); batteries good for
  taking about 240 flash pictures (equivalent to 1O
   rolls of 24-exposure film).
r Others
  Built-in lens cover (push-button lens cover ope-
  ning; closing lens cover automatically locks shut-
  ter release); provision for mounting 46mm  filters;
  tripod socket.
o Accessories (included)
  Strap, soft case.
View original page 26
Related documents and language editions
From the M. Butkus archive. Original publisher and archive notices are retained.
Check the model and edition against your equipment.
PDF verified 2026-10-10.