Film cameras
Fujifilm Fuji Discovery mini dual panorama plus User manual
User manual for Fujifilm Fuji Discovery mini dual panorama plus. 26 pages in English. Read the original PDF, download or print a copy without registration.
26 pagesEnglish3.8 MB PDF
Loading your manual…Open PDF directly
Document details
- Brand
- Fujifilm
- Model / document
- Fujifilm Fuji Discovery mini dual panorama plus
- Document type
- User manual
- Language
- English
- Pages
- 26
- File size
- 3.8 MB
- Category
- Film cameras
- Document date
- Not specified in catalog
Search available document text
Find a term, then jump to its page in the original PDF. Image-only pages may not be searchable; check the PDF for exact wording and diagrams.
Page 1 · Read text
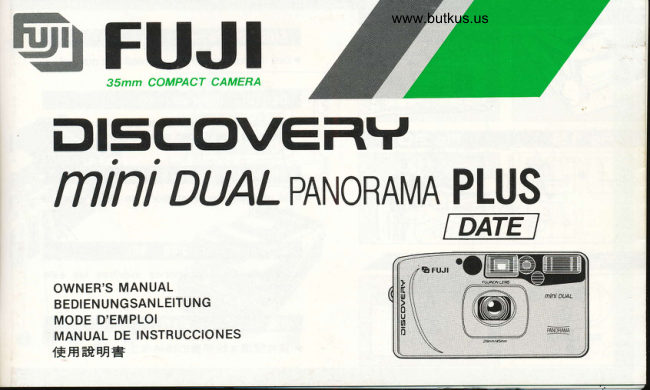
www.butkus.us
We  FuJl35mm COMPACT CAMERA
 DISCOVEFTY
      DUAL PNruORAMA PLUS MM


     OWNER'S MANUAL
     BEDIENUNGSANLEITUNG
    MODE D'EMPLOI
     MANUAL DE INSTRUCCIONES
      ,fFHEfrFN*
View original page 1Page 2 · Read text
NAMES OF PARTS
(When reading this manual, leave
this page open for quick reference)
BEZEICHNUNG DER TEILE
(Wenn Sie diese Bedienungsanlei-
tung lesen, diese Seite zwecks
schneller Referenz aufgeschlagen
lassen)
                 Mike Butkus Digitally                                                                                                   DN:email=mike@butkus.org,Date:cn=Mike2024.11.16signedButkus,by14:25:41Mikeo, ou=Butkus.org,Butkusc=US-05'00'NOMENCLATURE
(Lors de la lecture de cette bro-
chure, laisser cette page ouverte
pour une r6f6rence rapide).
NOMENCLATURA
(Cuando lea este manual, deje
esta p6gina abierta para que
pueda consultarla con rapidez.)
F{+€fiF
 ( B5 EN2F1F H ET HE Effi  , {+'+7FT
tTF*1J-1fFfliiE't^8+)
View original page 2Page 8 · Read text
Venmo @mike-butkus-camera  Ph. 2083
PayPal Name  Lynn@butkus.org      www.PayPal.me/lynnbutkus
View original page 8
Page 10 · Read text
www.butkus.us
                  dating                                  settings.                           unit                                                             Exposure                                                        Mode Button                            @I        .  quartzPowered                   by a                                  long-lasting lithium battery.                            small,                                                                      Socket                            @ TripoO
                            @ Landscaoe Button(,zl!    NAMES OF PARTS                @ Panorama Format Switchover Button (P-Button)
                            @ Panorama Format Indicator Window
    O Shutter Release                 @ Panorama Frame
   @ Power Switch                  @ Camera Back Stopper
   @ Wideangle/Normal Switchover Button
           (4) Auto-focus Windows                                                                 Liquid Crystal Display   @ Ftash Lampface
   @ Strap Lug                   @ Cartridge Loaded/Unloaded Sign
       (D Battery Compartment Cover                       (9 Battery Low Sign
       (9 AE Light Sensor                               Q! Flash Sign
   @ Finder Window                                 Q? Exposure Counter
   @ Lens (with Filter)                @ fitm Advancing Indicator
     e ned-eye Reduction Lamp                        (E Date
       QO Camera Back Lock               @ Red-eye Reduction Mark
   @ Panorama Format Indicator Window        @ Backtilnt Compensation Mode Sign
    @ Auto-focus Lamp                                              (3? Landscape Mode Sign
   @ rinder Evepiece
   @ LiquiO Crystal Display                                                                                       I. BASTC PROCEDURE       (D Camera Back
   @ Oate Selector Button                      LOADING THE BATTERY   @ Oate Settinq Button
   @ Date Mode-Button                              Use the following lithium battery:
   @ Mid-roll Rewind Button                             Panasonic CR123A
View original page 10Page 12 · Read text
www.butkus.us
   M... Stands for month (Fig. 4-A)                    numbers willjump suddenly to 87 then continue
   -.    . . Printing Mark (Fig. a-B)                      upward one at a time.                                o The instant you trip the shufter to take your
2. Changing the date and time                                 picture, the Printing Mark in the LCD will blink a
To change the date or time, press in the Date      few times to tell you that the date has been
Selector 6utton @ to make the number you want to         printed on your picture.
change blink, then press in the Date Setting Button
@ to bring out the number you want. After     3. Exposure mode indicators (Fig. 5)
changing the time numbers, press in the Button @    The exposure modes you selected  will show in the                             press                                            in                                       the                                            Button                        then                       blinks,      the        mark ":"until                                                  areas                                              LCD                                                            marked                                                              of the                                                                                      (see illustra-                                    @                                                                 and @                                         start                                     from                     now         dating                 unit                              will                   clock   tne@.                                              0      tion).                                                           But                                                                                                                             if you                                                                                leaving                                                                  are                                                                             exposure                                                                                                              entirely                                                                                                                   to the
second. Finally, press in the Button @ once again     automatic faculties of the camera, you won't see
to show the Printing Mark in the LCD.               any signs or indicators in these areas. (For details,.    lf any of the date numbers is blinking and the    see page 16 and the pages following  it).
   Printing Mark does not show, the date will not
   be printed on your picture.                 (A word about the camera's built-in battery)o  lf a bright-colored object is included in the   o The life of the camera's built-in battery (CR
   bottom right of your picture, the date will not       2025) that provides power for the dating unit,
  show up clearly.                               LCD, and control circuits is about four years.    lf your picture is taken in the panorama mode,      under normal use. (However, this depends on
   the date will not be orinted on  it.                 when you purchased your camera).r    lf you don't want to print dates on your pictures,   o  lf the date appears faded or does not show on
   press in the Date Mode Button until the "Dating        the print, or if it appears faded'in the LCD, you'll
    Unit Off Sign" (------) shows in the LCD.              have to change the battery. Your Fuji distributorr  Only the last two digits of the year will appear in          will do  it for you at a reasonable charge.  the LCD and in the picture. From 19, the   o  lf the battery is weak, the film may wind back
View original page 12Page 13 · Read text
into its cartridge in the middle of a roll. Always         listed on enclosed panorama photofinishing
   keep an eye on the shade (density) ol the LCD          sticker squares.
   signs and indicators and change the battery as   o Please note: lf your panorama-mode film is
   soon as they appear faded.                              printed as a standard roll of film, you will not
                                                       obtain satisfactory results. A black band will
ATTACHING THE CAMERA STRAP (Fig. 6,7)        appear both above and below the picture area
                                                on your finished print. Please be sure to specify
1. Pass the looped end ol the strap through the       "Panorama Developing and Printing Only" when
   camera's Strap Lug.                               you take your panorama-mode exposed film to
2. Next, pass the other end of the strap through the        your photofinisher.
   loop and pull  it.                               Once again, please follow the instructions listed
                                    on enclosed (fluorescent orange) panorama
TAKING PANORAMA-MODE PICTURES                photofinishing sticker squares.
r  To take panorama pictures, the camera must be
   switched to the panorama mode before loading    SWITCHING PICTURE FORMATS
  the film. You cannot switch to the Danorama
  mode or switch back from the panorama to the     To switch picture formats, proceed as follows:
   standard mode in the middle of a roll of lilm.
o Panorama mode pictures will measure 31/zxlO      1. Open the camera back (Fig. 8)
   inches (8.9x25.4cm),  for example, in size as a    To open, just push the Camera Back Lock toward                                                      the arrow. www.butkus.us   finished  print.
o When you take your panoramically exposed roll                                                     2. Swing the camera back allthe way out (Fig. 9)   of film to your photofinisher for processing and
    printing, be sure to specify "Panorama Develop-       Insert a coin as shown and twist it to release the
   ing and Printing Only". Please see instructions     Camera Back Stopper then swing the Camera Back                                                   as far out as it will go.
View original page 13Page 14 · Read text
www.butkus.us
                                                                                               position,                                                                      picture-taking                                                                                             the                                                                                 camera                                                                                                                                    will switch to                     to switch picture formats before loading         Be sureIa       .                                                                        picture-format                                                                             you                                                                                                  setting                                                                                                         selected.                                                                 the                     film.           the
                                                  your                      panoramic                                      take                                         effects,         .        For maximum(tz                                          LOADING THE FILM           pictures                                        set                                          to 28mm                       camera Lens                  with theUJ
           wideangle.
                                                    Use 35mm DX roll film (film marked with the letters
        3. Select your picture format (Fig. 10)             DX on the film box and cartridge).
            lf you select your picture lormat with the Power      .  Always set the camera to the desired format
       Switch on, the camera will switch to the format you       (panorama format or standard 35mm fprmat)
        selected as soon as you operate the P-Button.             before loading the film.
     o To set the camera to the standard 35mm mode,
             slide the P-Button all the way uP.                   1. Open the camera back (Fig. 12)
         .  To set the camera to the panorama mode, slide    To open, push the Camera Back Lock up toward
           the P-Button all the way down. A yellow "P" will     the camera top.
        now appear in the Panorama Format Indicator
        Window to remind you that the camera is set to     2. Load the film (Fig. 13)
           the panorama mode.                              Drop the film gently into the Film Chamber.                                                                          .    lf the length of film protruding from the cartridge
        4. Close lhe camera back (Fig. 11)                              is too short or too long, adjust  it (by pulling the
     o After setting the P-Button, close the Camera          film out or winding  it in) so that the film tip lines
            Back.                                       up with the Film Tip Mark (provided in the far
     o  lf the Power Switch is off (the Lens is in       end of the film channel), then drop the cartridge
            retracted position), the picture-format setting will          into the Film Chamber.
         not change and will always remain in the         Film Tip Mark (Fig. 13-A)
         panorama mode, but as soon as the Power
 12        Switch is turned onandthe Lens moves out into
                                                                                                                   ,i
View original page 14Page 15 · Read text
3. Close the camera back (Fig. 14)                  2. Frame your picture (Fig. 16)
As soon as you close the Camera Back, the Film        Bright Frame (Fig. 16-A)
Advancing Indicator in the LCD will move, the film         Parallax Correction Marks (Fig. 16-8)will prewind itself up to the very end in about 20                                                                                                                                                                                                                          mzotroIseconds  (in the case of a 24-exposure roll), and the     3. Taking pictures in the standard 35mm mode
Exposure Counter  in the LCD will show the number     Look through the Finder and compose your picture.
of exposures   it contiains.                                    You'll get in your picture everything you see within
                                                      the Finder's Bright Frame. But  if you are shooting a
TAKING PICTURES                              subject located about 80cm or less from the
                                                    camera, you'll get in your picture only the area seen
1. Switching the lens local length (Fig. 15)              within the Parallax Correction Marks.
First, turn on the camera by pressing in the Power
Switch. To switch the Lens from wideangle to     4. Taking piclures in lhe panorama mode (Fig. 17)
normal, press in the Wideangle/Normal Switchover       Panorama Frame (Fig. 17-A)
Button. To switch  it back to wideangle, press in the   You will get in your picture everything you see
same button a second time. The image in the     within the Panorama Frame (area enclosed with the
Finder will switch together with the Lens.              hyphenated  lines).
o   ll the Lens Mount is blocked while  it is sliding in
   or out, it will stop moving. To slide back the Lens     5. Hold the camera  still
   into the camera body, just press in the Wide-   When shooting, hold the camera still with both
   angle/Normal Switchover Button.                  hands.  lf you are shooting with the camera held
r   lf you leave the Lens in shooting position (nor-      vertically, position the Flash side up.
   mal or wideangle) for five minutes, it will auto-
    matically slide back into camera body.
View original page 15Page 16 · Read text
www.butkus.us
    o Keep your fingers and camera strap away from      gently all the way down. As soon as the shufterra        the Lens, Auto-focus Windows, and Flash       trips, the film will automatically move into position
                                                                                          shot.                                                                the next          Lampface.                                                  for(Jz                                                                         . Do                                                            not move                                                                      the camera abruptly right afterUJ        6. Aim the camera al your subject                         pressing down the Shutter Release.
          Auto-focus Bracket (Fig. 16-C)                          .   In the following situations, you'll have to use the
      Look through the Finder and aim the Auto-focus        Auto-focus Lock or the Landscape Button to
       Bracket at your subject. The Lens will focus itself       take your picture because the Lens, though
      on the oblect at which the Auto-focus Bracket is          rarely, may not be able to focus itself properly
        aimed.                                                    (see page 16).
                           O  lf the subject is illuminated directly from the
       7. Press the shutler release about hallway down           back; if it is illuminated by a very bright tight
           (Fig. 18)                                           source located close to  it; or if it is illumi-
              lf the Auto-focus Lamp (green lamp) turns on when           nated by strong reflected tight such as light
       the Shutter Release is pressed about halfway down,              reflected from the windshield of a car.
       your subject is in sharp focus. But if you move too   @ tt tne subject cannot reflect enough ligh!
       close to your subject, the Auto-focus Lamp will          such as black hair.
       blink to warn you to move back. Be careful,   @ lf you are shooting your subject through a
       however, because it will not warn you  if you bring          window pane.
       the camera closer than 0.2 meter from your subject.   @ tt tne Auto-focus Bracket is aimed at a        .  Always position the Auto-focus Bracket so that  it            strongly reflecting object such as a mirror or
             is completely covered by the subject at which  it           metal surface.
              is aimed.
       8. Take your picture
14    To take your picture, press the Shutter Release
View original page 16Page 17 · Read text
END OF FILM                                                     Printing".
                                                Take the exposed film to your photofinisher for
.  Your camera will expose the film frames in        processing and printing as soon as possible.   descending order, starting from the highest      Be sure to use your film before the expiration                        mzotraI   numbered frame, and rewind each frame into        date printed on the film box.
   the cartridge as soon as it is exposed.
. You can unload the lilm as soon as the last     2. Unload the exposed film (Fig. 20)
   frame (frame No. 1) is exposed and the camera     Make sure the Exposure Counter is showing the
   motor comes to a halt because there is no need      "E" sign then open the Camera Back and take the
   to rewind  it.                                                 film out.
o Even  if the Camera Back is accidentally opened
    in mid-roll,  all of the exposed frames, except the     3. Unloadlng lhe film in mid-roll(Fig.  21)
     last, will be safe from light                      To unload the film in the middle of a roll, turn on the
                                             Power Switch, press in the Mid-roll Rewind Button
1. After exposing the last frame (Fig. 19)               with a fine-pointed implement, wait unttl the Film
  As soon as the last frame (frame No. 1) is     Counter shows the "E" sign and the camera motor
   exposed, the Film Advancing Indicator in the     comes to a halt, then take the film out.
  LCD will move toward the left, the Exposure    o  lf the Camera Back is accidentally opened in the
   Counter will return to "0" then switch to "E" and         middle of a roll, close  it quickly. As soon as it is
  come to a halt.                                             closed, the film will automatically wind back into
. When you take your panorama-mode exposed              its cartridge.
   film to your photofinisher for processing and    o  lf the film is unloaded before the "E" sign
   printing, make sure the supplied "Panorama         appears in the Exposure Counter, the next roll of
   Photofinishing Sticker Square" is attached to          film will not prewind  itself but will immediately
   your film cartridge and don't forget to tell the        wind back into its cartridge (see page 19).
   clerk that you want "Panorama Developing and
View original page 17Page 18 · Read text
www.butkus.us
To         II. ADVANCED TECHNIQUES                            I  Using the landscape button (Fig. 2a)                                           To take landscape or distant scenes through a
      USING THE AUTO.FOCUS LOCK                window pane, press in the Landscape Button, makeJozl!                                                         sure the Landscape Mode Sign ( A ) in the LCD
        1.  lf the auto-focus bracket is off your subject (Fig.     has turned on, then compose your picture and take
           221                                                                                          it by pressing down the Shutter Release.
            lf the Auto-focus Bracket is aimed at an empty   o The Flash won't fire as long as the cahera is set
       space in the picture you composed, the Lens will         to the Landscape Mode.
       not focus on your subject. To focus  it on your       . To release the landscape mode setting, just
         subject, proceed as follows:                               press in the Landscape Button a second time.
       2. Move the camera slightly (Fig. 23)              SELECTING THE EXPOSURE MODE
      Move the camera slightly so that the Auto-focus
       Bracket overlaps some object in your picture then    TAKING ORDINARY PICTURES
        press the Shutter Release about halfway down (to      1. Aulomatic-flash mode (Fig. 25)
        lock the focus) and check to make sure the Auto-           lf you don't see any mark or sign in areas A and B
       focus Lamp (green lamp) has turned on.                of the LCD (see illustration), the flash will fire by
         .  You can use the Auto-focus Lock as many times         itself  if the light is low. After taking your flash picture
                                                                                                                          in the LCD turns          as you want before tripping the shutter.             and the blinking Flash Sign ( I   )                                                                                   off, you are ready to take your next picture.
       3. Take your picture (Fig.22l
       While pressing the Shutter Release about halfway       I  Effective flash range (meters)
       down, move the camera back to recompose your         (Using color negative film)
         picture, then take  it by pressing the Shutter Release     The effective range of your camera's built-in flash
           all the way down.                                                 differs with the film speed and the lens focal length
'16                                                 as shown below.

                                                                                                                    .-J
View original page 18Page 19 · Read text
TAKING DISTANT SUBJECTS AGAINST THE         Fildt::;:ti     I$0     ls0     rso      ,f$CI
   Speed       100   2W     400        1 600      LIGHT                                                  4. Backlight compensation mode (Fig. 28)
 28mm          0.45     0.45    o.45     o.45      To take distant subjects against the light, turn on
  wideangle   -4m  -5.5m  -7m  -14m      the Backlight Compensation Mode Sign ( 6  ) in 45mm          o.45    0.45    o.45    0.45        the LCD by pressing in the Exposure Mode Button
  normal                                               three times, and shoot. (The aperture will open up          -3m  -4m  -5m  -10m      two extra stops in this case and the flash won't  fire).
                                           As soon as you take your picture, the camera will
TAKING BACKLIGHTED PICTURES                    automatically reset itself to the Automatic Flash
2. Fill-in flash mode (Fig. 26)                        Mode.
The faces of people standing against a window or   o The flash exposure mode settings will remain as
 in the shade of a tree with the light in the back will        they are (even after you take your picture) until
turn out dark if they are taken without fill-in light. To      you release them by resetting the camera to
use fill-in light, press in the Exposure Mode Button       another mode or by pressing in the Power
                                                                 in        Switch again.once, make sure you see the Flash Sign ( t  )the LCD, then shoot.                     o To take stage scenes and indoor sports events
                                                            that are beyond reach ol the camera's built-in
TAKING NON.FLASH PICTURES                               flash, shoot with the flash turned off.
3. Flash ofl mode (Fig.27l                                  . When shooting with the flash turned off, mount
 lf you don't want to use flash, turn on the Flash Off       the camera on a tripod or use some other
Sign ( $t ) in the LCD by pressing in the Exposure         support.Mode Button twice, then shoot. The flash won't fire      . To take backlighted subjects that are beyond
even in dim light.                                   reach of the camera's flash, shoot with the
                                             camera set to the Backlight Compensation
                                                   Mode.
View original page 19Page 20 · Read text
www.butkus.us
Iq,    REDUCING RED.EYE EFFECTS                     either press in the Exposure Mode Button once
                                                                 the Red-eye                                                                             Reduction                                                                                                                                          lighted,                                                                     Lamp                                                                                      has                  your               lf        you want                                                 natural and   o After                               eyes to look                          subject's
                                                                                                                                              (Fig.                                                                     the Auto-focus                                                               Lamp                                                                                              remain                                                                                            (green) will                                                                                      on          beautiful,                                         mode.                     the                        red-eye reduction                use(,zUJ                                                    more or turn off the Power Switch.
                                                                        18) until the flash is fired to take your picture.
     A word on red-eye effects                      Do not move the camera while the Auto-focus
     o When a person is photographed with flash in      Lamp is lighting.
         dim light, the eyes will sometimes turn out red.
         This is because the light from the flash is
           reflected back into the Lens from the back
             (retina) of the person's eyes.
        5. Red-eye reduction mode (Fig. 29, 30)
       Thrs is the way to do it: Press in the Exposure
     Mode Button four times so that the Red-eye
       Reduction Mark ( @ ) appears in the LCD, then
       press down the Shutter Release. The Red-eye
       Reduction Lamp will turn on for one second, after
       which the flash will automatically fire to take your
         picture. The Red-eye Reduction Lamp will contract
       your subject's pupils to lessen their chance of
        turning out red in the picture.
      The Red-eye Reduction Lamp will turn on again
      when you take your next picture. To switch the
       camera off the Red-eye Reduction Mode, you must
View original page 20Page 22 · Read text
www.butkus.us
-o
                   Faufts'                   Possible Caiises                   Remedies             FageJ(5zut         3. The film wound back  OWnite taking pictures or while OWnen there is film in the     15
          into its cartridge  in     the film was prewinding, either    camera, do not open the
           the middle of the roll.     the Camera Back was opened    Camera Back or move the
                             then closed or the Camera    Camera Back Lock.
                              Back Lock was moved.
                     @rne CR 2025 battery (which  @Replace the CR 2025 battery     10
                                    provides power for the LCD) is     with a new one.
                                        nearly spent.
           4. The camera  is loaded  o The film is not loaded cor-  o Reload the film correctly.           12
         with   f ilm and the      rectly.
       Camera Back  is
          closed but the Film
         Advancing Indicator
            in the LCD does not
           move.
View original page 22Page 23 · Read text
PRINT FAULTS, POSSIBLE CAUSES, AND REMEDIES
          Faults                    Possible Causes                   Hemedies             Page                                                                                                                                                                                                                                                                                                      mzotr
  1. The Picture looks  Ofne Auto-focus Bracket was  ORim the Auto-focus Bracket    14, 16             u,r    luzzy.                 aimed incorrectly.                  accurately at your subject or
                                                          use the Auto-focus Lock.
                  @The Lens (Filter) is not clean.   @t<eep the Lens (Filter) clean at      22',
                                                                       alltimes.
                  @fne camera was shaken when  @HotO the camera stilland press     14
                    the Shutter Release was    the Shutter Release gently
                            pressed down.                  down. Also. do not move the
                                              camera abruptly right after
                                                                       tripping the shutter.
                    @Wnite taking ordinary pictures,  @When taking ordinary pictures,     16
                     the Landscape Button was    make sure not to press in the
                            pressed in by mistake.            Landscape  Button.
 2. The picture looks  Ofne picture was taken against  OUse fill-in flash.                   17
    dark.                     the light.
                   @tne subject was beyond reach  @tat<e the flash pictures within      17
                                of the camera's built-in flash.      the specified distances.


                                                                                                                           21
View original page 23Page 26 · Read text
www.butkus.us
 U'        rewinding unnecessary, provision for mid-roll   o Dating Unit
                          Display     o Liquid                  Crystal                                                                day, month-day-year,                                                                        and day-month-year)                                                                                                and Joz         rewinding.                                                        Digital quartz watch, 3-way dating (year-month-                       date        LCD shows                                                             printing (day-hour-minute);                                                                                             watch                       and time numbers. flash-mode      time UJ
           signals (battery charging, automatic flash,  fill-in       remembers dates up to the year 2019, provision
             flash, flash otf and, red-eye reduction signals),         for correcting date and time.
            back-light compensation mode sign, landscape      .  Batteries
        mode sign, exposure counter, battery low sign,     One lithium battery (Panasonic CR123A) pro-
            film loaded/unloaded  sign, and film advancing       vides power for camera operation and one
             indicator.                                                   lithium battery (CR 2025) provides power for the
     o Built-in Flash                                         liquid crystal display, dating function, and
           Automatic flash mode, fill-in flash mode, flash off       camera sequence  control.
         mode, red-eye reduction mode, electronically   o Others
           controlled flashmatic exposure, about 5 sec.        Shutter safety lock, tripod socket.
           recycle time, provided with red-eye reduction   o Dimensions & Weighl
            lamp.                                            121 X 65 X 41 mm, 208 g (less battery).
         Effective flash range (meters)
        (Using color negative film)                         Notice: Specifications are subject to change
              Film        rso     rso     rso     tso                 without notice.
          Speed       100     200     400     1600
       28mm         o.45    0.45     o.45    0.45
          wideangle    -4    -5.5   -7    -14
       45mm         o.45     0.45     o.45    o.45
24       normal      -3    -4   -5   -10
View original page 26Related documents and language editions
From the M. Butkus archive. Original publisher and archive notices are retained.
Check the model and edition against your equipment.
PDF verified 2026-10-10.