Film cameras
Fujifilm GA645Zi User manual
User manual for Fujifilm GA645Zi. 32 pages in German, French, Spanish. Read the original PDF, download or print a copy without registration.
32 pagesGerman, French, Spanish4.2 MB PDF
Loading your manual…Open PDF directly
Document details
- Brand
- Fujifilm
- Model / document
- Fujifilm GA645Zi
- Document type
- User manual
- Language
- German, French, Spanish
- Pages
- 32
- File size
- 4.2 MB
- Category
- Film cameras
- Document date
- Not specified in catalog
Search available document text
Find a term, then jump to its page in the original PDF. Image-only pages may not be searchable; check the PDF for exact wording and diagrams.
Page 1 · Read text
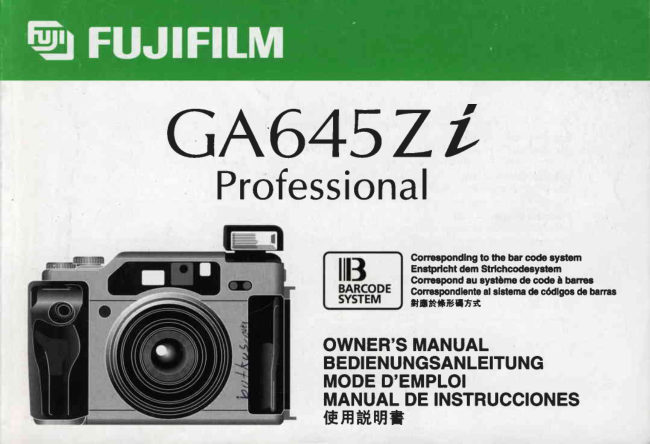
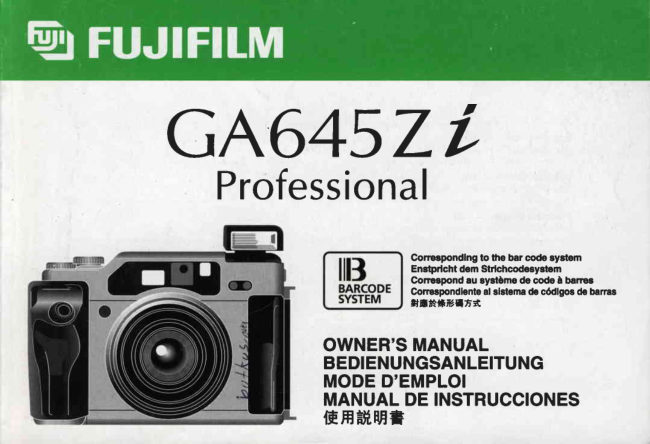
GA645ZL
  Professional


                                             Conespondlng to the bar clde systom
                                                       Enstprlcht dem Stdchcod$ystem
                                          Coneepond au syatlme de code I banps
                                                 Corr$pondlento al slsteme de c6dlgos (h barras
                                                   sr'tf;rtf,r

           OWNER'SMANUAL
           BEDIENUNGSANLEITUNG
          MODED'EMPLOI
           MANUALDE INSTRUCCIONES
               EHil,HE*
View original page 1Page 5 · Read text
Liquid-crystalDisplay
FIti ss i g krist allanzei ge
Affichagei cristaux liquides
Visualizactonde cristal liquido
ffiffiffirrtr
View original page 5
Page 12 · Read text
Venmo @mike-butkus-camera  Ph. 2083
PayPal Name  Lynn@butkus.org      www.PayPal.me/lynnbutkus
View original page 12
Page 13 · Read text
NAMES OF PARTS
        Thismanualwillshowyou howto useyourcameracorrectly.ft!'#ft.      Pleasefollowthe instructionscarefully.
tU'                                            C@ SelectingOiatLockReleaseDial
                                          O Up/DownDial    CONTENTS                                @ ExposureCompensationButton
     Namesof parts                                   1 2  @ PassiveAutofocusWindow
       Descriptionof the functionsof parts                   1 3  @ ActiveAutofocusWindow(alsoservesas an AE lightreceptor)
     Cameracareand cautions                          1 4  @ ShutterReleaseButton
       Soecialfeatures                                 1 5    @Self-timerLamp
       Specifications                                   1 6   @CameraGrip
            I.  Readyingthe camera                            1 7  @ LensCap Sensor
          Loading the batteries                            1 7   C Hot-Shoe
         Displayand printingof data                       1 8  @ FinderWindow
          Attaching the accessories                        1 9  @ ViewfinderFocusAdjustingDial
         Loadingthe film                              20  @ FlashHead
          II. Basicprocedures                            22   @ FinderLightIntakeWindow                                                                      (o Sync Socket         Takingautomatic-mode(autofocus/programmedauto
        exposurelautomaticf lash)pictures                 22  @ StrapLug
         Unloadingthe film                            24  @ AE lightSensor
         IIL Advanced techniques                          24  @ FlashSensor
         Aperture-priorityauto exposure                   24  @ ActiveAutofocusWindow
        Manualexposure                            25  @ Lens                                @ Self-timerButton        Usingthe built-inflash                         26                                                                         ,8 FlashButton         Using an externalflash                        28
         Exposure compensation                       28  @ LiquidCrystalDisplay
         Usingthe focus lock                          28  @ fitm ReminderSlot
         Manualfocusing                            29  @ Cameraback
         Usingthe self-timer                          29    @FilmLoadingKnob                                @ Mid-rollWind-upButton        IV. Extrafunctions                              30
       V. A word on the camera'sautofocussystem           31    @TripodSocket                                @ FinderEyepiece        Rererencedata                             31                                                                           6t DateButton
                                             @AF/MButton
                                           @ZoomLever
                                @ CableReleaseSocket
                                @ LigntButtonfor the liquidCrystalDisplay
                                @ CameraBackLockrji,frri
                             www.orphancameras.com
View original page 13Page 15 · Read text
o Data Button (DATA)                                        out to the edges.
      Usingthisbuttonandthe Up/DownDial,data(date,time,and ex-  @ Finally,afterall contaminantshavebeenremoved,wipeoff themzo      posuredata)printingis set.                                  remaininglenscleaningfluidwitha dry sheetof lenscleaningfw    o AF/M Button                                             paper.Again,startfromthecenterin a circularmotionthenmovet      Usingthis buttonwiththe UP/DownDialfor Settingthe shooting      out to the edges.
      distanceand autofocus.                                  o Breathinga miston the lenssurfacethenwipingit withsilicon
      o Self-timerButton (O)                                         clothor othersimilarmaterialis the worstthingyou can do.
      Forsettingthe self-timermode.                             Neverdo it becausethisis one of the maincausesof scratches
      o FlashButton (t)                                      on cameralenses.
      Forpoppingup andturningon the flash.                      o Cleanthe AutofocusWindowand Finderin the sameway as
      o Zoom Lever                                            describedabovefor the lens.Scratcheson the AutofocusWin-
      Forchangingfocallengthtowardthe tele andwide.              dow can causeincorrectfocusing.
    CAMERA CARE AND CAUTIONS                              3. Liquid crystaldisplay
                                                           o Thoughthe liquidcrystaldisplaymaysometimeslookblackat a
      Yourcamerais a precisioninstrument.Whenhandlingit, takesuf-      hightemperaturearound60 "C, it will returnto normalat an
        ficientcareand observethe followinginstructions.                 ordinarytemperature.
                                                           o At low temperatures,the responsespeedof the liquidcrystal
       1. Cleaningthe camera                                       displaytendsto becomeslower.Butthisis a naturalcharacter-
      o Do not use solvents,suchas thinneror alcohol,to cleanyour        isticof the liquidcrystaland it doesnot meananythingwrong.
        camera.
      o Makeit a habitto cleanthe camerabeforeand aftertakingpic-     4. Battery note
         tures.To cleanit, dustoft withan air blowerandwipethe cam-    o Thoughbatteryperformancewill generallybe reducedby low
        era exteriorwitha softclothsuchas siliconcloth.                temperatures,it will returnto normalat an ordinarytempera-
      a Dustand soilinsidethe filmchambermay damageyourfilm.       ture.lf you are shootingin coldweather,be sureto use new
       Takeparticularcareto cleanthe camerainterior.                  batteriesand keepsparebatterieson handand,whilewarming
                                                        them in a pocket,use thesebatteriesalternately.lf the battery
       2. Cleaningthe lens                                    poweris low,the cameramay will not operateat low tempera-
      o Scratcheson the lenssurfacecan reduceits sharpnessfar more       tures.
        thanyouwouldthink.lf the contrastof yourpictureseemssome-    o  lf the BatterySign(cz; switchesto the BatteryLow Sign(cr),
       how insufficientand it doesnot lookcrispenough,the possible     youshouldchangethe batteriessoon.Takesparebatteriesalong
        causeis scratcheson the lenssurfaceCleanthe lenscarefully      withyou.
           in the proceduredescribedbelow.                         o Neverdismantlethe batteries,heat,throwinto fire,chargeor
    O Setthe SelectingDialto OFF.                             causethemto shortcircuit.
   @ Blowoff dustanddebrisfromthe lenssurfacewithan air blower.
    O Moistena sheetof lenscleaningpaperwitha commerciallyavail-    5. The working temperaturerange
         ablelenscleaningfluidand wipethe lensgentlywith it in a cir-    o The workingtemperaturerangefor this camerais -10'C to
ll4       cularmotion.Alwaysstartfromthe centerthengraduallymove      +40'C.
                             www.orphancameras.com
View original page 15Page 16 · Read text
6. Storage precautlons                                        o What is a "Bar Code System"?    o In hot weather,do not leave your camera in a closed compart-      The film speed (lSO), type of the fitm (1201220),and other data     #t
     mentof your car, or on an ocean beach and in moist places       are recorded in a bar code format on the seal which connects              ;iltffi,
      excepttemporarilyfor a very short time.                             the leader paper with the film. The Fujifilm'sbar code system        ift;,
    o Keepthe camera where it will be safe from moisture,heat, and       allows the camera reading this bar code and setting the film        .ltrI
      dust.Be sure to put the lens cap on the lens.                    speed and type of the film automatically.
    o Do not store it in a wardrobe drawer because the gas of naph-
      thaleneor other insecticidescan cause damage to the camera     o Easy-loading film
     and film.                                                       This system allows the film to be easily and correcfly loaded
                                                                    simply by insertingthe leader paper into the slot on the take-up
    7. Film loading and unloading                                       spool. To be more specific,the round opening in the leader pa-
      r Alwaysload and unload film in subdued light.                       per head is hooked to the claw on the slot of the take-up spool.
                                                          The leader paper is properly stretched preventingthe roll from
   SPECIALFEATURES                                           slackeningand the film is loaded completely.
   o A fully automatic,6 x 4.5 cm format autofocuszoom cam-
     era(Correspondingto the bar code system)
  OSuperEBCFujinon1:4.5f=55mm - 1:6.9f=90mm 1.6xzoom
     lenspromisessharpand clearpictureswithhighimagequality
    fromwideto tele.
  @Useof filmwiththe bar codesystemeliminateserroneousfilm
     settingsand preventserroneoususe of film.
       r Automaticfilmspeed(lSO)setting
    o Automaticpressureplatesetting(automaticfocalplanead-              Easy-loadingfilm                  Conventionalfilm       justing,automaticexposurecounterinterlocking,automatic
   _   filmtypeindicationon the LCDpanel)
  O Equippedwiththe LensCap Sensor- Pieventingan erroneous
    exposurewiththe lenscap on.
  @TheLCDequippedwithan EL backtighr- Easitycheckeddis-
    playsevenin the dark
  O HyOriOautofocussystem{passivetypewithexternallight(sens-
     ingphasecontrast)and activetypewith infraredrays(sensing
     infraredrays))backsup the SuperEBCFujinonlensto bringits
    highperformanceintofull play.

l  ,                                                                                                                                                            il$
View original page 16Page 17 · Read text
SPECIFICATIONS                                    o Exposure ControlIfi2:                                                            Center-weightedlightmetering(SPDphotocell),programmedf,ll-     o Type                                                   autoexposure,A, AS: aperture-priorityautoexposure'manual
{n       Fullyautomatic,6 x 4.5cm formatautofocuszoomcamera(cor-      exposure,EV 3 - 19 couplingrange(lSO100).
E  i      respondingto the bar codesYstem)                       o ExposureCompensation
      o Picture Size                                                     t3 EV in 1/2-stopincrements.
                                                                              Setting                                                         Speed          x 4.5cmformat(actualpicturesize:56 x 41'5 mm)            o Film        6,t.iilri;                                                                                               in 1/3-stepincrements.                                                                                                                - 1600                                                       ISO25      o         Film'
                                                                                  set witha bar codesystemfilmloaded.                                                                 Automatically       120(16 exposures)and220(32 exposures)rollfilm.;i.i                                                               Flash                                                           o      o Lens
       SuperEBCFujinon1:4.5- 6.9 f=55- 90 mm lens(10compo-       Built-in,pop-uptypeflash,automaticcontrolof amountof light,
.iiii:al.li      nents,10 elements),equivalentto 34 - 56 mm on 35 mm for-      guidenumber12 (lSO100).
        mat,65 - 42" angleof view,1.0m minimumfocusingdistance,   o Film Advance
        52 mm filterdiameter.                                    Automaticfirst-framepositioning(alignmentof startmarkis not
tiu    o Focusing                                             necessary),automaticwinding,providedwithbuzzerfor indi-
tliii      Hybrid(activetypeandpassivetype)autofocussystem,1.0m -       catingthe lastframe,film is automaticallywoundup afterthe
             - focusingrange,switchableto manualfocusingmode'pro-       lastframeis exposed.
        videdwithfocuslock.                                   o ExposureCounter
      o Finder                                                    Additivetypecounteron liquidcrystaldisplay,interlockedwith
          llluminatingwindowtypebrightframefinder,automaticparallax     12Ol22Opressureplateswitchover,"E" sign appearsafterthe
         correction,88% fieldof view at infinity(-), 90% at 3 m, 0.4 -         lastframeis exposed.
        0.58xmagnification.                                  o Liquid CrystalDisPlaY(LCD)                                                                                        shutterspeed,aperture,filmspeed,typeiljii:ii:ii!    o Displayin the Finder                               Numberof exposures,
         Pictureframe(brightframe),autofocussign,datadisplay:aper-       of film (12Oor 220),batterywarningsign,flashactivationsign,
         turevalue,correct-exposuresign(|), shutterspeed,flashacti-      exposurecompensationmodesign,self-timermodesign,manual't.ttiU         vation,shootingdistance,distanceunit(m).Shutteractuated     focusingmodesign,dateand time (YearMonthDay/DayHour
'jiii       display.                                                  Minute),shootingdistance,totalshotsindicator.      o Shutter                                             o Data Printing                                                                                                Day/Hour                                                                                              (YearMonth                                                                                       picture                                                                                     frames,                                                                                         dates                                                                                the                                                                        outside                                                     (expo-      Printing                                                  shutter                                            interlens               programmed                           auto-exposure          Electronic,i1i                                                                                                       speed,                                                                                                              shutter                                                                               (exposure                                                                               mode,                                                                                                    aperture,                                                                              data                                                                  exposure                                                                   Minute),                                         and manual                                      ex'posure                                  auto                 on aperture-priority             settings        sure
 t : 4 1 ,      exposureare atsopossible),providedwithbuzzerfor indicating     exposurecompensatingvalue,AF/MF.)
          thatthe shutterhastriPPed.                             o Others
      o Shutter Speed                                          Hot-shoe,filmreminderslot,cablereleasesocket,syncsocket,
         B, 2 sec.- 1/700sec.                                           tripodsocket,provisionfor switchingon and otlbuzzersound.
'i,,1 o Self-timerElectronicself-timerwith 10 sec.delay,providedwithcountdown   o PowerLenscapSourcewarning.
        lamp.                                        Two CR123A/DL123Alithiumbatteries;about1600shotscan
                                                          be takenwithoutflash.:i1
                             www.orphancameras.com
View original page 17Page 20 · Read text
2. Dataprintingexample(Fig.7)                              strapeitherverticallyor horizontally.   Dataunderthe set mode(dateand exposuredata)are indicated  C Passbothendsof the strapthroughthe StrapLugs.                     ffi ":,::l
                         your                frames   outside         thepicture                    on                                     film.The printed                                                                                  properly                                       exposure                                                              Adjust                                                                     the                                                                            length                                                                         strap                                                                                            withthe                                                                                             Buckle.                                                 data   O                                                                                                                                                                                                                               Ht,fr',   are     exposure            mode,                     focal                         length,                                                           you                                                               pass                              aperture,                                       shutter                                         speed,expo-                                                       o When                                                                           the                                                                                strap                                                                       endsthrough                                                                                              the                                                                                               Anti-looseningRings,
   surecompensationvalue,focusingmode(automaticor manual)      slidetheAnti-looseningRings.The strapendswillpassthrough         ilI,
   andflashusedor not.                                          the themmoreeasily.
     * Whentheflashfired,"S"willbe printed.Whentheflashis turned
    onunderthe P modebutthe lightis so brightthattheflashis not     2. Put on the lens cap (Fig. 13)
     required,"S"will not be printed.                        Taketwo buttonson the lenscap withyourfingersto put it on or
                                                                                 off.
     3.e SetPressingthe datein the(Fig.Dial8,Lock9)  Release;                      Tolenspreventglass,putaccumulatingthe lenscapduston asandsoonotherasforeignyou aremattersthroughontakingthe
        \9  Set the SelectingDial to "P" (or "A" or "As" or "M").               pictures.To cleanthe lens,referto "Cleaningthe lens"on page14.
        \t  Pressingin the Data Button, press in the AF/M Button.
  @ TheYearnumber will blink. When the Year number has started     3. Put on the lens hood and filter (Fig. 14)
       blinking,you may leave your finger from the Data Button.          o Indicator(Fig.14-A)
                                                                                                             - Bayonettype]  o Set the blinkingYear number correctlywith the Up/Down Dial.    [Lens Hood
  @ Press in the AF/M Button to complete the Year setting. The     Placethe indicatoron the lenshoodupwardas shownin the fig-
      next        number (Month)                                                                put                                 will then blink. Set the number correctly     ure,                                                                   the                                                           hoodintothe frontof the lensbarreland turn it to the      a      as        described                                                                     right                                                                                                                  till it                                                                                        is locked.                      in @ above.                                                                                                                                                                        v
l  .  o As the AF/M Button is pressed in, set numbers will be shifted    o The lenshoodhas beendesignedespeciallyfor yourcamera.                                                                                                                                                       f      fromMonth to Day, from Day to Hour, and from Hour to Minute.     Be sure not to use the lenshoodotherthanthatcomeswith-t*t      Set the numbers correctlywith the Up/Down Dial.                yourcamera.lf you use otherhoods,Fujifilmcannotguarantee                   'lgtx                                                              correctautofocusingbecauselightmayfalloff alongthe picture
*lirt# 4. Set the time (Fig. 10)                                 edgesor the autofocusbeammay be blocked.
      Set the correct Minute as described above, and press in the      IFilter]tf     AF/M Button.Second will be zero-set,the film speed (lSO)will    Use commerciallyavailable52 mm diameterfilters.The filteris
     be displayed,and thus, time settingends.                 mountedby screwingit intothe frontof the lensbarrel.t*-l#
    * Thecorrectdatewill be displayedup to the year2030,          a Do not put on two or morefilters.Fujifilmcannotguaranteecor-
    :i<Whenthe batteriesare replacedwith newones,the set dataare       rect autofocusingbecauselightmay fall off alongthe picture
    erased.Be sureto resetthe data.                           edges.
                                                       o Whentakingpicturesby usingfilterswithexposurefactors,be
  ATTACHINGTHE ACCESSORIES                           sureto compensateexposuresaccordinglywiththe exposure
                                                                    factors.
   1. Attachthe neck strap (Fig. 11,121
     o Anti-looseningRing(Fig.11-A)                              4. Use the soft case (Fig. 15)
     o Buckle(Fig.11-B)                                Alwaystry to keepyourcamerain the SoftCasewhencarryingit
  Yourcamerahas threeStrapLugs,and you can attachthe neck    aboutor storing.Sucha habitwill protectyourcamerafromdam-      lig
View original page 20Page 21 · Read text
nx    aging and dust. You can keep your camera in the Soft Case with      * For the protectionof the lens,it is recommendedthat the Se-
       the lens hood attachedto the lens barrel.                            lectingDialbe in the off positionwhenloadingfilm.zo
ftt}'   LOADING THE FILM                                   PressurePlate 120               220
                                                                  Setting
        1. Opening and closing the camera back (Fig. 16)                                                              Type of Film    220              120      To open the Camera Back, raise the Camera Back Lock and turn it                                                             Loaded       toward the arrow (counterclockwise).To close the Camera Back,
       press it gently against the body till you hear the snapping sound.     LCD Indication  "120"lights         "220"lights           *
      Then, turn down the Camera Back Lock to the originalposition.
          *  For the protectionof the lens, recommendthe SelectingDial be     Exposure     After exposingthe   Operation may vary
          set to OFF when opening or closingthe Camera Back and when     Counter      1 5 t h f r a m e , t h e  dependingon the film
         loadingthe film.                                                   buzzersounds,and  type used. Most films
                                                                              the filmis woundup   are wound up after
        2. Setting the pressure plate (Fag.17)                                          after exposingthe   e x p o s i n g t h e 1 6 t h
      No pressureplate setting is requiredwhen a film with the bar code                   16thframe.Then,"E"  frame, and "E" will be
      system is used. The camera automaticallysets the pressureplate                          willbe displayed.     displayed.
       accordingto the film loaded. When a conventionalfilm (without                                                               Resultof Expo- Accurate focusing may not be made when the       bar code) is used, set the pressure plate. Open the Camera Back                                                              sureCounter   lens is at or near the fully opened position.      and press in the Pressure Plate Changeover Switch so that the
     LCD indicatesthe type of film loaded.The pressureplate will be                                                                    o When you find, after advancingthe film, that the pressure plate       set automaticallyand accordinglywith the loaded film after ad-                                                                  has not been set correctly,correct it by the following method:       vancingthe film.                                                                   *OFF".                                                    C  Set the SelectingDial to
                                     @ Pressing in the Data Button, set the Selecting Dial from "OFF"        3. Type of film and number of exposures                                                                                    to "lSO".          o 120 roll film: 16 exposures                                     @ Check the LCD to insure that the Battery Sign and "120" or          o 220 rollfilm: 32 exoosures                                                                            "220" have been indicated.       o The exposure counter is interlockedwith the pressure plate
        changeoversystem, and when the pressure plate is set, the   @ Keep pressingin the Data Button,turn the Up/Down Dial to the                                                                       desiredtype of film.         exposurecounter is also changed over accordinglywith the type                                                                  Turned clockwise:"120"           of film loaded.                                                                  Turned counterclockwise:"220"       o While 120 roll film is attachedto an opaque backing paper over
             its entire length,such paper is used only on both ends of 220   @ Leave your finger from the Data Button to end the setting.
             roll film. The thicknessof the backing paper causes a shift in the                                                                                   4. Press in the spool shaft buttons (Fig. 18)          position of the focal plane, and the pressure plate adjusts for                                                                  Press in the Spool Shaft Buttons on both sides. The Spool (Film)           this differencewhile keepingthe film flat on the focal plane.There-                                                               LoadingKnobs will pop out.           fore, check the type of film loaded displayedon the LCD to make                                                                 >k The Take-upSpool and rollfilm can be loaded easier by fittingin
20      sure that the Pressure Plate is set correctlvfor the film loaded.       the top side first, then pressing in the bottom side.
                             www.orphancameras.com
View original page 21Page 22 · Read text
5. Replacethe empty spool (Fig. 19)                           and close the Camera Back, the roll may slacken. Be sure      .iE
   Takeout the empty spool, fit it into the Take-up Chamber (on the         to wind the film by 3 to 5 turns around the spool.             ,!&'il
    rightside),then press in the Take-up Spool Knob.                          *  Exact start mark positioningis not requiredbecause the film tip     {5
     * The        empty spool is set in the Take-up Chamber, at the time of                                                                                           is                                                                    detected                                                                         by the                                                                                    Film                                                                                    Sensor.                                                                               Be                                                                                                              careful,                                                                                                  however,                                                                                                                      not                                                                                                                                         to                                                                                                               wind                                                                                                                                                                                       zut     0urcnase.                                                                                                                             it                                                                                       in                                                                          too much                                                                                                    until                                                                                        the                                                                                                        start mark                                                                                comes                                                                                                                          to                                                                                                              the right                                                                                                                      side                                                                                                                             the                                                                                                                                           of
                                                                      picture frame center because the first-framewill not be posi-
    6, lnsertthe film (Fig. 20)                                          tioned correctlycausing it to be partiallyexposed.
    Insertthe film in the Film Chamber (on the left side), then press in
   theFilmLoadingKnob till you hear the snappingsound and it draws      9. Set the film speed (lSO) (Fig. 23)
   backcompletely.                                   C  Wnite pressing in the Dial Lock Release,set the SelectingDial
       I Confirmthat the Film Loading Knob has drawn back and been         to "lSO". "lSO" will then blink on the LCD, indicatingthat the
      fixedcompletely.lf not, slackened film roll and inaccurate fo-       camera is under ISO setting mode.
     cusingmay result.                                                                *: Automatic ISO setting with a bar code system film used
                                  @ Turn the Up/Down Dial clockwise to set it to "Auto".
    7. Pull out the leader paper (Fig. 21)                                                 :i: Manual ISO setting with a film without bar code used
  O puttout the film leader paper and pass it along the film chan-   @ Turn the Up/Down Dial to set it to a desired number.
      nel.                                            When turned clockwise            : UP
  @ Insertthe tip into the slot of the take-up spool. The round open-      When turned counterclockwise:DOWN
      ing in the leader paper head will be hooked to the claw on the
       slotof the take-up spool. (lnsert the tip into the slot of take-up     10. Set the film to the first frame (Fig. 2a)
     spoolin the same manner also when the used film and spool    C  Close the Camera Back.
     are not of an easy-loadingtype.)                @ Wfrite pressing down the Dial Lock Release,
      I Turnthe Up/Down Dial to the arrow directionto adjust the spool   @ Set the SelectingDialto "P","A", "As" or "M". The film willthen
      slot position so it can be readily seen. The spool turns 90 de-         automaticallyadvance to the first frame position,and the Lens
    greesas the Up/Down Dial is turned, and the positioncan be           will move out into shooting position.
     adjustedeasily.                         @ Wfren the Selecting Dial has already been set to "P", "A", "As"
                                                                           or "M", the film will automaticallyadvance to the first frame po-
   8. Wind the leader paper (Flg.22l                                         sition as the Shutter Release Button is pressed down.
        r  Line up the start mark with this pin. (Fig. 22-A)         @ When the film is set to the first frame, the exposure counter
  Windthe leader paper around the take-up spool by turnirrgthe Up/        displays"1". Also displayedare ISO [Number]and set pres-
  DownDial toward the arrow. When you are using 120 roll film,        sure plate setting number nzOl or W.
  windit until the start mark appears in the left side. Do not wind it     *< When a film is not loaded correctly(slackened),the validitydate
  anymore. When you are using 220 rollfilm, wind it in by about 3 to       has been expired,or improperlystored film is used, the camera
  5 turns(about 15 cm) aroundthe spool.                       may not read the film data correctly.
  O To prevent the roll from slackening, press down the leader      >i<When the Up/Down Dial is set to "Auto" and LCD displays "- -  !',
    paper at the left side, and applying tension, wind the leader        the camera is not reading the bar code of the film correctly or film
f    paper securely around the Take-up Spool.                     used has no bar code. In this case, the shutter is locked and the
     I  ff you wind the film by only  'l to 2 turns around the Spool       camera does not work. Set ISO number and changeoverthe pres-                                                                                                21


                                                                                                                                                                                                                       :fl:,r,i:.],,i:..*sl                                       u:;*i#t
View original page 22Page 23 · Read text
TI'       sure platecorrectly.                                              the camera is placed under the programmed auto exposure mode
#i     >i<Recommendthe top coverof the film box be cut out and in-     (P mode), the Flash will not fire in bright light but it will automati-
                                                                                              fire                                                                                               in dim light.                                                                              cally                   FilmReminderSlotso thatyou won'tforgetwhich                 in                the        sertednl11:,                                                                                                                       fire in brightness of EV12 or equivalent (at                                                                                                                                       lt will                                                                                automatically                                                                                                 *          you                  using.u,       film               are
!E                                                                      F5.6, 1/90 sec. with ISO 100 film loaded).
       TI. BASIC PROCEDURES                                                  *  For details on flash photography,refer to page 26.
     TAKtNG AUTOMATIC-MODE (AUTOFOCUS/ PROGRAMMED      4. Display in the finder (The figure below shows all markings
                                                                                frame (for distant objects) (Fig. 28-A)    AUTOEXPOSURE/AUTOMATICFLASH)PICTURES      e displayedField-of-viewin the finder) (Fig. 28)
      o  lf you set the camerato the automaticmodes,you can take         \1)  Field-of-viewframe (for near objects) (Fig. 28-B)
         picturesvery easily.                                                                                                          v   Field-of-viewframe (fixed) (Fig. 28-C)
                                                               The area seen insrde the frame C or @ will be taken in your
       1. Set the camerato the programmedauto exposure mode         picture.
         (Fis.25)                                              The field-of-viewframe O moves to the positionof @, and the
      Whilepressingin the DialLockRelease,set the SelectingDialto         parallax is compensated automatically.
       "P"The camerais set to the programmedautoexposuremode,in  @ nf (autofocus)frame(Fig.28-D)
      whichthe apertureand shutterspeedare automaticallyset ac-      Aim at the desiredobjectby positioningit withinthisAF frame.
      cordingto the brightnessof the subject.                      The Lenswillfocuson the objectaimedwithinthisframe.
      a The programmedexposurediagramon page31 showsthe cou-  @ Shutteractuatedsign(Fig.28-E)
         plingrangesof apertureand shutterspeedin the programmed  @ Aperturevalue(F-number)(Fig.28-F)
        autoexposuremode.                                         Blinkswhenit is not suitedfor correctexposure.
      o Whentakingpictureswithoutflashin the programmedautoex-  @ Overor underexposuresign(Fig.28-G)
        posuremode,cautionis requiredbecausecamerashakemay      Under"P","A" or "As"mode:This sign is not displayedwhen
          to occurwitha shutterspeedlowerthan 1/45sec.                 the exposureis correct.
                                                          Under"M" mode:I lightswhenthe exposureis correct'
        2. Checkthe autofocus(Fig.26)                                                 r  lightsin caseof an overexposure.
     Makesurethatthe "MF"is not displayedin the LCD.lf it is dis-       v lightsin caseof an underexposure.
       played,pressingin the AF/MButton,turnthe Up/DownDialcoun-     Whena v appearunder"P","A" or "As"mode,it denotesthe
       terclockwiseto placethe cameraunderthe aOtofocusmode. The      systemis outsidethe exposureinterlockingrange.
      "MF"willdisappearas you leaveyourfingerfromtheAF/MButton'  @ Shutterspeed(Fig. 28-H)
      o Whenthe "MF"is not displayed,it denotesthe camerais under      The sign"11"willlightwhenthe shutterspeedis slowerthan0.7
         the autofocusmode.                                         sec.The sign" 5,r1" will appearduringbulbexposure.
      a Whenthe "MF"is displayed,it denotesthe camerais under  @ Exposurecompensationset sign(Z) (Fig.28'l)
        manualfocusmode. (Referto page29.)                        Thissignappearswhenexposurecompensationis set.
                                 @ Flashsign(f ) (Fig.28-J)
        3. Readyingthe flash (Fig.27l                        Whenthissignappears,the flashwillfire.Whenchargingthe
      Pressin the FlashButton(f ) andletthe FlashHeadpopup.When       flashsystem,thissignwillblink.22,
                             www.orphancameras.com
                                                                              i1""g.
View original page 23Page 24 · Read text
O Distance(Fig. 28-K)                                     *<The LensCap Sensorlocatedin the lensbarrelmeasuresout     "1"lightsin responseto the distancemeasuredby the autofocus     sidebrightnessand generatessignals.Forthis reason,when         llU9J
        When                              light,the                          measured                                       distance                                                             is in                                                   the       the                                                              brightness    system.              twosigns                                                                                              is darkerthanEV6ISO 100(F5.6,112),no warn-        fI,*,,                      when                                                     is set under                                                   the                                                             ingwill                                                         be made,    middleof          two signs.                      "1" blinks                                 distance                                                                                                                                                                                                                                                                       .lUi
    manualfocusmode.                                                  * The lenscap warningcan be turnedon or off. (Referto page
   >i:The distancesdisplayed in the finder are hints for autofocus      3 0 )
    distancemeasuring.
                                                                 8. Zoom the lens (Fig.33)
   5. Adiust diopter of the finder (Fig. 29)                 Whenzoomingthe lensto the teleside(spottingan objectin large
  Lookingat an AF frame through the finder, turn the diopter adjust     size),slidethe ZoomLeverup.
   dialproperlyso that the object can be seen clearly.           Whenzoomingthe lensto the wideside (takinga picturein wide
  Whenyou are far-sighted,turn the dial clockwise(toward"+" side),     range),slidethe ZoomLeverdown.
  orwhenyou are short-sighted,turn it counterclockwise (toward   Whenzoomingthe lens,the lensstopsat positionsfor 55 mm,65
   "-" side).                                    mm,75 mm and90 mm focallengths.
  Thediopteradjustablerange is -3 to +1D.
                                                                  9. Composeyour picture(Fig.34)
  6. Hold the camera (Fig. 30, 31)                              o AE lightmeasuringarea(Fig.34-A)
       r Takingveftical-positionpictures (Fig. 30)                     o AF rangingarea(Fig.34-B)
       r Takinghorizontal-positionpictures (Fig. 31)              eAim at the desiredobjectwithinthe AF mark"[ ]" (AF ranging
  Camerashake is a typical cause of harming sharpnessof pictures       area).
  taken.                          @ Pressthe ShutterReleaseButtonhalfwaydown,holdit there
  Holdthe camera still with both hands with your arms tightly at-      and checkthe displayin the Finder.
  tachedto your body, and squeeze the Shutter Release Button gently    o Whenthe objectyou aim at is out of the AF mark,shootusing
  00wn.                                                    focuslock. Forfurtherinformationon focuslock,referto Page
  a Be sure to keep your fingers and neck strap away from the Flash       28.
   Sensor,AE Light Sensor and AutofocusWindows. lf these parts
:rj,t':n' are blocked,exposuresand focusing cannot be made correctly    10.Checkthe exposure(Fig.35)    resultinga poor quality picture.                              o Blinking(Fig.35-A)
 Whenyou are taking horizontal-positionpictures,positionthe Cam-   O Whenyou see neitherthe Overexposure(r) northe Underex-
 eraGrip side down. When the built-inflash fires, shade of the ob-       posure(v) Signin the Finder,you willobtaincorrectexposure.
  jectis likely to appear in the back.                               (Exceptfor the manualmode)
 o When taking pictures under 1/45 sec. or slower shutter speed,  @ Whenthe UnderexposureSign(v) lightsand boththe F-num-
   mount the camera on a tripod to prevent camera shake.            ber and shutterspeedblink,the cameracan not set correct
                                                     exposurewithinits couplingrange,and your picturewill be
  7. Lens cap warning (Fig.32)                               underexoosed.
 When the Shutter Release Button is pressed half way down with  @ Whenthe OverexposureSign (r) lightsand boththe F-num-
 thelens cap put on the lens,the field-of-viewframe in the viewfinder       ber andshutterspeedblink,the cameracannotset correctex-
 blinksto warn you. Take out the lens cap before taking pictures.       posurewithinits couplingrange,andyourpicturewill be over-   2S
View original page 24Page 25 · Read text
exoosed.                                 UNLOADINGTHE FILM                                                                i
    @ Wfren the Flash Sign (l) turns on, it tells you that the Flash willlfliz:o:E'ffi           fire automatically.                                             1. Exposingthe last frame and unloadingthe film (Fig.a0)
                                                                     Afterexposingthe lastframe,the filmwillautomaticallywinditself
        11. Check the shooting distance (Fig. 36, 37)                 up to the veryend and the letter"f" willappearin the LCD.Make
          o Blinking(Fig. 36-A, 37-A)                              surethe "[" Signappearsin the LCD,henopenthe CameraBack
     O When the distanceindicator"l"  lights,the camera has com-    andtakeout the exposedfilm. To preventthe filmfromloosening,
           pleted focusing and set the correct distance.                   sealit tightlywiththe EndSeal.
    @ Wfren the 1m distanceindicator"r" blinks,you are too close to
          your object. Move back 1m or more from the object.              2. Unloadingthe film in mid-roll(Fig.41)
       o When the displayed disiance on autofocus differs remarkably    Pressin the Mid-rollWind-upButtonon the camerabottom. The
         from that estimated with your eyes, the cause may be that the     filmwillwinditselfup to the veryendthenstop.Whenwindingis
         AutofocusSpot is off your object. Focus again correctlyby aim-    completed,the "f" Signwill appearin the LCD.
          ing the Autofocus Spot at your object.
    @ When -  (infinity)blinks, it tells you that your camera cannot    III.ADVANCEDTECHNIQUES
          focus correctly.Use manual focusing or Focus Lock. (For de-
              tails, refer to Page 28.)                         APERTURE.PRIORITYAUTOEXPOSURE
            r When the Shutter Release Button is depressed with the dis-
         tance indicalep*  (infinity)blinked,the Lens will focus on infinity.    This techniqueis usedwhenyou wantto give perspectiveto the
       o When the distanceindicatorblinks all the time, your camera is    takenpicturesby openingup the aperture,or to takesharppic-
         under the MF (manualfocus) mode. Set it to the AF mode.        turescoveringshortdistanceto long distanceby stoppingdown
                                                                 the aoerture.
        12.Trip the shutter (Fig. 38)                                Forapefture-priorityautoexposure,therearetwo modes;modeA
       Press the Shutter Release Button halfway down and check the    and modeAs.Whenthe built-inflashis not used,the camerafunc-
       composition,distance and exposure. When all right, press the     tionsin the samemannerunderbothmodesA andAs.
       Shutter Release Button gently allthe way down. When the shutter   Whenthe built-inflashis used,it firesnormally.
         trips,the shuttertrip indicatorin the finder (upper left portion)lights,    However:
      and an electronicbuzzer "beep" sounds.                     UndermodeA: The shutterspeedwillnotbe slowerthan1/45sec.
             :i: When using the cable release, this halfway-down mode is not    UndermodeAs:Dependingon the lightmeasuredby yourcam-
          possible.Be careful to make one positiveshutter pressingto     era,the shutterspeedis controlledup to 2 sec. Thismodeis used
         operate the distance, exposure and shutter tripping .          whentakingnighttimescenesor portraitwiththe slowsynchro-
                                                         apenureprioritytechnique.Recommendthe camerabe mounted
      13.When the last frame is reached (Fig. 39)                  on a tripodbecauseshutterspeedis so slowthatthecamerashake
             lf the film is positionedfor the last shot, an electronicbuzzer will      is likelyto occur.
      sound six times to tell you that the film has reached the last frame.
             :i: lf the sound of the electronicbuzzer is worrisome, you can switch     1. Settingthe selectingdial (Fag.42)
                  it off. For details, refer to "Extra functions"on page 30.           Whilepressingin the DialLockRelease,set the SelectingDialto
                                                                    "A" or "As".24
                              www.orphancameras.com
                                                                                                                                                  }
View original page 25Page 26 · Read text
:ii;.i;::::,
                                                                                                                                                                                                                                           i:.1i1i:!:,
    2. Set the aperture (Fig. a3)                 @ Wnenthe shutterspeedblinksandthe OverexposureSign(r)         T....N
   Turnthe Up/Down Dial. The aperture indicated on the LCD will         lights,thecorrectshutterspeedsuitedfortheapertureyou have   H.                                                                                                                 .u   change.The aperturewill open up by turningthe Dial clockwise,       set is notwithinthe camera'scouplingrange.In thiscase,stop
   andis stopped down by turning counterclockwise.               downthe aperture.                                                                                                                                                                                                                                                                                                                                                                                                                              {tzl$     r The aperturewill be displayed in 1/2-stop increments.      @ Wherrtheshutterspeedblinksandthe UnderexposureSign(v)
                                                                          lights,the aperlureis stoppeddowntoo muchandthe aperture;    55 mm    F4.5- F22                                                       you havesetis notwithinthecamera'scouplingrange.Openup
    65 mm    F5.2- F27                                      the apertureor set the camerato the flashpicturemode.
                                                       o Fortakingflashpictures,referto Page26.
    75 mm    F6.2 - F32                                 o In caseof incorrectexposurein @ or @ above,the shutterspeed
                                                          displayedon the LCDwillalsoblink.    90 mm     F6.9 - F38
                                        MANUAL EXPOSURE
  o Whenthe apertureis set to F6.9at tele side 90 mm and the
   ZoomLeveris slid down(towardthe wide side),the aperture    1. Set the selectingdial to "M" (Fig.46)
   becomesF6.7at 75 mm, 65 mm and 55 mm. Whentaking   Whenthe SelectingDialis set to M, whilepressingdownthe Dial
    pictureswiththe aperturefullyopened,fullyopenit againafter    LockRelease,the "TV"signwill appearin the LCDto informyou
    decidingthe zoomposition.                                   thatthe camerahas beenset to the manualexposuremode.
  o Whenthe apertureis set to F4.5at wideside55 mm and the    o  lf you want intentionaloveror underexposureto take high-key
    focallengthis changed,the apertureis set to the full open F-       -  or low-keypictures,use manualexposure.
    valuesuitedto the set focallengthautomatically.                     r This modecan alsobe usedto set exposurefor backlighted
                                                               subjectsor othersubjectsfor whichcorrectexposurecannotbe
   3. Pressthe Shutter ReleaseButton about halfway down         obtainedin the "P"or "A" mode.     (Fis.aa)
  Aimyoursubjectandpressthe ShutterReleaseButtonabouthalf-     2. Set the shutter speed (Fig. 47)
  waydownThe aperlureyou haveset andthe shutterpeedsuited    Whilepressingin the ExposureCompensationButtonsetthe shut-
   forit willbe displayedin the Finderand LCD.lf you changethe     ter speedwiththe Up/DownDial.Whenthe ExposureCompensa-
  aperture,the shutterspeedwill changeautomatically.The upper     tion Buttonis depressed,the "TV"Signwill blink.
   limitof the shutterspeedthatcan be set differswiththe aoerture   o  lf the camerais set to the manualexposuremode,the Expo-
  asshownbelow.                                           sureCompensationButtoncan be usedfor settingthe shutter
                                                         speed,but not for exposurecompensation.
                                                                   3. Set the aperture(Fig.a8)
  4. Checkthe display in the finder (Fig.45)                   Set the apertureby turningthe Up/DownDial.
  Pressthe ShutterReleaseButtonhalfwaydown.                o  lf the shutterspeedis set for bulbexposure,the " 9,.,1"Signwill
 D Whenneitherthe OverexposureSign(r) northe Underexpo-    appearbothin the Finderand LCD.Duringbulbexposure,no
    sureSign(v) lights,you will obtaincorrectexposure.             batterypoweris consumedso you neednot worrythatthe bat-
                                                                    teriesmay runout duringa longexposure,                                                                                               25
                                             .*i*;                                                             '',.,.,'
View original page 26Page 27 · Read text
o At bulbexposure,the shutterremainsopenwhilethe shutter     ture. The flash sensor which receives the light reflectedfrom the
        buttonis heldpressed.                                       object measures the amount of light in the center of the picturemz.r)         * Underthe Manualmode,the exposurecompensatingfunctions    frame.
       do not work.                                               o When your camera is under "A", "As" or "M" mode and flash isIf/l:t                                                                    tuned on, the flash will always fire.
        4. Adjust the shutter speed and aperture(Fig. 49)              You can use it effectivelyas fill-in light when shooting your ob'
         o Correct-exposureSign(Fig.a9-A)                                  ject in the shade of a tree or for obtaininga catch-lighteffect on
         o Ov'erexposureSign(Fig.49-B)                                       portraits.
         o UnderexposureSign(Fig. 49-C)
      Pressthe ShutterReleaseabouthalfwaydown.lf the Correct-ex-
      posureSign(|) appearsin the Finder,the exposureis correct.lf
       the Over(r) or Underexposure(v) Signappears,adjustthe aper-
       tureor shutterspeedso that(C)Signturnson.
      o  lf youwantintentionaloveror underexposLlre,takepictureswith
         the Over(r) or Underexposure(v) Signdisplayedin the Finder.
     USINGTHE BUILT.INFLASH
        1. Readyingthe flash (Fig. 50)
     C Popup the FlashHeadby pressingthe FlashButton.
   @ As soonas the FlashSign(l) in the LCDstopsblinkingand
         glows,the flashis readyto fire.
      o The FlashSign(f ) willblinkwhilethe flashis charging.Whileit
          blinks,the camera'soperatingfunctionssuchas releasingthe
         shutterwill not work.
      o The tableshowsthe minimumexposure(allowableaperture)
        dependingon the ISOvalue,due to the limitationof flashcon-
           trol capabilities.
      rso              50     100       , 200    400
      Minimumexposure    8       11      1 6     22

         2. Exposure control with the built-in flash (Fig. 51)
                 r  Flash sensor (Fig. 51-A)
     When taking flash pictures,the exposures are controlledunder
        the manner of an automatic flash. To be more specific,the inten-
         sity of the light reflectedby the object is measured and its amount
2S     of light is automaticallyadjusted in accordance with the set aper-
                              www.orphancameras.com
View original page 27Page 28 · Read text
3. Variousexposure modes and flash operatlons                                                                          Ew
                                                Flash Pop-Up            Aperture            ShutterSpeed     w                                                                               &
                                         No flash firing         Automaticcontrol        Automatic control         LU
                 ProgrammedAE
                                       Automaticfiringin low light    Automaticcontrol      Automaticcontrol"1
  ExoosureMode    Aperture-priorityAE "A"                                               Automaticcontrolx1
                                                                    Set aperture
                    Aperture-priorityAE "As"        Alwaysfires                              Automaticcontrol
                 Manualexposure"M"                               Set aoerture         Set shutterspeed
 *1:Toavoidpoorpicturequalitydue to camerashake,the shutterspeedwill not be set to slowerthan 1/45sec.

0 UnderprogrammedAE "P" mode: The flash willfire automati-     4. Controlrange
   cally in low light. (Refer to Programmed Exposure Diagram in
  Page31.)                                                   Film speed (lSO)        50  100 160 200  400  800
   Underaperture-priorityAE "A" mode: The flash will always fire.
  The amount of the flash light will be controlled in accordance    Guidenumber          8.5  1 2  1 5   1 7  24   34
   with the set aperture, and the shutter speed will change in re-      Farthest flash distance (m) w 1 . 9N2.7 w3.3w3.7w5.3w7.5
  sponse to brightnessof the object.                                       T1.2T1.7 r2.2 T2.4T3.5 T4.9
O Under aperture-priorityAE "As" mode: The flash will always
   fire.The amount of the flash light will be controlledin accor-     Nearest flash distance (m)             1 . 0
  dance with the set apefture,and the shutter speed will change
   in responseto brightnessof the object. The shutter speed will   Whena filmof ISO25 is used,the guidenumberwillbe 6, andthe
  be quite slow in a dark place. Be carefulto avoid camera shake     flashlightwill be insufficientat the teleside. Forthis reason,use
  and avoid taking moving objects.                                of the built-inflashis not recommended.
.@ Under manual exposure "M" mode: The flash will always fire
  and the flash will adjust its amount of light accordingto the set    The guidenumberof the built-inflash(withthe maximumamount
   aperture.The shutter will trip at the set shutter speed.            of light)is 12 at ISO 100.The guidenumberwillincreaseby 1.4
r Light control cannot be compensatedwith the flash light.         timesif the filmspeed(lSO)becomesdouble,and doubleif the
                                                                   filmspeed(lSO)increasesfourtimes.
                                                     o The farthestflashdistanceis calculatedby dividingthe guide
                                                numberby the lensF-numberat fullaperture(W:4.5,T 6.9 in
                                                    caseof yourcamera).
                                                             Guidenumber                                                                                    lJistance =--                                                             F-number                        27
View original page 28Page 29 · Read text
o When your camera is set to the aperture-priorityAE (mode "A"),   EXPOSURECOMPENSATION
          calculatethe maximum flash distance with the set aperture.lltzr}
Hu,     o Sincerangesnegativeare longerfilmsthanhavethosea widerin theexposureabove table.latitude,the flash     1.lf youSetwantthe exposureto take high-keycompensatingor low-keyvaluepictures,(Fig.54)use exposureT:                                                         compensationin the programmedautoexposureor aperture-pri-
     USING AN EXTERNAL FLASH                                    orityautoexposuremode.
                                              C Wnitepressingin the ExposureCompensationButton(+/-),
        1. Mount the flash on the hot-shoe (Fig. 52)          @ turnthe Up/DownDial.
      Mount a commerciallyavailable hot-shoetype externalflash such  @ The exposurecompensatingvaluewillbe displayedin the LCD
       as Strobe GA (Fujifilmoptionalattachment)on the Hot-Shoeof the         in 0.5 EV-stepincrements.
      camera.                                          The compensatingrangeis +3 EV.
       o Do not use flashes designed for cameras of other makers
          that have a signal pin because mounting and dismounting      2. Display of the exposure compensatingvalue (Fig. 55)
       may become impossible.                         Whenyou leaveyourfingerawayfromthe ExposureCompensa-
       o When an externalf lash is used under "P", "9" or "As" mode in a      tion Button(+/-) aftercompensatingthe exposure,onlylhe "Zt"
         dark place, the camera will select a slow shutter speed resulting    signwill be displayedto tell you that the camerais set for expo-
          blurred pictures. Recommend your camera be used under the     surecompensation.
         "M" mode.                                       Now,pressin the ShutterReleaseButtonhalfwaydown.The com-
        :F When an externalflash is used, the shutter limiter (which oper-    pensatedvaluesof apertureand shutterspeedwill be displayed.
         ates under "P" or "A" mode) does not work.               Whenthe compensatedexposurevalueis sel,"7" signwilllight
          * Do not use both the built-inflash and externalflash together.    also in the finder,informingyou thatthe exposurecompensation
        The flash light will not be controlledcorrectly.                has'beenset.
                                                                                    *   lt shouldbe notedthatthe set exposurecompensationwill be
        2. Flash light distribution characteristics (Fig.53)                cancelledif the SelectingDialis set to "OFF".
                   .  Light fall-out (Fig. 53-A)
          o Flash light covering area (When the covering area differs   USINGTHE FOCUSLOCK
           Cepending on vertical or horizontalangle) (Fig. 53-B)
          o Covering area for 6x4.5cm version (Fig. 53-C)                 1. A word on the auto-focus lock (Fig. 56)
                r  Covering area of Strobe cA (Fig.53-D)                                       lf theAutofocusSpotis off yourobject,the Lenswill notfocuson it.
        In the case of an externalflash with differentvertical and horizon-     In sucha case,movethe cameraslightly,aim theAutofocusSpot
         tal coveringangles (lightdistributingcharacteristics),the flash cov-     at yourobjectto focuson it, thenrecomposeyourpictureby mov-
       ering area and the direction of an image plane may not coincide.     ing the camerabackto its originalposition.This methodis called
      To solve this problem (lightfall-out),recommend use of Strobe GA     "Auto-FocusLock".
        (optionalattachment)
       Strobe GA has 42 modes.                                          2. Aim your object and press the Shutter ReleaseButton half-
     When ISO 100 film is used and the aperture is set to F8, you can      way down (Fig.57)
       take pictures under the automatic exposure mode.              AimtheAutofocusSpotat yourmainobject,and pressthe Shutter
28                                                      ReleaseButtonhalfwavdownto lockthe auto-focus.
                              www.orphancameras.com
                                                                                           1.,o9*r;i:,;                                                                    "&;"i
View original page 29Page 30 · Read text
3. Compose your picture and trip the shutter (Fig. 58)               autofocus is eliminated. With the aperture stopped down (to F8       iff..ii    Withthe Shutter Release Button pressed halfway down, compose             - Fl1), the lens will exhibit its pan focus effect to enable you to      .tr.,:
    yourpictureand trip the shutter by gently pressing the Shutter        take quick shots.                                                                                                       iilirr..{Iil'i
    ReleaseButton all the way down.                       O   lf you want to minimize the time lag on shutter operation       Z , :                                                                                                                                                            ul      .* When the camera is set to automatic exposure (AE) (pro-        All-automaticcameras requiresome time for the distancemea-
    grammedor aperture-priorityautomaticexposure mode), the        surement and lens drive. lf you set the camera in the following
     exposurewill be determinedfor the picture you composed with        manner,the time lag from the moment you depressthe Shutter
      the Shutter Release Button pressed halfway down (focus locked).       Release Button to the moment the shutter trips will be mini-
                                                              mized to let you take pictures successively.
   MANUAL FOCUSING                                                                       i) Dependingon the subject,set the distance by manualfocusing.
                                                                                                                  ii) Pressthe ShutterReleaseButtonabout halfwaydown and move
     1. Set the manual focusing mode (Fig. 59, 60)                      the lens to the set distance in advance.
    Pressin the AF/M Button.The "MF" Sign will blink in the LCD to tell     a Distancesset under the manual focus mode
   youthat the camera is set to the manual focusing mode.
   Keeppressing in the AF/M Button, turn the Up/Down Dial clock       Indicationsin meter     I N F 2 0 m 1 0 m 7.Om5.0m 4.0m 3.0n
    wise.Distanceswill be displayedin order of Inf, 20m, .........1.0m      Indicationsin foot         I N F      30       1 5       1 0
    (fromfar distance to close-up distance).
   Whendistanceyou desire to set is displayed,leave your finger                     2.5 m 2.0m 1 . 7m 1 . 5m 1.3m   . 2 m1 . 1m 1 . 0n
   awayfrom the AF/M Button. The displayed distance will go out                      8    7    6    5         4   3.5
   and MF Sign will light to tell you that your camera has been set to                                                                  For changeover across the meter and foot indications,refer to Page   the manualfocusmode.                                                                     30.
   To returnthe camera to the autofocus mode, keep pressing in the
   AF/M Button,turn the Up/Down Dialcounterclockwise,and leave                                                  USING THE SELF,TIMER   yourfinger away from the AF/M Button when the camera is placed
    in the AF mode. The MF Sign will go out to tell you that the camera      1. Set the self-timer mode (Fig.61)   has been set to the AF mode.                                                              Press in the Self{imer Button(q;).The Self-timer Mode Sign (g)    >i:Under the manual focus mode, the distance mark "r" blinks in                                                                                       will be indicatedon the LCD and the camera is set under self-timer     the finder.                                                         mode.
                                                                                           *  After taking a picturewith the Self-timer,the self-timermode willl     Effectiveuses of the manualfocusing mode                                                               be switched off. To take a picture with the Self-timer again, press     2.e  lf you wantto haveanotherpersontakea pictureof yourself         in the Self-timerButton again.     Set the shootingdistancebeforehand,handoverthe camera
      to anotherpersonand ask him (or her)to depressthe Shutter     2.  Start the self-timer (Fig. 62)
     ReleaseButton.Youneednot explainhim (or her)howto aim     Press in the Shutter Release Button.The Self-timerLamp will light
     the subjectwiththeAutofocusSpot.                       and the Self-timerwill start. The Lamp will glow for seven sec-
  @  tf you want to take a moving object by pan focus                 onds, blink for three seconds, and then, the shutter will trip to take
           lf you have set the shooting distance in advance by using the     your picture.
     manual focusing mode, the time lag caused by a lens drive on                                                  29
View original page 30Page 31 · Read text
111v::::     * systemsUndertheofself-timerthe cameramode,will operatethe autofocusas soonandas theauto-exposureShutterRe-    An oelectronicBuzzer off"beep"(Fig.which65-8)sounds when the shutter tripped, or an..;|::lii      leaseButtonis depressed.Dependingon the objectconditions,   repeated"beep,beep, beep......."which tells you that the film has
ur':i    use manualfocusingand manualexposurefor compensating   reached the last frame can be switched off.l[.rii          for autofocus,intensifyingor reducingthe objectcontrast,etc.     While pressingin the Selttimer Button,turn the SelectingDialfrom                                                                                .lSO".                                                   OFF to                                                                     The "oFF b" Sign will be displayedin the LCD for
     IV.EXTRA FUNCTIONS                                              five seconds and the buzzer will turn off.
                                                             To reset it to "ON", repeat the same procedure.The LCD willshow
        1. Externalchangeoverof the pressure plate (Fig. 63)            "gn  b" forfive seconds to tell you that the buzzer has been switched
     The pressureplatesettingcan be changedafterloadingthe film.    on again.
      Set the SelectDialto "lSO",and turn the Up/DownDialwiththe
      DataButtondepressed.Typeof film(120,220)displaywillchange     4. Totalshots  indicator (Fig.66)
      on the LCD.                                           Use it as a guide for regular maintenance.
      Whenthe Up/DownDialis turnedcounterclockwise:220             o Indicates3,000th shots (Fig. 66-A)
      Whenthe Up/DownDialis turnedclockwise         : 1 2 O            o Always shows "00" (Fig. 66-8)
          * When the loaded film is a bar code system film and pressure    Press in the Exposure Compensation Button (+/-) and turn the
          plate has been automaticallyset, this function does not work.       SelectingDialfrom OFF to "lSO". While pressingin the Button,the
       *< This functionchanges when advancingthe film. For this rea-     Total Shots Indicatorin the LCD will show you the total number of
          son, when resettingafter the automatic first frame setting,take     shots that have been taken. lt will count the number in units of
          picture after exposing one extra frame.                          100. Use this function as a guide for overhaulingor regular main-
                                                                     tenance.
        2. Switchover of the distance unit (Fig. 64)                     o Though new, some units will show that they have been factory-
      The distance unit can be switched over.                               tested up to about 200 shots.
                r  Distance unit in meters (Fig.64-A)
          o Distance unit in feet (Fig. 64-8)                                   5. Turn off the lens cap sensor (Fig. 67)
      Your camera is Factory-setto display the distances in meters for    When the Lens Cap Sensor is not required,the warning can be
      manual focusing and the letter "m" will be displayedbeside the     turned off.
       distance number in the LCD. Depressingthe AF/M Button,set the      Slide the Zoom Lever up (Telephotoside), and set the Selecting
       SelectingDial from OFF to lSO. The LCD indicationwill be changed     Dial from OFF to lSO. The LCD will indicate"oFF c" for five sec-
       over from meter to feet, and "F[" sign will appear on the LCD for     onds to tell you that the Lens Cap Sensor has been turned off.
         five seconds. (When "feet" is set, distance unit (ft) will not be indi-    To turn on the Lens Cap Sensor again, slide the Zoom Lever up
       cated beside the distance number on the LCD.)                  and set the SelectingDial from OFF to ISO in the same manner as
          *  In the Finder,distancesare displayedin meters only. Even if the      to turn off the Lens Cap Sensor. The LCD will indicate "[]n c" for
           "feet" is set, the meter indicationswill not change to feet.             five seconds to tell you that the Lens Cap Sensor has been turned
                                                                     on.
         3. Switching  off the buzzer (Fig. 65)
              lf you feel the buzzer sound worrisome,you can switch it off.
30ii      o Buzzer on (Fig. 65-A)
                              www.orphancameras.com
View original page 31Related documents and language editions
From the M. Butkus archive. Original publisher and archive notices are retained.
Check the model and edition against your equipment.
PDF verified 2026-10-10.