Film cameras
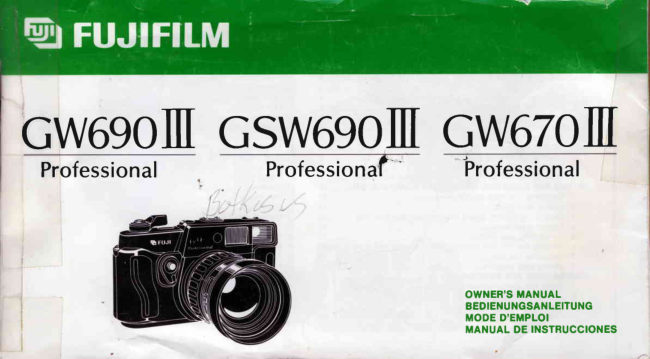
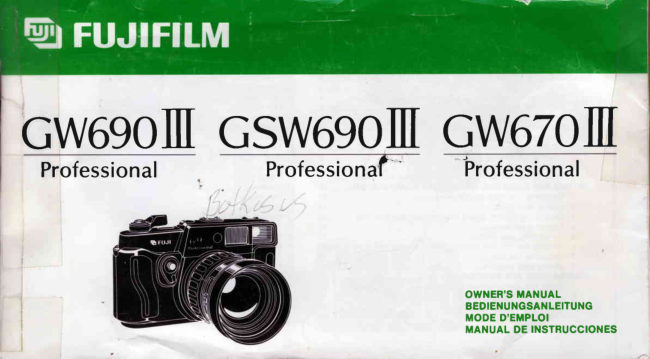
Fujifilm GW690III / GSW690III /GW670III User manual
User manual for Fujifilm GW690III / GSW690III /GW670III. 15 pages in German, French, Spanish, English. Read the original PDF, download or print a copy without registration.
15 pagesGerman, French, Spanish, English1.7 MB PDF
Loading your manual…Open PDF directly
Document details
- Brand
- Fujifilm
- Model / document
- Fujifilm GW690III / GSW690III /GW670III
- Document type
- User manual
- Language
- German, French, Spanish, English
- Pages
- 15
- File size
- 1.7 MB
- Category
- Film cameras
- Document date
- Not specified in catalog
Search available document text
Find a term, then jump to its page in the original PDF. Image-only pages may not be searchable; check the PDF for exact wording and diagrams.
Page 2 · Read text
OWNER'S MANUAL
 This manual will show you how to use and care for your FUJI GW690m Professional,     English (Pages 6    14)
 FUJI GSW690lllProfessional,or FUJI GW670IIIProfessionalcorrectly. Please follow the     See illustrations while you read instructions carefully.
 (The instructions are the same for the three cameras because the only differences      this manual.
among them are in the lens focal length and picture size.)

BEDIENUNGSANLEITUNG
Diese Anleitung enthilt alles, was Sie uber die Bedienung und Pflege lhrer FUJI     Deutsch (Seite 15   251
GW690lll Professional, FUJI GSW690m Professional bzw. FUJI GW670m Professional     OrientierenSie sich beim Durch-wissen mussen. Lesen Sie die Anleitung bitte aufmerksam durch.                                                                         lesen dieser Anleitung bitte an(Die Anleitung ist fur alle drei Modelle gleichermaBenzutreffend,da diese sich nur in
der Brennweite des Objektivs und im Bildformat voneinanderunterscheiden.)          den Abbildungen.

MODE D'EMPLOI
Ce manuel contient  les  instructions sur  I'entretien des  appareils FUJI GW690il      Frangais (Pages 26    35)                                                               I
Professional, FUJI GSW690Iil Professional ou FUJI GW670m Professional. Veuillez le     Se reporter aux illustrations enlire attentivement.                                                                                      lisant le mode d'emploi.(Les instructions sont les mdmes pour les trois appareils car les seules differences
entre eux r6sident dans la longueur focale de leur objectif et dans le format d'image.)

MANUAL DE INSTRUCCIONES
Este manual le explica c6mo manejar y conservar correctamente su FUJI GW690ll      Espafrol (P6gina 36    46)
Professional,FUJI GSW690il Professionalo FUJI GW670il Professional.Sirvase seguir     Consulte las ilustraciones mien-atentamente las explicaciones.                                                                                     tras lee este manual.(Las instrucciones son identicas para las tres c6maras porque las 0nicas diferencias
entre ellas son la distancia focal del objetivo y el tamafro del negativo.)

                          www.butkus.us
View original page 2Page 8 · Read text
,w
SPECIFICATIONS

                                GW690r[[Gw670rrrl                                GSW690l[
  Picture Size                 6 x 9 cm [6 x 7 cm] format; actual picture size 56 x  Same as Gw690lll.                             82.6 mm [56 x 68.5 mm]                             b< H
  Film                      120 half-length, 120, and 220 roll film.            Same as Gw690lll.
  Film Advance               Lever on camera top, 2-stroke advance (first stroke  Same as Gw690lll.
                            138o, second stroke depends on film roll diameter);
                               self-cockingshutter; double exposure prevention.
 Exposure Counter          Automatic reset, additive.                      Same as Gw690lll.
  Shutter                 No. 0 interlensshutter; T, 1-11500sec.; X sync;  Same as GW690l[.
                             shutterreleaselock. Providedwith hotshoeand sync
                             contact.
  Lens                 EBC Fujinon 90 mm, F3.5,5 components, 5 elements,  EBC Fujinon SW 65 mm, F5.6, 4 components, 6
                             non-interchangeable;1 m nearest focusing distance;  elements; non-interchangeable;1 m nearestfocusing
                          F32 minimum aperture; screw-in filter (70 mm outer   distance; F32 minimum aperture; screw-in filter (70
                              diameter, 67 mm inner diameter, 0.75 mm thread  mm outer diameter, 67 mm inner diameter,0.75 mm
                                   pitch); 58o [52o] covering power, equivalentto f:39    thread  pitch); 760 covering power, equivalent to
                   mm [f:44  mm] on 35 mm camera. Built-in retracta-   f:28 mm on 35 mm camera. Built-in retractablelens
                                ble lens hood.                                    hood.
  Rangefinder & Viewflnder     Double-image, coupled range-viewfinder; 0.75X mag-   Double-image, coupled range-vieMinder; 0.75X mag-
                                  nification;95% field of view at'l m,920/oal infinity;59   nification;93% field of view at 1 m,90% at infinity;59
                   mm base line length (44.3 mm  effective base line  mm base line length (26.6 mm effective base line
                               length).                                               length).
  Dimensions & Weight     H 119x W 201x D 129mm; 1,460g            H 119x W 201x D 132mm; 1,510g
  Other                        Shutter actuation counter, spirit level.             Same as GW690l[.
The data in brackets apply to the GW670il1.
Notice: Specifications are subject to change without notice.
View original page 8Page 9 · Read text
HOW TO USE                                        LOADING THE FILM

       READYING THE CAMERA                                                  1. Opening the camera backlnzotrv,-                                                                  To open the camera back, erect the camera back lock and press  it
           1. Attaching the shoulder strap                                down toward the camera bottom. (Fig. 5)
         o Buckle (Fig. 1-A)                                           To close it, keep the lock erect, press the camera back against the
         o Hoop (Fig. 1-B)                                                 body, then snap the lock down.
        Pass the strap ends through the camera's strap lugs and adjust the      o The Gamera back won't close unless the camera back lock  is
         strap length with the buckles. (Fig. 1)                                        erect.
         o To pass the strap end through the hoop, push the hoop back a       2. 12Ol22Ofilm selector
               bit so that you can do  it easier.                                    o Film Selector Lock (Fig. 6-A)
       O To carry the camera horizontally,use the strap lugs on both sides     While pulling the film selector lock, turn and set the film selector for
              of the camera; to carry it vertically, use the two strap lugs on the      the film you are using as follows: (Fig. 6)
             right hand side.
           2. Using the camera case                                               :   ,   :                                         6 x T c m F o r m a t    6 x 9 c m F o r m a t
        Use the soft case to protect the camera (Fig. 2)                                                                                                                                                                                       '                                                                                    ?i . '         220 roll film              20 EXP          16 EXP           3. Putting on the lens cap
         Just fit  it on the lens hood to protect the lens from dust and grit.          120roll film              10 EXP          8 EXP
           (Fis. 3)
        (Do not wipe the lens with silicon cloth because  it will leave tiny       120 half-length roll film        5 EXP           4 EXP
         abrasion marks on the glass. Take special care because dust and
        scratches on the lens can impair its sharpness appreciably. See     6 x 7 cm Format ..... Gw670lll
        paragraph entitled "Cleaning the Lens").                              6 x 9 cm Format ..... GW690l[ and GSW690lll
           4. Attaching the viewfinder eyepiece                                  o Be sure to set the film selector and pressure plate for the film
         Just screw  it into the eyepiece socket. (Fig. a)                           (120 or 22Ol you are using.
         o The eyepiece (-1 diopter) on your camera is designed for people              lf you don't use the correct side of the pressure plate, you won't
            with normal eyesight.                                                   get precisely focused pictures because the film will not move into
                                                                                    the exact focal plane.           l
                                                                              (120 roll film  is attached to an opaque backing paper over its
                                                                                      entire length, but such paper is used only on the leading and
                                                                                                   trailing ends of 220 roll film. The thickness of the backing paper
                                                                         causes a shift in the position of the focal plane and the pressure
                              www.butkus.us
View original page 9Page 10 · Read text
plate adjusts for this difference while keeping the film flat on the      aligned with the arrow mark  I  on the right hand side of the film   focal plane at one and the same time.)                             channel, then close the camera back. (Fig. 10)                                    E9,
Caution:                                                              (Avoiding   film slack)
 lf you switch the  film selector after loading the  film, caution  is      a To prevent the film from slackening, press down the leader paper                                                                                                                                                                                                                                                                                                                                                                                  J(,zUJrequired because the counter may not reset as  it should or the film       near the supply side lightlywith your finger so that it won't buckle,
may not wind properly.In such cases, the camera function will return       and wind the film advance lever firmly.
to normal if you open the camera back and reset the film selector to      o To prevent the film from becoming loose again when the camera
the correct oosition.                                              back is being closed, use the film advance lever to keep the
(Pressure  plate)                                                        leader paper taut until you snap the camera back into place.
 lf you are using 120 roll film, you'll have to use the side of the      (Positioning  the start mark on 220 roll film
pressure plate marked "12O" and if you are using 220 roll film, you,ll     o  lf you are using 220 roll film, line up the solid arrow mark (normal
have to use the side marked "220".  (Fig. Z)                              lead mark) with the arrow mark I   in the film channel. Do not use
To turn over the pressure plate, just push it toward the arrow and lift        the thin hyphenated line (long lead mark). (Fig. 10)
 it out.
3. Loading the take-up spool and film
 o Spool Knob Release Buttons (Fig. 8-A)
(1)Pop out the spool knobs by pressing in the spool knob release
   buttons (small red buttons in the supply and take-up sides).
    (Fis. 8)
(2)Take out the empty spool, fit it into the take-up chamber (located
   on the same side as the film advance lever), then press in the
   take-up spool knob.
(3) Load the film in the film chamber (located on the same side as      5. Winding the film and positioning  it for the first shot
   the viewfindereyepiece),then press in the film loading knob.        o After loading the film, just wind the film advance lever as far as  it   (Fis.e)                                                                                          will go. The exposure counter will switch from "S" to "1" and the
o The take-up spool and film roll can be loaded easier by fitting in        shutter will cock by itself. (Fig. 11)  the top (camera top) side first.                                                O Tear off the top of your film box and insert it in the film reminder4. Positioning the film start mark                                                                                  slot in the camera back.  lt will remind you which film you are
Pull out the film paper leader, pass it through the film channel,insert       using. (Fig. 12)
the tip into the slot of the take-up spool, and wind the paper leader
around the spool with the film advance lever.
Stop winding as soon as the film start mark on the leader paper is
View original page 10Page 11 · Read text
m     SETTING AND ADJUSTING THE CAMERA                              parallax as you focus.
       CONTROLS, ETC.                                                 o Moving top and left-side frame lines. (Fig. 16-C)
                                                                            o To take infrared prctures, measure the distance of the subjectzotrv,                                                                                    with the focusing ring and set that distance to the infrared markI          1. Unlocking the lront shutter release                                                                                   (red line labeled "R"). This will make up for the slightly nearer                 lf you can see the letter "L", the shutter release is locked. To unlock                                                                                    point on which you'll have to focus. (Fig. 17)                it, push the front shutter release lock toward the lens so that  it                                                                             (Using  the depth of field table)        covers the "L". (Fig. 13)                                                                       Depth of field is the zone of sharpness in front of and behind the           2.  Built-in lens hood                                                                                  point on which the lens is focused and it varies with the lens fobal        The lens hood is built into the lens barrel. To use, just pull it out.                                                                                     length, aperture, and shooting distance. Your camera is provided          (Fis. 14)                                                                                 with a depth of field scale on the lens top on both sides of the lens         o Just pull out the lens hood while turning it. Thus, you can do  it                                                                                       setting mark, but for more detailed readings, refer to the accompa-            easier.                                                                           nying depth of field table for your camera. ,..       I           3.  Setting the shutter speed selector and aperture  ring                                                                        Example:                                     {JU'In'1,,  >", 5         o Shutter Speed Selector (Fig. 15-A)                                                                                                                                                  lf the focal length of your camera is 90 mm and you are shooting         o Aperture Ring (Fig. 15-B)                                                                            from a distance of 5 meters with an aperture of F8, everything          Pull out the lens hood and set the shutter speed selector and                                                                      between 4.09 and 6.46 meters from the camera will come into sharp          aperturb ring for the picture you are taking.                                                                                focus.         o Be sure to  set the shutter speed ring at the  click positions.
           Caution is required because the shutter blades may not open  if
           you set  it anywhere between click stops.
           4. Focusing the lens
        Look through the viewfinder eyepiece, center your subject in the
         vieMinder, and turn the focusing ring to make the double images in
         the yellow center spot in the viewfinderconverge into one. (Fig. 16)
         o Bright frame (Fig. 16-A)
         o Double-imagecenter spot (Fig. 16-8)
         o Always line up your eye with the center of the viewfinder eyepiece.
                     lf you don't, the yellow focusing spot will move off center of the
            bright frame and you won't be able to focus the lens precisely.
           5. Composing your picture
       O Compose your picture within the bright frame. The top and  left
            sides of the bright frame will automatically move and correct for
1 0                            www.butkus.us
View original page 11Page 13 · Read text
m       6. Winding the film and cocking the shutter                               7. Unloading the film
         o  lf the number "1"  is showing in the exposure counter, the shutter     o After you complete exposing a roll of film, wind  it up to the very zotr        blades will open and close when you press in the top or the front       end with the film advance lever. A sudden release of tension willv,         shutter release.To advance the film and cock the shutter for the          tell you that the trailingend has left its spool and that winding has I           next shot, just wind the film advance lever two times.                been completed. To wind the film completely, it will take about
         o The first stroke will cock the shutter and advance the film partially;       three strokes after the release of tension.
           the second stroke will complete advancing the film. The winding        Next, open the camera back, take out the exposed roll of film and
           angle of the film advance lever will therefore differ on the second        seal the end to prevent the roll frorn unwinding. (Fig. 20)
           stroke with the amount of unexoosed film left.                       o The empty spool is transferred to the take-up side for taking up
           Note:                                                                 the next roll of film.
         To test  if the shutter operates or not, open the camera back. You       8. Taking flash pictures
           cannot press down the shutter release with the camera back      o  lf you are using a small-size clip-on flash, clip it into the accessory
           closed.                                                      shoe on the camera top. (Fig. 21)
         (Shooting  with the camera held vertically)   (Fig. 18)                 o To use the sync socket, turn the sync socket cover with your
                 lf you are shooting with the camera held vertically, use the front        finger in the direction of the arrow, then plug the cord into the
          shutter release. lt will let you hold the camera steadier.                    socket. (Fig. 22, 231
         (Using  a tripod)  (Fig. 19)                                         o The 65 mm lens of the GSW690lll has a covering power of 760 or
                lf you are shooting indoors or nighttime pictures with a shutter       eouivalent to that of a 28 mm lens on a 35 mm camera. This
        speed of 1/30-second or slower, use a tripod and a cable release.       means that a flash with a small covering angle will not provide
         (Time  exposure)                                             enough light along the picture edges. Be sure to use a flash with
        To take long-exposure pictures, set the shutter speed selector to "T"        a covering angle that is wide enough for a 28 mm lens on a 35
         (Time) and press in the shutter release.The shutter will remain open     mm camera.
        even if you take your finger off the shutter release.                    o Your camera has an X-contact, that  is, electronic flashes will
        To trip the shutter, just turn the shutter speed selectorback toward       synchronizewith all shutter speeds.
              " 1 " .                                                               o  lf you are using a flash bulb, use an M-class bulb with a shutter
                                                                                    '1l3O-second         o On time exposure, it  is also possible to  trip the shutter by       speed  of                or  slower.  lf  the  shutter soeed  is
           operating the film advance lever, but the film will advance and       1/60-second or  faster, the flash will discharge but  it  will not
         move your picture out of position in this case.                       synchronizeproperly and a large part of the light will be lost.
          To  trip the shutter on time exposure, always turn the shutter
          speed selector. Do not operate the film advance lever.

1 2
                             www.butkus.us
View original page 13Page 14 · Read text
CAMERA CARE AND MAINTENANCE                                 with  the  other mechanisms as soon as  the  shutter has been                                                                    actuated 10,000 times (when the counter returns to 000 from 999).          I2
It is assumed that most of you who oWn a Fuji GW69Oil, GSW69OIII     Note:
or GW670ltl are professional photographers who will put the camera          It would be wise to have your camera overhauled sooner if you take                                                                                                                                                                                                                                                                                                             JozUJto hard use and who cannot afford to develop camera trouble in the      a lot of pictures near the ocean or under other adverse conditions.
middle of a job.                                                                2. Ghecking the camera before shooting
It is therefore hoped that the following instructions and recommen-     Before loading film in the camera, make  it a habit to perform the
dations will be studiously heeded.                                      following checks.
1. Using the shutter actuation counter                                     (1) Film advance unit
Your camera is provided with a 3-digit shutter actuation counter in    Open the camera back and, while watching the take-up spool, wind
the bottom which will tell you how many times the shutter has been      the film advance lever to make sure the film advance unit is working
used so that you'll know when the camera needs maintenance.        smoothly.
It counts 10 shutter actuationsas 1;that  is, if  it shows 150, the      (2) Camera back interior
shutter has been actuated 1,500 times. After reaching 999 (9,990    Open the camera back and turn the four rollers (two on the camera
shots)  it will return to 000 with 10 more shots. (Fig. 24)               back and two on the camera body) to make sure they are working
(Overhauling)                                                         properly. Also, check the film pressure springs in the film take-up
Your camera is a precision instrument and  it is subject to fair wear     and supply chambers to make sure they are attached properly and
and tear. The heart of your camera is the shutter.  lt  is intricately    can exert sufficient pressure on the film.
constructed, precision-assembled,more delicate and less enduring      (3) Rangefinder
in consistency than the other parts, and shutter trouble can be     While watching the double-image focusing spot  in the viewfinder,
ruinous to your photographs.lt is therefore recommended as follows     focus the lens at infinity and at nearest focusing distance to make
on the strength of thorough factory tests.                             sure the focusing ring is operating properly. lf you can open the
(1) Shutter                                                 camera back and check the focusing image on the film plane with a
Normally, interlens shutters perform perfectly up  to about 5,000     sheet of ground glass and the milky-whiteTAC film that comes with
shots,  after which  they become  less accurate and may  start     your camera, all the better. The ground glass and TAC film should
behaving erratically.After 10,000 shots, the shutter blades will no     be placed on the inner focal-plane rails, not on the outer and
longer open or close, which means they have reached their endur-     elevatedfilm guide rails.
ance limit. Be sure to have your shutter overhauled as soon as it has      (4) Shutter
been actuated 5,000 times; that is, when the counter reaches 500.     Check the various shutter speeds through the camera back. You
(2) Film advance unit and others                                  can more or less tell whether the shutter is operating at the right
The film advance unit is much more durable than the shutter. To be     speed or not by the amount of light it passes through and by the
on the safe srde, however, you should have it overhauled together     sound it makes.
                                                                                                         1 3
View original page 14Page 15 · Read text
m        (5) Aperture                                                          lenses.
       Open the camera back and turn the aperture ring to make sure the       4. Precautions
        aperture blades open and close smoothly.                             o Always load and unload film in subdued light.zotr
                                                                                                       leave your                                                                                                                                                         in a closed                                                                                                                                            car or in          (6) Flash                  synchronization                                                                                       hot                                                                                      weather,                                                                                       do not                                                                                                   camera                                                                            o InU'-                                                                                     places                       flash, open the camera back, open up the aperture fully,                                                                                                        temporarily                                                                                                                                        for                                                                                                               a very short                                                                                                                                         time.            on the                                                                                moist                                                                                          except         Clip
         set the shutter speed selector to the speed you want, then press in      o Always clean your camera before and after taking pictures. Clean
         the shutter release. lf light comes in through the lens, flash and        the  interior with an  air blower, and wipe  off the exterior with
         shutter speed are correctly synchronized.                                   silicon cloth.
         (lmportant)                                                         o Put your camera away where  it is cool dry, and free of dust. And
       Camera trouble can cost you dearly both materially and otherwise.        don't forget to put the lens cap on.
        Always check  your camera before use and have  it overhauled     o  lf there  is soil or dust in the film chamber, the film may be
          periodically so that you can be sure of yourself at all times.               scratched. Be sure to clean the camera interior from time to time.
          3. Cleaning the lens
       As mentioned earlier, scratches on the lens surface can reduce its
        sharpness far more than you would think.  lf the contrast of your
         picture seems somehow insufficientand it doesn't look crisp enough,
         the cause is usually scratches on the lens surface.
        (How   to clean)
           (1)First, blow off dust from the lens surface completely with an air
            blower.
           (2) Next, moisten a sheet of lens cleaning paper with plenty of Fuji
            lens cleaning fluid and wipe the lens gently with  it in a circular
            motion. Always start from the center then gradually move out to
            the edges.
          (3) Finally, after all contaminants have been removed, wipe off the
           remaining lens cleaning fluid with a dry sheet of lens cleaning
            paper. Again, start from the center in a circular motion then move
            out to the edges.
        Caution:
         Breathing a mist on the lens surface then wiping  it off with silicon
         cloth or other similar material is the worst thing you can do. Never
        do  it because this is one of the main causes of scratches on camera
1 4
                              www.butkus.us
View original page 15Related documents and language editions
From the M. Butkus archive. Original publisher and archive notices are retained.
Check the model and edition against your equipment.
PDF verified 2026-10-10.