Film cameras
Kodak Retina I User manual
User manual for Kodak Retina I. 25 pages in English. Read the original PDF, download or print a copy without registration.
25 pagesEnglish1.9 MB PDF
Loading your manual…Open PDF directly
Document details
- Brand
- Kodak
- Model / document
- Kodak Retina I
- Document type
- User manual
- Language
- English
- Pages
- 25
- File size
- 1.9 MB
- Category
- Film cameras
- Document date
- Not specified in catalog
Search available document text
Find a term, then jump to its page in the original PDF. Image-only pages may not be searchable; check the PDF for exact wording and diagrams.
Page 3 · Read text
www.orphancameras.com
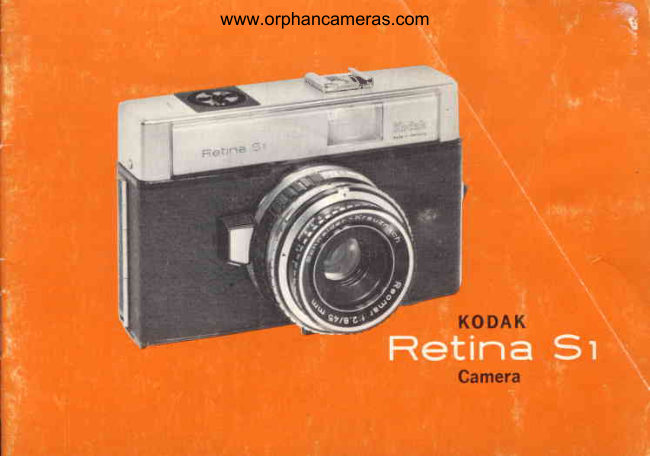
                             Your Kooex  RnrrNe  Sl Camera is a
                         member of the long line of traditionally
                                  excellent RnrlNe  cameras. A  certain
                                  pride  of  ownership comes with  this
                              knowledge. Features of  this  versatile
                             camera include  . . . unique daylight ex-
                              posure control     automatic flash ex-
                              posure control with  rotating flashcube
                                                             . . . easy loading and unloading  . . . plus
                         many  other  features which  promise
                                  picture-taking ease and picture quality.
                               o Beforetakingany importantpictures-ona
      K O D A K                 trip or of a specialevent-take sometest pic-
                                 turesto checkthe cameraand your operation
                                    of it. Exposepicturesoutdoors,and indoorsRetina  Sr     with flash.lf time is pressing,black-and-white
      Gamera               film can be processedvery quickly.
                                       Note: Equipment subject to minor appearance
                                                                                     .   changes.


                              -*#i                                                                              ,ttir{.;
View original page 3Page 4 · Read text
www.orphancameras.com
PICTURE-TAKING. . . It's as easyas A-B-C!
After loading,and settingthe film speed,you . . .

Set the shutter speed; for   Set the lens opening for   Set the distance for Ctose-
exampfe,  at  I25    (l / I25   the preva iling lighting   ups, Groups,or Scenes.
sec.).                           condition.

     . You're ready to take the picture. Read on for the important  details of
camera operation.
Note:The shutterreleaseon your cameracannot be depressedunlessfilm has been
loaded in the camera, as on page 6.


                                                     Lfifrl',!,i+
                                     ?


                                   www.orphancameras.com
View original page 4Page 5 · Read text
www.orphancameras.com
       FILMS
        Your camera accepts Koon   135 film. You can make color prints, black-
         and-white prints, or color slides. Prints are handy to carry, mail, and make
        enlargements of-slides  are  brilliant,  compact, and good  for showing  to
         large groups. Select the film that provides the type of picture you want.

          color films
        Kooecrnome II  Film-For  color slides for  projection or from which color prints or
         enfargementscan be made. Expose by daylight or blue flashbulbs. 20 or 36 exposures.
         Koolcxnoue-X Film-A  higher-speed film than KooecHRoMEII,  this  film also yields
          color slides for projection or from which color prints and enlargements can be made.
        Expose by daylight or blue flashbulbs. 20 or 36 exposures.
         Koolx ExncrnoltE-X Film-For  color slides for projection, or from which color prints
        and enlargements can be made. You can process this film yourself or have it processed
         by a laboratory. Expose by daylight or blue flashbulbs. 20 or 36 exposures.
         Koolcolon-X  Film-A  negative color film for color prints, enlargements or from which
          color slides can be made. Expose by daylight or blue flashbulbs. 20 exposures.
         Koorx High Speed Errncxnome Film-This  extremely fast  film permits excellent color
          pictures in low illumination. Yields cotor stides for projection or from which color prints
        and enlargements can be made. Available in Daylight Type (for exposure in daylight or
         by blue flashbulbs) or Type B (for tungsten light). 20 or 36 exposures.
        4
.&.;                                                                     .,r;giflflE'                                                   .-:.,*i;il'Y*:k                i'tws*\,l$siu,*.,:    .      riui#iai".,,
View original page 5Page 7 · Read text
www.orphancameras.com
 Loading-always in subduedlight
 I To open the back cover  of  the camera,
press in  the bright  metal cover LATCH, as
shown, until the cover springs open.
2 As shown opposite, place the film magazine
in  its compartment, and rotate the built-in
TAKE-up spooI- until one of the two white
pressure cI-rps ls up; then slide the film edge
under the white clip as far as possible in the
direction of the arrow.
3 Close the back of the camera. Swing out
the film RAprDwrND LEvER and allow  it to re-
turn-repeat  until the lever locks.
4 Press down  the sHUTTER RELEASE;then
operate the rapid wind  lever  until   it  locks
again. Repeat this operation once more  to
bring the figure 1 into the center of the expo-
sure couNTER. You  are now ready  for  the
first  exposure. The  exposure counter  indi-
cates the number of exposures taken.
6
View original page 7
Page 9 · Read text
www.orphancameras.com
SETTING THE FILM SPEED
Set the speed of the fil*  loaded in the cnmera before taking pictures-other-
wise pictures will be incorrectly exposed. ASA  film speed values are given
on page 5 and in the instructions packed with the film.
  To set the film speed, press in and hold the rocr  stud while turning the
black knurled ring until the proper film speed number (or indicated number)
on the scale labeled ASA*  is opposite the orange INDEx line. A  film speed
setting of 64 is shown in the illustration.
'rThe scale marked DIN (15-27) applies to films rated by a different method.
View original page 9
Page 10 · Read text
www.orphancameras.com
SELECTINGTHE SHUTTER SPEED
Your camera has the following shutter speeds: 30 (l/30  second), 60, lz5,
and 250. These settings, along with the blue flashcube symbol (for flashcube
pictures only, see page 17) and the letter "B,"  for time exposures (see page
20), are provided on the sHUTTER-seEEDscALE.
  A shutter speed of   | / 125 (marked in red) is recommended for general
daylight picture-taking. The faster shutter speed of 1/250  is useful to mini-
mize the effect of subject or camera movement, while the slower speeds of
l/60  and l/20  can be used for less favorable lighting conditions.
  Rotate the sHUTTER-seEEDscALE until  the number  representing the
desired shutter speed "clicks"  into place opposite the red rNDEX Dor. Do
not make intermediate settings.


                                           l5$ lli
                                  T
View original page 10Page 11 · Read text
www.orphancameras.com
    SELECTING LIGHT-CONDITION SYMBOL (DaylishtPictures)
    From the blue and gray scale, select the light-condition symbol which rep-
     resents the prevailing light condition. Rotate the r-eNs orENING ollr  by its
     black, knurled ring  until  this symbol  is opposite the black triangular
     poINrER. This  setting adjusts the lens opening  for  the  light  condition
     selectedon the symbol scale.
            If a symbol in the blue background (good lighting conditions) cannot be
     set opposite the triangular pointer, select a faster shutter speecl(ll25O  in-
     stead of  I ll25).   fi a symbol in the gray background (poor lighting condi-
      tions) cannot be set opposite the triangular pointer, select a slower shutter
     speed.
             If you prefer to make f-number  settings directly, lens opening values   N
     from  f 12.8 to  f 122 on the lens opening scale can be set opposite the white
     index line.


    1 0
;lied                  ;jl   ,        ,:*H*d*;";r;;;xiu**;uri;';ur*$&*,g$i",*-,!Ji*;i:;i#L;;*,     ,.tiui:*;ji;r;";;clkg;r*oius,,rn..*.$j*&d&,                   **
View original page 11Page 13 · Read text
www.orphancameras.com
SETTING THE FOCUS        .
Handy, Zone Focusing: For quick focusing, a symbol-type scale appears on
the rocuslNc scALE.The right hand (head and shoulders) symbol represents
CLOSE-UPS (3t/z to 8 feet), the middle symbol represents GROUPS (8 to
18 feet), the left hand symbol representsSCENES (beyond 18 feet). Rotate
the focusing ring to position a symbol opposite its triangular pointer.

Scale Focusing: For more accurate focusing (distance settirg), and always
for  flash, use the footage scale. Estimate the camera-to-subject distance
carefully; then rotate the focusing ring until the-orange number, represent-
ing the camera-to-subject distance in feet, is opposite its triangular pointer.
The blue bar under the footage scale is useful for flash only. A metric scale
(white figures) is also provided for distance settings in terms of meters.
View original page 13
Page 14 · Read text
www.orphancameras.com
VIEWFINDER
Hold the camera either horizontally or ver-
tically, depending on the nature of the subject.
Center your eye on the rear eyepiece of the
viewfinder so that  the complete luminous
viewframe in the finder is visible. The image
seen within  this viewframe will be included
in  the picture, except at short camera-to-
subject distances. To  avoid  "cut-off" when
the subject is closer to the camera thanT  feet,
aim the camera so that the subject image is
below or within an imaginary line drawn be-
tween the two pointers on opposite sides of
the luminous viewfraffi€, as illustrated above.
An equal area will be added to the opposite
boundary of the picture.


                           13
View original page 14Page 15 · Read text
www.orphancameras.com
SHUTTER RELEASE AND FILM ADVANCE
Because of  the double-exposure prevention
feature of your camera, the sHUTTERRELEAsE
can be depressed only after the RAprDwrND
LEVERhas been operated. Always press down
the shutter release as far as it will go with a
slow, sqLteezingaction.
  Swing out the rapid wind lever to the limit
of its travel and allow  it to return to its orig-
inal position; this sets the shutter and ad-
vances film for the next exposure.

DAYLIGHT PICTURE.TAKING STEPS
After loading the camera and setting the ASA  film speed .  .
1 Set the shutter speed; l/125  sec (L25) is recommended for generat picture-taking.
2 Set the lens opening by bringing the appropriate light-condition symbot opposite the
black triangularindex.
3 Set the focus by the handy 3-symbol scale, or by setting the footage scale for the
camera-to-subjectdistance in feet.
4 Compose the picture within the luminous viewframe of the finder.
5 Hold the camera steady and press the shutter release atl the way down with a stow,
squeezingaction to take the picture.
L4
View original page 15
Page 16 · Read text
www.orphancameras.com
UNLOADINc-always in subduedtight
After the last exposure (20 or 36), and
before opening the camera, rewind
the film into  its mag azine, as follows.
(1) Push in the npwrND LocK. Hold  it
and push the REwTND sLrDE toward
the base until   it  locks  in  its down
position.  (2) Operate the film RAprD
wrND LEVERuntil the diamond-shaped
mark  (f)  is centered in the exposure
coUNTEn; then, operate the lever sev-
eral more strokes to wind the film into
the ma gazine. (3) Open the back cover
of the camera by pressing the cover
latch on the bottom  of  the camera
(shown on page 6), and remove the
film  magazine.
View original page 16
Page 17 · Read text
www.orphancameras.com


FLASH PICTURES
Your camera provides X-type synchronization for the 4-bulb flashcube,
flashbulbs (in cordless-type flasholders), and electronic flash.

Battery: One 5.6 volt, mercury-type  battery such as the Mallory  PX-23
(supplied) is required to supply power to fire flashcubes.Open the battery
compartment on the bottom of the camera by pushing the covER in the
direction of the arrow and swinging it open on its hinge, as shown. Clean
battery terminals with a rough cloth; then insert the battery with its positive
(+) terminal toward the center of the camera, as illustrated. Close the cover
by pressingit down firmly until it locks.
IMPORTANT:Flashfailureusuallyresultsfrom tarnish(ofteninvisible)on cameraand
batterycontacts.Cleanbatteryand cameracontactsoftenwith a rough,damp cloth.
lf flashfailurepersists,installfresh batteries.
1 6
View original page 17
Page 18 · Read text
www.orphancameras.com
FLASHCUB ES
o Set Flash Exposure Gontrol-Rotate the sHUTTER-spEEDscALE until the
FLASH SYMBOLclicks into place opposite the red INDEX DoT, as shown in
the illustration; then set the lens opening dial at f 122 and,rotate the focusing
scale back and forth until the two scales are locked together. This coupling
automatically sets the correct lens opening as you focus the camera for
subject distancesbetween 5 and 18 feet (indicated by blue band).


                            pggirl $$ 3ff
                                              ry

                               'k&                                              gf                 W tt 1#                                   "#,,"ttft,,,+
View original page 18Page 19 · Read text
www.orphancameras.com
o Insert Flashcube-Insert a FLASHCueein
the flash socket on the top of the camera;
with one of the four bulbs facing forward,
press down the cube until  it snaplocks in
place. The cube revolves V+-turn each time
film  is advanced for  the next exposure,
thus providing flash for four exposures if
a fresh cube is in place. To remove a used
or partially used cube from  the camera,                      F{eltrra
lift  it out of the socket. When returning a
partially used cube to the camera, make
sure that a lresh bulb  is lacing forward
before the exposure is made. The flashcube
can be rotated manually in the direction of
the arrow.


1 8
View original page 19Page 20 · Read text
www.orphancameras.com
         . set the Distance-Rotate  the focusing scale until the orange number, r€p-
     resenting the subject distance in feet (between 5 and 18 feet, as indicatedTt    by the blue band) is opposite its triangular index.
     o Flash the Picture-Compose  the picture within  the luminous viewframe  of
     the finder, hold the camera steady, and press the shutter release slowly to
     flash the bulb and take the picture.

     Other Flash Sources
     Your camera accepts:
          I  Gordless'type flasholders with a center contact  in the base, such as the
     Kooesrrrz   Flasholder,  slip into  the shoe-type bracket on the top  of thenib-    camera. Set the shutter speed for  1/30 sec (30) and determine the lens
}    opening from  the table on the flasholder or  in the film  instruction  sheet.
      2. Efectronic flash equipment-Set  the shutter speed from  ll3o  to  llz50
     sec. See instructions packed with your flash unit.


                                                         19                                              *'J.l&-',-,                              -J;a;,...r;j.;":*,i*i;.     " r#;&r;;,;;;.,f         ..i;E
View original page 20Page 21 · Read text
www.orphancameras.com
   TIME EXPOSURES
       If a subject needs a longer exposure time
    than  I l3O second, such as for night pic-
    tures or other low-light  situations, place
    the camera on a firm support*-the   and make a
    time exposure. Rotate      shutter speed
    scale until the letter "B"  clicks into place
    opposite the red index dot, as shown. Now
    the shutter will remain open as long as the
    shutter release is depressed. The exposure
    time depends on the lens opening (l-num-
    ber) used and the light  available (do not
    use symbol  scale). To  reduce camera
   movement use a cable release attached to
    the threaded socket in the underside of the
    shutter release.

   SETTING EXPOSURE COUNTER
      If the exposure counter has not returned
    to the diamond-shaped mark  (a)  for any
      ';'A threaded tripod socket is located on the base20   of the camera.
View original page 21Page 22 · Read text
www.orphancameras.com
reason (such as removal from the camera of a partially exposed film maga-
zine, without  rewinding),  the counter must be reset manually,  before
loading the camera again. Open the back cover of the camera, and with the
LocK LEVER depressed, rotate the spnocxnr  until the diamond mark (O)
is centered in the counter.

CARE OF THE CAMERA
Your Kooer  Rprrrve Sl Camera  is a ruggedly built  precision instrument.
For long service and quality performance,  protect the camera from  dust
and dirt and avoid rough handling. IJse a rubber syringe to blow out any
dust that may be inside the camera. If the lens needs cleaning, first brush
or blow away any grit or dust. Wipe the surface gently with Kooer  Lens
Cleaning Paper.  If moisture  is needed, use Kooer  Lens Cleaner.
  Do not attempt to make any repairs or remove any parts from the shutter,
lens, or camera. Never oil the shutter or any parts of the camera. If you find
that service is necessary,see page 24.


                                                            2r
             ..,*r+.i1,,'*'6*                               ;,li?6ffi&d&*rfi44"
View original page 22Page 23 · Read text
www.orphancameras.com
PHOTOAIDS
 Koorx Rentrl Field Gase, Modil K-This  attractive, black, plush-lined case will provide
 maximum protection for your camera. This case attaches to the camera by a snap
 fastener, which fits a receptacle in the base of the camera. The fold-down front permits
 instant picture-taking with the camera in  its case. The case is supplied with a hand
 strap, and an adjustable extension strap.
Adapter Ring, Series 5 (screw-in type)-Permits  use of Series 5 filters and other tens
attachments.
Koolx  Relll   Lens Attachments  (32mm)-For   close and  ultra-close  pictures, the
Koonx RErtrunClose-Up Lens Set N/32, and the Close Range and Viewfinder Kit Model C
are available. Filters for both black-and-whiteand color, and the Koonx REnna 32 Lens
Hood (to protect lens from extraneous light) can also be obtained from your photo
dealer.
Koorx Flashcube Extender-Produces more pleasing modeling and shadow effects by
increasing the distance between the flashcube and the lens.
Koonx Proiectors-A  Kooex projector or viewer will show your color slides big, bright
and sharp on the screen. Ask your dealer to see the low-cost Kooex Renoyuerlc Viewer
or the popular Kooex Cnnoussr projectors.
Koonx Publications-Koonx  Publications cover a wide range of subjects. Your dealer
will be glad to show you, for example, "How to Make Good Pictures"-perhaps  the
most popular picture-taking book of  all time-and  other inexpensive books on pho-
tography.
22

                    .-d-qdrs*&es.6**.     ,   :u!&ij^k}u,eilo          :!qdr^   .,;*dk!aL.                  ierye-r*$.€i$trIrii4t
View original page 23Page 24 · Read text
I  I                     www.orphancameras.com  I
 I  CAMERA FACTS
'      Film: Film Load-Koorx  135, 20- or 35-exposure magazines.
     NegativeSize-24mm  x 36mm.
 l     L"nrt 45mm,  f/2.8  Schneider Rsounn Lens. Openings-f /2.8,  f/4,  t/5.6,  t/8,  t/n,
              f /76,  f /22.
     Shutter: Automatically cocks when film is advanced.
    Speeds-1/3O, 1/60, l/125,1/25O  second, plus "Flash" and "8"  setting.
    Release-On front of camera, or Koonx Metal Cable Rdlease No. 5. Double-exposure
        prevention.
     Flash Synchronization-Flashcubes at flash symbol; flashbulbs at 1/3O sec; electronic
        flash at all speeds.
     Daylight Exposure Gontrol: Set by five lighting-condition symbots. For films with ASA
      speeds 10 to 40O.
     Automatic Flash Gontrol: Correct lens opening set by focusing. ASA 10 to 400.
     Battery-Uses one 5.6-volt mercury battery.
    Focusing and Viewing: Focusing-Zone focusing (Ctose-ups, Groups, and Scenes) and
       scafe focusinC avz  ft to  I nf .
     Viewfinder-Projected viewframe type with parallax marks.
     Rapid Wind Lever: Advances film and sets shutter with one stroke; rewinds film  after
        setting for rewind.
    Photo Aids: An extensive line of specialized photo aids extends the picture-taking scope
        of your camera. See page 22 tor partial listing.

                                                            23
View original page 24Page 25 · Read text
SERVICE FACILITIES      www.orphancameras.comEastman Kodak Company         Eastman Kodak Company
 lf your Kodak camera should re-   Apparatus Service              Appa ratus Service
quire attention, complete service   800 Lee Road                   6300 Cedar Springs Road
facilities are provided at Roches-   Rochester, New York 14650         Dallas, Texas 75235
ter and in Kodak Regional Sales   Eastman Kodak Company         Eastman Kodak Company
Divisions  at  the  addresses  at   Apparatus Service               Apparatus Service
right. Also, service, covered un-   5315 Peachtree lndustrial Blvd.   1334 York Avenue
der the guarantee,  is available   Chamblee, Georgia 30005       New York. New York 10021
t h r o u g h    i n d e p e n d e n t s e r v i c e                                Eastman Kodak Company         Eastman Kodak Companyshops  in many  cities. For such                                 Apparatus Service               Apparatus Servicelocal, guarantee-covered service,                               1901 West 22nd Street           808 Rivera Roadplease see your Kodak dealer or                             Oak Brook, lllinois 60523           Whittier, California 90606refer to the yellow pages of your
telephone directory under Photo-   Eastman Kodak Company         Eastman Kodak Company
graphic Equipment and Supplies   Apparatus Service               Apparatus Service
-  Factory  Approved   Warranty    3250 Van Ness Avenue           1065 Kapiolani Blvd.
Service.                       San Francisco.California 94119   Honolulu, Hawaii 96807

                               GUARANTEE
Within a year after purchase, any repairs necessary to this Kooex Rsrrnn S1 Camera-bearing  a
serial number with "EK"  prefix-due  to a defect in materials or workmanship  will be made or,  .., .x
at our option, the camera  will be replaced without  charge, provided the camera has not been&fl
altered, modified, or disassembled  in any manner, No other warranty  or guarantee, express or'*F{{
implied, shall be applicable to this equipment. Nor are we responsible for loss of film, for other
expenses or inconveniences, or for any consequential damages occasioned by the equipment.
   In case of unsatisfactory operation, the camera should be sent directly or through  a Kodak
dealer to Eastman Kodak Company  or a repair firm authorized by us to make such repairs.  lt
should be accompanied by a description of the trouble encountered and other available informa-
tion regarding the camera, including the date and place of purchase.
         EASTMAN KODAK COMPANY .  Rochester, N.Y. 14650
Pr. No. 769288                                                                 Printed in the Unifed Stoles of Americo
t-67-CH-AE
View original page 25Related documents and language editions
From the M. Butkus archive. Original publisher and archive notices are retained.
Check the model and edition against your equipment.
PDF verified 2026-10-10.