Film cameras
GO TO User manual
User manual for GO TO. 18 pages in English. Read the original PDF, download or print a copy without registration.
18 pagesEnglish1.3 MB PDF
Loading your manual…Open PDF directly
Document details
- Brand
- Various brands
- Model / document
- GO TO
- Document type
- User manual
- Language
- English
- Pages
- 18
- File size
- 1.3 MB
- Category
- Film cameras
- Document date
- Not specified in catalog
Search available document text
Find a term, then jump to its page in the original PDF. Image-only pages may not be searchable; check the PDF for exact wording and diagrams.
Page 2 · Read text
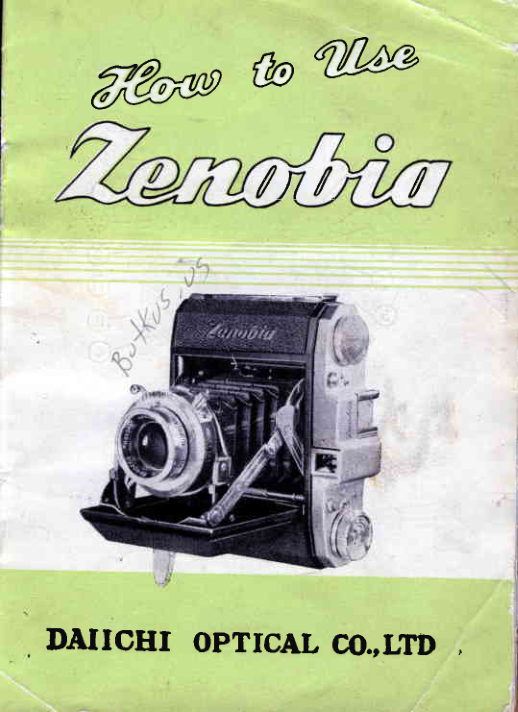
Figf-        Model C'l
(1)   Button to oPen Carnera
(2)
(3)
(4)
(5)
(6)
(7 )  Diaphragm  stop.
(8)   Shulter sPeed dial
(e)  S,hutter setting  lever
( 10)  Shutter release button
(11)  Fittd"t  Lens (objective)
(12)  Flash terminal
 ( 13) Shoe for accessories
(14) 'Depth of field scale
View original page 2
Page 6 · Read text
HOW  TO OPEN
                           Give  light  pudh on the opeq'
                            ing button (1) or slide the catch
                         in-Model R  and open the  lid
                           (base-plate) slowly  till   it stoPs
                            with  a  click.  Do  not  open
                      camera with  a  jerk  or  it  will
                          tend to cause trouble  to correct
                           focalplane of camera.


                HOW  TO  FOLD
                        Push both upper end  of  the
                          props and  fold  the camela bY
                           closing the  lid, and press it  till
                                                 it locks with a click.


                    LOADING   FILM
                                 Pull  out the slide lock at the


ri


                           spools are properly seated. Fix
                            the end of leader paper  of un-


                          pears in the ylpdow.
View original page 6Page 7 · Read text
CAUTIONS   ON  LOADING
        1. Do not load film  in direct  sun-light.
       2.  Iieep  outer package  of  film which
    indicates  sensitivity   of  the  fllm.
       3.  After  breaking  seal, be careful  not
     to allow  the  film  unroll-so      it   is safer
     io  load  film   first and then  cut the seal.
       4. Take  care  to  insert  the end  of the
     film  correctly  and  wind  on  until    )   {
    or <->   appears.

    Oi\r WINDING  FILM
          l.  Avoid  direct  sunlight while you
   read  film  number through the  ied-   window.
      2. Do not use force and wind slowlv
   so that no scar will be made on the fitm_
      3. When the new number of  nim
   appear in  the window, please be sure
   to close the slide-cover.

ON  UNLOADING    FILM
  - 1. Before  opening  camera,  turn  on
the winding  knob  until  you can ascer-
tain-the  film  is quite  taken up-to by the
winding spool and do not allow    unroll.
   2. Avoid  direct  sunliqht  when  vou
open  the camera and  rvhen  u,rtoadins
the  film  please hotd  tne  nf m'noi--i8
allow  it  unroll.
  3.  Before  sealing  the exposed  film,
turn  over the end of back paper-help  of the
film  5-6 mm and   tl is will        easier
work  in the dark  r -om.
View original page 7Page 8 · Read text
TO TAKE  PICTURE
 Focussing
  Open the camera to make ready  for exposure"
 Irirst you must get correct focussing. The figures
on the barrel of the front  lens indicate distance
 from the object to the film  in foot. Measure the
 distance with rangefinder or by a tape, and turn
 the lens barrel so that  the rqquired  figure  (dis-
 rance in foot) will come to the indicator. Measure
rnust be taken from the focal plane of the camera.
 First you must get a correct focussing.   If  focus-
 sing is incorrect, you can not make a good picture
 for  all other condition exposure etc. are good be-
cause the picture obtained will be out of focus.
The Diaphragm   (Aperture)
  Next you must adjust diaphragm"  Diaphragm
is the adjustable screento regulate the light allowed
into the camera and, at the same time,  to make
the  focal  field  of  lens thinner  or deeper. The
smaller you close the diaphragm, the deeper be-
comes the depth of  field, or in other words you
can get more clear-cut picture.  But in  this case,
you must slow down  the  shutter speed so that
sufficient  light can be allowed  into  the camera.
As shown  in  Fig.  5  opening of diaphragm  is
given in the figures-3.S; 4;5.6;  8;  and so on-
on  the  dial.    1'o  adjust  the  opening, move
the adjusting lever and thus.set diaphragm by
stopping the indicator at required number. These
View original page 8
Page 9 · Read text
figures show the proportion  of  effective aperture
          of  the  lens to  its  focal  length.  Therefore the
         larger the figure, the smaller becomesthe effective
        aperture of the lens naturally reducing the quantity
         of light allowed into the camera.
         Under the same light condition, when you wish
         to make shutter speed faster you must  set the
       diaphragm indicator at smaller figure (to get large
         aperture) and at a given shutter speed when light
        condition is poorer, you  will also have to adjust
       diaphragm at smaller figure to make wider open-
        ing to allow more light.
        The relative data between diaphragm and shut-
          ter speed based on the light  condition which en-
        nables an effective correct exposure at diaphragm
        3.5 and shutter speed 11250sec. is shown in  the
        following table.
        Shurter  Speed
        The shutter speedsadjusts the time of exposure,
        that is the duration of light allowed on the sensi-
         tive  film,  while  the diaphragm regulates the
        quantity of light allowed in to the camera.t
          Diaph ragm                     - f           3.5  4    5.6  8  1 1  16 22I       Shutter Speed                -  second -    r 125(Il25C1120(1/50| 125rll   r l 5
            In the above table, you  will  see that the change
          of diaphragm  by one graduation   (or scale)  calls
          for  corresponding  change  in  the  shutter  speed.
View original page 9Page 10 · Read text
To  mak!   Ficture   of  the moving  object, you
 must  use faster  shutter  speed  or   if  taken  at
 slow  speed you   vrill  have  the  object  blurred
 in  the  picture.
   To  adjust  shutter  speed, you turn  the outer


now  you  are  ready  to  take  a picture.   By
pushing   the   release   button   Fig.   1,   the
shutter   works   and   a  snap-shot    is  com-
pleted.

How    to  make   a  correct   exposure
   lVhen  you  take an upright   picture  you hold
the  camera   with   your  both  elbows   fixing
securely  on your  side  and  the camera  back
resting  on your  cheek  lest  the camera  moves
during  exposure  as  seen  in  the  picture  on
page  9.
  To  take  a side long picture,  you must push
shutter  release  rvith  your   left  hand  and  in
the  rneanwhile   you  must  kee p  your   righr
elbcw  f;xed on your  side.
  The  camera  may  be held   in  any  v/ay as
photographer   find   it convenient  but the thing
is  to hold   it secure-free   from  slightest  rnove
during  an  e:tDosllt'e,  that   is  at the  mone;rl-
when  you push  shutter  release.

I-Io'.'l  to  use  the  View-fi:rder
   Tlic   view-finder   is  usualiy  placed  abo,'c
tite  lens,  and  therefcre   the nearer  you  ap-
proach  the  object,  you  will   finC  the  centcr
of  the  field  of  the  finder  go  astray  from  the
center  of  the  field  of  the  film.   This    is  so
called a parallax.
  Alvrays  be sure  to see  the  object  through
t'he finder  keeping   the centers   of  the  eye-
piece  of  the  finder  and   its  front  giass  in  a
straight  Iine.
View original page 10
Page 11 · Read text
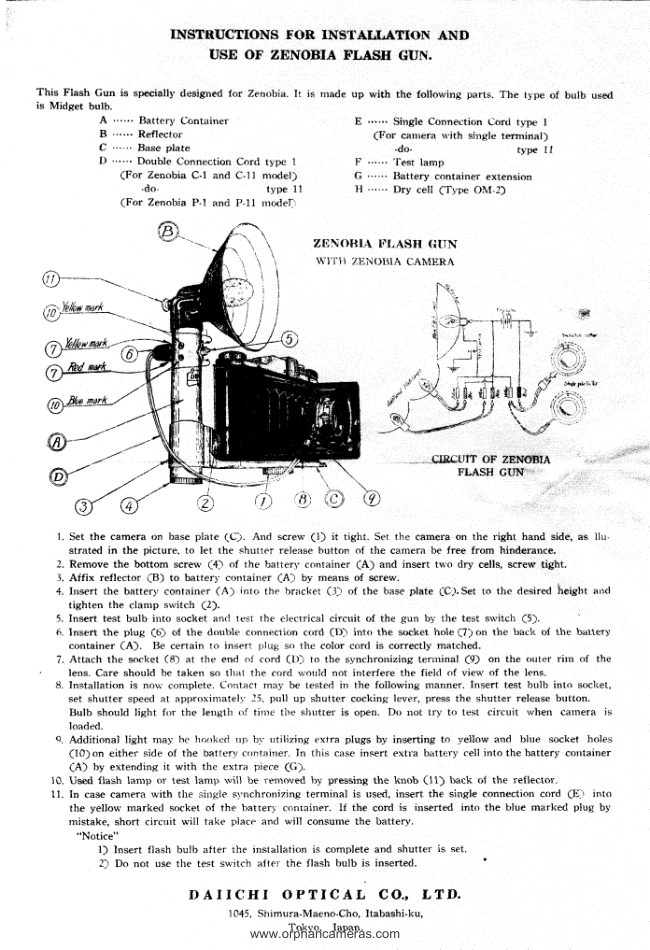
How   to  take  a flash  photograph
            Fix  a flash-gun  to the camera and connect
         both by circuit  cord as shown  in the Fig,  7.

By using two-way  circuit  cord, you  can  fire  a flas-h frorn
the gun detatched from  the camera. When  you  take flash
picture indoor or at night, longer time of exposure and largen
diaphragms are necessary for the distant objects than  in case
of close by obejct where shorter exposure and smaller aper-
ture can do-this    is  quite contrary to  the case of  ' outdoor
photograph by sunlight.
  The difference as above is based on the rule that strength
of  light   is  in  inverse  proportion  to  the squared distance
between the source of  light  and the object and the exposure
must be determined  by the distance of  the object from  the
flash.
  In short, to make  an exposure for  the  flash  picture, you
have to exercise contrary  precautions  to  adjust  diaphragm
(aperture) and time  of exposure relative  to the distance to
those observed for making sun-light photograph.  The shutter
speed for  a flash exposure must  be L 125 sec. in case your
flash bulb  is of time lug 15-20 m/sd and up to 11200 sec. in
,caseyou use flash bulb of time lug under 10 m/sd.
View original page 11Page 12 · Read text
How   to use  Range.finger
  (non-coupled)
                                                            'l        ZENOBIA Model  R " has a built-in range-
            finder,  not  coupled  with  the focussing of
           the lens, but only to find an exact distance
          from  the camera to the object.  You  look
          through  the eye-piece of the finder and will
            find a lighter  circular  patch in the center
         and the image of  your  object  is seen in
           two, inside and outside of the patch.
         You move the lever back and forth so that
         you  arrive  at  the  point  where  the  two
         images  of  your  object come to one, and
         you  will  read the figure on the scaled disk
          stopped at the red mark on the top plate.
         The  figure represents the number  of  feet
          from  the camera to the object.  Then  turn
           the front  lens barrel  so  that the number
            of feet inscribed on  it meets with the indi-
           cator and now- your-object ha-sbecome pr€-                                                                                         ,,,            cisely focussed on the film  of your camera.                                                                                                      !
To  prevent  double  exposure                                           \
        Make   jt  your             to wind  the  filmf                          -         -practice          immediately   after  making  an  exposure-*
          This   will  eliminate  the cause of  doubl5
            eXpOSUfe.                                                                                      ,l
                                          N?To  take  care  of  the  lens
         Keep your camera in a clean and dry place.
         Be sure not  to  touch the  lens  with  your
            fingers.     If  the  lens had  finger-print  by
          carelessness, give a light wipe immediately
           with  a  clean and  soft cotton cloth  or   it
              will become uneraceable.
                  If you find any dust on the lens, wipe the
           lens  with  a clean  and  soft  feather  or a
           brush.  Should you find a fibrous mold on
           the  lens, send the camera  to a  reliable
            optical works  for a cleaning.
View original page 12Page 13 · Read text
Depth  of  field  scale
   This scale serves to tell you how deep your
 object is focussed at a given aperturs  of  a
 len9.. The  figures  inscribed  al,ong the  rim
 of dial show the distance (between the camera
 and object)  in feet and the figures  given  in
an upright  line  in the inner disc denbtes the
diaphragm (aperture).
  When  your  object  is  10  feet  from  the
camera,  set the  arrow  at 10 feet (see Fig.
 7-1, ald    if  you  stop the  diaphragm   at  E,
the  object between 8 feet  to  15 feet from
the camera  will be in a.good focus as shown
in the picture.


  And A shows the furthest  limit and B the
nearest limit.   In  this  instance, A points at
(coincides) about  lS  feet and B   it  about
7/   feet and the objects in  the distance be-
tween 7ft   feet and 15 feet from  the camera
will be in a good focus.
View original page 13
Page 14 · Read text
this qqlsyryou can find the right opening of dia.   .In
 phragms to give a good focussing to ybur o6jects.
   After you made trials on many other distances and
 openings of diaph-ragm you  will  find  the  following
 facts concerning the depth  of field :-
   1.  The  smaller you  close the diaphragms,  the
    deeper gets the depth of the  field.
   2.      The.depth  of  field  is deeper behind the object         .
      in focus and thinner  in front  of  it.
   3.  The depth of  field  is deeper when the distance
     of the object is longer.
 Fixed  focus
  To take the instance of our   ,' ZENOBIA  " camera,
lvhen you  set diaphragm  at 10 and  the distance  at
25 f.t,, you can get  all object in a good focus  in  the
range from about 13 feet to the  infinite.
   In  other  words, you need not care  the  distance
about tle  objects beyond 13 feet from  your camera.
Thus,  if you  set the diaphragm   l0 and distance  at
25 feet, y-ou can  take  a- photograph  of  any objects
beyond about 13 feet  from  a iamera   in  the same
way with any fixed focus camera.  But you had better


Exposure   the  Foremost   Thing
View original page 14Page 15 · Read text
Daylight  Exposure  Table
     We give in  the following table some standard ex-
     posures under various conditions:
         A STANDARD TABLE OF EXPOSURE
         Object       Distance   Diaphragm   Shutter-speed
     Distant  view   of  over
     mountains,cloud.   50 meter      22     1/150 sec.
      etc.              (165 ft)
    Sea view                              l6      1/150 sec.
    Farm,    Fishing  over
      village,   country   10 meter      11     1/100 sec.
     side view          (33 ft)
    Water front view                 tt           1 1     1/100 sec.
     lJaseball  match
      etc.
             Snaptr  sportlng          5-10 meter       9      1/100 sec.                     2-5 meter       8      1/100 sec.     (near)
     Street  snapshot                     4-6 meter       8      1i100 sec.      in  bright   light
     5napshot  ln
    shadowy  light           ,,           6.3    1/100 sec.
     lutdoor   group
     Dortrait          4-8 meter      1 1     1/50 sec.
     Portrait outdoor  1-3 meter       8      1/50 sec.
     Portrait.  in
    shadowy lieht                        ,t            6.3    Li25 sec.
     Portrait  by
    a window        1.5-3 meter      8      1/10 sec.
     Place:  Japan          Season:   March*June
     Weather:  Fine          Tirne  :  11 a. m. -1p.  m.
     Film:   NEOPAN; NEOCHROM: pAN F: pAN X
             __(:Kodak  Plus-X Panchromatic film).
           When you use USS or SS film  (:K6dak
              S-uper-XX Panchromatic film),' increase
                  shutter speed by multiplying  3  to  the
              speed in the table.
View original page 15Page 16 · Read text
Note:
-  _ For an exposure at L0 a. m. and 2 p.m., slow down
 shutter speed bV 50%: for an exposuie at 9 a. m. and
 3 p.m.,  slow down the speed by half the speed in
 the table; and at 8 a. m. and 4 p. m. by TSfu^.
  On a light-cloudy day, you must slow down shut-       'il
 ter speed"into huff tfre'sp'ela,-""0- o"  a cloudv day.
 to one third  of the speed in  the table.
   - In the moqths, {.otr  July to October, speed up the
 shutter speed by double the speed and in the months,
 from November  to  February, you must slow clown
 the speed into a half of the speed in the table.
View original page 16Page 17 · Read text
I

    Colour  Photography
           you              use                   a colour                              you                                    film,                                  must                                       use a quite    ..WhenI   different           sense                  from                              in the                                case;f                                  a                                                    bi;;k:;J-;hi;;
    p_hotograph..First thing a colouiphotographe;-
    -rs a parnter's sense about colour,  its composition";A;or
    h.ut-o.ry-   it  -is not, of course, in  easy tisk  to ex-    plain in  brief.
    A colour film  h1s a very narrow latitude  (or an
    allowable r_ange of exposurey-much  smal-lei tt
   a  black-and-white film.  Therefore, a correct repro-""
    duc_tionof natural colours i" po"iini"  o"iy  ;h*      i;   make a quite adequate exposure.
     Generally speaking, colour  film  will need an ex-
   pos-urethree times as much than in case of a black-
   and-white film.  But   it  is  safer to use an exposure   meter for a better result.


       Our  Products:
                  " Zenopia  " cameras,
          Neo-Hesper  lenses,
           Pent-Hesper  lenses,
         E-Hesper F 3.5. 4 elements'enlarger
           Daiichi Rapid shutter (Comper rype),
         B-C Flash-guns, etc.
View original page 17Page 18 · Read text
DAIICHIOPTICALCO., LTD.
HEAD OFFICE: 1045 SHIMURA  MAENO'CHO,
              ITABASHI-KU, TOKYO, JAPAN
SALES DEPT.:  3-CHOME,KYOBASHI,
             CHUO.KU, TOKYO
                  ..DAIOPT,,CABLE ADDRESS:
View original page 18Related documents and language editions
From the M. Butkus archive. Original publisher and archive notices are retained.
Check the model and edition against your equipment.
PDF verified 2026-10-10.