Light meters
Gossen DIGISIX User manual
User manual for Gossen DIGISIX. 16 pages in English. Read the original PDF, download or print a copy without registration.
16 pagesEnglish1.0 MB PDF
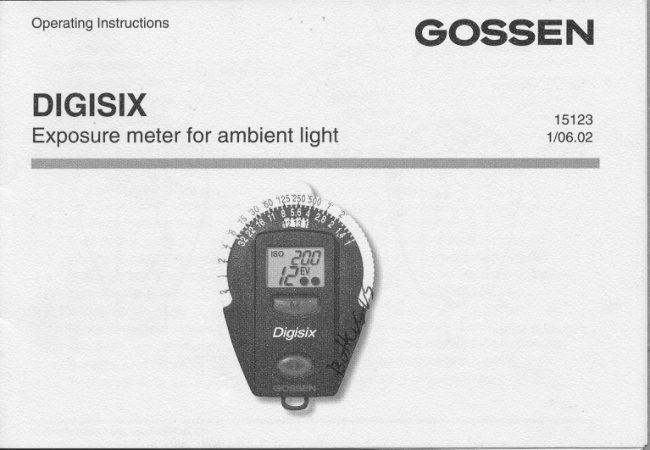
Loading your manual…Open PDF directly
Document details
- Brand
- Gossen
- Model / document
- Gossen DIGISIX
- Document type
- User manual
- Language
- English
- Pages
- 16
- File size
- 1.0 MB
- Category
- Light meters
- Document date
- Not specified in catalog
Search available document text
Find a term, then jump to its page in the original PDF. Image-only pages may not be searchable; check the PDF for exact wording and diagrams.
Page 3 · Read text
Content                              The Digisix is a small but smart GOSSEN
                                        exposure meter, with digital read-out,
1   The functioning of the Digisix  ..... 4    for ambient light. The D.igisix is made to
1.1 Preoaration and self-test  ................ 4   exacting GOSSEN calibration standards for
1.2 Incident light and reflected light          high precision measurements. The trendy
     measuring mode               5    styling and logical functioning make  it easy
1.3 Duration of read-out in display ....... 5   and comfortable  to operate.
2   Functions of the Digisix  .............. 6   Key features:
2.1 Setting the film speed ..................... 6    .  Incident and reflected light meas. mode
2.2 Exposure measurin9  ...................... 7    . pP controlled
2.2.1 Read-out of the values measured  .. 7    .  Digital LCD read-out in the display
2.2.2 T aking a measurement                        in 1/3 stop increments
      outside the measuring range............ 8    . Contrast readout in 1/3 EV steps
2.3   Contrast measurements ................. 9    . Storage of the measuring results
2.4   Setting correction values  ................ 9    .  lndication of all suitable combinations
2.5   Function TIMER              ......... 10       of shutter speeds and f-stops                                                  .  Signal "range over" or "range under"2.6  Watch/Alarm clock               ..... 122.7  Measuring temperatures  .............. 13    . Automatic battery check
2.7.1 Min./Max. temperatures  ...............  1 4    . Countdown timer for long exposures
3    Service and repairs  .................... 14    .  Function Watch/Alarm clock
4    Technical data  ............................ 15    . Measuring temperatures


GOSSEN Foto- und LichtmeBtechnik
View original page 3Page 4 · Read text
1  The functioning of the Digisix
1.1 Preparation and self-test
Battery                                       Self-Test
The Digisix is powered by a 3 V                After the new battery has been inserted,
Lithium battery, type CR 2032.                the microcomputer  will carry out a selftest.
When the battery is running low, the signal    Every display segment appears in the
BAT appears in the display.                   display panel.
                               as soon    The self-test takes 10 seconds. lt can be- The battery should be replaced
  as possible. When BAT is shown alone     interrupted before by pressing any button.
   in the display, the battery will need to be
   replaced before further measurements                                 iS8#ff'trH  are possible.
                                out the battery- To replace the battery, pull
  compartment placed under the eyelet for  the carrying cord.              ffffeu
            the old battery and insert the       After the self{est, the standard settings will- Remove
  new one. Observe the "+" and "-"         be shown as set by the factory.
   polarity!                                Standard settings
  Close the battery compartment         lso  100121" coR 0 EV   8-
Attention! Changing the battery will cancel
allthe individual values stored in memory.

GOSSEN Foto- und LichtmeBtechnik
View original page 4Page 5 · Read text
1.2 Incident light and reflected  light measuring mode
Incident light method                    The measurement  is taken from the position
For the incident mode, the diffusor is to be     of the camera towards the subject. In this
shifted to the left and placed in front of the    method, only the light reflected from the
measuring aperture. Taking measurements     subject is detected by the meter' Therefore,
using the incident light mode in particular      the measuring values always depend on the
produces perfectly exposed shots. In this       reflection capacity of the subject' As a result
mode, the DS measures from the subject      of this, bright subjects are reproduced
towards the camera. This guarantees that     darker and therefore not properly exposed'
the tone quality of the picture is equivalent    Consequently,  this mode is conveniently
to that of the subject. This is especially        used, when the suject does not show too
important for very bright or dark subjects'      high contrasts between bright and dark
                                                            Ut,1. & ;, , # "5Even under very difficult photographying      areas. iiconditions, as for example with subjects
which have a lot of contrast, the incident     1.3 Duration of read-out in display
 light mode is a more reliable waY of         The Digisix will always display the last
 producing well exPosed Pictures.              function used. The meter does not
                                              automatically switch off, as the power
 Reflected light method                   consumption is extremelY low'
 Forthe reflected mode, the diffuser must be
 shifted to the right. Care must be taken, that
 the light measuring aperture is entirely free'

 GOSSEN Foto- und LichtmeBtechnik
View original page 5Page 6 · Read text
2   Functions of the Digisix        2.1 Sefting the fllm speed
                                                  Select the function "Exposure" and holdPress the function button for selecting the     -
individual functions of the Digisix.            down the function button until the
Each time the button is pushed, the next         OK-signal sounds. The'display will show
function will be activated.                      lSO, blinking, instead of EV.
The     display panelwill                  show the functions in           tso             sequence.:the following
. Exposure metering +l
. Timer                                         I. Watch                                     I
. Alarm clock                                      I                  -. Temperature                            desiredUse the filmmeasuringspeed. key M to select the                       L_l
                                 When holding the key M pressed down,
The next function will only be activated after      the film speed will automatically be
the Function button has been released.           increased. When getting close to the
When the Function button is kept pressed                                              desired ISO value, release the key M
down for more than two seconds. the          and set the desired film speed by pushing
settings of that function are displayed and                                               the key in individual steps.
can be adjusted as desired.                  Each time you push the key, the film
                                        speed is increased by a 1/3 stop.


GOSSEN Foto- und LichtmeRtechnik
View original page 6Page 7 · Read text
Confirm the speed you selected by      2.2 Exposure measuring -
                                        Use the Function button to select the   pushing the Function button until the       -
   OK-signal sounds and the Digisix             function Exposure Measuring.
   returns to the function 'EXPOSURE,.      - The measurement is taken by briefly
   The film speed is shown in the upper right      pressing down the qreasuring key M.
   corner of the display.                                          (Su,lKt S_yS
                                              Read-out                                                                of the values                                                               measured       tso  ,-t f-tff              2.2.1The EV                                                   value measured                                                                                                  will appear                                                                                                      in the             '     1rJ|'J,                display. The values will be indicated  in         i  Elev-j                1/3 - stop increments by one dot, the
                                             2/3 - stop increments by two dots.    _)ao
 lf the film speed is changed, the measure-
ment read-out stored in the memory will be
immediately converted to the new ISO
settings.
The film speed selected  will stay stored
in memory until  it is changed in the way
described above.


GOSSEN Foto- und LichtmeBtechnik
View original page 7Page 9 · Read text
t2.3 Contrastmeasurements           2.4 Setting correction values
           Function button to select the         In order to deliberately change the- Use the
   function "EXPOSURE".                    exposure of your photos, you may adjust
  Keep the measuring key M pressed down    the factory calibration.-
  and the meter will switch over to contrast   - Remove the battery from the Digisix for
  measurement. Continue holding down        a moment and then put  it back again in
   the key to measure various other areas in      the compartment. The meter will then
   the subject. In the display, the difference     make the self-test.
                                               During this test, keep the measuring key  between the individual results of the       -
   additional measurements and the first        and also the function button pressed
  measuring value will be indicated in EV.     down until the accoustic signal sounds.
  A new metering will be made approx.         Release the key to enter the
  2 times a second.                     CORRECTION  function.
                                                                                                                                                                     i              Use the measuring key M to enter or
                                                                                                                                                                                                                                                                       I                change the correction value.
                                           Press the function button again to return the
                                           meter to the normal measuring functions.   uil_,After you have released the measuring key
M, the value of the first exposure measure-
ment will reappear.

GOSSEN Foto- und LichtmeBtechnik
View original page 9Page 10 · Read text
TIMERThe EV in the display will blink to remind    2.5 Function
you thatthe standard factory calibration has   A timer function is provided in the Digisix,
been changed. Input of the correction in       useful for long exposure or other timings
1/3-stops in the range of t 3 EV.              ranging from one second to thirty minutes'
                                         - Use the function button to select the
For cancelling the correction value, remove       function TIMER and hold  it down untilthe
the battery from the compartment  for a          OK-signal sounds. The display shows the
moment and then Put  it back again'                 last value used. The read-out will show
                                                  the "minutes" and will flash to allow the
In case of over-exposure a positive             countdown timer to be adjusted'
correction, in case of under-exposure         - Use the key M to enter the desired time
a negative correction value should be set'         in minutes.
                                         - Confirm by pushing the function button'
                                      The read-out "seconds" in the display
                          trlr                        EVi
                                                                                                                                                                                                                                                                                                                                                                                                                               i                                willflash.r

 GOSSEN Foto- und LichtmeRtechnik
View original page 10Page 11 · Read text
of the desired length - Enterthe "seconds"
    of time. Confirm by pressing and holding
    the function button untilthe OK-signalwill                                t    sound. The timer will now be in the StarU                fftf
    Stop function.
 - Push the key M to start the timer.                                                                                                                        I   The display will show the remaining time        Et'u
    of the count-down. In addition to that,
    during the last 10 seconds of the count-    - To pause the count-down, push the
   down, interrupted signals can be heard.      measuring key; pressing it again will
.   At the end of the set time, a continued           restart the count-down.
    signalwill sound                       The timer will work in the background so
                                                   that you can use other measurements.


 GOSSEN Foto- und LichtmeBtechnik
View original page 11Page 12 · Read text
2.6 Watch/Alarm clock
WATCH - Setting the time
  Use the function button to select the         Use the key M to set the hours and-
   function WATCH and hold the key down       confirm with the function button.
    until the OK-signal will sound.             The read-out "minutes"  in the display
   12124 will flash.                                    willflash.
                                       Use the key M for setting the minutes. To
                                               confirm settings hold down the function
                                               button until the OK-signal  is heard.          l'{tr
                                   ,5'{ff
- With the function button select either
  12 hours (AM/PM) -24hour display.
  Confirm with the function button.-
  The read-out "hours" will flash.


GOSSEN Foto- und LichtmeBtechnik
View original page 12Page 13 · Read text
ALARM CLOCK                   2.7 Measuringtemperatures
-  Use function button to enter the function    - Use the function button to select the
  'ALARM CLOCK" and hold it pressed          function TEMPERATURE and hold the
  down until the OK-signalwill sound.            button pressed down untilthe OK-signal
  The time of the alarm clock is set in the       sounds. To change between "C or "F
  same way as the watch.                       read-outs, press and hold the function
- Hold the function button untilthe              button until the display changes.
   OK-signal sounds.
- The alarm is activated or deactivated
   with the measuring button.                              15  When the alarm is activated it is shown   I   fqi-                                  trfF   in the display with a bell symbol.    xt-                                        ,
                                  ,;;;;h;, P,##ir;  j",,",-",',,"",     dAM Xttrili               temperature. The temperature probe is
                                             incorporated in the meter housing.
                                      As a result, the temperature measurement     frr                   may be affected  if you are holding the meter
  When the alarm is sounded  it will sound       in your hand. lf you attach the Digisix with-
  each second for 1 min.  lt can be stopped     the clip to your camera, these errors can be
  by pressing either the measuring key or     avoided.
  the function button.

wggvq9!q!9@w,l@@@r@@@
GOSSEN Foto- und LichtmeRtechnik
View original page 13Page 14 · Read text
2.7.1 Min./Max. temperatures        3   Service and repairs
When repeatedly pressing the measuring       In the event that your DlGlSlX is not
key, the minimum (Lo) and maximum (Hi)     working to your complete satisfaction,
temperature values will be indicated. The      please send it to:
minimum and maximum values indicated
                                GOSSEN Foto- und LichtmeBtechnik GmbHare those that have been measured since
                                            Thomas-Mann-Str. 1 6-20the last cancellation operation.
                                D -90471NUmberg
                                                  or to the GOSSEN agency in your country.          ,#j       1;' lfx                                              i        I

                                                                                                            I                       e  )^ )J   H
The min. and max. temperature values
stored in memory can be cancelled by
pressing the measuring key untilthe OK-
signal sounds. The temp. measurements
are repeated automatically every two min.
providing always the actual values. These
min. and max. temp. values will make  it pos-
sible for you to check, whether your films
may have been exposed to excessive high
temperatures and have been damaged.

GOSSEN Foto- und LichtmeBtechnik
View original page 14Page 16 · Read text
Battery                      l x3VLithium
                       battery CR2032
Operating temP.     -10 "c  ... 60 "c
Dimensions       75x50x23mm
Weight             40 g incl. battery
Accessories  incl.       Battery, carrying
                      case, cord,
                        instruction manual
Optional accessory    Mounting clip
                          for camera shoes
                    Order code V069A


 Printed  in Germany   ' Subiect without notice

 Bogen Photo corp.
 565 E. Crescent Ave.
 P.O. Box 506, RamseY, NJ 07446-0506
 Phone (201) 818-9177Fax   (201) 818-9177         GOSSEN
View original page 16Related documents and language editions
From the M. Butkus archive. Original publisher and archive notices are retained.
Check the model and edition against your equipment.
PDF verified 2026-10-10.