Film cameras
Hasselblad H1 film Pt. 4 User manual
User manual for Hasselblad H1 film Pt. 4. 39 pages in English. Read the original PDF, download or print a copy without registration.
39 pagesEnglish9.2 MB PDF
Loading your manual…Open PDF directly
Document details
- Brand
- Hasselblad
- Model / document
- Hasselblad H1 film Pt. 4
- Document type
- User manual
- Language
- English
- Pages
- 39
- File size
- 9.2 MB
- Category
- Film cameras
- Document date
- Not specified in catalog
Search available document text
Find a term, then jump to its page in the original PDF. Image-only pages may not be searchable; check the PDF for exact wording and diagrams.
Page 1 · Read text
www.butkus.usll0lnosnnnan


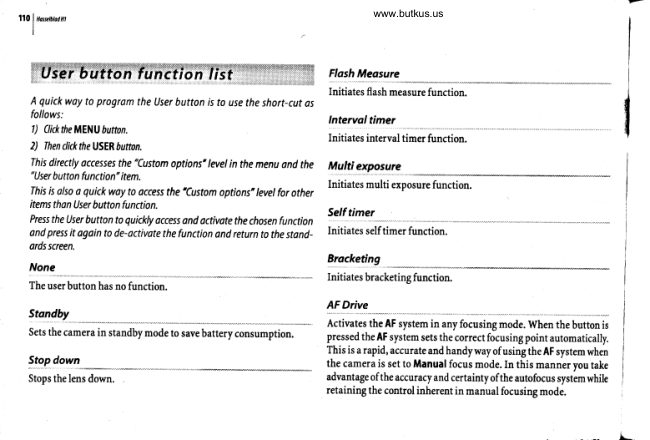
                                                                Flash Measure
                                                                                  Initiates flash measure function.
  A quick woy to program the User button is to use the short-cut as
   follows:                                                    lntervaltimer   l) Click theMENU button.
                                                                                  Initiates interval timer function.
  2) Then clickthe USER Dufron.
   This directly accesses the "Custom options'level in the menu and the   Multi exposure
   "User button function" item.
                                                                                  Initiates multi exposure function.
   This is also a quick way to access the'custom options'level for other
   items than User button function.
                                                                              Self timer
   Press the user button to quickly access and activate the chosen function
  and press it again to de-activate the function and return to the stand-    Initiates self timer function.
   ards screen.
                                                           Bracketing
  None
                                                                                  Initiates bracketing function.
  The userbutton has no function.
                                                 AF Drive
  Standby
                                                                          Activates the AF system in any focusing mode. When the button is
  Sets the camera in standby mode to save battery consumption.        pressed the AF system sets the correct focusing point automatically.
                                                                      This is a rapid, accurate and handy way of using the AF system when
  Stop down                                                      the camera is set to Manual focus mode. In this manner you take
                                                                    advantage ofthe accuracy and certainty ofthe autofocus system while  i6'  tr,. t.nr-Ililn.
                                                                         retaining the control inherent in manual focusing mode.


                                                                                                               L-
View original page 1Page 2 · Read text
H$sehtodffi1111


Mirror up                                                   Delete last image
                                                                                                                   for the last image in a digitalback' (NotControls th€ mirror up or down function (same function as the Activate the delete function
M-UP button).                                                    supported by all digital backs).

B mode                                                   Dig.foc check
                                                                        Displays last exposure taken at 100% scale on digitd bad$ with LCD,Sets the camera to B €xposure mode,
                                                                    (Not supported by all digital backs).
T mode
Sets the camera to T exposure mode.

Histogram
Recalls the last shown histogram. (Not supported by all digital
backs).

Grey balance exp.
Initiates a grey balance exposure. (Not supported by all digital
backs).

 Cycle LM mode
Changes the light-metering method in a loop manner: Centre
Weighted /Average/ Sp ot.
View original page 2Page 4 · Read text
Venmo @mike-butkus-camera  Ph. 2083
PayPal Name  Lynn@butkus.org      www.PayPal.me/lynnbutkus
View original page 4
Page 5 · Read text
tt&'ehtodffi
                                                                                                                                                 1113

                                      4,2,2Text
                                                                                                                                                                                                  .
                                                              ln Textyou ,on ,o^)rrrr;;;;:;ri ;;;:;i;;;;r;r ;;;r;;r;r, ;;;;;,, ;;r;;;, ;;;,;;;;l; ,;;; ;;;;,;
                                                   mation.The same procedure is also used to change a profile name.
                                           Film edge text composition:
                                         From 4.2.2 Text press ENTER.
                                                  Profile name change:
                                         From the standard screen, click on the PRoFIIES button, scroll to and highlight the name
                                                       in the profile list, and press Load. You will now be returned to the standard screen where
                                               you press the PRoFILES b-utton again. You will then be returned to the profiles screen again,
                                               where you press Save to finally access the 'profire name' screen.
                                                                          '                                                    0n the left side of the screen there is a smoll box frone contnining an X symbol ond two onow synbols.
                                                          By turning the front control wheel, the cursor will enter the box ind by tirning the rear control wheel the
                                                                         ltrsor                                                                                           will nove up ond down. These symbok describe whot witt happen to tie cursor on the row of text
                                                               being chonged when thesel.(AF) button is pressed. For example,irtt txi, the box is norked and you
                                                                           press fte Sel.(AFl button, the hrghlighted charocter in the teit row witt be deleted.  lf, however, you hove
                                                                        the left pointing orrow in the box highlighted ond presthe Sel.(AFJ button the cursor in the row of tut
                                                                                   will nove to the left to highlight another choroctu which you can then chonge or erose.
                                                         By turning the front controlwheel, the cursor noves horizontolly.                                                                         '
                                                                         '                                                         By turning the reor controlwheel, the cursor noves vertically and introduces alt availobte chorocters.
                                                           To storethe characters, proceed asfollows:
                                                    l) You can firctly dear on unwonted  line of text by hightighting theLsymbol in the box ond repeatedty
                                                            p resi n g tf e Sel. (AF/ button.

I)
View original page 5Page 6 · Read text
1nalnwauom                                                         www.butkus.us


                                           2) Find the chdrncter you wnnt by turning the reor control wheel until it oppeors on the soeen. (fhe'spoce'
                                                                chorocter is the 'empty spnce' to the left of ilte exclonation mark, top row furthest to the left).
                                           3) Move the cursor with o conbinotion of the front ond rear control wheels untit the desired character is
                                                                highlighted.
                                     4) Presst/re Sel.(AF) button to save the chorocter thot witt then oppeor along the lower port of thescreen.
                                           5) Continue with he sane procedure untilyou have completed the line of choracters ond symbols.
                                                                    Press tfie Save (DRIVE) button t0 storethe new setting.      rTFfirGEtrtEEr          6)
                                                           You con erase or chonge o character at any time in this node but remember to sove ony chonges node.


                                      Date & Time
                                                      l) From4 Settings, press theEnter (DRIVE) button.
                                        2) Turn the front control wheel unfil 4.3 Date & Time appenrs.
                                          3) Presthe DRIVE (Enter) button.
                                                       You will now see the following on the disploy.
                                          5) By turning the front control wheel you cnn nove the cursor to mark the foltowing for chonge: houn,
                                                              minutes, year, month ond day respectively. 8y presing the 24 h button (AF), you can choose between o 24
                                                          hour or 12 hour systen for time.
                                        6) Turn the reor control wheel to moke the chonges when the cursor  is conectly positioned.
                                      7) Pres fhe Save (DRIVE) button to storethe new setting.
View original page 6Page 8 · Read text
rt6lnadomn                                                        www.butkus.us
                                                                      $


                                                Used to checkcomponent  usogefor seruicing reasons.
                                                      l) Fron4 Settings, pras theEnter (DRIVE) button.
                                        2) Turn the front control wheel untit 4.4 Info lppelrs.
                                          3) Presstfe Enter(DRIVE) button.
                                                             The display now shows a.list of comuo conponents and to the right of eoch individuol onponent 0 figure
                                                                 thot represents the nunber of octions token by thot component.lleose ,ott- th1t even o comptetety niw
                                                   cnnert will have registered actions 0s these occur during testing before detivery.
                  ;s:llE     :.:,;.,,n:'-;                      Press the Next (DRIVE/ button to disptoy the softwore version for eoch component.
            TSES
                  SI*I'.    ffi GSfi    ,.;1
View original page 8Page 10 · Read text
www.butkus.us118

     lnosscnndnr


                                                 The Hl can be used together with most flash units. Connection  is via a PC socket or hot shoe ac-
                                                    cording to the flash units capabilities.
                                               Theviewfinder houses on integralfill-flash  with a guide number of t2 and features 1TF/TlLflash
                                                       control. This unit is capable of providing enough illumination for simple indoor shots at shorter
                                                       distances as well as many  fill flash functions outdoors.
                                                     Flash output con be adjusted separately from ombient exposure for optimum control.
                                                   Separate flash units can be used in dedicated mode when connected to the hot shoe if the unit is
                                                  compatible with the SCA3002 (Metz) system using a Hasselblad SCA3902 adapter. This provides a
                                                     cablefree link up for information transfer.

                                                 Automatic flash works equally well with digital backs as well as film back.
                                                         Flash synchronisation can be set to normal or rear (the beginning or end of an exposure).
                                                      Please see the relevant user manuals for information regarding separate flash units.
                                                /   n t with all strobe/studio flash use, very particular attention should be
                                       taken to ensure correct connections and generalhandlingpractice,  Potential
                                       dangers might increase when carneras are also connected to electronic periph-
                                            erals (digitalbacks, computers,lightingunits,  etc) and should diminishwhen
                                      IR and similar wireless flash release devices ere used.
                                          Victor Hasselblad AB can accept no responsibility whatsoever for accidents
                                         that might occur when Hasselblad equipment is used in combination with
                                            third-party units of any description.
View original page 10Page 11 · Read text
nascnnam
                                                                                                   1119


General
When using the A or S setting together with flash, the exposure requirements of the camera
will dominate which might produce slow shutter speeds indoors, for example, requiring the
use of a tripod.  If, on the other hand, you select P or Pv instead, then a shutter speed of 1/60
is automatically chosen by the camera enabling you to hand hold.
When using flash close up or when using larger aperture settings, remember that the flash
unit's output has a specific minimum duration which might still be too great for correct
exposure. Read the unit's output specifications  for further information regarding any Po-
tential restrictions.
You can use the flash metering capability with external flash units of all kinds (TTL flashes
must be set to Manual mode). The metering also works with digital backs.
Rear sync is a useful feature used either for effect or to produce a more 'natural'look when
combining long exposures involving light trails and flash.
When using suitable dedicated units (compatible with SCA3002), adjustments are made
automatically and governed by the settings on the camera. This applies to whether the flash
unit is set to TTL or whether  it is set to its own integral metering system (A). However, when
using a digitalback, the A mode on the flash unit is recommended.
Control of either the integral flash unit or separate SCA3002 compatible flash unit regard-
ing the two functions, exposure compensation and shutter sync, is via the grip. The flash
measure function can be used for flash units that are not SCA 3002 compatible or for SCA
3002 compatible units, studio/strobe units for example, at manual setting.
                            use an SCA 3902 adapter shouldbe connected to the/   Only flash units that
hot shoe onthe camera.
View original page 11Page 12 · Read text
120                                                               www.butkus.us
    lnunnuaar


                                             To change the balance between flash output and camera exposure requirements to produce a
                                                      variety of effects, use the exposure compensation function. For various long exposure effects
                                                use the sync function. To make flash exposure tests use the flash measure function.
                                       To accessthe controls:
                                                         l) Activate the comera ond press the FLASH button once.
                                                                      controlwheelto set the nmount of compensotion required:                                         2) Turn the front
                                                       . from +3EV through -3EV (amount dependent on tS? of film)
                                         3) Turn the rear controlwheelto set:
                                                . normal sync (flwh triggued just after the shutter opens)
                                                . rear sync (flash triggued justbeforethe  shutter closeg
                                                . flash measure (with non-TTlflash  units orTTL units in Monualmode)
                                         4) lhe grip LCD shows the flash node- Normal or Rear  - in the standord disploy. However, when set to
                                                                                      Ff ash Meas ure, a specific screen rcquests you to press the AE-L button in order to moke a reoding.


                                                The integral flash unit features the following specifications:

                                                Guide no.                                        t2
                                               Coverage                                         560 h orizo ntal, 44o verti ca I
                                    Maximum lightfall-off  at sidecentres  - tEV (50%)
                                                    Colour temperature  (full flash)          5,000 - 5,6000 K
                                            To raise the flash unit into its operative position, slide the flash-unit catch backwards in the
                                                  direction of the flash symbol. To return the flash unit into its closed position, push down on
View original page 12Page 13 · Read text
nascnhaat
                                                                                                   1121
                                                                                                                                                                                                                                                                                                                                                                                                           I


the top of the unit until  it clicks back into place. The flash unit is automatically activated when
it is in the operative position and de-activated when returned to its stored position.
The green LED flash symbol blinks in the viewfinder when the flash unit is charging and
remains stationary when fully charged. The flash output can also be adjusted for optimum
light balance in fill-flash situations.
                                                     TTL flash unit is con'?  no not use the integrat flash together when another external
nected (andusedinTTL or Amode)
                                              use 80 mm or longer lenses,?   nor lull coverage with the integral flash,

 Using the integral flash  :
                                                                     flosh symboL t)  Slide the flosh-unit catch bockwords in the dhection of the
2) iet ony required flash compensntion (FLASH bufton / front control wheel / Sove),
3) Mokean uposure.
4) tf the settings were inconect to motch the output of the flash unit, o red triangle oppeorc in the viewfinder
    along witlt a flashing green 'flosh' symbol together wittt a warning messlge on the LCD -'Low flash'. The
    grip LCD will oko disploy o worning messlge -'Low flosh melsurement'.
5) Conventionol meosures should then be tlken to correct the situation. (That is: move closer to the main
     subject, use o larger aperture setting or use o foster film).


 Separate flash units can be electrically connected either by way of the hot shoe accessory
holder (if SCA3902 compatible) on the top of the viewfinder or via a cord to the PC connection
 port on the lefthand side of the camera body. Slave unit switches/ transmitters can also be
View original page 13Page 14 · Read text
www.butkus.usl22lnsaunn


                                            connected similarly dependant on unit (see specific user manuals for details).
                                         Keep the plastic safety cover in place in the hot shoe when not in use.

                                         Flash measur.e

                                            You can measure the effect of an attached flash unit (with PC connected flash units and SCA3902
                                               compatible flash units set to M mode), where the camera acts much as a flash meter would.
                                         By choosing'Flash measure', a trial exposure  is made with the auxiliary shutter still in place
                                          which therefore prevents film frames from being used. The aperture setting can be adjusted
                                         and more trial exposures made until the information on the grip LCD is satisfactory.
                                     To useflashmeasure:
                                                           Pressrhe FLASH button on the grip once to access the flosh option screen.     #                                                                               1 )
                                                                                                                                                                                                                                                                                                                                    :          2) Turn the rear controlwheel untilFlash measwe appenrs,                                                                   ,            f ,5;F.. ,8,,,, ,                        ;,                                                                                                                          ',           3) Press rhe DRIVE/S ave buttln t0 lccess the flosh explsure scrcen.                       '   ,;I ',Ptggi'      ,: ,
                                                Moke preliminary required operture sefting.                                              ,, ,           *"          4)         [l{l',   Hf"-]#,H                                       5) Press rhe AE-L button, The comera will close the aperture, roise the mirror and fire the flosh. Light reflect-                    .r  ,,                  ed from the flash  lit subject will be reflected off o white spot on the auxiliory shufter to the meter sensor.              ,4;,: ,bilri.-                  I
                                           6) Deviations from o normol exposure nre displayed as differences in EV on the grip LCD and the viewfinder                                :'fl58',i',,,i',,,,.,,
       i*i$$                                       LCD. lf 'high' or'low' oppears, change the operture accordingly ond make 0 new test reoding.                  Fiif5   :                                                                         : :.r.:,          7) Change the operture until Daff EV z 0 oppeors, or the desired onount of deviation from the normal exposure.            i[.H1      ,fff-[tlfl{',tn                                          ...'  fll#.t u,l!s,  ,,     ,                Lo signifies nore thon 2 EV under
                                                ''.
                                                          Hi signifies morc thon 2 EV over
View original page 14Page 15 · Read text
Hb'ehhdffi
                                                                                 1123


0ptional Accessories
  ',,.,.',:
W tnstant film back
ffi Converter ,,                                                          :
ffi Extension tube
ffi Rechargeable battery grip
ffi lR Release unit
ffi Release cord
ffi Filters
ffi Tripod quick coupling
ffi Support strap  ,   ,i
W CriA focusing sceen
View original page 15Page 16 · Read text
l24lnosscuoan                                                        www.butkus.us


                                                      There are a number of optional accessories availoble for the Hl with more being devetoped to suit
                                            a variety of photographic situations ond needs. Please see www. hassetbtai.com for the latest
                                                    information. The figures in brackets after the headings are the product codes.


                                         Converter H l.7X                                                 (30237t7)
                                          The Converter attaches between the lens and the body to increase the focal length by a fac-
                                                              tor of 1.7.
                                                   This provides a convenient way to expand your range oflenses. The Converter H 1.7 X features
                                                 the same outstanding optical and mechanical quality as all the lenses in the Hasselblad Hl
                                                 system. The optical design consists of 6 elements in 4 groups.


                                            Baftery G!!p Recharge,able 9.6V                                (3043346)
                                          Removable Ht gtip containingrechargeablebatterywith acapacityof750mAh. Aneconom!
                                                        cal option for full time users. A Battery Charger (3053564)  ii also available.
View original page 16Page 17 · Read text
Huscrbtodn
                                                                                                   1125

      lR release unit                                                   (30433s8)
i.liii...liiiiiiliii.ii This compact IR remote control (that includes the IR Remote control 3044113)provides
.i.lllillll..ll remote, wireless operation at a range of up to l0 metres. Has single frame, continuous
liiti:i:l:;iilil:i:li:iii frame, and delayed exposurefunctions.


      Remote release cord with a cable length of 0.5 m.


      Absorbs UV radiation and reduces blue haze without affecting colours. Also protects the
        front lens surface. Particularly recommended when the camera is used in harsh condi-
        tions. There three sizes available to suit various lenses: UV-sky 67 mm (3053470), UV-sky
       77 mm(3053474) and UV-sky95 mm (3053478).
       Tripod quick coupling H                                         (3043326)
      Mounted on a tripod, this accessory facilitates rapid attachment and removal of the cam-
         era. The camera is firmly held in an exact and repeatable position. Two integrated spirit
         levels make horizontal positioning of the camera easy. The Tripod quick-coupling H fits
         l/4" and 3/8" tripod threads and has a safety catch.
      Support strap Hl                                                (30s3623)
       Improves comfort and security in hand-held photography.
View original page 17Page 18 · Read text
126lnssetillaur                                                        www.butkus.us


                                        Focusing screen HS-grid                                         (3043310)
                                                 Spherical Acute-Matte D type with grid and central markings for spot (0 7.5 mm) and AF
                                               metering area. Grid provides aid in technical, architectural, and other detail photography.
View original page 18Page 20 · Read text
l2Slnsscnndnt                                                         www.butkus.us


                                                                           within exposure control. For example, ifyou change the aperture
                                                                 on a lens from f/ll to f/8, you will increase the exposure by lEV.
                                                                                  similarly, if you change the shutter speed from l/l5s to l/60s you        For the sake of clority, here are short and simple explanations of several
                                                                                       will decrease the exposure by 2EV. A change in EV can therefore        terms, items and features mentioned in the manualthat may be unfa-
       niliartosome.                                                         represent a change in aperture, shutter speed or a mixture of both.
                                                                                                                                          It is a simpler and more useful way of referring to the essential effec-
      Bar code                                                                             tive combination when making exposure settings without referring
      some roll film brands have a Bar code which the Hr magazine can     to the implications and sometimes confusing aspects of specific
                                                                                  shutter speeds or apertures.       recognize and interpret. This automatically transfers the ISo rat-
       ing and film length of the film to the camera and saves you from    As a practical example, if you are using'exposure compensation', the
      an incorrect setting. However, you might wish to rate the film at a     settings are in EV's (often referred to as 'stops'in older descriptions)
        different ISo setting, in which case you should transfer to manual     or fractions of EVs (or'stops'). Therefore an exposure compensa-
      IS0 setting.                                                                    tion of +lEV, for example, will provide 'one stop overexposure,and
                                                                               similarly an exposure compensation  of -ll2EV, for example, will
                                                                        provide 'a half stop underexposure'.
      The practice of making extra exposures over or under (normally     see the chart in this manual for cross reference of EVs and their
      both) the'standard' exposure to ensure the desired result. This is    aperture/shutter sp eed equivalent
       particularly useful when using transparency film in difficult lighting                                                               Default setting / factor       conditions. Easily set and controlled with the Hl.
                                                             A standard setting that a device is set to in the first instance during
                                                                  manufacture and returns to if a setting change is halted or inter-
      The setting chosen by the user that differs from the default setting.    rupted in anyway.

    ErPosurevalue.ItrePre8entsthestandaIdPhotogaPhicnotations"..*ii"''..i"i.i"ffi

\tr..$
View original page 20Page 21 · Read text
$s/'htodffi1129


half way down. For example, the auto focus and light metering are    tion is advised to ensure the desired result. Naturally, many seasoned
both activated by a'half-press'.                                        users always prefer manual controlbut theybase their calculations
                                                          and decisions on much experience.
                                                               To illustrate this point, imagine the following example:
Liquid Crystal Display. An electronic information panel. The grip   Pin two sheets of paper, one black and the other white, onto a grey
and magazine both have LCD panels.                                       wall. Take three exposures using an average light reading; a close-up
                                                                                        of the black sheet, a close-up of the white sheet, and a distance shot of
LED                                                                          the whole wall including the two sheets. Without any manipulation,
Light Emitting Diode. Electronic devices used in information dis-    the first two exposures will produce a tone that is similar to the wall,
plays. The viewfinder displayhas LED's to the left and right of the    namely, a grey tone; not black or white. The third exposure, however,
integral LCD panel.                                                             will reproduce the wall as a grey tone while the two respective sheets
                                                     now appear as black and white respectively, as originally observed.
                                                         However confusing this might at first seem, it is fundamental to
An important point to be remembered  is that all photographic    mastering exposure calculations and exposure control. Ifyou are at
exposure meters / light metering systems are calibrated to provide     all unsure about this basic concept, you are strongly recommended
a reading that will reproduce a'mid-grey or l87o grey tone' from    to refer to a general photographic manual for a fuller explanation in
the measured subject tone. This is an international photographic    order to obtain the maximum from your Hl.
standard upon which all exposure calculations must be based. The
                                              OTFHl has very accurate and sophisticated exposure measuring modes.
Pre-programmed information  is taken into account via the metering    Off The Film - a literal description ofthe light measurement mechan-
system when calculations are automatically made. This provides a    ics regarding flash exposure measurement.
very satisfactory compromise for a host of photographic situations
and many users will certainly be very satisfied with the consistently    Profile
high quality of results. Nevertheless, some situations are either so   You can programme the Hl by the user to followpre-determined  'pro-
technically difficult or open to interpretation that manual interven-

                                                                                                                              /
View original page 21Page 22 · Read text
7-
                                                                 www.butkus.us
130 | nassetbtodfit                                                                                                                                                                                                                                                                                                                                                                                                                                                                                                                                                                                                         I

            I


     files'. These profiles are combinations ofmodes, methods and settings    120 film is supplied on a spool complete with a paperbacking that
   (custom or default) that suit specific photographic situations. By using   runs the full length of the film and extends beyond both ends. 220
   a personal profile  - which you can create, name and save - the camera    film, on the other hand, just has paper at each end. In both cases, the
    is immediately configured for a specific purpose without anyneed to    film is graduallytransported in the magazine from its original spool
   check through the menus. This is a very rapid and secure way ofworking    onto another so called take-up spool. The spool left empty then acts
  when repeatedly confronted with similar photographic situations.       as the next take-up spool for the following film, and so on.
   As an example you might regularly take outdoor portraits ofwedding   Care should always be taken in loading, unloading, and general
   couples with a long lens. You want a specific aperture to restrict depth-    storage. Tryto avoid direct light sources when handling film in any
    of-field and a fairly fast shutter speed to freezeany movement. You are   way, in particular strong sunlight. Exposed film should be stored
   concerned about the couple blinkingduringthe exposure and so want    in dry and preferably lighrtight conditions, and developed as soon
   to take several shots in succession, possibly with slight variations in    as possible. Also avoid any sharp objects pressing against the film,
   exposure settings for safetyb sake so you might choose the bracketing    exposed or unexposed, as indelible marks can sometimes be caused.
   option too. All these parameters can be preset and stored as a profile    Please note any special conditions or restrictions regarding airport
   that is rapidly accessible.                                                  security x-ray devices or similar as they can potentially damage film
                                                                     (byfogging) in some cases.

  When altering settings, a half-press of the shutter release button
   will cause a return to the standard screen and save the new setting   A'standard exposure'in the manual refers to the concept of techni-
    at the same time.                                                                 cally correct in accordance with internationally accepted photographic
   Roll film                                                  measurement standards (see section on Mid-grey I L}%grey). This
                                                                       does not imply, however, that it would automatically be the preferred
  The Hl uses two sizes of roll film that has different lengths; 120 and                                                                          choice or be 'correct' according to the desired result. See section on
   220.120 film generally produces 16 exposures per film and 220fi1m                                                                          Bracketing.
  produces 32 exposures per film. ( 'Half-length 120'fiIm, that has a
   very limited availability, will produce 8 exposures per film).
View original page 22Page 23 · Read text
HossetbhdffilBl


Standard screen                                          Toggle function
To simplify the descriptions, rderenceis often madeto a'standard' Ifa button has a'toggle function',  it has the ability to access two
screen regarding the menu. Apartfrom ddault settings, there is no  separate ltat€s simplybybeingpressed,gin.  Onthe magazine, for
standard setting in the normal sense and therefore you create your €xample, ifyou want to charge the data setting from 'od to bff, you
own Standard', which of course can be changed at any time.      would start\pressing the fufftion selectortwice to access the film
                                                                   length s€tting. Then, to change from bn'you can press either theThe'standard screen is therefore the one you have currendy oc-
ated and is the one visible on the LCD when photographing (ercepl 'change up' or 'cJrange down' button as both buttons have a 'toggle'
                                                                             function. Bypressingthe same button again therefore, the settingwillwhere a particular mode is in actual operation, such as self-timcr, for
example). In the pocket guide this 'standard' screen is slmbolized revert. This rneans you do not haye to rememberwhich button to press
                                                                           as they will both produce the same desired result in this case.by a'home' symbol, that therefor€ represents th€ scrc€n that you
normally see when working.
                             :9j:-Hr"rnl_
Through The Lens - a literal description ofthe light measurement The Zone qatem is a nethod ofcombined exposure calculation/film
mec.hanics, The advantage  is that only the essential parts ofthe sub- development providing a great deal oftonal control. It was originally
ject in front ofthe carnera are induded. Accessories such as filters, dwised by Ansel Adams  - the classic landscape photographer and
bellows, close-up rings, conv€rters, etc that could affect exposure Hasselblad user - and now exists in various forms for both blac-k &
are also takcn into account automatically with exposure evaluation  white and colourphotography. An integral part ofthe method indudes
(for general purposes).                                                  the classification and grouping ofany given scene into a range ofnine
                                                                                    (or ten) so-called zones, hence the name. The method produces a greatTime out                                                                  degree of result predictability and image tone control.
This is the time interval that a temporary setting is maintained   Concerning the Hl, the word zone refers to the grouping and clas-
for before it automatically returns to the original setting (default    sification ofvarious tones, where Zone V is the equivalent (whether
or custom).                                                              in black & white or colour) to 18% mid-grey on a scale of Zone I

                                                                                                                                                                                                                                                                                           fi
                                                                                                         )
View original page 23Page 24 · Read text
l32lmnuaan                                                         www.butkus.us


    (black) through zone IX (white). see specific literature for a complete   At the fastest shutter speeds, however,  it is not possible to adjust the
   description of this method.                                             shutter speed and so the aperture  is adjusted instead.
                                                                Although  it is probably an infrequently used combination, please
                                                                         note nevertheless that the fastest shutter speed  / minimum aperture
   The effective shutter speed for a central lens shutter is defined as the   combination cannot be adjusted by True exposure.
   length of time between the opening and closing when measured at the
   halfheight positionwhen expressed in diagram form (see diagram  ).
   The fact that  it will take some time to open and close the shutter will
   have an influence on the effective shutter speed as the lens aperture
   closes to its setting. The faster the shutter opens and closes, the less
   this influence will be. It is also follows that the influence will be
   greater on shorter shutter speeds.
  with the lens at full aperture (largest opening), the amount of light
   atthefilm plane appears as illustratedbythe-curve  in ihe
  diagram. The effective shutter speed then becomes Tl.If the lens
   is now closed down by one stop, the amount of light appears as il-
   lustrated by the           curve. The effective shutter speed is now
   increased to T2, which is longer that Tl. The result is that the exposure
   is not       reduced                                                                             less.
  At     the         shorter shutter                                                                  as               by- exactlyspeeds,one stopthe exposure(lEV), however,error canbutbeslightlyas much
   0,5 - 0,9 EV.
  The True exposure mode can compensate for this exposure error since
   the behaviour  of the shutter is a known and predictable factor. At shut-
   ter speeds of 1/150 second or shorter (faster), the camera will shorten
  the shutter speed to compensate, as illustrated by the .  .  .   o curv€.
View original page 24Related documents and language editions
From the M. Butkus archive. Original publisher and archive notices are retained.
Check the model and edition against your equipment.
PDF verified 2026-10-10.