Sewing machines
Howe New B — User manual
User manual for Howe New B. 26 pages in English. Read the original PDF, download or print a copy without registration.
26 pagesEnglish57.9 MB PDF
Loading your manual…Open PDF directly
Document details
- Brand
- Howe
- Model / document
- Howe New B
- Document type
- User manual
- Language
- English
- Pages
- 26
- File size
- 57.9 MB
- Category
- Sewing machines
- Document date
- Not specified in catalog
Search available document text
Find a term, then jump to its page in the original PDF. Image-only pages may not be searchable; check the PDF for exact wording and diagrams.
Page 1 · Read text
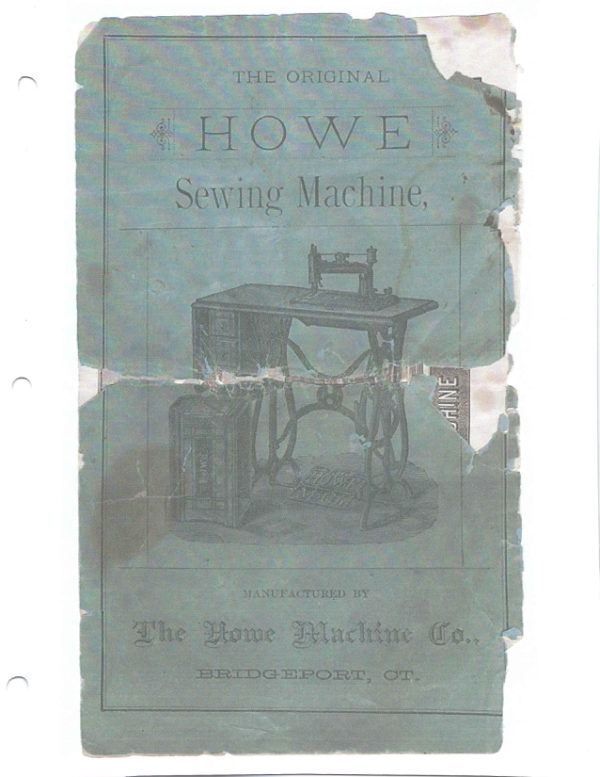
THE ORIGINAL
 • HOWE
   Sewing Machine,


                                              FINI


             MANUFACTURED BE

The Home Machine Co..
    BRIDGEPORT, OT.
View original page 1Page 2 · Read text
INSTRUCTION BOOK

                 FOR


   THE NEW "B" MACHINE.


         MANUFACTURED BY


The Howe Machine Company,


                                  STEREO TRADE MADE
                   WEJR


           PRINCIPAL OFFICE,
   BRIDGEPORT, CT.


AGENCIES IN ALL THE PRINCIPAL CITIES AND TONS THROUGHOUT

                     THE UNITED STATES.
View original page 2Page 3 · Read text
INDEX.


                                                              PART

To the Learner ..

 Remarks upou Needles and Thrend
 To Place the Machine on the Table
To Oil the Machine..
To Oil the Stand.....
To Operate the Machine.

 To Wind the Bobbin.

The Stitch Indicator...

To Thread the Shuttle..

 To Put the Shuttle in the Machine.

To Remove the Needle.

To Set the Needle..

To Thread the Machine..........

 To Draw Up the Lower Thread.

 To Regulate the Tension

To Oil the Tension...
 To Regulate the Length of Stitel                    19
To Commence Sewing. ...........
 To Remove the Work from the Machine.               13
Missing Stitches..                                        .13
 Breaking Thrends..                                            ..18

 Special Instructions....

To Take Off the Presser Foot

To Adiust the Hemmer.

To Make a Hem.......
To Make a Felled Seam.                             16
 Braiding..                                      17
 Quilting..                               18
Cording                                               .19
 Price List B Machine.                                    .20, 21, 23. 28
View original page 3Page 4 · Read text
TO THE LEARNER.


   A little time given to the study of the Instructions before

 attempting to operate the machine will be found of great ad-
vantage.
   The machines always leave our offices in good order and
 never fail to give satisfaction if managed according to instruc-
tions.
  Become perfectly familiar with the operation of the ma-
 chine before undertaking any practical work, but never attempt
 to take it apart or you will get into trouble. No machine can
 be benefited by being tampered with by inexperienced persons.
   The working of the machine is explained as minutely as
 possible, the operations are fully illustrated and the instructions
 are given in the order in which the learner should proceed.
 Do not attempt to use the attachments until you can manage
 the machine with ease on plain sewing.
 Never run the machine when the Presser Foot is down,
 unless there is a piece of material between it and the Feed Sur-
face.
   The Race Covers should always be tightly closed when the
 machine is running unless the Shuttle is removed from the
Race.
   The "Remarks upon Needles and Thread,"(Page 5) should
 be carefully read and frequently referred to. Much of the
 trouble with sewing machines arises from the use of a needle
 which is not of the proper size for the thread used.
   Study carefully the Special Instructions on Page 14.
  NoTE. The following attachments are furnished with each
machine, viz: Twelve needles, six bobbins, a hemmer (which
 is also a feller,) a braider, a quilting gauge, a tucking gauge,
a thumb screw, an extra throat plate, large and small screw
driver, a wrench, and an oil can. Any attachments other than
those above enumerated will be charged for extra.
  In ordering parts for this machine, it is only necessary to
give the letter or number by which they are designated in this
 book, and the number of the cut on which they are found,
thus: Send me part numbered 45, Fig. 7," etc.
View original page 4
Page 6 · Read text
The Howe Sewing Machine.
                          Fia. 1.


                               160
            756

      To Place the Machine on the Table.
  Enter the hinge rubbers No. 150, into the holes in the back part of
 the table-top, at 1, 1, (Fig. 1,) and the table rubbers No. 160 into the
holes157 intoin thethefrontsmallpartholesof thein thetable-topback cornersat 3, 2; ofenterthethemachinehinge-pinsat 4, No.and
enter the hinges into the hinge-rubbers in the table, after which, turn
the machine down into the position shown in Fig. 8.
             To Oil the Machine.
   Turn it back upon its hinges as shown above, and oil all the bearings
 indicated by the Jetters, commencing with A, and taking them in their
regular order, A, B, C, D, and so on to T. In this way you will be

suremore tothanfindonce.every place requiring oil, and avoid oiling the same place
minate at the exactThepointsdottedwherelimestherumningoil shouldfrom thebe severalapplied.lettersAfter oil-ter
     ing the machine rum it as directed on page 7 for about a minute to dis.
tribute the oil upon the bearings, and then with a soft cloth wipe off all
 surplus oil from the machine.
            To Oil the Stand.
   Commence at A. Fig. 2, and oil the points indicated by the letters
A, B, C, D, E.Five points only upon the stand require to be oiled.

    Nots.- Une good oll; pure Sperm oil is the best. Kerosene oll will be found weg-
fal for cleaning the machine if it becomes gammed from the use of bad oil,
View original page 6Page 7 · Read text
The Howe Sewing Machine.

                   Fin.


             To Operate the Machine.

   Care should always be taken, befors commencing to operate, that all the

                   running parts are well oiled and clean.

   The machine being turned down upon the table, as shown above,

pass the belt around the palley on the balance wheel No. 10, and the

 groove in the driving wheel No. 175, sufficiently tight to drive the
 machine. Place your chair near enough to the machine to enable you

 to sit erect while operating; raise the presser foot by moving the press-

 er bar lifter No. Gl upward; place your feet evenly on the treadle No.

185, with the instep directly over the treadle rod No. 180, and with the
 right hand turn the balance wheel in the direction indicated by the
arrow. Keep the machine in motion by pressing with the heel and too

 alternately upon the treadle, until you can run the machine regularly,

 and start and stop with ease. Never run the machine when the presser

 foot is down unless there is a piece of material between it and the feed

 surface,
View original page 7Page 8 · Read text
The Howe Sewing Machine.
                               Pig. 3.


                                                                                              SENSEE D


                                                                                01. 352


           To Wind the Bobbin.
   The spooler when not in use occupies a perpendicular position di-
  rectly back of the arm of the machine.
   To wind the bobbin, drop the spooler No. 183, until the rubber ring
 No. 158, comes in contact with the balance wheel No. 10.Turn the
 wheel until the needle bar No. 44 is at its highest point; this will bring
 the lever No. 15, above the table, as shown in the eat; hold the wheel
 steady with the left hand, and with the forefinger of the right hand
  pull the lever toward you; this will unlock the balance wheel and allow
  it to revolve upon its shaft without turning the machine. Now enter
 one end of the bobbin No. 77, into the hole in the spooler step No. 138,
 and push it to the left until the other end of the bobbin will enter the
 hole in the spoofer spindle No. lag, taking care that the driving pin
 in the end of the spindle enters the amm/I hole in the bobbin flange.
  Press the bobbin a little to the left. aud catch the end of the thread
  between the spindle and the bobbin flange; start the balance wheel
 and guide the thread evenly onto the bobbin until it is filled, taking
  care that it is not wound so full as to crowd the thread over the ends.
  The bobbin being filled, remove it, and raise the spooler to its posi-
 don back of the arm of the machine, turn the balance wheel until the
lever No. 15, appears above the table; hold the wheel with the left hand
 and push the lever from you, then turn the wheel slowly for one rev.
 olution which will re-lock it and the machine wth de ready for sewing.

 Note.-The spooler spindle should be oiled occasionally.
View original page 8Page 9 · Read text
The Howe Sewing Machine.         9
          The Stitch Indicator.
  The indicator plate " P." is numbered from 6 to 40, and by turning
 the stitch serew    No. 113, until the upper edge of the indicator No. 116
 comes even with the short line opposite any one of these numbers, the
 machine is prepared to make that number of stitches to an inch of
 sowing. For exumple: if it is desired to make 8 stitches per inch, turn
the stitch screw until the indicator points to 8, as shown in Fig. a
  The indicator is especially useful when it becomes necessary to lay aside a piece of work before it is finished and change the machine for
 other workBy noting the position of the indicator the original length
 of stitch can be restored, when desired, with exuctness and without an-
 nogance or loss of time.
                    Fig. I


          To Thread the Shuttle.
   Hold it in the left hand with the point to the right, and open it
by pushing the shuttle plate toward you. EnterOBO end of the

 bobbin No. 7, into the small hole in the heel of the shuttle, and drop
 the other end into the slot in the point of theshuttle as shown in Fig.
 1. Place the forefinger upon the bobbin aud turn the shuttle over from
 you until you can see the under side of the shuttle-plate; pass the end
 of the thread upthrough the hole A, then turn the shuttle over to-
 ward vou, and hold it in the position shown in Fig. 4. Raise the
 tension spring No. 15, by pressing upon it with the forefinger; draw
 the thread around under the tension-plate No. 74, as shown above, and close theshuttle, leaving the end of the thread about three inches
 long. The thread should pass entirely around under the tension-plate
 No. 74, coming out at A.
       Never use glazed thread in the shuttle.
       To Put the Shuttle in the Machine.
  Remove the ba. k mace cover No 86. (see Fig. 6, Page 10); turn the The iron c wi el No..to from poo sandal abe a mid rearbos 118 low of point.
  Take the shaust Besserthe thuratesand ding r of the right land. hold-
  ing the point toward vou, and the Hat side up; pass the point under
 the front end of the shuttle carrier so. 78, aad drop the need into 11s
  placo, as showa in Fig. G.
View original page 9Page 10 · Read text
10          The Howe Sewing Machine.

      Fig. 5.                         Fig. 6.


               wWa

                         * SHANK

                         64


                                                                                          & LONG GROOVES
                  C LONe pROOVE.S co                                             SHORT


                            765
                                  33.1


           85


              To Remove the Needle.

   Turn the balance wheel from you until the needle bar No. 44 renches
 its highest point, them loosen the set-screw No. 45, and remove the
 needle.

               To Set the Needle.

   Raise the needle bar to its highest point; hold the needle between
 the thomb and flnger of the left hand, pass the point of the needle down
 through the needle hole in the throat-plate No. 87, and enter the shame
 of the needle into the hole in the lower end of the needle bar No. 44.
 Push the needle up until the lower part of the shank at S, Fig. 5, is
even with the lower end of the needle bar, then fasten it in its place by
 means of the set-screw No. 45. Be very careful to have the short groove
of the needle next to the shuttle and the eye pointing straight across
the thront-plate in a like with the thread, as shown in Fig. T.
View original page 10Page 11 · Read text
11             The Howe Sewing Machine.
                        Fig. 7


            64


          To Thread the Machine.
         (See " Remarks upon Needles and Thread," Page 5.)
  Place a spool of thrend upon the spool-pin No. 3, Fig. 7, pass the
 thread into the right hand slot in the tension check plate at A (See Fig.
S,leftPagehand19)slotthencein thebetweencheck platethe tensionat O, theneecheck intowashersthe Vat shupedB and intogroovethe
 in the tension wheel at D; wind it once around the wheel in the direc-
 tion of the arrow, theme through the thrend controller at Band the
 slot in the top of the needle bar at F, then downward under the thrend
 guide G, over the hook on the take-up I, back under the thread guide
 G thence into the eurved hook I at the lower end of the needle bar, and
  last.y through the eye of the needle from left to right, leaving the end
 of the thread about three inches long.
          To Draw up the Lower Thread,
  Remove the race covers No, 85 and 86, hold the end of the upper
 thread slack with the left hand, as shown in Fig. " turn the balance
 wheel No. 10 from you with the right hand until the needle reaches its
  lowest point. By continuing the movement of the wheel the needle will
 rise about one-eighth of an inch, and if properly set will throw squarely
 across the shuttle race a loop of thread through which the shuttle will
         The bottom of this loop at the eye of the needle should be on a
 Perel with the bottom of the shutle race, as shown in Fig.o. After the
 shuttle has passed through the needle loop, the needle in ascending will
  draw the lower or shuttle thread up through the hole in the throat-plate
  No. 87, as shown in Fig. 7: then close the race covors and the machine
  is ready to commence sewing.
View original page 11Page 12 · Read text
12            The Howe Sewing Machine.

                        Fig. S.


             To Regulate the Tensions.

   Before commencing to sew, alwnys be careful to have some tension
 upon encis thread. Try them with the hand to see that they pall as
 nearly alike as possible.
  umountIf the threndsof tensionareuponof thethem,properthey willsize.beInvingdrawntheandrightlockedandtogetherequal
  in the centre of the material, thus,                     If the shuttle
 tension is tight and the upper tension too loose, the under thrend will

 lie straight, thus,             On the contrary, if the upper ten-

 sion is tight and the lower tension too loose, the upper thread will lie
  straight, thus,                 Therefore, in order to make a perfect

 stitch on both sides of the material, it is necessary to have the tensions
 ns nearly equal as possible, and tight enough only to make a firm seam  without breaking the threads.
   To increase the tension on the upper thread turn the tension nut No. 197

 to the right, thus,        To decrease it turm to the left, thus,

 screwTh increaseNo. 76 theneartensionthe pointon theof theloarershuttleor shuttle(See Fig.thread,4, Pageturn the9) tosmallthe

right, thus,       To decrease it turn the screw to the left, thus,

In changing the shuttle tension, which is seldom necessary, use the
small screw-driver No. 165 (shown in Fig. 6) and turn the serew but
 very little.
           To Oil the Tension.
  Take off the tension nut No. 127, then the tension mut washer No.
128 and the tension wheel No. 124, and put a single drop of oil on the
stud at the point where the wheel revolves. The tension need not be
oiled oftener thau once a month.
    To Regulate the Length of the Stitch.
 To lengthen the stitch turn the stitch screw No. 118, Fig. 7, to the
 riaht. To ahorten the stitch turn the screw to the left.
View original page 12Page 13 · Read text
The Howe Sewing Machine.         13

          To Commence Sewing.
  The machine being fully threaded both above and below (See Pages
9 & 11), the shuttle thread drawn up (See Page 11), the needle bar and
 presser bar both at their highest point, slacken the upper thrend by
taking hold of it between the tension wheel D and the thread controller
    E, Fig. 7, and drawing it off from the spool (this is necessary to avoid
 bending or breaking needles), then draw it through the eye of the needle
 so as to leave an end two or three inches long, Draw the shuttle thread
 up through the throat plate about the same distance and pass the ends
 under the presser foot toward the back part of the machine. Place the
 material to be sewed under the needle, let the presser foot down upon
 the work, start the balance wheel from you and proced with the sewing.
     To Remove the Work from the Machine.
   Inving finished the seam, stop the machine with the needle at its
 highest point, and to avoid bending or breaking it take hold of the thread
between D and E, Fig. 7, and slacken it by drawing about two inches
 off from the spool, then raise the presser foot, take hold of the work,
 raiso it up, draw it gently from you toward the back part of the machine,
 keeping the upper thread in the needle slot in the presser foot and eut
 the threads, leaving ends two or three inches long.
  Note. If the shuttle thrend should break Frequently when removing
the work os directed above, it will indicate that the shuttle tension is
 too tight. (See Page 18.)
                Missing Stitehes.
    If the machine misses stitches see that the point of the needle is per-
 fect, that the needle is straight and that it is not set too high or too low.
 (See Page 10.) The needle loop may be thrown to one side so that the
 shuttle will pass by instead of through it. To correct this turn the
 ncedle so that it will throw the loop squarely across the shuttle race as
 shown in Fig. 6. The machine may miss stitches because the needle sets
 too far from the shuttle--the needle should run as close to the shuttle as
 possible without striking it.
   To adjust the needle in relation to the shuttle, rlace the wrench No.
 165, Fig. 6, on the hend of the screw No. 38, and press it downward,
 then move the end of the adjusting cam No. 39, upward to draw the
 needle nearer to the shuttle or dovenward to set it farther from the shuttle.
 then tighten the screw No. 33.
   Note. This adjustment is necessary only when changing from course
  to very fine needles, or rice terza.
                Breaking Threads.
    If the thread breaks while sewing see that the needle is not too small
  for the thread (See Page 5), that it is properly set (See Page 10), that
  the tensions are not too tight (See Page 12), that the eye of the needle is
 not sharp, and that the needle does not bear against the throat-plate
  Note. The throat-plate with the large hole should be used for all
 needles coarser than No. 2.
View original page 13Page 14 · Read text
14           The Howe Sewing Machine.

         SPECIAL INSTRUCTIONS.
   Keep the machine well oiled and clean.
   Be careful to use perfect needles of proper size for the thread used.
  (See Page 5.)
 Do not pull upon the work while sewing.The operator should sup.
  port the material when sewing large and heavy garments, so that it will
  not pull upon the feed or the stitching will be irregular and the needle
 may be bent or broken.
   If the tensions are equal the stitch will be alike on both sides of the
  material. (See Page 12.)
    For seams which may require to be ravelled out leave the upper ten-
  sion loose; the shuttle thread will then lie straight on the under side of
  the material and may be easily drawn out.
  To run a gathering thread, have the upper tension loose and use coarse
 thread in the shuttle.
  For sewing flannel or bias seams the stitch should be short and the
  tension on both threads loose to allow for stretching of the material.
   For sewing soft, thick material the machine should be adjusted for a
 longer stitch than for ordinary work.
  The gauge No. 153, Fig. 6, will be found useful for guiding the work
  in making tacks, etc. It may be set at any desired distance from the
 needle and fastened in place with thumb screw No, 153.
   'The beit should be somoved from the driving wheel when the machine
 is not in use.
      If the belt becomes too loose to drive the machine shorten it by cutting
 oft about half an inch, punch a new hole and fasten the ends together
 as before.

         To take off the Presser Foot.
  Remove the back race cover No. 8G (See Fig. 7. Page 11), raise the
presser foot by moving the lifter No. 61 upward, loosen the serew No.
 66, turn the presser foot around to the left until it points directly from
 you, and remove it from the presser bar by lowering it into the shuttle
race.
  NoTe. The above direetions should be strictly observed, beth in tak-
ing off and putting on the Presser Foot, Hemmer, Braider and Corder,
 the object being to avoid scratching and defacing the machine.
           To Adjust the Hemmer.
  The presser foot being removed as directed, lower the needle bar until
 the point of the needle passes through the hole in the throat plate No. 87,
 Fig. 6.4 Take the hemmer No. 143, Fig. 9, in the left hand, and with
 the screw driver loosen screw No. 145, pass the lower end of the hem-
 mer into the shuttle race, put the hemmer on the presser bar and work
 it up to the shoulder at No, 54. & Adjust'it so that the needle will pass
 directly through the centre of the needle hole in the hemmer foot and
 fasten it securely in place with the screw No. 145.
View original page 14Page 15 · Read text
The Howe Sewing Machine.


         Fig. o.                        Fin. 10,


                To Make a Hem.

   Fold over the right hand edge of the material and crease it down

       for about two inches in length, enter it into the hemmer, as shown in

 Fig. 9; let the hemmer down upon the feed and proceed with the hem-

 ming, pulling gently to the left upon the work to keep it straight, and

 feeding into the hemmer just a suflicient amount of material to fill the
 channel over the blade B as shown.  If too much material is
 led into the hemmer it will be crowded out under the right hand edge,
 thus making a wide and irregular hem--if not enough the raw edge will
not be turned in.

    If the stitching is too far from the edge of the hem loosen the screw
No. 145 and turn the hemmer a little to the right, if too near the edge
 turn it a little to the left, and when properly adjusted fasten it firmly
with screw No. 145.

   in removing the work from the hemmer always draw it out from you
toward the back part of the machine. If you pull it out toward you,
 you will bend the hemmer tongue and render it useless. Never run the
 machine when the hemmer foot is down, unless there is a piece of mud
terial between it and the feed.
View original page 15Page 16 · Read text
16          The Howe Sewing Machine.

                        Ig. 11.


             To Make a Felled Seam.
    Place the two pieces of material to be felled under the hemmer No.
 148 and let it down upon them, having the edge of the lower piece pro-
 jeet about an eighth of an inch beyond the edge of the upper pirce.
 Stitch them together, making the line of stitching as near the edge of
the upper piece as can be done with safety. On reaching the end of the
 seam raise the hemmer foot, remove the work and eut the threads,
 leaving ends about three inches long attached to the material, as shown
at A, Fig. 11.Trim the edges if necessary, as in hand felling. leav.
ing the lower edge just wide enough to fill the channel of the hemmer, as
shown at B above. & Open out the goods, crease the broadest edge
over the other to the left, take hold of the threads A, raise the ma-
terial a little and draw the edge to be felled into the hemmer over
the blade B as far as the needle, let the foot down upon the work
and proceed with the sewing, pulling gently upon the threads until two
or three stitches have been taken. If the ends of thread are broken
off the work may be assisted into the hemmer as shown in Fig. 9.
 Keep the material smooth and guide it evenly into the hemmer ns shown
 above. Be sure to draw the work from you when removing it.
  NOTE-Never attempt to fell coarse, heavy goods with this hemmer.
View original page 16Page 17 · Read text
The Howe Sewing Machine.                                             17


                         Fig. 12,


       Th


                    Braiding.

   Attach the braider No. 148 in place of the presser foot, taking care to
 adjust it so that the needle will pass through the centre of the needle
hole in the braider foot. Insert the short end of the braid wire No. 150
into the hole in the presser arm as shown above, and fasten it with the
 set screw in the back part of the arm. Place the spool of braid on the
 long end of the wire No. 150, pass the end of the braid under the spring
 No. 148 and down through the needle hole in the foot, letting it extend
back from the under side of the foot. Lower the foot and start the ma-
 chine, guiding the material sccording to the fancy or a design previous.
  ly traced upon it, In turning square corners the needle should be
 about half way down through the material.
View original page 17Page 18 · Read text
18              The Howe Sewing Machine.


                       Fig. 13.


                    Quilting.

  To attach the quilting gauge put the quilter bar No. 154 through the
hole in the presser foot No. 05, from right to left, as shown abore.
 Adjust the guide G so that it will set to the right of the needle, just the
 distance desired between the rows of stitching and far enough from the

 bed plate of the machine to allow the material to pass freely under it

   when the presser foot is down, then fasten it in place by means of the

 screw No. 155. Fold the material to be quilted through the centre in
 the direction the lines of stitching are to run, and crense it as a guide for
 the first line of stitching; when wadding is to be used the crease should
 be made before the material is basted to the wadding. Make the first
 line of stitching in the crease; this line may them be used as a guide for
 the second, the second for the third, and so on as show above.
View original page 18Page 19 · Read text
The Howe Sewing Machine.
                                             10
                        Fig. 14.


                   Cording.
  Altach the corder to the presser bar in place of the presser foot, ad-
 justing it so that the needle will pass through the centre of the needle
 hole in the foot and fasten it by means of the screw No. 66. Insert
the spool wire No. 150 in the arm of the machine, as shown; place the
 spool of cord upon the wire, pass the end of the cord through the hole in
 the bow at A, then through the eyelet on the side of the blade at B, and
 lastly through the cord guide at the point of the blade, letting it extend
 back under the foot two or three inches. Fold the material or stitch
two pieces together; pass one thickness under and the other over
 the cord guide as shown, and the whole under the corder foot. Draw

 the material to the left until the cord guide reaches the fold or seam,

 then let down the foot and proceed with the stitching, drawing the work

 slightly to the left so as to lay the cord closely in the fold. Keep the

            material smooth in front of the needle, and in turning square corners
 have the needle about half way down through the work.The stitch

 should be rather longer than for ordinary sewing.

   This Attachment will be charged for extra. Price $3.00.
View original page 19Page 23 · Read text
Price List of Parts--New «B" Machine.     23

             WOODWORK.

  TABLE TOP. (PInin)
                    Drawer.
  BOX TOP COVER...
                  Plate
  DROP LEAF TABLE!
200 DRAWER CASE...
                  all..203 Drop Lear Table, Cover mm d Drawer Case                                                                                   8584429288

            WHEEL FEED PARTS.
101 FEEDEP ORDICES TRANSFESSIONE
                Wheel Stai             Wheel sind Washer....
                  Wheel Stud Nut.
                 Wheel Sind Fricton 1Spring
                  Wheel Stud Friction Spring Washer.
            Clutch............................                113 3 31171
                 ClutchCatch LeverLever.......Connection.*....
                    Ointch cover ConnectionScrew..as
                  Catch Lever Connection Spring
               DITCH LEVEConnection Spring Fin


                Wheel Bracket screw

                    Collar Serew ..
  THROAT PLATE (Large fole).....
  PILESSER FOO'Plate (Small Holes...
   ROLL PRESSBIZ (Complete).
                   Presser Arm.....
                    Presser Arm Stud
                   Presser Wheel....
                      Presser Set Screw

    NEEDLES, per doe

        CAUTION. -Do not use any but Genuine Howe Nee
      dles, See that E. Howe, Jr., is stamped on the shank
            FILEDELATIONLEAS
View original page 23Page 26 · Read text
OUT OF THE FIRST SEWING MAOHINE.

                 ELIAS HOWE, JR., INvENTOR.

   The above is a correct representation of the first Sewing Machine. It
 was constructed by Elias Howe, Jr, and in April, 1845, sewed the first
 sean ever made by machinery. This fact has been established beyond
 dispute, notwithstanding the musty archives of every nation on the face
 of the globe have been searched, and unscrupulous pretenders brought
 forward in the vain endeavor to prove a prior invention,
   This machine is a marvel of mechanis, and contains every radical
 element that goes to make up the first-class Sewing Machine of to-day,
 theviz:reciprocatingthe grooved andshuttleeye-pointedand bobbin,needletheattensionthe enduponof athevibratingthread vari-arm,

able at will, the reaction of the needle to form a loop for the shuttle to
pass through, the thread controller, the clamping of the shuttle thread
                                    All these are embraced in this
Machine,and the automaticand were coveredfeedingbydevice,air. Lowes first patent, and without
 them there would be no Sewing Nachine today.  At Mr. Howe's desth
this Machine passed into the possession of his eldest daughter, Mrs. Levi
S. Stockwell, and is now on exhibition at the office of the Company, No.
28 Union Square, New York,
View original page 26Related documents and language editions
From the ISMACS International. Original publisher and archive notices are retained.
Check the model and edition against your equipment.
PDF verified 2026-10-11.