Sewing machines
Howe Step Feed — User manual
User manual for Howe Step Feed. 21 pages in English. Read the original PDF, download or print a copy without registration.
21 pagesEnglish15.2 MB PDF
Loading your manual…Open PDF directly
Document details
- Brand
- Howe
- Model / document
- Howe Step Feed
- Document type
- User manual
- Language
- English
- Pages
- 21
- File size
- 15.2 MB
- Category
- Sewing machines
- Document date
- Not specified in catalog
Search available document text
Find a term, then jump to its page in the original PDF. Image-only pages may not be searchable; check the PDF for exact wording and diagrams.
Page 1 · Read text
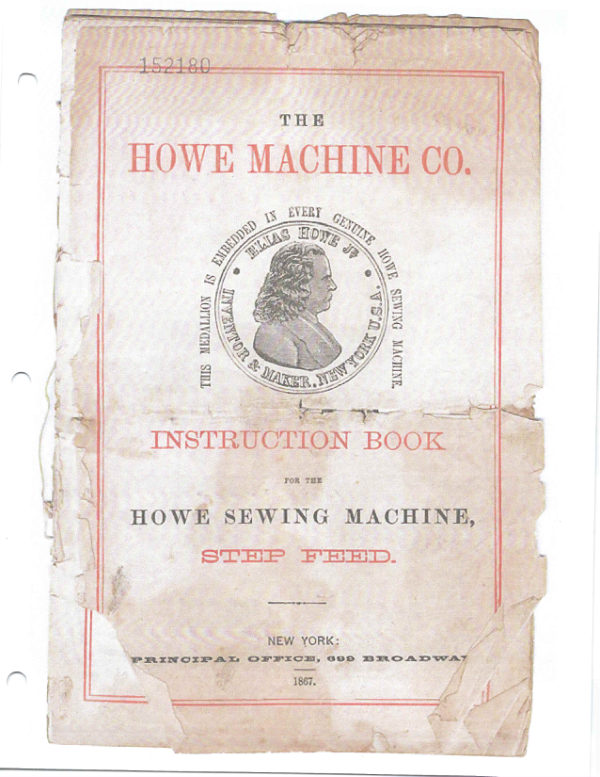
152180

         THE
HOWE MACHINE CO.


 INSTRUCTION BOOK


                        FOR THE
HOWE SEWING MACHINE,
   STAR FEED.


              NEW YORK:
 PRINCIPAL OPPIOS, GOB BROADWA


                                   1807.
View original page 1Page 4 · Read text
THESE NUMBERS AND NAMES REFER TO THE
PLATHSOF PARTS

           ON THE PRECEDING PAGES.


     Order all Parts by the Numbers, and state what Size Machine, A, B, or C.


            SECTION A.
  2 Arm Screw,                          4443 NeedleNeedle BarBar ThreadThread Guide,Guide, (Lower.)(Upper.)
   4 Arm Plate Screw.                      45 Needle Bar Thread Guide Screw
  5 Arm Spool Pin.                       40 Heedle Bar Piston,                                        47 Needle Bar Piston Pin.
            SECTION D.                48 Needlo Lever.
   8 Shaft Cap.                          49 Needle Lever Stud,
  9 Shaft Cap Screw.                    50 Needle Laver Stud Washer.
  10 Bed Plate Washer. 163%                 St Needle Lever Stud Nut,
                                     59 Needle Cam.
                                        53 Meedle Cam Roll,
            SECTION                                       34 Needle Cam Boll Stud,
 13 Puller.                            55 Needle Cam Screw.
 14 Polley Screw,
                                            SECTION T.
             SECTION D.           & Presses
  15     Outside             Face                  Plate.                     St Presser Bar Spring. 16    Inside           Face                Plate.
                                       55 Presser Bar Guide.
 17 Fresser Bar Guide Adjuster,            39 Presser Bar Guide Fin.
 18 Presser Ear Guide Adjuster Screw.      69 Liter.
 19 Thread Controller,
  23 Thread Controller Screm.                       SECTION G.
  23 inside Face Plate Serew.               61 Shuttle complete.
 2 Outsido Faco Plate Screw.              65 Shuttle Lateh,
 23 Presser Serew.                      67 Tension Plate, (Upper.)
 26 Presser Slide.
                                              EB Tension Plate, (Lower.)
 21 Adjusting Cam.
 18 Adjusting Cam Serew                     69 Shuttle Tension Spring.
                                             10 Shuttle Tension Screw, 30 Presser Screw Boss.
                                         "1 Bobbin.
 3t Pressor Serow Doss Screw.
                                          74 Shuttle Cam.
 32 Take Up.
 33 Take Up Spring.                         15 Shuttle Cam Screw.
34 Take Up Spring Serew.                   1617 ShuttleShuttle CamCam FollBell.Stud.
 35 Take Up Adjuster.
                                              79 Shuttie Lever. 37 Thread Gulde Fin.
                                              19 Stuttle Lever Stud.33 Thread Guide Pie, (Drifted.)
39 Thread Guide Pin Wire.                   50 SUnttle Lever Stud Washer,
                                                6t Shuttle Lever Stud Pin.
            SECTION E.                    62 Sbuttle Driver Link.
                                                83 Shuttle Driver Stud.
40 Keedie Bar,                                             84 Shuttle Driver slide
41 Beedie Bar Set Screw,                    85 Shuttle Driver,
42 Hoodie Dar Thread shieid.                80 Shuttle Driver Seraw
View original page 4Page 5 · Read text
LIST OF PARTS,-Continued,

          SECTION H.                 143 Leg Brace Screw, No. 20. B
                                          144 Driving Wheel.
 B1 Feed Lever.                                           146 Driving Wheel Stud,
 83 Feed Lever Spring.                       147 Driving Wheel Stud Mat.
 89 Feed Lever Spring Pin.                 148 Crank Pin.
  90 Feed Lever Alder                    149 Crank Pin Nut.
 el Feed Lever Rider Screw.                 100 crank Pin Washer.
 92 Feed Surfice.                        131 Wheel Guand.
 93. Fced Surlace screw.                     152 Wheel Guard Screw.
 94 Teed Rocker Screw,                        133 Filmtan.
 13 Feet Harken Tim                      154 Treadle Rod.
 96 Lift Car,                              155 Treadle Rad Nuts.
 97 Lift Cam Screw.                       156 Treadle,
 91) Feed Cam Complete.                  157 Treadle Pla.
 08 Feed Cam.                                158 Treadle Pin Screw,
 90 Feed Cam Screw.                     159 Treadle Screw.
 100 Feed Cam Nut.                       160 Dripper.
 101 Feed Cam Nut Spring.                 161 Dripper Serew.
  102 Presser Foot.
   103 Presser Fool Screw,                            SECTION L
 104 Guilting Gage.
 107 Quilting Gage Screw.               195 Wrench
 108 Shaft.                           196 Oil Can,
                                   197 Screw Driver. 109 Throat Plate, (large hole.)
 110 Throat Flate, (small holo.)            1ãs Shuttle Screw Driver.
                                 199 Bell. 111 Throat Flate Screw,
 112 Shuttle Race Cover, (Back.)           200 Belt Hook.
 113 Shuttle Race Cover, (Front           201 Gage.
                                     202 Gage Screw,
                                  203 Oll Cup Complete,
         SECTION LISTENSION                                       204 Oil Cup Set Serew,
                                     201 Spooler Complete,
 116 Tension Complete.                  208 Spooler Frame.
 111 Tension Stand,                                      209 Spooler Spindle.
 118 Tension Back Plate.                    210 Spooler Step.
119 Tension Wheel,                       211 Spooler Thumb Serew.
 120 Tension Washer, (Back.)               212 Spoaler Spindle Washer.
 191 Tension Washers, (Front.)             214 Spooler Spindle Driving Pig
 122 Tension Nut Washer.                                        215 Spooler Spring.
  123 Check Spring.
                                     217 Fubber Ring,
 1231 Check Spring Washers.              218 Roll Presser Complete.
 124 Check Spring Slot.
                                                224 Hemmer Complete.
 125 Check Spring Screw.
                                       221 Hemmer Set Screw.
126 Screw Stud.                                           228 Braider Complete.
127 Tension Set Screw,
                                            259 Braider Foot.
 126 Thumb Nut.
                                              230 Braider Foot Screw
           SECTION J.-TABLE.                 231 Braider Spring,
                                              233 Braider Spring Bar Screw.
 129 Table Top.                            234 Carder Complete.
sO Drawer.                              235 Carder Foot.
 131 Drawer Slides,                         236 Corder Foot Set Screw.
                                             237 Corder Foot Surface Guide.
 134 Leg, (Right.)
                                             238 Corder Foot Surface Guide Screw,
 135 Leg, (Left.)
137 Outside Leg Brace.                       239 Spring Cord Guide,
128 Inside Leg Brace.                           241 Spring Cord Guide Screw.
 139 Outside Leg Brace Cap.                   243 Spring Cord Culde Washer.
                                                 243 Spool Pin for Braid.
140    Inside           Leg               Brace                     Cap.                  244 Set Screws for 243. 141     Leg Brace               Cap                   Serew.
View original page 5Page 6 · Read text
DIRECTIONS FOR USING THE

HOWE STEP-FEED SEWING MACHINES.


    Place the Machine upon the table and adjust the belt on the driving-
  wheel (144), and the palley (18).


                        RAFTER NE

    The operator should frat become familiar with the treadle motion. Flace
 the feet upon the treadle so that the hollow of the foot may rest directly

 above the treadle rod (154). Press alternately on the heel and toe to give a rocking motion to the trendle, taking especial care that the top of the

 driving-wheel (144) turns over from the operator, and never backwards;
 this will give the right motion to the Machine. The trendle motion should
he even and regular. If it is dificult to get a regular motion nt frst, throw
the belt off and operate the table only, until a perfectly even motion becomes
easy and natural. Them replace the belt and operate as before.Be care.
 fal that the presser foet (102) is raised up when running the Machine,
there la no fabrio under it.
View original page 6Page 7 · Read text
THE HOWE SEWING MACHINE.


              SETTING THE NEEDLE.


  Raise the needle bar (60) to its highest point. Place the shank of the
needle up into the hole in the lower end of the needle bar, and fasten it
Armly in its place with the screw (41) near the lower end of the bar,


  Let the smooth side, or the side of the needle having the short groore,
be next to the shuttle, and the long groove on the opposite eide, the eye of

the needle pointing at right angles to the direction of the shuttle motion.

 so as to throw the loop of thrend directly into the shuttle race.


  By turning the driving wheel (I44) over, the needle will descend to its
lowest point, and Ly continuing this movement, the needle will raise alous

am eighth of an loch and throw out a loop of thread; (the seodle should be
threaded through frous left to right)
View original page 7Page 8 · Read text
THE HOWE SEWING MACHINE.


   Upon frat sotting the needle, this loop may not be in proper position for

 the shuttle to enter, as the needle may be set too high, or too low. The

rule for setting the needle is,-Set the needls with the short grooee on the

 side towards the shuttle. so that the shuttle will enter the largest part of the

 loop, as illustrated at a, d.


  When using ordinary sized threads, the eye of the needle should be
 about half-way beseen the bottom of the shuttle race and the point of the
 abuttle.  For conree threads the needle should be set somewhat lower.


              MISSINO STITCHES

     If the thread is impropetly twisted, it may throw the loop towards ons
  side, instead of square into the shuttle race. In that case the needlo
 should be slightly turned in an opposite direction, to counteract this
 tendency to throw the loop away from its proper position.
  Sometimes the shactle will miss the loop becauee the needle seta too far
 from the shuttle, and at other times the shuttle may strike the needle
 becuuse the needle sets into the shuttle race.
  To adjust the needle nearer to, or farther from the shuttle, turn the
 screw (28) outwurds a little, so that the hend of the Machine may be moved.
  To get the needle neater to the shuttle, more the end of the adjusting
cum (27) up, and then turn the serew (28) back firmly into its place.
   To set the needle further from the shuttle, more the adjusting cam (27)
 downwards, and tighten the screw (98), as before. The needle should set
 as near the shuttle as possible without danger of striking it.The needles,
 being of different sizes, will set at different distances from the shuttle,

 unless the bend com be adjusted to suit the different sizes.

    When using very fine needles, and also when stitching beavy work, be
 sure that the points of the needles are perfect, and on a line with Anthe
 centre of the direction of the needle, and not blunted or turned over.
 imperfect needle may cause the best Machine to miss stitches.
View original page 8Page 9 · Read text
THE HOWE SEWING MACHINE.


                               Figure 9.

           THREADING THE MAONINE.

 Upon the spool pin (5), place the spool A, so that it will turn
perfectly free,Draw the thread into slot (124), (See Flg. 2), thas is
in the top of the tension stand (117), carrying the thread down to
the bottom of 124. Them pass the thread around the outside of
View original page 9Page 10 · Read text
SHE HOWE SEWING MACHINE.


    the tension wheel (119), letting the thread lie in the V shaped groove
    foraned by the corrugated tension wheel. Them pass the thread through
               the thread controller (10) and thence into the slot at the top of

            the needle bar (40), themes downwards under the thread gaide

              pin (38) and through the eyelet at the lower end of the take up

                  (39) god back again to the right of the lower thrend guide pin

              (37), and themes through the curved book (14) at the lower end

              of the needle bar, and lastly, through the eye of t weedle, (the

              thread running from left to right us described.]


                  THE SHUTTLE.


     Wind the. Bobbin evenly with
  ritable thread. Soft or unglazed

  thread is best.

    TO TaLEAD TuE sHUTTLE, open

  the Intel (G5) as represented by

   the dotted lines. Insert one end

  of the bobbin in the small hole inside the shuttle tip (63), and let the other


 endcloseresttheuponlath.theTheshelfthreadunderneath,shoulf lead(65),offinsothethatheeltheofupparthe shuttle.side of thisThen

  bobbin will revolve over outwards; this is to prevent cross friction of the

 thrends. Pass the end of the thread up through the slot (9), farthest from

  the edge of the sbuttle, and down through the other slot; thence through

  the small hole in the latch, (05), nearest the edge of the shuttle, and up

  through the other hole. The latch may be opened whew it is threaded.

   The tension is procured by passing the thread between the two tension
  plates (07 and G8). De sure that the thrend passes setwees she wo
 PLATES, and not under botk plates
   To paas the thrend between these plates, drew off sis os eight unches of
 the thread, and hold the shuttle and the end of the thread in the left hand;

 then taking the intervening thread in the right hand, form a loop, and pass

 the thread that leads from the left hand between the tension plates (67 and


Os) at the notch (4), and draw it around the circular edge of the upper tension plate (07). Draw up the loose thread between the latch and the

 tension plates, and pass the end of the thread out of the hole (G).


 ofTheordinarytensionscrews.serew With(TO) thatis a theleft-handedtemsion canscrew,be inereasedand operatesor lessenedthe reverseat
plensure.

  To incrense the tension, turn the serew to the left as indiented by the
 arrows, thos:                               To decrease it, turn in the opposite direction.
View original page 10Page 12 · Read text
THE HOWE SEWING MACHINE.


             TO COMMEROR SEWING.


    Raise Presser Foot (102) by moving Lifter (60) from you. Withdraw

 Slides (112 and 113) as in Fig. I, and hook the shuttle on to the shuttle

  drirer (85), which extends into the shuttle race. Then let the meedle

  descend, (putting the finger on the end of the thread). The shuttle will

  then pass through the loop of the needle thread, and when the needle rises

 it will bring the shuttle thread up with it. Then close the slides (112 und

 118) as in Fig. 2. Place the fabrie under the needle and let the presser

  foot dowm upon it. De sure that the presser foot rests upon the fabrio
  before commencing to sew. There must be some tension upon the threads,

  otherwise they will knot, or tangle up.


                 ThE TENSIONS


  To produce good m al, tha tensions shouid                                                          re thorough
Ay understood. The ere (or look) stitch F      317 is that chief.
ly used by first elms Machines, add will            meither rip
 nor ravel, and has the same appearance on                                                            both sides of
 the fabric. When the needle riscs to ita highest point, the shuttle travels

 forward a little at the same time, and both threads are locked together and

 drawn to the center of the fabric, thus:-


 leaving a fair stitch on both sides, if both threads are of proper size and
 have the right amount of tension upon them


   If the shuttle thrend is very tight and the upper thread too lose, the
under thread will lie straight. thas -
View original page 12Page 13 · Read text
THE HOWE SEWING MACHINE.


because there is not sufficiont upper tension to draw the under thread in.

 On the other band, if the ahuttle thread draws off too easily, and the upper

is too tight, the under threed will be drown up through the fabric, and the

 upper thread will lie straight, thus


 while the under side may look well. The stitch should he made perfect on

 both sides. It is therefore necessary to lavo the tensions of both threads

 as nearly alike as possible, and as tight as the threads will sew without

 breaking. The upper tension can be increased or lessened at pleasure by

 turning the tension thumb nut, (128); the lower tension by turning the

 small screw within the shuttle, as before explained.


   The pressce foot (180) is intended to hold the material down firmly to

 the feeding surface, and also to prevent the material from being lifted up

 by the needle. Heary and compact material requires more pressure upon

it than lighter fabrics dog If there Is not sufficient pressure, the needle

 may stick and raise the fabric and presser foot up together. On the other

hand, guard against too much pressure on light fabrics.


  When quilting light wadded fabrics, (as cont linings) the pressure
 should be quite light, and the foed should sometimes be raised a little

higher.


  In sewing thick material, or in making very long stitches more thread

 is requirel to form the stitela.


   More or less thrend may be given off by raising or lowering the thread.

controller, (19). When more thread is required lower the controller, and

 when less is needed raise it.


    To vary the pressure, -turn thumb screw (25) so that it will give the

 pressure required. If the presser foot ever becomes loose and vibratee

 sideways, it may be made tight by setting up the presser bar guide ad-
 juster, (I7) (at the top of the head of the Machine) against the presser bar
 guide.
View original page 13Page 14 · Read text
THE HOWE SEWING MACHINE,


     TO LEMOTEN OR SHORTEN THE STITON.


   On the end of the shaft of the Machine is a comical cam, (98) against

 which the lover part of the feed lever rests. Connected to the cam (98) is a


thambon to nat,the shaft,(100).theBy stitchturningwillthisbe nutlengthened,so that theand camby reversing(98) willthisbe movednut,

so that the cam is moved towards the end of the shaft the stitch will be
shortened.
View original page 14Page 15 · Read text
THE HOWE SEWING MACHINE


         TO RAISE OR LOWER THE FEED.

  The foed lever rider (90) resta. upon the lift cam (90). The feed lever

(87) is slightly slotted at the two screw holes near the lower and of the

lever. Loosen the two feed lever rider screwa (91), and pross the rider

downward a little and tighten the serews ngain. This will eause the feed

surface (92) to rise higher.

  For ordinary stitching, the teeth of the feed surface when at Its highest

polat should be about one thirly-second of an inch above the needle plate.


               THE HEMMER,

   Take the presser foot off and fasten the hemmer (224) to the presser bar
 in place of the footy and let the hole (A) in the hemmer be directly over
 the hole in the needle piate, and fasten it securely to the presser bar by the
sere (327).
   Raise the presser bar a little, and turning the edge of the cloth as shown
 as (K), put it into the hemmer and drew it along to the needle. Them let
the hemmer down upon the feed surface, and operate the Machine as

 uanal.

    If the stitch takes the hem (5) too far from the edge, turn the hemmer

 a little to the right. If on the contrary, the stitch does not eatch the edge

 of the hem, turn the hemmer a little to the left.

   To make a wide hem, fold the cloth the width desired, and enter the

 edge of the cloth as before.
View original page 15Page 16 · Read text
THE HOWE SEWING MACHINT.


               B


                    TO FELL.


    Sew a common seam, letting one edge of the cloth project beyond the

  other enough to form a fell of proper width. Place the projecting edge in

 the hemmer, letting the cloth lig as shown (BB) and sow as usual.
  Thus a beautiful and durable Fell heny be produced.


                 THE BRAIDER.


  Substitute the brnider foot (229) for the presser foot, and pass the
braid under braider epring (281), deawing it through the needle hole as

 shown at a, and sew as before. Thus any design may be wrought with
the braid.
View original page 16Page 17 · Read text
THE HOWE SEWING MACHINE.


                  QUILTiNG.

  Put the quilter bar (105) through the hole in the presser foot, as showa

in the figure, and fasten it by the screw at the back side of the foot.

Adjust it to right or left according to the distance required between the

rows of stitches.


                 CORDING.


   Fasten the corder font (285) to the presser bar. Pat the broad end of

the corder (239) under the left end of the bed of the machine. You will

see a screw hole about three-fourthe of an inch from the left end of the bed
View original page 17Page 18 · Read text
THE HOWE SEWING MACHINE


 of the machine. Fasten the corder by sorow (241) to the bed undernesth,

 letting the small end of the corder lie about one sixteenth of an inch

 direatly in front of the hole in the needle plate. Pass the cord through

 the tension holes (r x) and through the egelet at the end of the corder.
 Double the eloth over and under the condet as shown (D D), letting tho
 end of the cord run backward, as at E.


     THE MAOHINE SHOULD BEKEPT OLEAN.


                                 OILING.

   Care should be taken that the ranning parts of the machine do not get
 dry for want of oil. Only a few drops of oil are required at a time, and

 these should be applied more frequently to those parts having the greatest

motions, such as the needle bar, the main shaft, cam rolls, shattle driver,
 slide, do. None but the best oil should be used. Pure sperm oil is

excellent for Sewing Machines. Should the machine become gummy and
ron heavy, this will be from tho ye of impure oil, or from want of proper


   Spirits of turpentine
                                  osene trill be useful in cleaning away gummy
 material.

  The band should be t                          a of when the machine is not in use; and it
 it becomes too loose to
                            to the nesile through heavy work, it may be
shortened by cutting off aY fle, and making a new hole where the band is
 clasped together.

   The fistures belonging to the machine consist of a gauge and thumb-

 screw, twelve estra needles, siz bobbins, wrench, oiler, sorew-driver, and
 extra needle or throat pita.


   With each of the sip-feed, A and B, there belong, in addition to the
 above, one hemmer, bráder and quilter.

  With the step-feed O, ow quilter.

  Don't attempt to tinker the matine.
                                 Purchasers sometimes say, "Why,

INotookworaemy muchinething allcouldto pieces,be done.and Theit it together again, soon as I got it."

order, and it is a great mistake t chines leave our oficeg in
being tampered with by inexperick 16 thatraOna.they"Letcan be bet
 ALONE."
View original page 18Page 19 · Read text
THE HOWE SEWING MACHINE.


  de.Thei following sizod Needles are suited for the following aired Threads,


     For No. 100 to 300 catton, or 000 twist.       ...No. 000 needle.
          80 to 90     or 00             00
          60 to 70
          40 to 60            B
          20 to 36
           10 to 20                      OF DEES

         Coarse cotton, limen or twist, No. 4 or No. 5 needle.


        DIFFERENT KINDSOR   MOLEE

      1-RouNn PoiNts,


         3.- -FLAT POINTe,


    eedles usad for cloth have round pout                                    The other kinds of pointe
 specified are intended mostly for leather.
                                         ound point needles are also
sometimes used on certain kinds of legthen where strength of seam is
 required, as they do not out the leather; they make a hole like that
represented by dotted line No. 1.


   The twist point needle is used for stitching leather when a twisted

 appearing stitch is desired, and enta the materin!/ as at 2.


  The flat pointed needle is used when a closs, guare stitch is required, and
cuts the msterial as represented, (3).
View original page 19Page 21 · Read text
L TEASE


       -ROUND Pors


        3.- FLAT POINTE


 Needles wed for sloth have round posit

 specified are intended mostly for leather.
sometimes used on certain kinds of leathe
required, as they do not out the leuther; er
represented by dotted line No. 1.

   The twist point needle is used for stitchin

 apperring stitch is desired, and ents the materin


   The fat pointed needle is used when a clor

 outs the material as represented, (3).
View original page 21Related documents and language editions
From the ISMACS International. Original publisher and archive notices are retained.
Check the model and edition against your equipment.
PDF verified 2026-10-11.