Film cameras
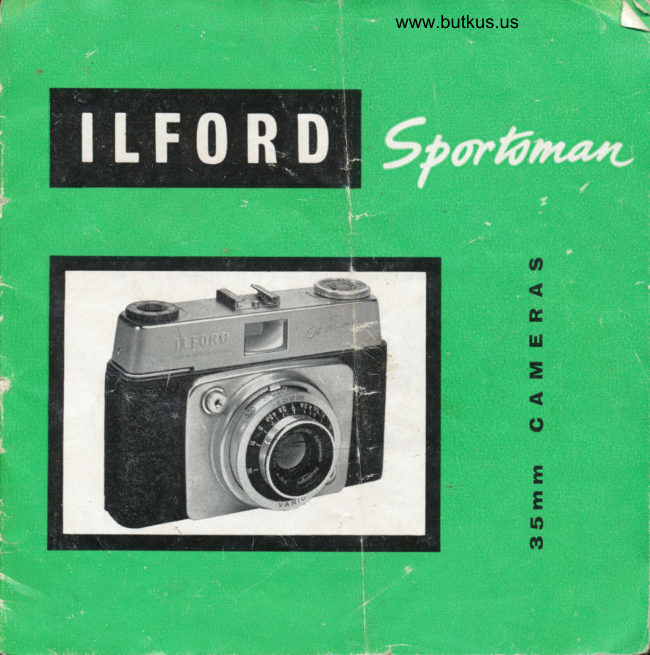
Ilford Sportsman and Sportsmaster Guide Reference guide
Reference guide for Ilford Sportsman and Sportsmaster Guide. 83 pages in English. Read the original PDF, download or print a copy without registration.
83 pagesEnglish7.4 MB PDF

Loading your manual…Open PDF directly
Document details
- Brand
- Ilford
- Model / document
- Ilford Sportsman and Sportsmaster Guide
- Document type
- Reference guide
- Language
- English
- Pages
- 83
- File size
- 7.4 MB
- Category
- Film cameras
- Document date
- Not specified in catalog
Search available document text
Find a term, then jump to its page in the original PDF. Image-only pages may not be searchable; check the PDF for exact wording and diagrams.
Page 5 · Read text
THE SPORTSMAN AND SPORTSMASTER
           CAMERAS
   The Sportsman cameras are miniature cameras producing
 a negative I x l$ in. (24x 36 mm.) on standard 35 mm. film.
 A single load in a standard cassette will take up to thirty-six
 exposures. The film can be loaded and unloaded in daylight.
  The body is a precision lightweight alloy casting, with
 black anodized interior. The outside finish is a black leather
 covering with the metal parts (the top of the housing, shutter
 base plate and catches) in satin chrome finish to ensure
 permanent good appearance and to make the camera climate
 proof.
  The overall dimensions of the Sportsman camera are
 5tx3*x2$ in. (13x8.8x6.5 cm.). The weight is 18 to
 22 oz. according to model.
   The lens and shutter are rigidly fixed to the front of the
 main body. A quick transport lever advances the film and
 film counter and tensions the shutter in a single movement.
 An interlock mechanism automatically prevents double
 exposures or blank frames. The built-in fi.lm counter is
 geared to the film transport. A film type indicator is fitted.

                                                                                                                                                                                                                                                                                                                                                                                                                                                                                                                                                                                                                                                                                         I The release is placed on the front of the camera, carrying                                                                  I
 a thread in its centre to accept a standard cable release
 (except Sportsmaster). An accessory shoe is fitted to the top
 plate of the camera.
   The film is transported by a sprocket wheel on to a per-
 manently fixed take-up spool. The film is held in position by
 a pressure plate in such a way that only the sections outside                It
 the picture area touch the guide rails on the film aperture,                             I                                                                                                                                                           l thus avoiding the possibility of scratching the film. Rewind-
 ing the film is simplified on the latest models by a rewind
knob with countersunk handle.
 A tripod bush is situated centrally below the lens in the
base plate. A depth of field indicatoris engraved around the
lens focusing mount. The camera back is hinged on.
  The lens built in varies according to the model (see green
                              arepages). All current lenses                                   f 2.8 aperture with a local                       www.butkus.us
                        4
View original page 5Page 7 · Read text
t-
 The Sportsman Models
          Models no longer in production are marked O


                                                                                                                                                                                                                                                                                                                                                                                                                                                                                                                                                                                                                                                                                                     I  O ORIGINAL SPORTSMAN CAMERA fi951o. As eeneral des-
 cription above but with direct vision optical hndei (in ilace of the
 bright             finder).        line               The                                        +S                         lens is a Dignar                                       mm.;                                                        the shutter is the                                             f LS                                                       {       speeded                  1125, Vario,                       1,150,1/200                                      sec. and                                                   flash syncfuonized.                                      B,                          X
  O SPORTSMAN CAMERA (1959). As above but firted with the
 brightline viewfinder and parallax indication marks.
  O SPORTSMAN VARIO CAMERA (1960). As general descrip-
tion fitted with Vario shutter 1125, ll50,.ll10} sec. and B, X flaih
synchronized, and Dignar f 28 45 mm. lens.'
  O SPORTSMAN PRONTO (1960). As general description, fitted
with Pronto shutter ll30,.1160,lli25,l./500  sec. and B, buift-in cielayed
 action, X flash synchronized, and Dignar f 2.8,45 mm. lens.
  SPORTSMAN PRONTOR SVS (1960). As general description,
fitted with Prontor SVS_ shutter l, t, +, +, lll5: lp}, 1160, ill25',
                                delayed                                            aCtion,                           built-in               sec. _and!L?10,1/500                    F,                                                       lighi-   value scale, futi                andXM synchronized,                      Dignar                                                       lens.                            mm.                                       f 2.8,4S
  RANGEFINDER SPORTSMAN (1960). As Sportsman pronto
with rangefinder built in and coupled tb the lens.
  SPORTSMAN AUTO (1961). As general description, fitted with
Pronto LK shutter -speeded lll5 to 1/500 sec. and B, X flash syn-chronized,_ built-in delayed action, builrin matching n6edle exposure
meter, fold up rewind crank handle. The lens is a Cassar f 2.8,45 mm.
  SPORTSMAN AUTO RANGEFINDER (1961). As Auto above
but additionally with built-in rangefinder coupied to the lens.                                                                                                                                             l
  SPORTSMASTER  (1961). As general description, fitted with scale-
less Prontor Lux shutter (speed range 1i30 tb l/500 sec.), X flash
synchronized, built-in photo electric exposure meter for fullv-dutomaticape_rt]rrsishutter  speed selection, with light strength signal in viewfinder       I
and four zone-focusing buttons. The lens is the Dignar f 2.8,45 mm,A fold-over rewind crank handle is fitted.
  SPORTSMASTER MANUMATIC (1962). As general description,
with Prontormatic shutter speeded from 1/30 to-1/300 sec. aird B,X flash synchronized, built-in photoelectric exposure meter, con-
tinuous automatic setting with manual over-ride. The lens is a four-
element Ysare4 f 2.8, 45 mm. in focusing mount with three click-stop
zone focus settings.
 SPORTSMAN PRONTOR 125 (1963). As general description fitted
with Prontor 125 shutter ll3O,ll60,llI25 sec. and B, flashsyrichronized,
gxpo-lure counter self setting in base of camera, fold-over iewind cranli
handle. The lens is a Cassar f 2.8,45 mm.                       www.butkus.us
View original page 7Page 8 · Read text
I
I

                  SPoRTSMAN/SPORTSMASTER EVOLUTI O N
                                  The Sportsman and Sportsmaster cameras have developed from
                                    the original 1957 and 1959 models of the traditional 35 mm.
                                   type (now discontinued) into a range including models with
                                       rangefinder focusing, automatic focusing, scaleless shutters,
                                          built-in exposure meters, etc. The automatic models are
                                       featured in the right-hand column.


                    Sportsman


    1959            $portsman                                                           i$port$nrarl
     @                                                 $portsman
     @
    1960         Prontor 125     1900             Prontor $tl $


                                                                   I 960         flangqf inder     I902 $porttmaster ilanumatic
View original page 8Page 9 · Read text
T'

                                                                                          *
  HANDLING THE SPORTSMAN AND                                      {,I'i
     SPORTSMASTER CAMERAS
   In order to simplify the description and handling of the                   i
Sportsmans cemeres without being confused by dffirent
features of individual models, this guide has been divided into
                  generaltwo sections. The                           section                                    applies to                                                      all models.                                                 The                        Itirequirements,                   consequently                                          handling,           and                                              of each                                dffirent                                                                                                                                                                                       :
model are found on special pages after page 16.
  For convenience a symbolic reference system is also used in the                     t,tgeneral section. Wherever the sign I appears, further details will be
found in the camera pages of the special green section for each camera
type.
                                                                                                                                               $
Holding                                                                                                                                                                  .r
   It is obvious that the camera should be held as steady as                t
possible, as the slightest shake, even if not seen in the nega-
tive, will become visible in enlargements. Always stand with
your legs apart.
  FOR HORIZONTAL PHOTOGRAPHS  hold the camera
horizontally against your nose while looking through the
finder with one eye. Keep both elbows close to the body.
Press the right thumb against the back of the camera and
let the right index finger rest on the release, while the right
middle finger, bent downwards, presses against the camera
front. The left hand grips the camera body on its left side.
 FOR VERTICAL PHOTOGRAPHS rest the camera
upright against forehead and nose, gripping its top with the
left hand, left thumb against the camera back. The right
hand holds the camera from below, right index finger on
the release, the camera resting in the palm of the right hand.
  To release the shutter, press the release with the ball of
the finger. Use finger pressure only and keep the hand and its
grip on the camera steady. The actual pressing down must
be done slowly and smoothly.
  For slow exposures in the hand it is advisable to rest the
elbows, or at least lean the body, against some support in
order to avoid shake. In this way lll5 sec. can be risked                      www.butkus.us
View original page 9Page 11 · Read text
without camera shake. Such a support is also desirable for
faster exposures.l-slightly unsteaby hold may easily lead
to blurred pictures.           ^of          a tripod is necessary when taking time ex-     {  The use
                                                                     sec.poiui6 undit is alio recommended for speeds of l/15
ind slower. For vertical photographs from the tripod use a        {
Uuff una iocket head to illow itrahging from horizontal to
vertical position.

Cawying the SPortsman
  However elegant it may be to_ caffy the Sportsman in its
.uei-teaay        u tong ltr?P hanging from the shoulder' ;liir p;;itlo""ur."onir quite uniuitabie foiqulck action. A better
metfioO is to cariy the camera on a ihort strap round the
                             chest.-opening the case and;;;ft"-trtut ii-ii'.,t ott ott.'.                           eye is then a matter of a split iiiting ttt" .u-.*  ,rp to the
 second.-                             camera ready for use;   ttr. ever-ready case carries the
 there is a cametu holding screw which prevents the Sports-
man from falling out of the opened case'

 Yiewing and Focusing
  The viewfinder oi the Sportsman (except 1957 model)
 rfro*r ttre suUjectln two-tttirbs natural size. Looking lhlough                                                          out-                                      frame which                             see                                        brillant             yo"u              can clearly     nttOer, inr                                                        area                                                the                                         lens. However'                             of-thethe                     of vi6w                   field       tttr eiact ii*r
 i"ri          this fiild of view is also visible. You can thus                                                 be taken' ';;;.h;ilh;;dlti."uiiide          tnttorrodings of the subject to
                                  para-llax indicatibn marks in the   ih; Utigtriii";il;t"thas                                         field of view for close-uq ni.*nnait-, *f,iit gi* the cbrrect                                          the camera field of work. With n.ui-t-"Ui..tt ut 3 to 6! ft'                                         do-wnwards if view as indicated-bi til  finder is displaced                                               held verti- the camera is held-fioiiio"tally and sideways if
 ;;ily:Thir Oirpf ur.t"i"i tt.rtrriic4lly .t?11.9 hnder parallax)
 is-- shown by t"i'o short lines in the bright frame'                                          clos_e lange, the actual field   Wf,rn tuting ;i;j*t;  ;i rn.1
 rou.i.Jir ttruii"Oitaieawww.butkus.usat the top by thele short lines, but
                             10
View original page 11Page 12 · Read text
VIEWING AND FOCUSING


 Right: Inside the viewfinder of modern Sportsman
 cameras you see a brilliant white frame apparently
 suspended around the subject area. This frahc out-
 lincs exactly what will be recorded on the film. The
 centrc of the field is marked by a cross. At the same
 tlme you sce also something of the surroundings of                                                                       $ che subject-a useful feature when following-fast
 action.                                                                                                                                                                                                                                                                                                              .tl
                                                                                                                                                                                                                                                                                                                                                                                                       .iI


With ncar sublccts bctwccn about 3{ and 6 ft., most
camera viewfinders suffer from a so-called Darallax
crror. The finder then shows a little more of the
!9p ofa subiect than is actually recorded on the film.
The two short marks near the top of the brilliant
image frame show thc degree of pirallax correction
required. With such near subjects, therefore, take
the upper. limit of the field of view as an imaginary
horizontal  line ioining these two marks. The fiIm, oi
course, shows correspondingly more at the bottom
of the framc which is also indicated by short lines.


                                                  left: Thc centre ofthe vicwfinder image ofSportsman models
                                            fitted with couplcd rangefinder showl a squarc area. Within
                                         this area _subiect outlines appear double as long as the lens is
                                           lncorr,ectly focused. Turning the lcns mount until the two
                                      rangcfinder images fuse into one automatically sets thc leni                                      to thc correct distance.
                              With the camcra held horizontally, this doubllng of outlincs
                                         is most prominent with  vertical sublect contours. For
                                     gpright shots, view horizontal subject lines to observc the
                                       fusing best.


                                   1l
View original page 12Page 13 · Read text
F

 tlre corresponding area is added to the opposite side (below
 the base of the reflected frame when the camera is held
 horizontally) and again indicated by two short lines.
  The viewfinder of the Sportsman camera 1957 is of the
 direct vision type and should be held close to the eye. Do
 not attempt to turn the camera to the right or left, away
from the eye; nor must the eye be moved from the centre
 of the eyepiece to flnd the limitation of the field of view.
This "spying round the corner" is deceptive because the
negative includes only what you see in the finder when
holding the eye close to, and in the centre of, the eyepiece
while lookrng straight ahead. The field of view is exact for
photographs taken at 9 to 12 ft. distance. At infinity a trifle
more appears on the negative than seen through the finder,
and at 3[ to 6 ft. a shade less.
  To obtain a sharp negative, set the distance from the
camera to the subject as accurately as possible. On Sports-
man models without built-in rangefinder, estimate or measure
it with a separate rangefinder or other aid. On these models,
the distance is set by turning the focusing scale until the
required distance figure is opposite the distance index mark.
On the Sportsmaster model focusing is accomplished by
pressing the release with the appropriate distance zone
shown on it.

Rangefinder Focusing
  On the Sportsman models with coupled rangefinder the
Iatter measures the distance and at the same time brings the
camera lens automatically into correct focus. To use the                l
rangefinder look through the combined viewfinder/range-                  t+
finder eyepiece. You will see a bright rectangular fi61d and
on this field the image of the subject appears double. On
slowly turning the lens focusing mount, the two images will
fuse into one. Stop when the two images are superimposed;
the lens is then focused accurately on the subject.
  The orthodox way of rangefinder focusing just described
is suitable for stationary or very slow moving subjects. For
action subjects a different method of focusing is suggested.                      www.butkus.us
                             t2
View original page 13Page 14 · Read text
There you set the camera and the rangefinder to a distance
 at which the subject will be at a given moment, or focus on a
 spot which the subject has to pass. Watch the scene in the
 rangefinder, and press the release button when the two
 rangefinder images coincide, indicating that the subject
 has reached the pre-focused point.
  With subjects liable to react self-consciously  (e.g., chil-
 dren), set the lens to a suitable distance and then approach
 your subject quickly, exposing as soon as the two images
 coincide in the rangefi.nder.
   Alternatively, focus on some object which is the same
distance from the camera as your real subject, but in a
 different direction. When the range is found, swing the
camera round and press the release button as soon as your
 subject comes into the field of view.
  See also page 49 for quick shooting with zone focusing.

Shooting
   Practice the following operations first with an empty
camera until you can do them practically automatically.
1. Work the film transport. This advances the film counter
   and tensions the shutter.
2. Set the exposure. Adjust the shutter for the right amount
    of light for the subject conditions (page 32). On Sportsman
          with built-in photo electric exposure meter, the   -models'meter          indicates the sefting required or bven sets the con-
    trols.
3. Select the aperture-speed combination you want to use;
   smaller aperture for greater depth of field (page 40) or
   faster speed to arrest movement (page 46). Not required
  on Sportsmaster.
4. Focus and determine the picture area to obtain a sharp
   picture and the view you want.
5. Release the shutter gently.
Film Packings
  The Sportsman cameras, like the majority of 35 mm.
miniature cameras, use standard perforated miniature film,
                              l3
View original page 14Page 15 · Read text
35 mm. wide.'It is available in various packings (see also
page 18), the most convenient being standard daylight
cassettes. These are light-tight containers with a ready cut
and trimmed length of film for 36 or 20 exposures.
  The cassette can be loaded into the camera in daylight,
but avoid loading or unloading the camera in brilliant sun-
light. Choose a shady spot or do it in the shadow of your
own body if nothing better is available.

i:t{{:"the camera back. Slide the catch in the centre of
   the side wall of the camera downwards (on latest models
  push up the catch on top of the side wall) and the back
   will spring open.
2. Insert the film cassette. Pull out the rewind knob and place
   the cassette, with the protruding film end pointing to the
   take-up spool, into the cassette chamber. Fully push back
   the rewind knob, so that it engages in the cassette spool.
3. Fix the film end to the take-up spool. Pull out about 3$ in.
 '  of film until the first perforation on the lower part of   the film protrudes from the cassette. Turn the fake-up
   spool by its serrated flange until its slot is facing you and
   insert the film end into the slot as far as it will go.
   Turn the take-up spool by its serrated flange until the film
     is just taut and its top perforations engage in the sprocket
   wheel.
4. Close camera back, by pressing the back against the
   camera body, when it will click shut.
5. Set the fiIm counter !.
6. Make two blind exposures to advance the exposed part
   of the film. Work the film transport, press the release, . work the transport again and release once more. During
    this operation, check that the film rewind knob rotates
   in an anti-clockwise direction to show that the fllm is
   advancing properly. When using a shorter than 36
   exposure film it is advisable to take up the possible slack
   in the cassette by flrst rewinding the rewind knob in a
   clockwise direction www.butkus.usuntil a slight resistance is felt.
                            L4
View original page 15Page 16 · Read text
I

i,                                         LOADING


    Top- Row: Open the camera back by releasing the catch (left). Pull out the rewind knob-(centre) and               iniert the film cassette. Pullout the film leader (risht) and attach it to the take-up spool.
       lvliddte Row: Close the camera back (left). Set the exposure counter to A (.centre). Make two btind
            exposures (right).
     Bottom: Set film indicator to the type of film in use.
                                   l5
View original page 16Page 17 · Read text
7. Set the film indicator (on models without exposure meter)
   by turning the indicator in the top plate to bring the type
   of film in use opposite the index mark on the rim.
7a. On models with built-in meter set the film type to the
   speed of film on the indicator on the camera top and also
   set the film speed on the shutter rim (see pages t 9, l2).

Unloading
  After all exposures have been made (the number of
exposures made or still left on the film is automatically
shown on the film counter) unload the camera.
1. Set for rewinding. Press the rewind button to disengage
   the transport sprocket in the camera. Keep it depressed
   during rewinding.
2. Rewind the film. Rewind the film into its original cassette
  by turning the rewind knob or crank in a clockwise
   direction. Winding becomes distinctly easier the moment
   the film is fully wound back.
3. Open the camera back.
4. Remove the cassette and close the camera back (see
   Loading No. 4) or reload with a new film.
Cutting off Exposed Lengths
   If a film which is only partly exposed has to be processed,
set the shutter for the next exposure and, in the darkroom
or in complete darkness, cut through with a pair of scissors
the frame which lies in the film aperture. Retrim the re-
mainder of the film (see page 20) fix it again on the take-up
spool, and close the camera. It is ready for the next exposure
once the film counter has heen set four numbers forward
(the amount of film lost through cutting and re-loading).
  The re-inserting can be done in daylight. In this case a
total of about six frames are lost, for, after inserting and
closing, two blind exposures have to be made to wind on the
film length which was exposed to the daylight.
     Main text continued on page 17 (after the green section),                    www.butkus.us
                            l6
View original page 17Page 18 · Read text
TIIE SPORTSMAN AND SPORTSMASTER
       MODEL BY MODEL
  These green pqges deal with the individual Sportsman and
Sportsmaster cameras in detail. 'Self-contained                  sections for each model cover points of
loading, unloading, shooting and specific controls.
  For a fuller explanation of aspects common to all models,compare these sections with the same headings in the main
text,

The Sportsman Vario, Pronto,      The Sportsmaster
Prontor 725, Rangefinder and         Loading                     10
Prontor SYS                                 Unloading                  t2
  Loading            2     Shooting                   t2
  Unloading          4     Special Controls            t2
  Shooting                 4
  Special Controls              5

The Sportsman Auto, Auto
Rangefinder and Sportsnaster
Manumatic
  Loading                    6
  Unloading                  8
  Shooting                    8
 The Built-in Expostre
    Meter                 9
  Special Controls            9
View original page 18Page 19 · Read text
THE SPORTSMAN VARTO, PRONTO,
         PRONTOR !25, RANGEFINDER
            & PRONTOR SYS
              These models conform to the general description given on page 4.
             Rigid body, with hinged-on back, quick wind film transport, acc€ssory
            shoe in top plate, release on camera front with cable release socket in
                  its centre, film type indicator, depth of field indicator on shutter front
               plate, flash contact on lower part of camera front.
             The original Sportsman of 1957 is fitted with a direct vision view-
                finder. The lens built in is an /3.5 three-element anastigmat in Vario
               shutter, speeded 1125, 1150,1/200 sec. and B for time exposures. The
             quick transport lever is on top of the camera top plate.
             The Sportsman 1959 is as the original model but the finder is replaced
            by a bright line viewfinder with parallax indication marks.
            The Sportsman Vario has improved body styling with the quick
              transport lever let into the base of the camera top plate, the lens is the
            /2.8 Dignar three-element anastigmat in Vario shutter, speeded 1/25,            ll5O,ll2W sec. and B for time exposures.                                                       *            The Sportsman Pronto is distinguished from the Vario model by
             being fitted with the Pronto shutter giving speeds of 1/30, 1160,lll25,
             1/500 sec. and B, and has built-in delayed action release.
            The Sportsman Prontor 125 is fitted with the Prontor 125 shutter,
            speeded ll3O,llffi,lll25  sec. and B. The film counter is in the base of
            the camera and is self zeroing. The rewind is fitted with a fold-over
            crank handle. Other features are as in the Vario model.
            The Rangefinder Sportsman is a Sportsman Pronto with a built-in
             rangefinder coupled to the lens.
            The Sportsman Prontor SVS has a Prontor SVS shutter built in
              giving speeds of 1, *, +, t, ll15, ll3O, ll60, lll25, l1250,l/500 sec. and             has built-in delayed action release and adjustable flash synchronization,
         XM, for use with electronic flash and flashbulbs at all speeds.
          ALL MODELS ACCEPT 32 mm. push-on filters and lens hood.
          FOR CLOSE-UP WORK from 39 to 13 in. close-up lenses can be
              used.
           Loading
             1. Open the camera back.
             2. Insert the filn cassette.
             3. Fix the fhn end to the take-up spoot.
            4. Close the camera back.
            5. Set the film counter. Turn the outer rim of the film counter knob in
                 the top plate in the direction of the engraved arrow to bring the "A"
            mark in case of a 36 exposure film, or the 22 mark when using a
              20 exposure film, opposite the index mark on the film counter. The
               counter shows the number of exposures left.
ri         t2                 www.butkus.us
F
View original page 19Page 20 · Read text
l-F'

spoRTsMAN VARIO, PRONTO, PRONTOR 125, RANGEFINDER
                         AND PRONTOR SVS

                                                     Focusing ring
                                                       Shutter ring
                                           Aperture setting
                                                                  lever
                                                   Film transport
                                            Rewind handle
                                                    Focusing Ring
                                                Viewfinder
                                                       Shutter ring
                                            EV knob
                                                Exposure values
                                                 Shutter release
                                                             Flash setting
                                                      Flash socket
                                          Rewind release
                                                       button
                                              Exposure counter
                                                     Focusing ring
                                                       Shutter ring
                                                Aperture ring


 Focusing is by scale only (except on the Rangefinder model). Distances are marked on the focusing.ring
on the front'qf the lens-inount. Behind this are the shutter ring, controlling shutter speeds, and the
aperture ring with operture setting lever. On the Prontor SVS there is also an exposure volues- ring.
When the knob on this ring is moved to an EV setting, shutter speed and aperture are pre-selected
to give an appropriate combination. They are also locked togetherso-that adjusting o_ne automatically
adjusts the othei. The flash socket on all models takes the standard 3 mm. coaxial plug. Shutters are
X-synchronized, excepi the SVS which has both X and M synchronization  . Film tronsport  is. by lever,
whiih also tensions th; shutter. The viewfinder is a direct-vision, bright-line opticaltype with parallax
correction marks.


Shooting with the above models. From leftto right: Advance the film and tension the shutter with the
film transport lever. Set shutter speed and aperture (or exposure value on SVS). Focus, compose the
picture in the viewfinder and press the shutter release gently.
                                                              3I
View original page 20Page 21 · Read text
on the spo{g-man                      prontor 725 thefilm counter is self-setting and will             o'A"    show to      automatically after inserting tt" hmJ'tn"";o;"i;;    shows the number of exposires taken.
  6. Make two blind exposures.
  7. set the film indi.cator by                                -turning the inner disc of the rewind knob      until the gvmp_ot for th6 black-ind-white nlm bic"i""inr*-p"i"t,
     l:-l\"sure). index (this acts as a reminder and doiJ;;t;ft."d td;-"6;-
  Unloading
  1. set for rewinding by pyshing doryn the rewind stud in the---' base of the _ camera. Keep the stud depiessed while rewinding.---
  2. Rervind the fiIm by turnin! ttte r"*ino knob in the direction of the    arrow.           After                      all                                is                      film                       rewound                                   wilding                                       tecomes                                                     oirti""tiv;ir;                  prontor   on sportsman                          125                                  fold up                                         the ri*i"o                                                  iiunt                                                                 lo, ,ewinding.'    Open           the 3.-            camera                      back.
  4. Remove the cassette by pulring up the rewind knob and close camera    back or reload with film.
 Shooting
  1. work the film tranpno$ by. swinging out the rapid wind lever as far             go, then let it s\iing                               bickl            _will 2.^ qssetit the           exposure..Except                           with                                the sportsman SVS turn the milled    shutter rim to bring tlig re4 line ori ttre iiiE opporit"'trrJrrr"ilt",    speed you want to,y^r":lhS                                   !g-otq, 30, 60, tiS,'etli,lepillsent  fraction
                                                                       t'f tZS sec. 2a.-  ofse!secondsthe expoiure'varue'on'sf;.16;e.g., 1130, l160,                                       prontor svs. The shutter rim
     carrles a range of numbers engraved in red from 2 to ts whicrrii;
    exposure values for correct exp-osure. Each exposuri vatue,"presents
   a ranse of shutter speed-aperlure combinationJ iovi;;abt;;Gi;
    setting. To s-et the exposurb varue, press in thJi*ut"dl"uer on the
    e-xposure value ring (which also cliries the apertur" ,.ui"j Ad il;                                     value                                            oppoiit"                                                          itteliiJrgrrrur                                                                marli   onll"ltlthe shutterl9j1inespeedthe. bppropriate                                      hav6                      you may                                                 to rotate                                                        the shirtter spJio                          1iqs.    ring as. well. Lef go of tht s"irui"d"teuer, so that the exposure value    (or an.intermediate  value) cricks into positloti:T6;-.5"t
 -_   value is obtained from exposure tabl-ei oi;6u..;";;;r.  "*po.*"
 2b. select t-he ap_grtyrg/sneea combinaiion on ttie Sp;rffi; svs by    turning.the milledshutter ring. until the r_p..a uno'uprriJr" ,"quirii   are in           tine                       index             with the                       on                                 lhe top oi tfi;il;;u-ifit                                                                   rr,"                                                               ottii    qairs         of            aperture                 and                       speed                                 opposit'e                                                                   alterna_                                               othei are i,-"rJiur"    tive combinations.                     "actt
   set the                     (9;<9ent3'           aperture                      on                          SportsmaS                                        by turning                                                            the                                                            aperture                                    !vs)   ring       by            its-serrated                       lever                           or                                   slrut uniil the                                            aperture                                                       vaiue                                                                 serected                                                                                                  is   oppo_site           the            mark                  on                                                                 shutter                                     lens baiiei. irt"                            -top of the   speed        and              aperture                    combination                                               is obtaineali;m;i"ble                                                         "oii""tor separate
   exposure meter.     www.butkus.us
r4
View original page 21Page 22 · Read text
4a. Focus. To focus, estimate or measure the distance of the subject
    with_a separate rangefinder and set this on the distance scale. Turn
   the front lens mount until the focusing distance is opposite ihe
    indicator opposite the distance scale.
  On the Rangefinder Sportsman with built-in rangefinder, look
   through the finder and watch the image, especially-in the'brighi
   centre rectangle. Turn the front lens mouni to mbke the dou6le
    outlines in the rangefinder field merge into one. The camera is now    set to the correct subject distance. -
 4b..Determine the picture area. The view reproduced on the film is
    that outlined by the white frame visible in the finder. To compensate
    for parallax at near distances (about 3 ft. 6 in.) the horizontai marks
   on the frame indicate the upper limit of the freld of view.
5. Release the shutter gently.
Special Controls
 FoR TIME EXPosuREs set the shutter speed ring to B. A cable
release screws into the centre of the release button.
 DELAYED ACTION. on Sportsman prontor svs set the lever
on the left of the shutter opposite the vXM engraving to v. on the
Pronto and Rangefinder models, tension the delayed actfon mechanism
by moving the lever below the shutter rim clbckwise. operate the
winding lever first.
  FLASH. A socket (X;s_ynclronized) is on the bottom right of the
front plate. The-flash^of the sportq-uq prontor svs is adjisiable by
the lever on the left of the shutter rim. set to X or M accor-ding io ttt6
synchronization  required. See also Flash page 50.


                                                     5I
View original page 22Page 23 · Read text
TTIE SPORTSMAN AUTO,
     AUTO RANGEFINDER AND
    SPORTSMASTER MANUMATIC
   These models conform tg thp general description give on page 4.
 Bigi4 body, with hinged-on back, quick-wind nfn traniporr. accessorv
 shoe in l9p plate, release on cameia fronr with cauie..tiise 6;kiii"n ii. centre, film type-and speed indicator, depth of field indicitor on shuttei
 tront pJate.,. tlash contact on lower part of camera front, film rewind
 craflk, brilliant bright line viewfindei with parallax indicator.
                            h_as a photoerectrii exposure meter built into   . The sportsman Auto
 the camera on the matching. ireqdre priniciplel semi-automatic,-  wiirr indicator            visible               above                       the                            viewfindei                               and                                                           itre                                            in                                             top                                                         .r-tn"                                                         ;;d;:                  pronto The      shutter                 is               the                                 givine spe-eds                                                              or-                LK                                                   t7ts,                                                                  i/ro                                                           ,1leo,-{iirj,                                    -builtlin 11250,         t/S-09                    and.has           gl4                                       delayed-d"tib;';;iedsttf                                                                            seli                     !, timer) and is X flash synchornized.
   The lens is the CASSAR/2.8,45 mm., three-element anastigmat of good overall definition and coloirr correition.
  The sportsman Auto Rangefinder is a model Auto with built-in
 raqgefiqder in one eyepiece with the viewfinder anO coupteO'to tfre feni.
 . TlJ_spo4sman lManumatic has a photoelectric expos'urJmeter-trftctru"ism     buiit. in. when the camera is set to Auio, the meter              sets the
 correct:perture automatically according to the pre-selected shuttei
 spe.ed. The action of the metei is controiied by th6 nmipieo  ,-6ltiril.
 This model.al,"o permits manual over-ride      i"aiviouii sEtii"g 5i
 apertu_re.and shutter-speed. This does not, holiever,".g.,    preveni ttre m?tii f:,qf .b,"*s_ gry$._fhe shutter is the prontor-MatiCgivft afi;a;;i ll39' 1160,lll21,ll250,l/500 sec. and B. Ir is flash sinchr-onired.   'rhe        lens is the Ysa.rel,                           !2r.p, 45 nunr a four glals, 3- component construction of highest definition and coiour correitiori.
  ALL MODELS accept 32 mm. push-on filter mounts and lens hood.
The outer lens mount {akes 42 min. attachment.
  FoR cLosE-uP woRK from 39 to 13 in. close-up lenses can be used.
Loading
1. Open the camera back.
2. Insert the film cassette.
3. Fix the film to the take-up spool.
4. Close the camera back.
5. set the fiIm counten Push the flat milled knob on the side wall of
   the top plate to and fro until the arrow head on the rim of tnJnm
   counter let into the top plate -points to A for a 36 exposure film or   to 22 for a 20 exposure film.
6. Make two blind exlnsures.                      www.butkus.us
l5
View original page 23Page 25 · Read text
7a. set the fi[n indicator by turning the centre disc beside the film
    counter untilthe type_of film B+W:Black and White, Rev:Coioui
    lgversal film, Neg^:^9o.lo_gt neg:ative film, points to the speed of ifre
    film used on the ASA/DIN scale in froni bf the disc. rtris ooeJ noi
     affect the exposure, but acts solely as a reminder.
 7b. set the fiIn speed. Press in the smail serrated lever behind the
    shutter fpeed setting.ring and turn the shutter speed ring to bring
    the small red dor on its qiry oppogjle the ese or otN rp"."d ofittE    film used. Then let go of the irirall lever.
 Unloading
 1. set for rewinding by pushing down the rewind stud in the base of    the camera and keeping in this position.
 2. Rewind the fiIm by folding over                                     rewind crank and turning it in                                           -the   the direction of- the arrow. After all film is rewound, ;fta-G   becomes distinctly easier.
 3. Open the camera back.
 4. Remove the cassette by pqling up the rewind knob, close camera
   back or reload with newfilm.-
Shooting
 1. work the filn hansport by. swi4_ging out the rapid winding lever in
   the camera back as far as it wil|gol Then let if spring badk.
2. set the ex-posure. Turn the shutter ring to bring the required speed
   opposite the mark                  9n thq top of the lens mounl barret. ttre fi-gG;
   on the,shutter  s_pj_ed ring indicate fractions of second: 30:u30";e%   6O:1160 sec., 125:l/125 sec., etc.
 3a.. set the aperture on                    $portsman Auto by turning the aperture ring by     its serrated lever until the red pointer coincides iittr ttr5 wtrite poifiter
    in the cut out in the caEera-top plate or the rectang,rtui g.e6n n"t,o
   above the viewfinder. For full instruction on usiig the exposure
   meter see below.
3b. on sport-smaster Manumatic set to Auto. The aperture is set
   automatically and can be read off in the rectangle a6ove the view-
    fin<lpr. A triangular pointer indicates the apertuie figure on a green
   background.  If _the.light is too po-or a red field with a flaaf;E;
   gppears. below the indicator triangle, indicating that the prevaififig
    light is insufficient for a correct eiposure.
   Y,o!*l  s.glting. with.the "Auto" ring turned through Ig0 degrees to   "Manual" you can choose your own aperture. yo[ can stiliuse the
   exposure meter by pressing the black 6utton in the back of the top
   qlate. The correct aperture for the speed of shutter ana nm set oi
   the camera is then shown in the rectangle above the finder.
   Note: You cannot set the shutter to F and to Auto at the same
   time. Nor should.you try Lo change from manual to Auio operiiion
   while the shutter is set to B.                      www.butkus.us
IA
View original page 25Page 26 · Read text
4a. To focus_sportsman Auto and sportsmaster Manumatic, estimate or
    measure the distance of the subject with a separate rangefinder and
    set this on the distance scale. Turn the fronl lens motint until the
    focusing_ distance is o,pposite the black mark opposite the distance
    scale. The symbols shown on the focusing scble are zone focus
     settings:
     Portrait :3 to 6 ft.
   GrouP :10 to 20 ft.
     Landscape:2O  ft. to o.
  On Sp-ortsmal Auto Rangefinder with built-in rangefinder, Iook
   through the finder and watch the image, especially-in the bright
    centre rectangle. Turn the front lens mounf to mike the double
    outlines in the rangefinder field merge into one. The camera is now
    set to the correct subject distance.
 4b. Determine the picfure area. The view reproduced on the film is that
    outlined.by the white frame visible in Jhe finder. To compensate
    for parallax at near distances (about 3+ ft.) the horizontaf marks
   on the frame indicate the uppei limit of the,field of view.
 5. Release the shutter gently.
 The Built-in Exposure Meter
  To operate                    built-in exposure meter of the sportsman Auto and                 -the ^ Sportsmaster Manumatic models:
 1. set the filn speed. Depress the serrated lever beside 6'500" on the
    shutter qpegd qqrl^e an{ !-e_ep it depressed. Turn the shutter speed
   ring until the ASA or DIN ipeed rtquired is opposite the red'dot.
2. Point the camera at the subiect, taking care not to obstruct the
   honeycomb  cell of the exposure meter with your fingers.
 3a.. Turn the aperture ring on sportsman Auto to line up the two pointers
   in the exposure meter winiiow in the top of the bamera or in the
   green rectan_gle immediately above the viewfinder aperture. you
   have now selected the correct aperture for the pre-seiected shutter
   speed (see Shooting, No. 2).
3b. on sportsmaster Manumatic set to "Auto" the aperture sets itself
   automatically. You just release the shutter

Special Controls
  FOR TIME EXPOSURES, set the shutter speed ring to B. A cable
release screws into the centre of the release knob.
 THE DELAYED ACTION RELEASE of the Sportsman Auto is
tensigned by moving the lever below the shutter rim c'lockwise. operate
the fiIm transport lever first.
  FLASH. A socket (X-synchronized) is on the lower part of the base
plate. See also Flash, page 50.
                                                                                          tl
View original page 26Page 27 · Read text
THE SPORTSMASTER
  This model conforms to the general description given on page 4. It
has a rigid body with hinged-on back, quick wind film -transport,accessory shoe in top plate and a set of four release knobs on the
camera front. A film type indicator is let into the top plate, and a flash
contact is let into the lower part of the camera front plate. The brilliant
brightline viewfinder has parallax indicators.
 A photoelectric exposure meter is built in and coupled to the scale-
less Prontor Lux shutter, which combines the shutter speeds with the
film speed setting. The camera therefore works at a fixed shutter speed,
depending on the speed of the film used.
  The 10 ASA setting yields a shutter speed of 1/30 sec.
  The ?A ASA setting yields a shutter speed of 1/60 sec.
  The 50 ASA setting yields a shutter speed of 1/125 sec.
  The 100 ASA setting yields a shutter speed of 1i250 sec.
  The 200 ASA setting yields a shutter speed of 1/500 sec.
  The exposure metef system, via the release lever, therefore selects
the lens aperture to correspond to the fixed shutter speed which is
determined by the speed oflhe film used. The aperture opens up and
closes down Continubusly according to the prevailing light conditions.
The aperture selected is shown in a rectangle above the viewfinder on a
green-backglound. If this changes to red, there is insufficient light to
take a picture.
  The shutter is X flash synchronized and has "B" setting for time
exposnre whereby the aperture is fully open at f 2.8.- _ _
  The lens is the three-element Dignar anastigmat f 2.8,45 nn;r.  The four release buttons in addition to releasing the shutter and
actuating the automatic aperture setting will also set the distance. Each
button has its focusing zone engraved on it and also has on its base an
actual distance figure.
  There is no provision for a cable release.
  THIS MODEL ACCEPTS 37 mm. push-on filter and lens hood.
  FOR CLOSE-UP WORK from 39 to 14 in. close-up lenses can be
used.
Loading
1. Open the camera back.
2. Insert the fitm cassette.
3. Fix the flm end to the take-up spool.
4. Close the camera back.
5. Set the film counter. Turn the outer rim of the film counter knob in
   the top plate in the direction of the engraved arrow to bring- the "A"   mark, fbr a 36 exposrue film or the 22 mark when using a-20     fi
   exposure film, opposite the index mark on the film counter. The
   counter shows the number of exposures left.
6. Make two blind exposures.
7a. Set the fihn indicalor www.butkus.usby turning the inner disc of the rewind knob
rl0
View original page 27
Related documents and language editions
From the M. Butkus archive. Original publisher and archive notices are retained.
Check the model and edition against your equipment.
PDF verified 2026-10-10.