Film cameras
Kodak 3A Autographic User manual
User manual for Kodak 3A Autographic. 75 pages in English. Read the original PDF, download or print a copy without registration.
75 pagesEnglish1.0 MB PDF
Loading your manual…Open PDF directly
Document details
- Brand
- Kodak
- Model / document
- Kodak 3A Autographic
- Document type
- User manual
- Language
- English
- Pages
- 75
- File size
- 1.0 MB
- Category
- Film cameras
- Document date
- Not specified in catalog
Contents
Search available document text
Find a term, then jump to its page in the original PDF. Image-only pages may not be searchable; check the PDF for exact wording and diagrams.
Page 2 · Read text
www.orphancameras.com


                      Velox Transparent Water Color Stamp Outfit

                  NO EXPERIENCE NECESSARY

The outfit consists of an Artist's Mixing Palette, three special Camel's Hair Brushes, and one book
of Velox Transparent Water Color Stamps ( 12 Colors). Price, $ .85 Price subject to change
without notice

EASTMAN KODAK COMPANY, Rochester, N. Y.


                               Prints do not curl when mounted with .. Kodak Dry Mounting
                             Tissue

                                 Just the Tissue and a Flatiron

                        Dry Mounting Tissue is incomparable for album work. The
                              leaves lie flat with perfect adhesion.


            EASTMAN KODAK COMPANY, ROCHESTER, N. Y.


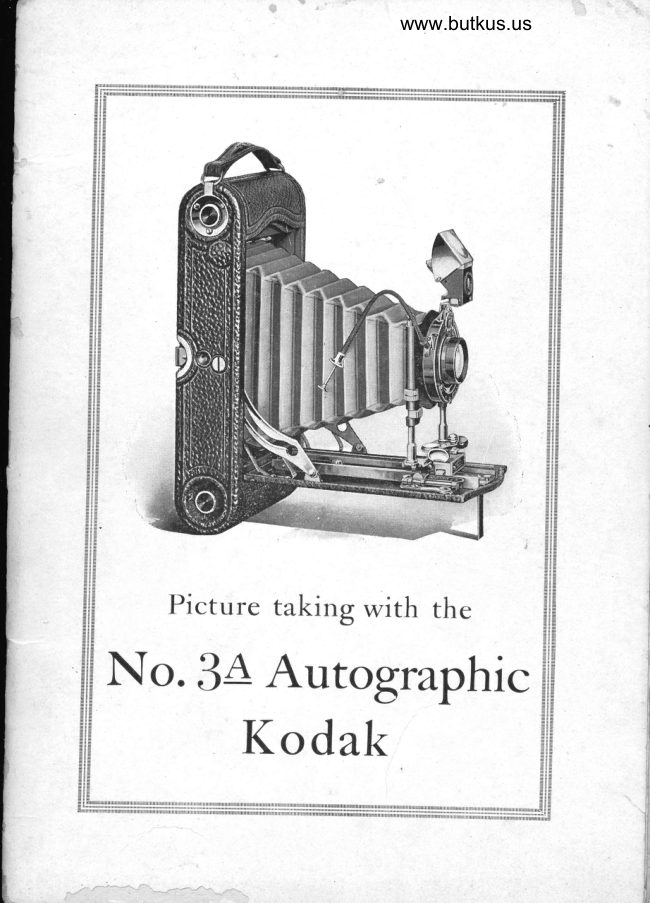
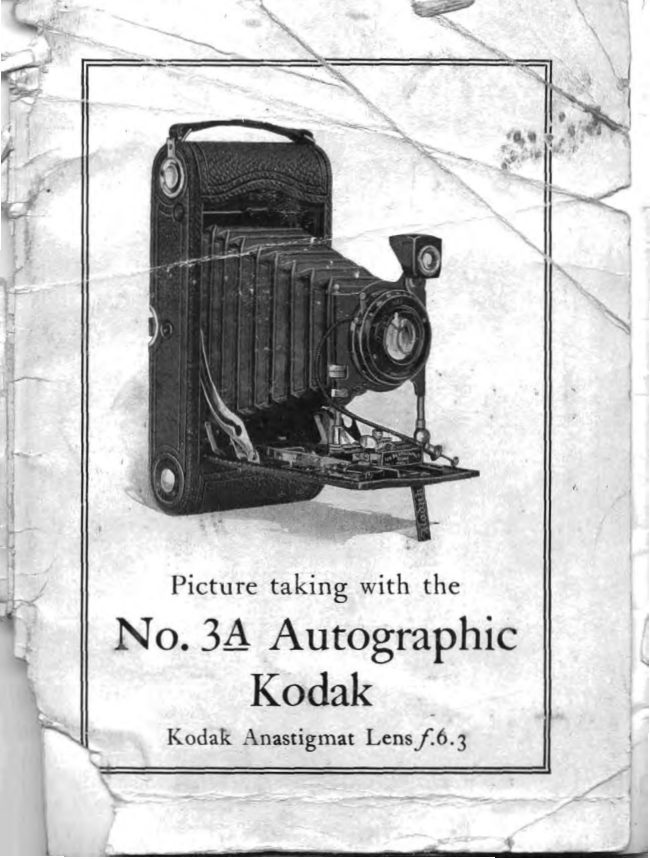
                                    Picture taking with the

                                No. 3A Autographic

                                   Kodak

                       (Rapid Rectilinear and f.7.7 Anastigmat Lens)

                                       Published by

                   EASTMAN KODAK COMPANY

                          ROCHESTER, N. Y.
View original page 2Page 3 · Read text
Order Film by Number

All Eastman Films may be distinguished by the numbers on the ends of the cartons. A-122 is the
number of film for this camera ( No. 3A Autographic Kodak) . The number appears on the carton,
on the cartridge, and on the Autographic door which is located on the back of the Kodak.

Autographic film can be used in old style Kodaks, old style film can be used in Autographic
Kodaks, but to get autographic results, Autographic film must be used in an Autographic Kodak.

                          IMPORTANT

  When Autographing film, bear down with the stylus as heavily as the paper will stand
                                   without tearing.

                                     Before Loading

BEFORE taking any pictures with the No. 3A Autographic Kodak read the following instructions
carefully. Make yourself perfectly familiar with the instrument, taking especial care to learn how
to operate the shutter. Work it for both time and instantaneous exposures several times before
threading up the film.

The first and most important thing for the amateur to bear in mind is that the light which serves to
impress the photographic image upon the sensitive film in a small fraction of a second when it
comes through the lens, can destroy the film as quickly as it makes the picture. Throughout all the
operations of loading and unloading, be extremely careful to keep the red paper wound tightly
around the film to prevent the admission of light.

EASTMAN KODAK COMPANY, ROCHESTER, N. Y.


CONTENTS

PART I.

Loading the Camera . . . . 3

Loading with Film . . . . 3
View original page 3Page 4 · Read text
www.orphancameras.com

Loading with Plates . . . 7

PART II.

Making the Exposures ...9

Operating the Shutter . . 10

Instantaneous Exposures . . 12

Time Exposures . . 24

Flash-Light Pictures . . . 30

The Rising and Sliding Front . . 33

                            PART III.

Removing the Film . . . . 37

Finishing the Pictures . . . . 42

PART I

Loading with Film


        THE film for the No 3A Autographic l.

          Kodak is furnished in light proof carriages and
             the instrument can therefore be loaded in
             daylight. The operation should, however, be
           performed in a subdued light, not in the glare of
             the bright sunlight. It should also be borne in
          mind that after the seal is broken care must be
            taken to keep the red paper taut on the spool,
            otherwise it may A-122 slip and loosen
              sufficiently to fog the film.
View original page 4Page 5 · Read text
- The Autographic Film Cartridge is made with a thin red instead of the familiar thick red and
black (duplex) paper.

The thin red paper is not light proof in itself. Between it and the film is inserted a strip of tissue.
The tissue serves two purposes: To supplement the red paper in light proofing the cartridge, and
to permit the recording, by light, of the writing upon the film.

1. To load the Kodak, take a position where the daylight is somewhat subdued, and grasping the
instrument with the left hand remove the back by pressing in simultaneously with the thumb and
second finger of the right hand as indicated in Fig. I.


                                                    2. The Kodak having been opened, an empty
                                             spool having a slit in it will be seen in the
                                         winding end of the camera. This forms the reel
                                       on which tile film is wound after exposure. The
                                                        full spool is to be placed in the recess at the
                                              opposite end of the Kodak. To accomplish this
                                                  pull out spool pins as shown in Fig.   II.4.butkus.org
View original page 5Page 6 · Read text
www.orphancameras.com


                                                            3. Drop the film cartridge into this
                                                           recess. as shown in Fig. III Be careful to
                                                        get the top of the spool at the top of the
                                                 camera. The top is the winding side of
                                                        the camera. Each cartridge is marked
                                                   with the word "Top" on the red paper
                                                     near the top of the spool.


Note - If the cartridge is inserted wrong end up, the red paper instead of the film will be
brought next to the lens, resulting, of course, in the absolute loss of the pictures


 4. Push spool pins into place so that spool
revolves upon them.

 5. Remove the gummed slip that holds the end
 of the red paper, pass the paper over the two
aluminum rollers and thread into the slit in
 reel, as shown in Fig. IV. Be careful in so
doing that the paper draws straight and true.


To secure a tight grip on the red paper, do
not unfold the end, but thread it into the slit
 in reel with the paper creased. By doing this
the red paper will not be liable to slip.

 6. Give the key one or two slight turns - just
enough to bind the paper on the reel - and no
more. See Fig. V.
View original page 6Page 7 · Read text
The paper should now be in position indicated in Fig. (VI)7.

                               Replace the back on Kodak, being careful to put it on right
                                   side up (the wide catch at the top), and snapping the springs
                                       at the top and bottom fully into place. Care should always be
                                taken to handle the back of Kodak carefully, especially when
                                                   it is detached from camera, as even a slight bend would make
                                                   it fit badly, resulting very probably in a leakage of light and
                               consequent loss of film.


Throughout the foregoing operation, from the time the gummed slip is cut on the fresh roll of film
until the back is once more in place, keep the red paper wound tightly on the roll. If it is allowed
to loosen, light will be admitted and the film fogged.

 8. The roll of film in the camera is covered with red
paper and this must be partly reeled off before a
 picture can be taken. Turn the key slowly to the left
and watch the little red celluloid window at the back
 of the camera. When 15 to 18 turns have been given,
a hand pointing toward the first number will appear,
then turn slowly until the figure 1 is exactly in the
 center of the red window. Fig. VII.


The film is now in position for taking the first picture. Press in slightly when turning the winding
key, so as to make sure that the web on the key stays within the slot in the top of spool.

                               Loading with Plates

1. If using glass plates the plate holders must be loaded in a dark-room--that is, a room from
which all white light has been excluded. The only light permissible is a dark ruby light, such as
can be obtained from a properly constructed dark-room lamp.

2. Provide also:

No. 3A F. P. Kodak Combination Back.
No. 3A F. P. Plate Holders.
1 dozen Seed Dry Plates,
3 1/4 x 5 1/4. Kodak Dark-room Lamp.
A shelf or table on which to work.
View original page 7Page 8 · Read text
www.orphancameras.com

3. Light the lamp and place it upon the table.

4. Remove the dark slides from the plate holders.

5. Open the box of plates by running a thin knife blade around the edge of the box.

6. Take out one of the plates and place it in the holder face up. (The face is the dull side.) Brush
gently over the face of the plate with a camel's hair brush to remove dust.

7. Replace the dark slide in the holder.

8. Repeat the operation until all the plate holders have been filled, then close up the remaining
plates in the box, wrap up securely and put them away in a dark drawer.

The remaining operations may be performed in daylight.

9. Remove the back from the camera as before described. (See page 4.)

NOTE - There must, of course, be no film in the Kodak when opening it for use with plates.

10. Remove the back of the adapter by pressing down on the inside spring catch and sliding same
out. Then insert ground glass panel for focusing, being sure that side marked front faces the lens.
Snap the combination back into place, taking care that the springs at each side engage with the
catches and that the back is right side up, i. e., the plate holder should draw from the end towards
the Kodak handle.

11. Focus carefully with the largest stop before the lens, and when the lines show sharp and true,
close the shutter, remove the ground glass, pressing down on catch at the bottom to remove it, and
insert one of the plate holders.


                                                     12. Pull out the dark slide. The plate is
                                      now in position for making the first
                                                          picture, and the exposure should be made
                                                      the same as for films. After making the
                                                 exposure re-insert the dark slide in plate
                                                       holder. Remove the plate holder from the
                                              camera by means of leather lug, pressing
                                              back slightly on same to start it.
View original page 8Page 9 · Read text
Focusing with Scale When Using Combination Back

As it may sometimes be desirable to focus by scale when using plates, the Kodak may be focused
    in the same manner as for films, the slight variation in focal plane being provided for by a
 supplementary focusing scale situated directly under the film scale. Merely lift up the scale used
                              for film, and the plate scale will appear.

                          PART II

The general instructions in this No. 3A Autographic Kodak manual apply equally well to the
camera, whether fitted with Rapid Rectilinear or f. 7.7 Anastigmat Lens.

                           Making the Exposures

Before making an exposure with the No. 3A Autographic Kodak, either time or instantaneous, be
sure of four things:

FIRST- That the shutter is adjusted properly. (For instantaneous, time or bulb exposure.)

SECOND - That the diaphragm lever is placed at the proper stop opening.

THIRD - That the camera is focused.

FOURTH - That an unexposed section of the film is turned into position. (Or a fresh plate is
ready for exposure.)


                                                       This illustration shows the shutter
                                                 on the Kodak when it is equipped
                                                       with the Rapid Rectilinear Lens.

                                                   Note - Exposures are made by
                                                           pressing push-pin at end of cable
View original page 9Page 10 · Read text
www.orphancameras.com

                                                              release D or pushing down on
                                                              release C.

                                                The shutter is self-setting.

                                                 Avoid making too sharp a bend in
                                                            the cable release, as by doing so it
                                                               will be liable to kink.


                               Operating the Shutter

Perfect familiarity with the shutter is essential to successful picture taking with any camera. The
following directions should, therefore, be carefully read and the shutter operated several times
before threading the film up for use.

                               Instantaneous Exposures

FIRST- Set the lever A at 25, 50 or 100 (representing the speeds of the shutter), according to the
time of instantaneous exposure desired.
View original page 10Page 11 · Read text
Note - The lever A should be used
 at 100, only when taking moving
 objects in bright sunshine, and lever
B must always be placed at No. 4
 or f. 7.7 when taking this kind of a
 picture.

Second - Set the lever B at No. 8 or
 f. 11. Lever B controls the Iris
diaphragm and No. 8 or f. 11 is the
proper opening for ordinary
 instantaneous exposures in bright
 sunlight, using speed 25.


NOTE - For instantaneous exposures when the sunlight is unusually strong and there are no heavy
shadows such as in views on the seashore or on the water use diaphragm No. 16 and speed 50.
With light clouds or slightly smoky atmosphere use No. 4 or f. 7.7 and speed 25. With heavy
clouds do not attempt instantaneous exposures.

Third - Press push-pin or push down on release C. This makes the exposure.

Note - Press push pin with a firm, quick movement. At the same time be sure to hold the Kodak
rigid, as a slight jarring will cause a blurred negative.

                             Time Exposures

FIRST - Set the lever A at the point T (time). This adjusts the shutter for time exposures.

Second - Set the lever B at No. 4, 8, 16, 32, 64 or 128. If the Kodak is equipped with the f. 7.7
Anastigmat lens, set the lever at f. 7..7, 11, 16, 22, 32 or 45. See instructions for the use of the
stops for Interior Exposures as given in table on page 26, also the table for Time Exposures in the
Open Air, page 28.

Third - Press the push-pin. This opens the shutter. Time the exposure by a watch. Again press the
View original page 11Page 12 · Read text
www.orphancameras.com

push-pin. This closes the shutter. Shutter may be opened by pressing release C and closed by a
second pressure if desired.4.butkus.org

                                Bulb Exposures

When it is desirable to make a very short time exposure this is best accomplished by making a
"bulb exposure."

First - Set the lever A at the point "B" (bulb). This adjusts the shutter for "bulb" exposures.

Second - Set the lever B at No. 4, 8, 16, 32, 64 or 128. If the Kodak is equipped with the f. 7.7
Anastigmat lens set the lever at f. 7.7, 11, 16, 22, 32 or 45. See instructions for the use of the
stops for Interior Exposures as given in table on page 26; also the table for Time Exposures in the
Open Air, page 28.

Third Press push-pin or release C to open the shutter and release it to close the shutter. This makes
the exposure. The shutter will remain open as long as the push-pin or release C is under pressure.

                                    Important

Do not oil any part of the shutter.

In case of accident return shutter to your dealer or to us for repairs. As a general rule, make
exposures with the cable release instead of with the release C, as the cable release is less likely to
jar the camera.

                               Instantaneous Exposures

                           "SNAPSHOTS
When making ordinary instantaneous pictures the subject must be in the broad, open sunlight, but
  the camera should not. The sun should be behind the back or over the shoulder of the operator.

                               Focus on the Subject
View original page 12Page 13 · Read text
1. Press the concealed button as shown in Fig. I and
   push down the bed of camera to the limit of motion.


2. Set the locking device on the index plate for the
distance desired, grasp the springs at the bottom of the
front board and pull out the front to the limit of motion.
Fig. II.

On the camera bed will be found an index plate which is
divided for 6, 8, 10, 12, 15, 25, 50 and 100 feet. _ This is
for focusing the camera.

NOTE - The index plate is scaled both _ for feet and
meters and care should be taken not to confound them.
View original page 13
Page 14 · Read text
www.orphancameras.com

Except when photographing at_ a distance of 15 feet or less, it is not necessary to estimate the
distance with any more than approximate accuracy; for instance if the focus is set at 25 feet (the
usual distance for ordinary street work) the sharpest part of the picture will be the objects at that
distance from the camera, but everything from 15 to 35 feet will be in good focus. For general
street work the focus may be kept at 25 feet, but where the principal object is nearer or farther
away, the focus should be changed accordingly. Everything beyond 100 feet is in the 100 feet
focus. Nothing nearer than 6 feet can be focused without using the Portrait Attachment. See page
27.

                            Automatic Locking Device


                                                The automatic locking device
                                                   which is on the right side of
                                                    camera bed will be found a great
                                                       convenience in focusing.

                                           By means of this device the front
                                                           locks automatically at 6, 8, 10, 12,
                                                            15, 25, 50 or 100 feet focus.


To set the focus, pull over and slide the lever shown in diagram, and set catch in the slot marked
for the distance desired. Then pull out front of camera lo limit of motion and the camera will be in
focus for the distance at which you have set the catch.

                                With Plates

When using plates with the combination back, the ground glass or the supplementary scale (see
page 8) can be used for focusing, as the Automatic Locking Device in this case cannot be
employed.4.butkus.org

                             Use Stop No. 8, or f. 11

For all ordinary out-door work when the sun is bright, use stop No. 8 or f. 11 and use speed 25. If
a smaller stop is used for ordinary snapshots, the light will be so much reduced that it will not
View original page 14Page 15 · Read text
sufficiently impress the image on the film and failure will result.

When making portraits out of doors, when the sun is shining bright, place the subject in the shade
of a building or large tree, but with clear and unobstructed sky overhead,--then use stop No. 4 or
f. 7.7 and use speed 25. By following this rule unpleasant and distorting shadows on the face will
be avoided.

In views on the water when the sunlight is unusually strong and there are no heavy shadows,
diaphragm No. 16 and speed 50 may be used.

If a smaller stop opening than No. 16 is used for snapshots absolute failure will result, except that
No. 32 or f. 22 may be used for extremely distant views, marine or snow scenes or clouds, in
bright sunshine using speed 25.

                                 Locate the Image

                                       Aim the camera at the object to be
                                                  photographed and locate the image in
                                                         the finder. For a horizontal picture hold
                                                         the camera as shown in Fig. III,
                                                        reversing the finder, as indicated.
                                             Always look into the finder from
                                                            directly over it, not at an angle. (Of
                                                        course, when using plates and the
                                                      focusing glass is employed, the image
                                                           will be located on that instead of in the
                                                              finder.)


For a vertical exposure the camera must be held as
shown in Fig. IV. The finder gives the scope of view
and shows a facsimile of the picture as it will appear,
 but on a reduced scale.

Any object that does not show in the finder will not
show in the picture.
View original page 15Page 16 · Read text
www.orphancameras.com


                                                              It will be noticed that the top of the finder is
                                          notched as shown in Fig. V. This is done so
                                                   that one finder will correctly show the view
                                            included when the Kodak is held in either
                                               horizontal or vertical position. As the
                                                picture taken with the No. 3A Autographic
                                    Kodak is oblong it will readily be seen that
                                              unless the finder was made in this manner it
                                           could not correctly show the exact view
                                            intended when held in either position.


Remember that only the view indicated in the dotted lines will show in the picture.


                                                Fig. VI shows how to hold the camera when
View original page 16Page 17 · Read text
making an exposure without the use of the
                                                   cable release. Grasp the bed of Kodak
                                                   firmly with the left hand, steady it with the
                                                            right, and with the thumb of the right hand
                                                         lightly touch the exposure lever.


                                Hold It Level

The Kodak must be held level.

If the operator attempts to photograph a tall building while standing near it, by pointing the
camera upward (thinking thereby to center it) the result will be similar to Fig. VII, page 20.

When making this picture the camera was pointed too high. This building should have been taken
from the building opposite and at a level corresponding with the middle of the subject.


                         IMPORTANT

                             When making
                                          instantaneous
                                      exposures, hold the
                                       instrument firmly
                                        against the body, as
                              shown in illustrations,
                                and when operating the
                                        cable release or
View original page 17Page 18 · Read text
www.orphancameras.com

                                      pressing the exposure
                                           lever, hold the breath
                                             for the instant.

                              The operator should
                                   hold the camera level,
                                          after withdrawing to a
                                   proper distance, as
                                      indicated by the image
                              shown in the finder on
                                      the front of the camera.


                         Note - The rising front may be used in helping to center high
                              objects on the plate. See page 33.

                                     If the object is down low, like a small child or a dog, the Kodak
                           should be held down level with the center of the object.

                   When making the exposure:
                             --hold the Kodak steady,
                             --hold it level,
                              --press push-pin on cable release.


                          The Autographic Feature

The Autographic Kodak has a spring door on the back, covering a narrow slot through which the
writing is done upon the red paper. The slot is provided with an automatic safety spring border
which operates when the door is open to press the papers into contact with back of the film, thus
securing the sharp printing of the image of the writing and preventing the diffusion of light
around the edges of the slot. This slot is located so that normally the writing comes between the
exposures.
View original page 18Page 19 · Read text
The Autographic Record as a Guide

Many amateurs have distinctly improved the quality of their work by making notes, at the time of
 exposure, of the prevailing conditions. As. Bright light, 1/25 sec., stop No. 8, which, by the way,
can be easily abbreviated to: B. 1/25, 8. By keeping such records the amateur can quickly find the
 cause of failure, if any. By comparing negatives and records he will soon get a line on his errors
and when he knows what his errors are, he can easily rectify them. It is obvious that the best way
                 to make these records is autographically - on the film, at the time.

                              The Operation


                                  After the picture is taken, lift up the spring door with thumb
                                     (Fig. VIII). Use the stylus, held in as upright a position as is
                                  convenient, and write on the strip of exposed red paper any
                          memorandum desired, such as the title of the picture, the
                                     date, or details in regard to the exposure, light, stops, etc.
                                     (Fig.  IX).4.butkus.org


The "Autographic Negative" printed
below is merely to suggest a few of
the thousand and one ways in which
autographic records may be used to
add value to your negatives.

To get a clear impression, press
firmly on both up and down
strokes. While writing or afterwards
the sun should not be allowed to
shine upon the paper. The action of
the stylus so affects the tissue as to
permit the light to record the writing
upon the film. After finishing the
View original page 19Page 20 · Read text
www.orphancameras.com

 writing, the door should be left open
 for the printing, in accordance with
 the following table:


(Expose to the sky, but not to the sun.)

                                        INDOORS CLOSE TO                   OUT OF DOORS                                   WINDOW
 BRILLIANT LIGHT         2 to 5 Seconds             5 to 7 Seconds
 DULL LIGHT               5 to 10 Seconds           10 to 15 Seconds

INCANDESCENT LIGHT, distance 2 inches, 30 to 60 sec.

Welsbach Light, distance 6 inches, 30 to 60 sec.

Close the door before winding a new film into place.

Caution. In order to locate the writing accurately in the space between the negatives it is
important that the film should be turned so that the exposure number centers perfectly in the red
window of the Kodak.

TURN A NEW SECTION OF FILM INTO POSITION: Press in slightly and turn the key in top
of camera slowly to the left, until the next number appears before the window. Three or four turns
will be sufficient to accomplish this. Fig. X. The warning hand appears before No. 1. Repeat the
foregoing operations for each picture.

Important. When you have used the last exposure on your roll of film and have made the
autographic record of it in accordance with the foregoing directions, turn the winding key of the
Kodak until a letter (A) appears in the center of the window in the back of the Kodak. Raise the
spring-door and write your name on the red paper, expose it to the sky the same as was done
View original page 20Page 21 · Read text
when making the exposure records, then close the spring-door and finish winding film and red
paper for removal from the Kodak. Your film is now ready to send to your finisher and when
developed will be readily identified by the autographic copy of - your name which you wrote on
the red paper.

                             Time Exposures

                           INTERIORS

                                 Set camera in such a position that the finder will embrace the
                             view desired.

                           The diagram shows the p rope r positions for the Kodak. It
                                should not be pointed directly at a window as the glare of
                                      light will blur the picture. If all the windows cannot be
                                 avoided, pull down the shades of such as come within the
                                range of the Kodak.

To make a time exposure place the Kodak on some firm support, like a chair or table, and focus
as before described. Be sure, however, to place the Kodak not more than two or three inches from
the edge so as to avoid including part of the chair or table in the picture.


 Fig. XI shows the Kodak in position for a vertical exposure. The
Kodak is also provided with tripod sockets and may be used on a
 tripod.4.butkus.org

When it is desired to make a horizontal time exposure without the
use of a tripod, pull down lever at side of focusing scale and place
Kodak in position, as shown in Fig. XII (page 25).

Adjust the shutter for a time exposure as described on page 11.

 All being in readiness, press the push-pin or once to open, close the
 shutter. Time the exposure by a watch.
View original page 21Related documents and language editions
From the M. Butkus archive. Original publisher and archive notices are retained.
Check the model and edition against your equipment.
PDF verified 2026-10-10.