Lenses & filters
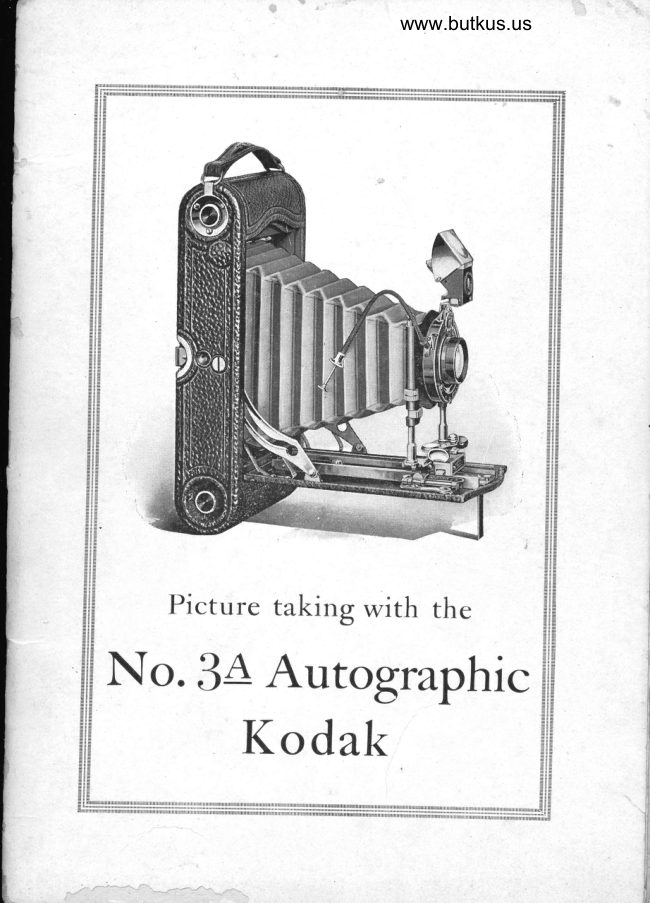
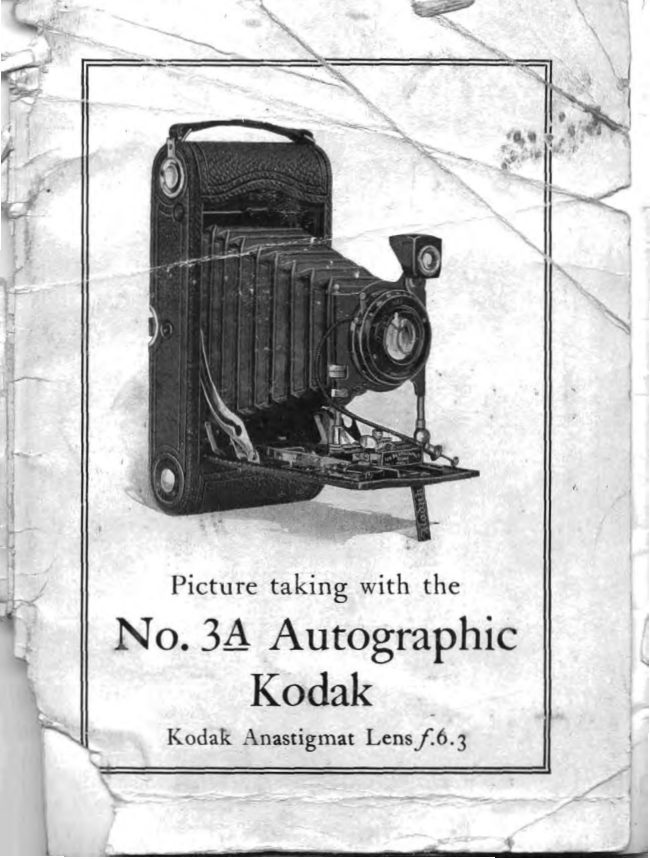
Kodak No. 3A AutographicF/7.7 Anstigmat lens User manual
User manual for Kodak No. 3A AutographicF/7.7 Anstigmat lens. 52 pages in English. Read the original PDF, download or print a copy without registration.
52 pagesEnglish10.0 MB PDF
Loading your manual…Open PDF directly
Document details
- Brand
- Kodak
- Model / document
- Kodak No. 3A AutographicF/7.7 Anstigmat lens
- Document type
- User manual
- Language
- English
- Pages
- 52
- File size
- 10.0 MB
- Category
- Lenses & filters
- Document date
- Not specified in catalog
Search available document text
Find a term, then jump to its page in the original PDF. Image-only pages may not be searchable; check the PDF for exact wording and diagrams.
Page 2 · Read text
"Kodak"
          TRADE MARK
                      1888

EASTMAN KODAK COMPANY.
          Rocnrsrnn, N. Y.
        Manufactwrers of
Kodak Cameras,   Brownie Caureras,
Eastman Film,       Kodak Film Tanks,
Velox Paper,          Solio Paper,
    Kodak Dry Mounting Tissue,
   Eastman Velvet Bromide Paper,
    Eastman Royal Bromide Paper,'
   Eastman Standard Bromide Paper,
  Eastman Enameled Bromide Paper,
Eastman Matte-Enamel Bronride Paper,
     Eastman Tested Chemicals,
     Tripods arrd Other Specialties.

        Trorle Marks Reg. U. S. Pa.t. Off.

                                         January, 1920
View original page 2Page 4 · Read text
Order Film by Number
    All Eastman Films may be distinguished by the
numbers on the ends of the cartons.
   A-122 is the number of film for this camera
(No. 3A Autographic Kodak). The number ap-
pears on the carton, on the cartridge, and on the
Autographic door which is located on the back of
the Kodak.
   Autographic film can be used in old style Kodaks,
old style film can be used in Autographic Kodaks,
but to get autographic reswlts, Autographic film
must be used in an Autographic Kodak.

         IMPORTANT
 When Autographing film, bear down with the
stylus as heavily as the paper will stand without
tearing.
View original page 4Page 5 · Read text
www.butkus.us


           Before Loading
[)EFORE taking any pictures with the No. 3.A. Auto-
 f,)  graphic Kodak read the following instructions care-
fully. Make yourself perfectly familiar with the instrument,
taking especial care to learn how to operate the shutter.
Work it for both time and instantaneous exposures several
times before threading up the film.
  The first and most important thing for the amateur to
bear in mind is that the light which serves to impress the
photographic image upon the sensitive film in a small frac-
tion of a second when it comes through the lens, can de-
stroy the film as quickly as it makes the picture. Through-
out all the operations of loading and unloading, be extreme-
ly careful to keep the red paper wound tightly around the
film to prevent the admission of light.
          EASTMAN KODAK COMPANY,
                                Rocnrsmn, N. Y.
View original page 5Page 7 · Read text
www.butkus.us

          PART I
             Loading with Film
fJfHE film for the No. 3.A. Autographic
 |  rcoa"t is furnished in light proof car-
tridges and the instrument can therefore be
loaded in daylight. The operation should,
however, be performed in a subdued light,
not in the glare of the bright sunlight. It
should also be borne in mind that after the
seal is broken care must be taken to keep the                                        The Filnr
red paper taut on the spool, otherwise it"may      A-122
slip and loosen sufficiently to fog the fihn.
  The Autographic Film Cartridge is made with a thin red
instead of the familiar thick red and black (duplex) paper.
The thin red paper is not light proof in itself. Between it


                         FIG.  I.
                     Removing the Back.
View original page 7Page 8 · Read text
,lPicture Taking with the


         www.butkus.us

                                  rspool
                             spri,' gi,,gT:;                 Pi,.'.
                                                                                       "r
and the film is inserted a strip of tissue. The tissue serves
two purposes: To supplement the red paper in light proof-
ing the cartridge, and to permit the recor<ling, by light, of
the writing upon the film.
   1. To load the Kodak, take a position where the
claylight is somewhat subdued, and grasping the instrument
rvith the left hand remove the back by pr essing in simul-
taueouslv with the thumb and second finger of the right
hand as indicated in F'ig. I.
   2.  Tl-re Kodak having been opened, an empty spool
having a slit in it will be seen in the winding end of  tl.re
carlera. This forr-ns the reel on which the film is wound
after exposure. The fu1l spool is to be placed  ir-r tl-re recess
at the opposite cnd of the l(oclak. To accomplish this pull
out spool pins as shon.r.r in trig. II.
   3. Drop the {ilrrr cartridge into this rccess, as shown
in Fis-. ITI.  Bt'c:rrcful to gcl thc tolt ot' tltc spool tt   tlttt


                              I-IG. III.
                       Inserting the Cartridge.
View original page 8Page 9 · Read text
www.butkus.us

                              I{o. 34 Autographic Kodale-S


                                                         I' hrea  cl  i ng -1,1r";#k" u Pap er.
tof of the conoera. The top is the winding side of the cam-
era. Each cartridge is marked with the word "Top" on the
red paper near the top of the spool.   Norr-If the cartridge is inserted wrong end up, the red paperinstead of the film will be brought next to the lens, resulting, ofcourse, in the absolute loss of the pictures.                            ,!
   4.  Pusl-r spool pins into place so that spool revolves
upon thenr.
   5. Remove the gummed slip that holds the end of
the red paper; pass the paper over the two aluminum rollers
and thread into the slit in reel, as shown in Fig. IV.  Be
careful in so doing that the paper draws straight and true.
  To secure a tight grip on the red paper, do not un-
fold the end, but thread  it into the slit in reel with the
paper creased. By doing this the red paper will not be
liable to slip.
   6. Give the key one or two  slight turns-just
enough to bind the paper on the reel-and no more. See
Fig. V.


                         FIG. V.
            Turning the Key to bind paper on reel.
View original page 9Page 10 · Read text
6-Picture Toking zaith the

    l'he paper should now be
 in position indicated in Fig.
 VI.
   7. Replace the back on              trIG. VI.
 Kodak, being careful to put    Showing position of paper.
 it on right side up (the wide
 catch at the top), and snapping the springs at the top and
bottom fully into place. Care should always be taken to
 handle the back of Kodak carefully, especially when it  is
 detached from camera, as even a slight bend would make it
 fit badly, resulting very probably in a leakage of light and
consequent loss of film.
   Throwghout th,e  f oregoitr'g operation, from tke time the
gummctl slip is cut on tlt'e fresh roll of fi'lvn until the back is
once lnore in place,lzeep tke red paper wound tightly on tke
 roll.  If  it is allo-ued to loosen,, liglot will be odtnitted and
the film fogged,.


   8. 'Ihe roll of film in the camera is covered with
red paper and this must be partly reeled off before a pic-
ture can be taken. Turn the key slowly to the left and
watch the little red celluloid window at the back of the
camera. When 15 to 18 turns have been given, a hand
pointing toward the first number will appear, then turn
slowly until the figure I is exactly in the center of the red
window. Fig. VII.
  The film is now in position for taking the first picture.
   Press in slightly when turning the winding key, so as to
make srtre that the web on the key stays within the slot in
the top of spool.
View original page 10Page 11 · Read text
Venmo @mike-butkus-camera  Ph. 2083
PayPal Name  Lynn@butkus.org      www.PayPal.me/lynnbutkus
View original page 11
Page 12 · Read text
www.butkus.us

                         No. 34 Autographic Kodak-7
             Loading with Plates
   1. If using glass plates the plate holders must be
 loaded in a dark-room-that  is, a room from which all
 white light has been excluded. The only light permissible
 is a dark ruby light, such as can be obtained from a prop-
 erly constructed dark-room lamp.
   2. Provide also
           No. 3,4' F. P. Kodak Combination Back.           No. 3,A' F. P. Plate Holders.                  I dozen Seed Dry Plates, 3r/+ x 5%.
           Kodak Dark-room Lamp.
        A shelf or table on which to work.
   3. Light the lamp and place it upon the table.
   4. Remove the dark slides from the plate holders.
   5. Open the box of plates by running a thin knife
blade around the edge of the box.
   6. Take out one of the plates and place it in theholder face up. (The face is the dull side.) Brush gently
over the face of the plate with a camel's hair brush to re-
move dust.
   7. Replace the dark slide in the holder.
   8. Rep-eat the operation until all the plate holders
have been filled, then close up the remaining plates in the
box, wrap up securely and put them away in a ilark drawer.
   The remaining operations may be performed in daylight.
    9. Remove the back from the camera as before de-
scribed. (See page 4.)
  Nom-There must, of course, be no film in the Kodak whenopening it for use with plates.
  10. Remove the back of the adapter by pressing down
on the inside spring catch and sliding same out. Then
insert ground glass panel for focusing, being sure that side
marked front faces the lens. Snap the combination back
into place, taking care that the sprihgs at each side engage
with the catches and that the back is rieht side up. i. e., tie
plate holder should draw from the end-towards ttre KoAak
handle.
   11. Focus carefully with the largest stop before the
lens, and when the lines show sharp and true, close the
View original page 12Page 13 · Read text
\-Pictnre T-aking with, tke


                    www.butkus.us

shutter, remove the ground glass, pressing down on catch at
the bottom to remove  it, and insert one of the plate holders.
   12. Pull out the dark slide. The plate is now in
position for making the first picture, and the exposure
should be made the same as for films. After making the
exposure re-insert the dark slide in plate holder. Remove
the plate holder from the camera by means of leather lug,
pressing back slightly on same to start it.
       Focusing with Scale When Using
             Combination Back
  As it may sonretimes be desirable to focus by scale when
using plates, the Kodak may be focused in the same manner
as for films, the slight variation in focal plane being pro-
vided for by a supplementary focusing scale situated direct-
ly under the film scale. Merely lift up the scale used for
film, and the plate scale will appear.
                   t"
View original page 13Page 14 · Read text
-                                     www.butkus.us
                               No. 34 Autographic Kodah-7l
         Tnrnn--Press push-pin or push down on release C. T'his
           mahes the erposure.
            NslB-p1s.s push-pin with a firm, quick movement. At the          same time be sure to hold the Kodak rigid, as a slight jarring will           cause a blurred negative.

                    Time Exposures
         Frnsr-Set the lever A at the point T (time). This adjusts
              the shutter for time exposures.
         SncoNn-Set the lever B at No. 4,8, 76, 32, 64 or 128. If
             the Kodak is equipped with the  f . 7.7 Anastigmat  lens,
               set the lever at  f .7.7,11, 16,22,32 or 45. See instruc-
              tions for the use of the stops for Interior Exposures,
             as given in table on page 26; also the table for Time
             Exposures in the Open Air, page 28.
         'fnrnn-Press the push-pin. This opens the shu,tter. Time               '    the exposure by a watch. Again press the push-pin.
            This closes tke shutter. Shutter may be opened by
             pressing release C and closed by a second pressure if
                desired.
                     Bulb Exposures
         When it is desirable to make a very-"bulbshort time exposure           this is best accomplished by making a        exposure.-"
        Frnsr-Set the lever A at the point "B" (bulb). This
              adjusts the shutter for "bulb" exposures.
        SrcoNo-Set the lever B at No. 4,8; 16, 32, 64 or 128. If
              the Kodak is equipped with the  f . 7.7 Anastigmat  lens,
               set the lever at  f .7.7,11, 16, 22,32 or 45. See instruc-
              tions for the use of the stops for Interior Exposures as
             given in table on page 26; also the table for Time
            Exposures in the Open Air, page 28.
        Tsrnr-Press push-pin or release C to open the shutter,
           and release it to close the shutter. This mahes the er-
             l>osure. The shutter will remain open as long as the
             push-pin or release C is under pressure.
                          Important
        Do not oil any part of the shutter.
           fn case of accident return shutter to your dealer or to
         us for repairs. As a general rule, make exposures with the
         cable release instead of with the release C, as the cable
          release is less likely to jar the camera.
View original page 14Page 15 · Read text
77-Picture Toking uith the


                        FIG. 1.
                      Opening the Front.

            Instantaneous Exposures
                   *SNAPSHOTS''
  When rnaking ordinary instantaneous  pictures the sub-
ject must be in the broad, open sunlight, but the camerzr
should not. The sun should be behind the back or over the
shoulder of the operator.
           Focus on the Subject
   1. Press the concealed button as shown in Fig. I
and push down the bed of camera to the limit of motion.
   2. Set the locking device on the index plate for the
distance desired, grasp the springs at the bottom of the
front board and pull out the front to the limit of motion.
Fig. II.
View original page 15Page 17 · Read text
I4-Picture Taking witk the


www.butkus.us
        r,r,,   Showing Automatic Locking Device.   To set the focus, pull over and slide the lever shown in
diagram, and set catch in the slot marked for the distance
desired. ifhen pull out front of camera to limit of motion
and the camera will be in focus for the distance at which
you have set the catch.
               With Plates
  When using plates with the combination back, the ground
glass or the supplernentary scale (see page 8) can be used
for focusing, as the Automatic Locking Device in this case
cannot be employed.
                                       11          Use Stop No. 8, or  /.    tror all ordinary out-door rvork when the sun is bright,
use stop No.8 or f. 11 and use speed 25. If a smaller stopis used for ordinary snapshots, the light will be so much
reduced that it will not sufficiently impress the image on the
film and failure will result.
  When making portraits out of doors, when the sun is
shining bright, place the subject in the shade of a building
or large tree, but with clear and unobstructed sky over-
head,-then use stop No. 4 or f.7.7 and use speed 25. Byfollowing this rule unpleasant and distorting shadows on
the face will be avoided.
   In views on the water when the sunlight is unusually
strong and there are no heavy shadows, diaphragm No. 16
and speed 50 may be used.
View original page 17Page 18 · Read text
t
                                      www.butkus.us

                                     No. 34 Autogr&phic Kodak-7|


                                     FIG. III.
                 If a smaller stop opening than No. 16 is used for snap-
            shots absolute failwre will result, except that No. 32 or f.22
         may be used for extremely distant views, marine or snow
            scenes or clouds, in bright sunshine using speed 25.
                        Locate the Image
          Aim the camera at the object to be photographed and
            locate the image in the finder. For a horizontal picture
           hold the camera as shown in Fig. III, reversing the finder,
         as indicated. Always look into the finder from directly


                                   FIG. IV.
View original page 18Page 19 · Read text
16-Picture Taking zilith tke


      View Included When    View Included When         Making a Horizon-       Making a Vertical               tal Picture                    Picture
                         FIG. V.

over it, not at an angle. (Of course, when using plates and
the focusing glass is employed, the image will be located on
that instead of in the finder.)
  For a vertical exposure the camera must be held as
shown in Fig. IV. The finder gives the scope of view and
shows a facsimile of the picture as it will appear, but on a
reduced scale.
  Any object that does not show in the finder will not
show in the picture.
    It will be noticed that the top of the finder is notched as
shown in Fig. V. This is done so that one finder will cor-
rectly show the view included when the Kodak is held in
either horizontal or vertical position. As the picture taken
with the No. 3.A Autographic Kodak is oblong it will read-
ily be seen that unless the finder was made in this marlner
it could not correctly show the exact view intended when
held in either position.
  Remember that only the view indicated in the dotted
lines will show in the picture.
View original page 19Page 20 · Read text
www.butkus.us

                        No. 3A Autographic Kodah-77


   Fig. VI shows how to hold the camera when'-making an
exposure without the use of the cable release. Grasp the
bed of Kodak firmly with the left hand, steady it with the
right, and with the thumb of the right hand lightl)a touch


                                                                                                                                                                                                                                                                                                                                                                                                                                                                                        :the exposure lever.
             Hold It Ldvel
                                                                        ,,1,
                                                                                                                                           .''.i,,..,,  The Kodak must be held level.
    If the operator attempts to photograph a tall building
while standing near it, by pointing the camera upward
(thinking thereby to center it) the result will be similar to
Fig. VII, page 20.
  When making this picture the camera was pointed too
high. This building should have been taken from the
building opposite and at a level corresponding with the
middle of the subject.
View original page 20Page 21 · Read text
L8-Picture Taking with the


         IMPORTAI\T
     When making instantaneous ex-
     posures, hold the instrument lirmly
     against the body, as shown in illus-
View original page 21Page 22 · Read text
www.butkus.us

                                    No. 34 Autosralhic Kod,ok-L9


4


                 trations, and when operating the
                cable release or pressing the expo-
               sure lever, hold the breath for the
                    instant.
View original page 22Page 23 · Read text
20-Picture Tahing wittrc the

                                  The operator should
                                  hold the camera level,
                                           after withdrawing to a
                                    proper distance, as in-
                                   dicated by the image
                              shown in the finder on
                                 the front of the cam-
                                             era.
                                    NorB-The rising front
                                 may be used in helping to
                                     center high objects on
                                          the plate. See page 33.
                                                      If  the object  is
                             down low, like a small
                                  child or a dog, the
                             Kodak should be held
                        down level with the
                                     center of the object.
            FIG. VII; Effect produce-d by tilting     camera.
                               ,the

  When making the exposure:
                 the Kodak steady,         -hotd
          -hold'it level,                     on cable release.         -press.push-pin

                                                              $
          The Autographic Feature
                                                                                                                                                                                                                               I
  The Autographic Kodak has a spring door on the back,
covering a narrow slot through which the writing is done                           .{
upon the red paper. The slot is provided with an auto-
matic safety spring border which operates when the door is
open to press the papers into contact with back of the film,
thus securing the sharp printing of the image of the writing
View original page 23Page 24 · Read text
www.butkus.us

                        No. 34 Autogrophic Kodak-Zl
and preventing the diffusion of light around the edges of
the slot. This slot is located so that normally the writing
comes between the exposures.

     The Autographic Record as a Guide
  Many amateurs have distinctly improved the quality of
their work by making notes, at the time of exposure, of the
prevailing conditions. As: Bright light, 1/25 sec., stop
No. 8, which, by the way, can be easily abbreviated to:
B, 1/25, 8. By keeping such records the amateur can
quickly find the cause of failure, if any. By comparing
negatives and records he will soon get a line on his errors
and when he knows what his errors are, he can easily
rectify them. It is obvious that the best way to make these
records is autographically-on the fi,lut,, at tke tim,e.
             The Operation
   After the picture is taken, lift up the spring door with
thumb (Fig. VIII).  Use the stylus, held in as upright a
position as is convenient, arrd write on the strip of exposed


                       FIG. VIII.
View original page 24Related documents and language editions
From the M. Butkus archive. Original publisher and archive notices are retained.
Check the model and edition against your equipment.
PDF verified 2026-10-10.