Film cameras
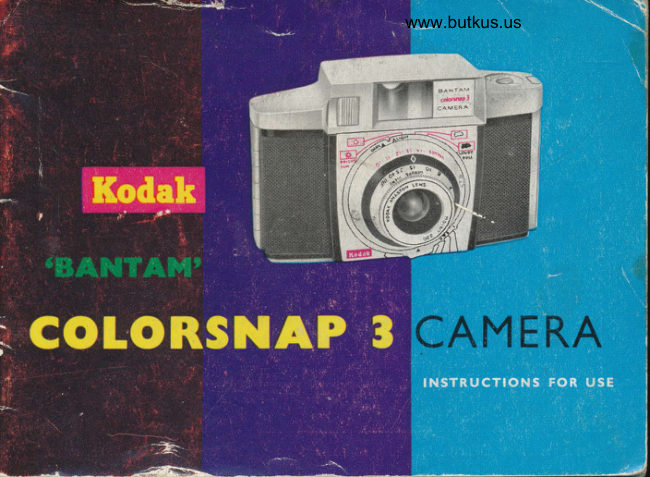
Kodak BANTAM Colorsnap 3 User manual
User manual for Kodak BANTAM Colorsnap 3. 24 pages in English. Read the original PDF, download or print a copy without registration.
24 pagesEnglish5.0 MB PDF
Loading your manual…Open PDF directly
Document details
- Brand
- Kodak
- Model / document
- Kodak BANTAM Colorsnap 3
- Document type
- User manual
- Language
- English
- Pages
- 24
- File size
- 5.0 MB
- Category
- Film cameras
- Document date
- Not specified in catalog
Search available document text
Find a term, then jump to its page in the original PDF. Image-only pages may not be searchable; check the PDF for exact wording and diagrams.
Page 2 · Read text
Colour Printo o| Enlargemanta crn be nade from 'f,odaohrome' or 'l(odacolor' tilms-View original page 2
Page 3 · Read text
www.butkus.us
 About '|(0DACHR{)II|[' Film (828
 :5_;o_d-a,cl1r-91e'Film,giv.esminiaturetransparencysuoes. tn tull natgral colour_at no extra Drocess_ rng. cnarge.              prjlts and enlargements in colour                    - or black-and-white and duplicate colour trans_
 p-?r€nqes can be made subsequendy from these
 $de.s. . 'Kodachrome' Film cin als6 ilG.J   b:; me rrght oI btue-coeted flashbulbs (either aloni: or supplementing  daylight).
About '|((lllA0()t0R' Film CB2B
 'Kodacolor' Film makes colour zagalroes, which
 are then printed on paper to provia? targiiatu;i colouJ .prLrts_. ,'Kodacolor' Fitn is -faster in spee-d ttran 'Kodachrome' FiLn aud thus enables
good picures to be _made in fignting conaitionspp€rto                     unsuitable                                               colour.         .consrdered                              for.Kodacolor'Lorour pntrts              or enlargements                           from
negatrves cost less than from ,Kodachrome'
transparencies; developing and printing, which
m-ust be ordetect through a Kodak dealer.  is
c_harged.separately.  There is only one kin<i of'Kodacolor' Fifmi it is suitable fdr 6kd;A;:trgrt.prctures, or for picrures at night by tf,e1ole. light of clear flaahbulbs. nor-aitais ofnasn exposures see page r5.
View original page 3Page 4 · Read text
i:ll::il:i:iq:'.Digitally signed by Mike Butkus
                                       DN: cn=Mike Butkus, o=Butkus camera
                                          manuals, ou=butkus.org,Mike Butkus email=mike@butkus.org, c=US
                                             Date: 2023.11.22 16:49:03 -05'00'
View original page 4Page 6 · Read text
Venmo @mike-butkus-camera  Ph. 2083
PayPal Name  Lynn@butkus.org      www.PayPal.me/lynnbutkus
View original page 6
Page 9 · Read text
H(}tl| T(l T(IAD A FILil|
                                     ln subdued light, please
          To unlock the camera-back, press the button
                  recessed in the metal strip on the end of the camera
              and pull up the sliding latch. Do not attempt to
                 force the latch without pressing on the button.
              Use the pin provided to pull open the camera-back.
                Fit the empty spool into the recess under the
                winder; engage the winder end of the spool first.
             The spool will then fall easily into place.


www.butkus.us
View original page 9Page 10 · Read text
www.butkus.us
 New film in place
 Always load in subdued light (in the shade).
 Take the new film out of its metal container;
hold the film firmly. Place it in the empry
 recess cs shown, so that the spring holds it in
position. Carefully pull the leader paper
 (coloured side towards you) across to the take-
up spool so that the paper lies between the
four raised studs.


Attach leader
Operate the lever wind until the slot of the
empty spool is uppermost. Thread the end of
the leader paper squarely through the slot as
far-as- it will go; the tapered end of the paper
will then protrude from the other side oi tfre
spool. To ensure trouble-free winding, take
c-are that the tongue goes straight into theslot-not askew.
View original page 10
Page 11 · Read text
Wind 4 times
  Hold the leader paper down into the slot with
  the finger-tip. Keep the finger in place while
  operating the lever wind 4 times. Make sure  the paper winds tightly and evenly on to the
  take-up spool, without 'wandering'.  If  the
  paper is not then lying between all four studs,
  disengage the take-up spool, unwind the paper
  from it, and re-insert the empty spool. Keep-
  ing the full spool tightly wound, re-thread the
  paper.


  Close Gamera
  Make sure that the sliding latch is still up.
  Close the camera-back and keeo it shut while
  pushing down the sliding ht6h.  This will
  lock the camera. Operate the lever wind
  while watching the red window. $fhen the
  number 'r'appears (just after the name of(filmthe   film), stop winding. After loading, set the
  reminder' disc (see page 5) to indicate the type
  of film in the camera.
10
View original page 11
Page 12 · Read text
www.butkus.us


 I|JHE]'| Y(}U'UT FII'IISHED THE R()LI (}F FITtl/l

 Keep operating the lever wind until the end of
 the coloured paper passes the red window, then
 give a few more turns. In subdued light (i.e. in
 the shade), open the camera-back  gently;  lift
out the full spool, making sure that the paper
remains tightly wound. Seal the spool with the
gummed paper strip. Do not leave the unloaded
spool lying about in strong light. place the spool
into the metal container.  If it is ,Kodachrome,
Film, enclose the packed film in the mailing
bag, print lour name and address clearly on the
label, then either hand it to your dealer or
post it to a Kodak processing station. If  it is
'Kodacolor' or black-and-white  film, have it
developed and printed through your Kodak
dealer-
                                                                                                                            ll
View original page 12Page 16 · Read text
www.butkus.us

      FTASH PICTURES
         Fit a 'Brownie' Flasholder 3.  Full instructions on this simple operation are packed
         with each Flasholder.  It is essential, for best results, to follow these instructions:
        For black-and-white or for 'Kodacolor' pictures, indoors or at night, use a clear No. r,
       PFr or No. 5 bulb. LJse a blue-tinted No. rBS, or PFIB bulb for daylight-type
     I      'Kodachrome'Film.
        I                                                                                                                                                                                                    l
f,.     To take flash pictures
             I   Set the film-speed setting scale on the camera (see page r3).
      2  Set the appropriate arrow on the bottom of the light-setting ring to the subject
             distance shown on the scale at the bottom of the shutter.
          Use the arrow marked 'r'  for PFr or No. r bulbs.
         use the green arrowhead marked 'B' for PFIB or No. rBS bulbs. use the
           arrow marked  '5' for No. 5, PF5 or No 58 bulbs.
      3  Set this same distance on the distance ring and take your picturel
                            sim ry
                                                                                                        street)                                                                                  and                                                                                                       the
                                                                                                       the                                                                                                   will re-setI{      NOTE-Ifflashbulb  failsusingto fire,flashpressas thethesoleshuttersourcere-setof lightlever(e.g.(see inpagean 5)unlitto theroomleft.or darkThis
           shutter without winding on the film. You can then try again without wasting an exposure.
                                                                                                15
View original page 16Page 17 · Read text
EIP(I$URE I,ATUES
  One of the scales on your camera is    indicated by the meter scale.
  engraved with 'exposure values'. These    (4) Turn the film-speed setting scale  are for use with those exposure meters                                                  until the exposure value number, found  which have a similar scale of numbers.                                             in (f) above, comes opposite the white
 To use an exposure metet so scaled,    diamond.
  proceed as follows:-
                                           (5) Set the distance and take your picture.   (l) Set the meter for the type of film in                                                             ,1                                When using an exposure meter scaled to  the camera.                                          read lens apertures and shutter speeds,
  (2) Set the film-speed setting scale on    note that the shutter speed of the 'Color-         {l
  the camera (see page r3).                  snap' 3 Camera is r/4oth secondl the
  (3) Point the meter at the subject and   exposure value numbers then correspond
  read off the 'exposure value' (E.V.)    to the following apertures:-

     Exposure              value                                              t2*            t3+           t4+      on Camera

    Approx. Aperture    fl3.e                                                                                                                       f 172
  Note that moving from one exposure value to the next alters the aperture by one stop (e.g. E.V.ro
  gives twice the exposure of E.V.r r); moving to the adjacent dot (half exposure value) changes the
  aperture by half a stop.
t6
View original page 17Page 18 · Read text
www.butkus.us
I}TPTH OT FIELll
When a camera is focused for a given    lens openings the depth is much greater
distance, objects a little nearer and   than at larger openings. The table below
farther away will also be in focus. The    gives, for each exposure value, the
distance between nearest and farthest    distance limits (depth of field) between
sharply rendered obiects is known as the    which the subject must lie for it to appear
depth of fi.eld of a lens for a certain   sharp. You will see from this how these
aperture. At close distances the depth    limits vary with the distance upon which
is less than at greater distances; at smaller    the camera is focused.


                     DEPTH OF FIELD TABLE
     Exposure        When set at 5 ft.       When set at 15 ft.       When set at 40 lt.
      Yalues          pictures are sharp at        pictures are sharp at        pictures are sharp at
                        4f to 6f ft           9* to 36 ft             Eeyond 16 ft
                   IOil         4 to  61i ft           8+ to 83 ft             Beyond l2j  ft
          t2               3* to 8+ ft             Beyond 7  ft             Beyond l0   ft
          t3                34!to ll   ft             Beyond 5i ft           Beyond 7| ft
          t4         3 to22 ft              Beyond 4{ ft           Eeyond 5{ ft
View original page 18Page 19 · Read text
In winter with no snow, set to the next  tYHEr{ c(}t{D|TI(lNs                        lower number.
  ARE N(lT AUERAGE                                          Winter snow at low altitudes: find ex-  The camera settings cover the most       posure value setting for average subject,     j                                                                   lower half-ztalue  common types of subject in full day-      then set to the \ext  light during spring srunmer ana         (dot).
  autunrn. For other conditions some
  modification to the settings must be      Mountain snow scenes in winter: find                                                                                        the  made. Note that at each normal       setting for average subject on                                     exposure value scale, then move   setting a certain number on the exposure
   z.talue scale is indicated by the white       exposure scale to next higher number.
  diamond.
                                        Mountain snow scenes in summer: find
                                                setting for average subject and then
                                   move exposure value scale to add t* to
                                               the indicated number.
  Daylight                              Angle of lighting:  \trfith front lighting
                                           use normal setting. For side lighting,
  Early or late in the day, within two      turn exposure value scale to indicate
  hours of sunrise or sunset, note the      the next lower half-oalue. For back
  exposure value indicated and then turn        lighting, subtract r from the indicated
  the scale until the diamond indicates       exposure value and use a 'Kodisk' Lens
  the next lower number.                  Hood, size 3zo.
l8
View original page 19Page 21 · Read text
E

 ACCE$$0RlE$


  Use size 3zo lens attachments, including     filter.  Kodak '$flrarten' filterS of the
  special-purpose  filters for colour or   numbers specified can be obtained fitted
  black-and-white  films, and lens hoods.    in 'Kodisk' Lens Attachments. Ask your
  'Kodachrome' Type A Film can be used    dealer more about the use of lens hoods
  in daylight if a No. 85 filter is fitted, but,   and filters.
  with this filter, set the film-speed setting  An ever-ready case (Code 789) allows                     'fill
  ring to ro ASA instead of 16 ASA.   winding, setting and picture taking                $
  $7ith clear flashbulbs, use a No. 8rC   without removing the camera from its
  filter. 'Kodacolor' Film can be used in   case. For flash pictures use 'Brownie'
  daylight or by clear flash without any    Flasholder 3.                                                                        1


20
View original page 21
Page 24 · Read text
www.butkus.us
     A$K Y(IUR DEATER
         for these easy-to-read Kodak publications.
        Entertainingly written and profusely illusEeted, these inexpensive books help you to
J       get more fun out of photography. If you are touring or visiting other parts of Britain,
      you will find the 'Kodak'Photographers'Maps   invaluable.
     LET'S TAKE KODACOLOR PTCTURES      3/_
       Follow the advice of this book and make sure your colour snaps really make the most
        of your subiects.
    HOvv TO TAKE SNAPSHOTS BY FLASH    2/6
       Flashsnaps are easy-especially with the 'Colorsnap' Camera. Nevertheless, you will
        find many useful hints and tips within the covers of this book to enable you to improve
       your results.
     'KODAK' PHOTOGRAPHERS' MAPS         3/9 each.
       Besides being first-class tourist maps, they are a mine of information as to what to
      photograph and where, and how to do it.


                               Product names quoted thus-'Kodok'-are trodemorks
View original page 24Related documents and language editions
From the M. Butkus archive. Original publisher and archive notices are retained.
Check the model and edition against your equipment.
PDF verified 2026-10-10.