Film cameras
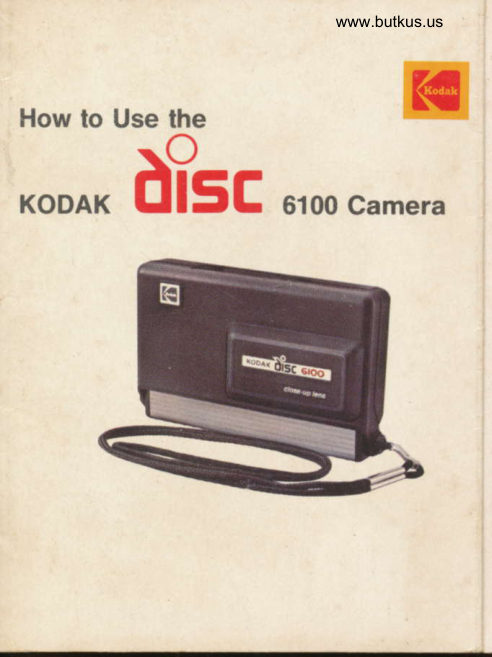
Kodak Disc 6100 User manual
User manual for Kodak Disc 6100. 23 pages in English. Read the original PDF, download or print a copy without registration.
23 pagesEnglish1.9 MB PDF
Loading your manual…Open PDF directly
Document details
- Brand
- Kodak
- Model / document
- Kodak Disc 6100
- Document type
- User manual
- Language
- English
- Pages
- 23
- File size
- 1.9 MB
- Category
- Film cameras
- Document date
- Not specified in catalog
Search available document text
Find a term, then jump to its page in the original PDF. Image-only pages may not be searchable; check the PDF for exact wording and diagrams.
Page 2 · Read text
Welcome to the exciting world
of disc photography!
Your KODAK Disc Camera incorporates the
latest in photographic technology. lt lets you take
pictures almost anywhere, in almost any kind
of light.
   In dimly lighted places-in living rooms, and
outdoors in deep shade or at night-the built-in
flash will fire automatically, letting you take
pictures at distances up to 18 feet. Outdoors in
daylight and in bfighter scenes indoors-brightly
lighted stage shows, sporting events, and otfices-
you can take pictures at virtually any distance
beyond 1% feet. The special close-up lens lets you
take pictures of subjects such as flowers, pets, and
people that are as close as 1% feet from the
camera.                                                                                                                                                                                                            i
  This booklet will help you to take good pictures.
Before you use your camera, please read these
instructions, and then follow them closely.  lf you                                                  I
have questions about your camera, please write to                                   i
Eastman Kodak Company, Photo Information,
Department 841, Rochester, New York 14650. The
warranty and instructions for obtaining service are
at the back of this booklet.

@Eastman Kodak Company, 1984
View original page 2
Page 6 · Read text
www.butkus.us

  Store your camera and film away from heat and
  direct sunlight-not  in the trunk, on the rear-window
  shelf, or in any other hot spot in a Car.
    Before you take any especially important
  pictures, take some test pictures and have the disc
  processed. This will let you check your camera and
  your operation of it. Take pictures outdoors as well
  as indoors with flash


NECK STRAP
Clip the neck strap onto the NEcK-srRAp posr on the side
of the


POWER SOURCE
Your new disc camera contains a built-in long-life
power source that powers the electronic flash, the
automatic film advance, and the automatic exposure
control.  lt is covered by the full five-year warranty. Do
not attempt to disassemble this camera.  lf your camera
won't operate, see the "Troubleshooting Guide" on
page 14, and the warranty at the back of this'manual.
View original page 6Page 7 · Read text
DOOR LEVER


LOADING THE FILM
Be sure that the covER HANoLE is closed. Lift the ooon
LeveR to its fully open position, and open the osc ooon.
Be sure that the door lever is raised and latched in the
upright position before inserting the film disc. Then
insert the disc as shown;  it fits only the correct way.
  Press the door as shown until the door lever snaps
toward the closed position; then push the lever lully
closed. Do nol pmh the door lever down whlle the
dlsc door is open.


2
View original page 7
Page 9 · Read text
TAKING PICTURES
1. Open the cover handle to its fully open position. Ihe
  camera will operate only with the cover handle open.
  The disc will automatically advance to the No. 1
  frame. After each picture, the disc will advance to the
  next frame. See the FRAME wrNDow on the back of the
  camera.
2. Check your subject distance. For subjects beyond 4
   feet, be sure that the ruonuauclosE-uP sELEcron is in
  the normal (4:)    position. For subjects 1% to 4 feet
                                                   position. To  from the camera, use the close-up ( !   )
  switch from the close-up position to the normal
   position, press the cLosE-up RELEASE surroN. See
  "Close-Up Plctures," page 7.
3. Hold the camera up to your eye, and frame your
  subject within the luminous frame in the vtewrtHoen.


            Horizontal
        CORRECT
View original page 9Page 10 · Read text
www.butkus.us
  The area that you see within the luminous frame will
  be included in your picture.
4. Use the cover handle to hold the camera firmly,
  keeping your fingers away lrom the lets and the
  ELEcrRoNtc rusx. When you take vertical pictures,
  hold the camera with the flash at the top. This
  produces more normal shadows on the subject, and
  helps prevent accidentally covering the flash with
  your fingers. See the illustrations below.


                                                    Vertical.
                                CORBECT
View original page 10Page 11 · Read text
5. Gently squeeze the sHurreR BELEASE.  lf the flash is
  needed,  it will fire automatically.
6. When you are finished taking pictures, close the
  cover handle to protect the lens and to prevent
   accidentally pressing the shutter release.
  When you've taken 15 pictures, the camera will not
operate. You'll see an X in the frame window. Close
the cover handle firmly. Then raise the door lever to its
fully open position, open the disc door, and remove the
exposed disc. To avoid fogging the film, be sure that
the door lever stays in its fully open position as you
remove the disc.
Note: Do not remove the disc until you have taken all
15 pictures.  lf you remove and reinsert a partially used
disc, one of the pictures will be lost. For example,  if the
frame window shows 8 and you remove the disc, when
you reinsert the disc the camera will automatically
advance to frame 9. Frame 8 will be skipped.

                                                                        .I EXPOSURE LEFT


                              FULLY EXPOSED DISC
View original page 11Page 12 · Read text
www.butkus.us
CLOSE.UP PICTURES
 Your camera has a built-in close-up lens that lets you
 take pictures of subjects as close as 11/z feet from the
 camera. For close-up shots, set the normal/close-up
                                   position, and be sure selector at the close-up ( .i  )
 that the subject is 1% to 4 feet from the camera. lf your
 subject isn't within this range,  it will be out of focus.
  You can use the neck strap as a guide for measuring
your subject distance. Hold the camera up to your eye.
Do not put the strap around your neck. Hold the end of
the strap out to its full length, and touch your subject.
This gives you a subject distance ol lilz feet (1g inches).
Then drop the strap, and take the picture. Don't try to
take pictures of subjects closer than 1.lz leet.
  When the lens is in the close-up position, a yellow
lilter moves into the viewfinder to remind you to stay
within the range shown in yellow inside the camera
cover handle. The normal picture-taking distances are
shown in white.
  The normal/close-up selector does not return to the
normal lens position after you take a close-up picture.
When you are finished taking close-up pictures, return
the selector to the normal position by (1) pressing the
close-up release button, (2) sliding the normal/close-up
selector back to the normal (gf;1 ) position, or (3)
closing the cover handle.
View original page 12Page 13 · Read text
FLASH
In dimly lighted places-in living rooms, and outdoors
in deep shade or at night-the flash distance range is
approximately 1'lz to 18 feet.


   11/, tt                                    18ft
   In brighter scenes indoors-brightly lighted stage
shows, sporting events, and offices-and outdoors in
daylight, you can take pictures at virtually any distance
beyond 1'lz feet.
Minimizing Eye Reflections
When you take flash pictures, people's eyes sornetimes
appear red. The red is produced by reflections from the
retina of the eye. This effect is especially noticeable
when your subject is young, has a light complexion, or
has blue eyes-also when your subject is in a dimly
lighted place. You can minimize these reflections by
(1) turning on additional room lights, and (2) having
your subject look directly at one of the room lights. This
causes the pupils of the eyes to contract, reducing the
ref lections.
8
View original page 13
Page 14 · Read text
www.butkus.us
PHOTO TIPS
 . Keep your camera steady. Stand still and grip the
  camera firmly with both hands while holding your
  elbows close to your body. Gently squeeze the
  shutter release.
 . Take close-ups of your subjects when possible. Move
   in to a distance of 11lz feet, and fill the frame with
  subjects such as people and pets.
. Take pictures at your subjects' level (lower for
  children and pets, for example).
. Keep it simple. Have one center of interest and avoid
  cluttered backgrounds.
. Keep your subjects busy. Have them do something
  natural rather than stand stiffly staring at the camera.
. Keep your fingers away from the flash.  lf your fingers
  block the flash, the light can't reach your subject, and
  your prints may be too dark.
o Indoors, place your subjects as far away from walls
  as possible. Subjects close to walls will cast dark
 shadows on the wall.
o Hold the camera so that the flash is at the top when
  you take vertical pictures. Shadows will appear
 above the subject when the flash is at the bottom.
  Also, you may cover the flash with your fingers if you
  hold the camera with the flash at the bottom.
View original page 14
Page 15 · Read text
o To minimize shadows around your subject, turn on
   extra room lights.
 o Use fresh film, keep  it cool, and process  it as soon
  as possible after exposure.
CAMERA CARE
When you carry your camera in your pocket or purse,
close the cover handle to protect the pictule{aking
lens. Always protect your camera from sand and dirt.
  When necessary, clean the front and the back of the
picture-taking lens and the viewfinder lenses by
blowing away any'dust or dirt. (You can clean the back
of the picture-taking lens only when there is no film in
the camera.) Then wipe the surface of the lens with a


Back of camera{isc door open.


       VIEWFINDEB LENS
          (rear)


   PICTURE.TAKING  LENS
    (rear)


10
View original page 15Page 16 · Read text
www.butkus.us
cotton swab or a soft, clean, lintless cloth moistened
with a lens cleaner, such as KODAK Lens Cleaner. Use
a circular motion, beginning in the center of the lens
and working out to the edges.  lf you don't have a lens
cleaner, breathe on the lens to form a mist, and lighily
wipe the mist away with a dry cotton swab. Don't apply
pressure, because you may scratch the lens.
lmportant: Never wipe or rub a dry lens. Never use
solvents or solutions not designed for cleaning camera
lenses, and never use chemically treated tissues
intended for eyeglasses.
WARNING: Do not disassemble or attempt to repair
this camera. The voltages associated with the energy
source in this camera can, under certain conditions,
present a shock hazard. See "service for your
Camera," page 12.


                            t.'.t
                                                                  11
View original page 16Page 17 · Read text
SERVICE FOR YOUR CAMERA
 lf you have questions about your carnera or have
difficulty in using  it, carefully reread the section of this
manual that pertains to the questions you have.
ESPECIALLY be sure to check the "Troubleshooting
Guide" that begins on page 14. Since many cameras
that are returned for repair do not need service, please
carefully review thrs information.
ll you have a ditficulty that isn't covered in the
"Troubleshooting Guide"   :
Take your camera, the disc you were using, and any
sample prints that show the problem to your photo
dealer.
                  OR
Take your camera, disc, and prints to a Kodak
Consumer Center  if one is located near you. The
addresses are listed on pages 18 and 19.
                  OR
Send a letter describing the problem to Eastman Kodak
Company, Photo Information, Dept. 841, Rochester,                     l
New York 14650. Please enclose the problem disc and   I
                                                                                                                         {prints with your letter to help us in answering your
questions, and be sure to specify the model of your
camera. We'll give you help and return your disc and
prints.

12
View original page 17Page 18 · Read text
www.butkus.us
    lf your camera requires repair, you may send it
through your photo dealer or directly to one of our
Service Centers, listed on the back cover. See the
warranty on page 20.
Packing lnstructions
1.Include a note with your camera giving all details.
  date and place of purchase and a description of the
  problem, as well as the disc and sample prints. lf
  possible, include a telephone number where you can
  be reached between 8:00 a.m. and 5:00 p.m.
2.Place the camera in a plastic bag to keep out dirt
  and packing material.
3. Use a sturdy carton that is large enough for you to
  surround the camera completely with packing
  material such as crumpled newspaper.
4. Securely fasten the carton with tape. Clearly write
  the address of the Service Center and your name on
  the top and bottom of the carton.
5. Mail the carton to Kodak. lt's a good idea to insure
  the camera to replacement value.


                                                         13
View original page 18Page 19 · Read text
TROUBLESHOOTING GUIDE
What Happened Probable Cause  Correction
Camera will not  a. No film in      a. Load camera with
operate.      camera.           disc.
                   b. X shows in     b. Disc fully exposed.
                  trame window.  Remove disc and                           I
                                              install new one.
                   c. Disc doorl     c. Hold door firmly
                  door lever not    closed. Push door
                          lully closed.      lever to fully closed
                          .                   position.
                  d. Energy source d. See warranty on
              exhausted.    page 20.

Fuzzy pictures.  a. Camera too    a. Stay at least 11/z teet
                   close to subject. from subject.
                  b. Normal/close- b. Check subject
                up selector not in  distance and position
                   proper position.  of normal/close-up                           i
                                          selector. See page 7.


14
View original page 19Page 20 · Read text
www.butkus.us
   What Happened Probable Cause  Correction
 I  Foggy, misty      Dirty camera    Clean lens; see
  pictures;     lens.          page 10.
,  blotches, specks
5 in pictures.
  Black/dark   Hand or object  Keep hands and
   picture or partial covering lens or  objects away from lens
  picture.      flash.          and flash.
   Blank frame     Film advanced  Don't raise and lower
                      without taking   door lever unless
                   picture.          you're loading film or
                                     removing exposed
                                                 disc.
   Light fog on      Door lever      Be sure door lever
  frames  '1 and 15. moved during    always stays in fully
                     unloading of     open position during
                   disc.              unloading.
   Flash pictures   Flash too far       Su,bject should be no
   too dark.        from subject.     farther than 18 feet
                                      from flash in low-light
                                              situations.


                                                       15
View original page 20Page 21 · Read text
What Happened Probable Cause  Correction
Flash pictures      Flash too close  Subject must be ai
too light.            to subject.      least 1% feet from
                                                flash.

Flash fails to       a. Scene too      a. Check flash
operare.             bright for flash.     operation in dark: if it
                                 does not flash, see b,
                                     below.
                   b. Camera in      b. Return camera to
                                                                                                '13.                 need of repair.     Kodak; see page
Subject not      lmproper use of  Frame subject as
framed properly viewfinder.    described on page 4.
or partly cut off.
Red reflections in  Flash reflected    Turn on additional
subject's eyes.   back to camera   room lights. See
                        lens.            page 8.
View original page 21Page 22 · Read text
www.butkus.us
  TECHN ICAL SPECIFICATIONS
   Film Advance  Automatic-motorized.
                        12.5 mm  f 12.8 4-element glass; 4I Lens
                            i""J;J,Xfi  I 3' tsn n' ::T: i ;ffi  iJ' ,                      closed.*  Foru"         Normal lens-Fixed, 4 feet to
                               infinity.
                    Close-up lens-Fixed, 11, to 4 feet.
  Fifm         KODACOLOR VR Disc Film. F'ash                         Fi:"'':i3iia 1?333Jt :?3.J?,Jfr,''i"'
                           lighted).
   Exposure Control Automatic 2-step:
                                                   f 12.8 at 1/100 second (with flash)
                      cycles at 1.0 second.
                                                       f /6 at 11200 second (without flash)
                      cycles at 0.4 second.
                Two 3-volt lithium cells. Free. Energy Source
                    replacement during $year
                      warranty; after warranty,
                    replacement for nominal fee atI
                  Kodak Equipment Service Center...
  Viewfinder    Projected reticle.

  I


                                                            17
View original page 22Page 23 · Read text
SERVICE CENTERS
  lf your Kodak camera should require service, complete
 facilities are provided at the following Kodak
 Equipment Service Centers. For fastest service, send
 your camera to the Service Center nearest you.
 12100 Rivera Road, Whittier, California 90606
 5315 Peachtree Industrial Blvd., Chamblee, Georgia 30341
 1122 Mapunapuna Street, Honolulu, Hawaii 96819
 1901 West 22nd Street. Oak Brook. lllinois 60521
 800 Lee Road, Rochester, New York 14650
Campo Rico Ave. and 246th Street, Country Club,
   Carolina, Puerto Rico 00630
 2800 Forest Lane, Dallas, Texas 75234


  KODAK Film.
  Because time
      goes by.


     Consumer/Professional & Finishlng Markets
                     Rochester. New York 14650
12-83-CEX            Kodak, Kodacolor, and VR                M3t010
Pt. No.633677              are trademarks.             Printed in U.S.A.
View original page 23Related documents and language editions
From the M. Butkus archive. Original publisher and archive notices are retained.
Check the model and edition against your equipment.
PDF verified 2026-10-10.