Film cameras
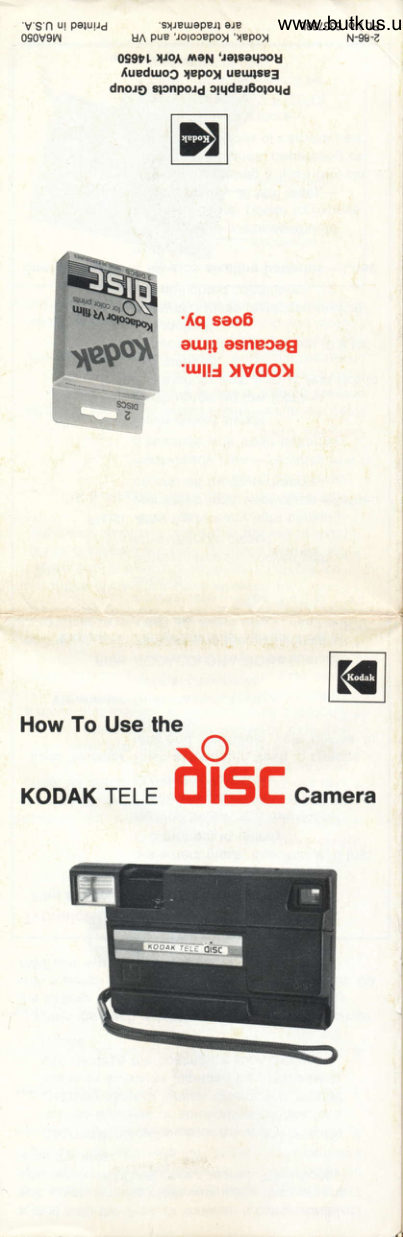
Kodak tele disk User manual
User manual for Kodak tele disk. 7 pages in English. Read the original PDF, download or print a copy without registration.
7 pagesEnglish2.7 MB PDF
Loading your manual…Open PDF directly
Document details
- Brand
- Kodak
- Model / document
- Kodak tele disk
- Document type
- User manual
- Language
- English
- Pages
- 7
- File size
- 2.7 MB
- Category
- Film cameras
- Document date
- Not specified in catalog
Search available document text
Find a term, then jump to its page in the original PDF. Image-only pages may not be searchable; check the PDF for exact wording and diagrams.
Page 2 · Read text
LJNS/VIEWFINDER  SELECTOR  (Push flash ro extend                    2. Grasp the battery-compartment door by the
 TELEPHOTO LENS: push flash again to return to NORMAL LENS.)             recesses on both sides of the door and rotate
                                                          open. Arrows show the way to pull.
                                   ELECTRONIC FLASH        3. Insert the batteries and malch the " + " and " - "
                                                                terminals to those in the battery compartment.
                                     DUAL.MAGNIFICATION         (See decal in compartment.) Close the battery                                        VIEWFINDER
                                                                    door.
                                    TELEPHOTO/             4. Close the cover/handle and squeeze near its top
                                NORMAL LENS               center to latch.
                                     BATTERY.              When the flash-ready light takes up to 30 seconds
                                COMPARTMENT                                 DOOR (open)               to blink, or when the film disc does not advance,
                                                           replace both batteries with lresh alkaline bafteries.
                                      FINGER.GRIP INDENT      To save battery-charging time, you may want to
                                     SHUTTER RELEASE         clean the contacts or change both batteries when
                                                            the ready light begins to take 15 seconds. Use a
                                  COVER/HANDLE (open)       pencil eraser or clean, dry, rough cloth to remove
                                                           residue from battery terminals and compartment
                                    WRIST.STRAP POST         contacts. Do NOT use water or sandpaper.
                                                 To prevent batlery drain and to protect and keep
                                                           the picture-taking lens clean, keep the cover/handle
                                     DUAL-MAGNIFICATION      closed when the camera is not in use.
                                       VIEWFINDER             Remove the batteries when you store the camera
                                    FILM.DOOR LEVER           for an indefinite time

                                       FILM DOOR


                                    FLASH-DEFEAT SWITCH


                                   FLASH.READY LIGHT

                                   EXPOSURE COUNTER

    Equipmenl subiecl to minor appearance changes.
  Basic Operation
  1. Open the covenrHnnole
  2. lnsert the eerrenres.
  3. Load the film disc.
  4. Compose your picture in the vrewrrnoeR.                                                                                      DigitallyDN: cn=MikesignedButkus,by Mikeo=ButkusButkus camera
  5. Select NoRMAL or rELEpHoro LENS            Mike Butkus manuals,email=mike@butkus.org,ou=butkus.org, c=US
  6. Alter the rless-neADy LtcHr blinks. hold the           Loading the Film         Date: 2021.04.11 17:38:01 -04'00'
    camera steady and gently depress the             The rlu-oooR LEVER latches and unlatches the llu
     SHUTTER RELEASE.                                       ooon, and opens and closes the light seal on the
  7. Unload the film disc, after you have exposed           film disc.
     15 pictures.                                           1. Fully raise the film-door lever to pop open the
                                                                     film door.
Wrist Strap                                           2. Insert a film disc into the camera.
Insert the shorter looped end of the wrist strap            3. Be sure lo close the film door belore you lower
behind wRtsr-srRAp posr: then pass the longer end             lhe door leyer, or you can fog some film frames.
through the shorter loop and pull the strap tight.            To close the film door, squeeze  it at top center
Batleries                                           and fully lower the door lever until the door
                                                                       latches.   Note: Use only two AA-size alkaline
    batteries. Check the battery case for the                4. When you lower the film-door lever, the film disc
   word "alkaline." Other batteries will give                advances to "1" in the exposuRE couNTER.
   poor performance.                            We do not recommend that you remove a film
                                                                 disc until all 15 frames are exposed. When you
The camera will not operate without batterres or            remove and reinsert a partially exposed film
with improperly installed batteries.                                disc, the disc skips to the next film frame number
  To install the batteries:                                              In the exposure counter. Thus a blank frame
1. Grasp the cover/handle by both sides and pull to            results and you lose the ability to take one
   open.                                                          picture on a reinserted film disc.
View original page 2Page 4 · Read text
Taking Pictures                                       3. Hold www.butkus.usthe camera firmly by the cover/handle as
1. Open the cover/handle to turn on the built-in             shown. Be sure not to obstruct the Lerus and rLRsn
   flash. When the flash-ready light btinks, the flash            with your fingers, the wrist strap, or anything
    is charged for picture-taking.                                     erse.
    The ready light blinks in 4 to 8 seconds with            When you take vertical pictures, hold the
   fresh batteries. This takes longer as the batteries         camera with the flash at the top. This produces
  become weaker.                                   more normal shadows on the subject and helps
2. Select normal or telephoto lens.                        keep your fingers away from the flash.
                                                          4. Wait for the flash-ready light to blink; then gently
                                                     squeeze the sxurren RELEASE to take the picture.
                                                  The camera will flash every time unless you
                                                     choose to defeat the flash.
                                                       The film disc automatically advances to the
                                                            next frame. See the exposure counter on the
                                                   camera back. Wait lor the flash-ready  light to
                                                                 blink belore laking another piclure.
                                                    Flash
    Normal lens. In the vrewrnoEn you can see          The built-in flash in your disc camera will fire every
  how your picture will be framed in lhe normal            time, aller the flash-ready light blinks. This feature
   lens setting. With the normallens, make sure              will help keep your subject well lighted in shade or
   that your subject is at least 3 feet (0.9 metre)            shadows.
  from the camera.
                                                                                                                       ?0      In low-light conditions, your subject should be          ?          Normal lens
  between 3 and 20 feet (0.9 and 6 metres) from
   the camera.
     Telephoto lens. Push the side of the
   extendable pusn/lens selector, as shown,
   to change the lens (and viewfinder) to the
   telephoto setting. The flash will extend from the        Flash range (in low light)
  camera. Now you can see in the viewfinder how           . normal lens'.
  your picture will be framed in the telephoto                  3 feet (0.9 metre)          20 feet (6 metres)
  mode. With the telephoto lens, make sure that              . telephoto lens
  your subject is at least 6 feet (1.8 metres) from                    Vn                                                                                                                   !^^+lgga     \/<r.vo   rliviiVJ,-^a-^^\             16 feet (5 metres)
  the camera. Subjects photographed through                . beyond these distances only in well-lighted
  the telephoto lens will appear closer or larger              conditions   in your pictures than those through the
  normal lens.                                     Frame a picture at an angle from shiny objects
                                                                        like windows or mirrors, animal-cage bars, or     ln low-light conditions, your telephoto subject                                                           fences. Light from the flash can reflect from shiny  should be between 6 and 16 feet ('1.8 and
                                                         surfaces and make a bright spot on your subject.  5 metres) from the camera.
    Beyond those distances good results can be
  obtained only in well-lighted conditions.
   To return the lens lo lhe normal setting, push
  the flash until it clicks into place.


                                                            Flash-defeat switch. Roll down and hold the
                                                            FLAsH-DEFEAT swrrcH with your thumb until lhe flash-
                                                   ready lighl goes out. Continue to hold the switch
                                                and depress the shutter release at the same time.
                                                 Use the flash-defeat switch, for examples: to
                                                         prevent unwanted reflections in well-lighted outdoor    Horizontal CORRECT                Vertical CORRECT
                                                   scenes taken through a closed window, or in flash-
                                                                  restricted areas.
                                                        Minimizing eye reflections. When you take color
                                                                flash pictures, people's eyes sometimes appear
                                                               red. The red is produced by reflections from the
                                                               retinas in your subject's eyes. This effect is
                                                             especially noticeable in a picture taken of a young
                                                           subject with blond hair, blue eyes, and a light
                                                       complexion, in dim light. To minimize the
                                                                   reflections, use the normal lens, turn on roomlights,
                                                and have the subject face the lights.
View original page 4Page 5 · Read text
Unloading                                    a mist onto the lens; or moisten a cotton swab or
 The automatic motorized film advance rotates the           soft, clean, lintless cloth with just a drop of lens
 film disc from one frame to the next. The film disc        cleaner like KODAK Lens Cleaner. Then lightly
 automatically stops at "X" after the 15th exposure.       wipe the lens.
 1. When unloading the film disc,  it is best to close         CAUTION: Never wipe or rub a dry lens. Do
    the cover/handle.                                         not use solvents or solutions not made lor
 2. Fully raise the film-door lever and keep  it open           cleaning camera lenses. Chemically treated
    to avoid fogging the film.                                    tissue or solutions intended for eyeglasses
                                                     can damage the coating on your camera 3. Next open the disc door and remove the exposed
    film disc.                                                         renses.
 4. Close the film door and fully lower the film-door       When the flash is weak or inoperative, first clean
    lever.                                                 the battery terminals and compartment contacts
                                                            with a pencil eraser or a clean, dry, rough cloth. Do
                                                      A/Of use water or sandpaper.

                                                  Technical Specilications
        15Th EXPOSURE  FULLY EXPOSED                Film Advance Automatic-motorized
      READY TO TAKE       FILM DISC                                                  Lenses Telephoto lens-22 mm f/5.6,
                                                                      3-element glass, fixed-focus, 6 feet
 Photo Tips                                                                        (1.8 metres) to infinity
 . Hold your camera steady (against your forehead                     Normal lens-12.5 mm f14.0,
   or nose) and gently squeeze the shutter release.                       3-element glass; fixed-focus, 3 feet . Use the telephoto lens when possible to "bring                             (0.9 metre) to infinity
   your subjects close."
 . Take pictures at your subjects' eye level-for          Lens Seleclor Push extendable flash to change                                                                           lens and viewfinder lrom normal lo   example, lower for children and pets.
 . Choose a simple center of interest and avoid a                             telephoto.
   cluttered background.                                     Viewfinder Dual-magn   if ication-
 . Have your subject do something natural rather                        normal/ telephoto
   than stare stitfly at the camera.                               Film KODACOLOR VR Disc Film, ISO 200
 . Keep your fingers and anything else away from            Exposure Tblephoto /ens-fixed ,  f /5.6 at
   the flash.  lf you block the flash, your pictures can                         1/300 second
   turn out too dark.                                                                                                                                                                                                                                                                         f /4.0 at 1/300 . Place your subjects away from walls and turn on                    Normal /ens-f ixed,                                                                     second   roomlights to minimize shadows on the walls.
 o For verlical pictures, hold the camera with the                          Shutter release blocked with
   llash at the top to prevent shadows above the                          cover/handle closed
   subject.                                                    Flash Atter flash-ready light blinks,
 o Use fresh film, keep  it cool, and have  it                                   electronic llash every time-turned
   developed promptly.                                           on and otf by cover/handle
                                                                        Flash-ready light-recycles in 4 to
Camera Care                                                     8 seconds with fresh batteries
                                                                                Flash-defeat switchKeep the cover/handle closed when not in use to
prevent batlery drain, to protect and keep the                            Flash range (in low light)-                                                                                         . telephoto lens:6 to 16 feet (1.8 topicture-taking lens clean, and to prevent an
unwanted exposure. Always protect your camera                        5 metres)
                                                                                                                     (0.9 tofrom sand and dirt.                                                                   . normal lens'. 3 to 20 feet
  Blow any dirt away from the exposed surfaces                        6 metres)
of the picture-taking and viewfinder lenses. Breathe                    o beyond these distances only in
                                                                                     well-lighted conditions
                                                   Energy Source 2 AA-size alkaline batteries-Load
                                                                     from front.
                                                                         Fresh, tested batteries should
                                                                         provide enough power to expose
                                                                        approximately 25 film discs-
                                                                            without exceeding a flash-recycle
                                                                         time of 30 seconds, depending on
                                                                   normal conditions of camera use:
                                                                                         . in room temperature-
                                                                                 approxi mat ely 7 2" F (22' Cl
                                                                                         . other variables-such as
               Back of camera-film door open                                     frequency of use
View original page 5Page 7 · Read text
More Information                                         Full Three-Year Warranty
 lf you need help with this disc camera or with other       Warranty Time Period
photographic questions, see your photo dealer.            This KODAK TELE Disc Camera is warranted by
                 OR                          Kodak to function properly for three years from the
Write to Kodak, specify the model of your camera,         date of purchase. This warranty covers the
and send any problem film disc, prints, and your          purchaser of this camera and anyone else who
daytime telephone number to:                        owns  it during the warranty period.
    Eastman Kodak Company                           Warranty Coverage
    Photo Information                                                                     lf this camera does not function properly within the
    Department 841                                      warranty period, Kodak will repair it without charge.
    Rochester, New York 14650                                                lf Kodak is unable to repair it, the option of
  Do NOT send your camera to the above address.       replacement or refund of the purchase price will be
We'll mail or phone help to you and return your film        available.
disc and prints.                               How To Obtain Service
                                                       For assistance in using this camera, contact a
                                                       dealer in Kodak products. For service on thisService lor Your Gamera                                                     camera, return  it through a dealer in Kodak
   WARNING: Do not disassemble or attempt to           products or to one of the Kodak Equipment Service
    repair this camera. The voltages in the                Centers below. Enclosing a note with the camera
   camera can cause a shock hazard.                      giving details of the problem and date of purchase
Carefully reread the sections of this manual that             will help Kodak return the camera promptly.
pertain to your questions. Especially be sure to             Limltations
check the Troubleshooting Guide in the previous          This warranty does not cover circumstances beyond
section. Since many cameras returned for repair do       Kodak's control, nor problems caused by failure to
not need service, please carefully review this               follow care and operating instructions in the
information.                                               manual.
     lf you have ditficulty not covered in the                                             Kodak makes no other express warranty for thisTroubleshooting Guide:                                                     camera.  Take your camera, the film disc you were using,
and any sample prints to your photo dealer.               Repair and the option of replacement or refund, in
     lf your camera does require repair, you may send        the event that Kodak is unable to repair the camera,
 it through your photo dealer or directly to one of our       are Kodak's only obligations. Kodak will not be                           I
Sei'vice Ceniers on the rrext panel. See the                 responsible for any consequential or incidental ,- -+warranty, next panel.                              damages resulting lrom the sale or use of this
                                                     camera, even if loss or damage is caused by the
                                                        negligence or other lault ol Kodak.
Packing Instructions                                Your Rights Under State Law
1. Include a note WITH your camera giving all         Some states do not allow the exclusion or limitation
   details: model, serial number, date and place of         of incidental or consequential damages, so the
   purchase, a description of the problem, the film        above limitation or exclusion may not apply to you.
   disc and sample prints, and your daytime               This warranty gives other rights which vary from
   telephone number.                                         state to state.
2. Enclose your camera in a plastic bag to keep out
   dust from packing material.
                                                  Service Centers3. Use a sturdy carton large enough to surround
   the camera completely with crumpled                                      lf your KODAK TELE Disc Camera should require
   newspaper, bubble-pack, or other packaging             service, complete facilities are provided at these
   material.                                       Kodak Equipment Service Centers. For service
                                                           outside the United States and Canada, contact your4. Securely fasten the carton with tape. Clearly                                                      photo dealer or write to Kodak in your country.   write the address of the Equipment Service                                               Send your camera to the Service Center nearest
   Center and your name and address on the top          you.
  and bottom of the carton.
5. Ship the carton to the Kodak Equipment Service         12100 Rivera Road, Whittier, California 90606                                                             5315 Peachtree Industrial Blvd., Chamblee, Georgia 30341
   Center. Remember to insure the camera.                1901 West 22nd Street, Oak Brook, lllinois 60521
                                                             800 Lee Road, Rochester, New York 14650
                                                 Campo Rico Ave. and 246th Street, Country Club,
                                                                    Carolina, Puerto Rico 00630
                                                             2800 Forest Lane, Dallas, Texas 75234
                                                             3500 Eglinton Ave. W., Toronto, Ont. MOM 1V3 CANADA
View original page 7Related documents and language editions
From the M. Butkus archive. Original publisher and archive notices are retained.
Check the model and edition against your equipment.
PDF verified 2026-10-10.