Film cameras
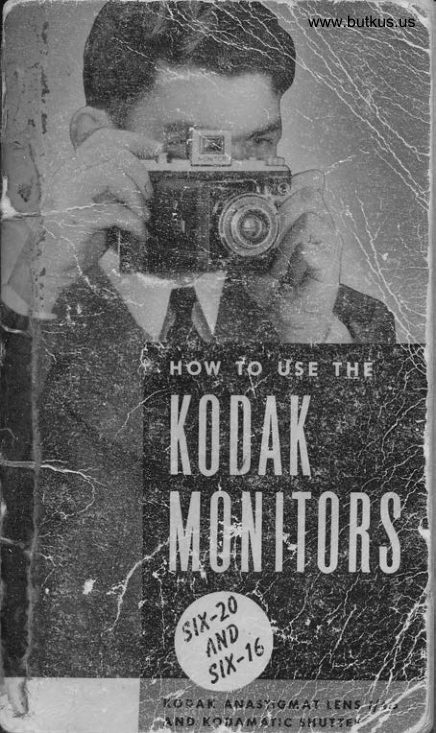
Kodak Monitor Six - 20 User manual
User manual for Kodak Monitor Six - 20. 31 pages in English. Read the original PDF, download or print a copy without registration.
31 pagesEnglish4.1 MB PDF

Loading your manual…Open PDF directly
Document details
- Brand
- Kodak
- Model / document
- Kodak Monitor Six - 20
- Document type
- User manual
- Language
- English
- Pages
- 31
- File size
- 4.1 MB
- Category
- Film cameras
- Document date
- Not specified in catalog
Search available document text
Find a term, then jump to its page in the original PDF. Image-only pages may not be searchable; check the PDF for exact wording and diagrams.
Page 2 · Read text
,"4


                gr.r:t:1


      l{ODAK
     $14$NrTfim
     $!K-y.fr
i'fush Superrn*ticShutter * Xoduk AnnstigmntSperiulf t4,5 t-enn
View original page 2Page 5 · Read text
I1'lTRODt|CTION

The  ability  of the Kodak  Monitor   to make good
pictures,   .  . outdoors or indoors  .  .  . duy or night
      . winter  or summer, enables your picture-taking
activities to be as simple or as varied as you care to
make them. Yet, with  all  its versatility, the Kodak
Monitor   is easy to operate and dependable.
  The instructions in this manual give you quickly
the essentialsof camera operation. Read them care-
ftrlly because good  pictures depend upon  a clear
understanding  of these principles.  In  this way, you
can handle  your  camera  easily and  confidently
right from the start and thus devote more attention
to makirg  your pictures interesting.


                     www.orphancameras.com
View original page 5Page 6 · Read text
I,OADIHE CAMERAIN SUBDUEDI.IGHT
-NEVER IN STROI{G,DIRECTIIGHT        Lcndln

Raise and push back  slightly  on  the  latchunder the carrying  handle. Open  the back. 1
The empty  spool should be  in  the winding
knob end of the camera. Place the new  roll                 2
of film in the opposite end adjoinirg  the hinge
of the back.
Break the seal and  pull  the end of the paper
over the two  rollers. The  black  side of the                 3
paper must be toward  the lens. Thread  the
end of the paper through  the longer slot in the
empty spool as far as it will  go.
Turn  the winding  knob two or three times tobind  the end  of  the  paper  securely  to  the 4
View original page 6Page 7 · Read text
empty spool. Be  sure  the  paper   is started
straight,  then close the back.
The   winding    indicator   must  be  set  at
"WIND."    The  winding  knob  cannot  be
turned  to advance  the  film  to the  first expo-
sure number  unless the  indicator   is  in  this
position.
Push the lever on the back  of the camer a to
uncover  the red window.  Turn  the winding
knob  until  a small hand appears in the win-
dow and  continue  turning  slowly  until  the
figure  one  (1) just  appears; then  release the
lever to cover the red window.
Move  the winding  indicator  to "1-8."  Turn
the winding  knob a  trifle  until   it  locks. The
engraved figure  (1) should be centered in the
exposure counter  opening.   If   it  isn't,  turn


                                           fr
                                                                                                                                                            gI


              www.orphancameras.com
View original page 7Page 8 · Read text
the knurled wheel of the counter  in either direction
until  the figure 1 is in position.

IMPoRTANT-After   each picture  is taken,  turn  the
winding  knob  until   it locks. While  the film  is ad-
vancing,  the exposure counter  dial makes a com-
plete turn and  all the numbers appear in the open-
irg. When the winding knob locks, the next expo-
sure number  is in place. Norm allyrthe winding knob
cannot be turned  unless the exposure button  has
been pressed.
  The red windowshould  be uncovered to bring only
No. 1 into position. Succeeding numbers appearirg
in the red window  can be disregarded because the
exposure counter  dial registers each section of film.

  USE ONE OF THE KODAK ROtL
  FItMS DESCRIBEDON PAGE I4
View original page 8
Page 9 · Read text
r


         Opening ond closing
           the ctrmerq

             Io  open  fhe  ccimere,, press this  button  and  pull
         down the front  until   it locks. The lens is now  in a
           picture-taking  position.

             Io close fhe ccrmerc,tpress the same button and push
         up the front.
          6


                               www.orphancameras.com
View original page 9Page 11 · Read text
SHUTTER SPEED


 The  length  of time  the  shutter  is open  to admit
 light  to the film  is controlled  by turning  the knurled
 collar  until one of the spEED poTNTERSA  is at  the
speed desired.
  The  camera  rrray be held  in  the hands  for  the
speeds marked  in black, 1,1400to 1lZ5 second. The
black pointer  is used for  the  black  shutter  speed
settings. Note that each of these settings gives an
exposure twice as long as the one precedirg   it. For
example:  at  11100 second, twice  as much  light
reaches the film as at 11200 second.
  Place the camera on a tripod  or other  firm sup-
port  for the exposures marked  in red , 7110 second
to 1 second and  "8."  Use the red pointer  for the
                             (cB,'red shutter speeds. The       setting enables you to
keep  the  shutter  open  for  longer  exposures. The
use of this setting is described on page 18.


               Kc#crT
                                                                   f#
                                                                                                                                                         * * r -t'*.)l

                    www.orphancameras.com
View original page 11Page 12 · Read text
LENS OPENINGS


                        ((8"Moving  the lever      across the ;f-number  scale
changes the size of the lens opening through  which
 the light passeswhile the shutter is open.
  The opening  is smallest when the lever is atJl32.
Each succeeding setting admits,  it a given exposure
 time,  twice  as much  light  as the one before;  for
 example,fl22   lets through  twice  the  light  of f 132,                                                                     *J 116twice that  of f 122, and so on along the scale.

 *The setting f 14.5 is not o  full lens opening lorger
  thon  f 15.6, ond  odmits only  507" more  light.


                                t            i$                   [iffi

                                                'r
View original page 12Page 13 · Read text
Y,;4P!.'i


                        Lens Opening and Shutter Speed
                             control  the amount  of  light  ad-
                            mitted  to  the  film.  The  correct
                          combination   of  settings  for  vari-
                        ous lighting  conditions and types
                               of subjects can be obtained  from
                            the Snapshot Kodaguide  packed
                            with the camera, or from the table
                       on page 22.  p


           FOCUS


        The lens must be focused  f
          the camera and the subject. Tq                  NS
         Mount  until  the figure under   tli                indi-
          cates the number  of feet from  lens to subject.
          The engraved focusing scale is marked from 3%
           feet to INF   (infinity).  Use the  infinity  setting  for
          distances 100  feet from  the camera  or  beyond.
            For subjects closer to the camera than 10 feet,
         be sure  to measure the  distance  or use a Kodak
         Service Range Finder.
       10


                               www.orphancameras.com
View original page 13Page 14 · Read text
The Finders
 t - The Woist Level Finder enables
you  without  stooping  to make
pictures  of  children  and  other
subjects below  normal  height.
For  horizontal  pictures turn  the
finder and camer a to the side.
2-The  Eye Level Finder is better
for action pictures. To bring  the
finder into  position,  lift the front
finder frame. To aim the camera
properly, look through the finder,
hotding the camera firmlY against
the face with the rear finder sight
close enough to the eye to enable
you to superimpose its edges uP-
on the edges of the  front  finder                                                                     '
frame.
  When using the eyelevelfinder,
always rotate the adjustment  dial
on the rear sight until  the arrow
 is pointing  to approximatelY  the
same distance for which  the lens
 is focused. This changes the Posi-
 tion of the rear sight so that the
 field of view seen in the finder  is
 the same as that covered bY the
 camera lens.
                        7 7
View original page 14Page 15 · Read text
f


 l. Sef ihe shutler speed.
2, Set the lens open ing,
3. Focus.
4, Cock  fhe  shvtter by pushing  the cocking  lever
  D as far as it will go in the direction  of the arrow.
5. Compose fhe piclure  in the frnder,
                                                                         }
6, Hold  lhe coimerr sleady, Ary  movement  during
  exposure blurs the picture.             $
7. Press #re exposure bulton slowly, see illustrations
  on page 11,.
8, After eoch  pictvre  is loken, advance  the film  by
   turning  the winding knob until   it locks.
7 2

                    www.orphancameras.com                                                                                                                                                                                                  I
View original page 15Page 16 · Read text
Removing the Film
After   all  the  exposures have
been made, move the winding
clutch lever to "WIND."   Turn
the winding knob until the pro-
tective paper not only passesthe red window  but is
drawn  up  to the take-up  spool. In subdued light
open the back of the camera. Do not allow the roll
of film to unwind flom the spool or it will be fogged.
Pull out the winding  knob  to disengage it from the
end of the spool. Remove the roll of film but do not
twist   it  tightly  on  the  spool or  the  film  rnay be
scratched. Fold  under  the end  of  the  protective
paper and fasten it with the sticker. Move the empty
spool to the winding knob recess.Push the winding
knob in and engage it with the slot in the end of the
empty spool. The camera is now ready for reloading.

To Operole The Cqmerc Without Film
This ccmero, becouse of  the double exposure prevention feoture,
 is so constructed that normolly the shutter ccnnot be operoted  with
fhe exposure button unless the comero is loqded  with ftlm.
  To operote the shutter with the exposure     liii                                -
button   (l ) when  there  is no  film  in the
cqmero, (2)if you hove pressed the ex-
posure button before  cocking the shutter,
or (3) to moke <ln intentionol double ex-
posure, push the lever found between the
front snd reqr sights of the eye level finder
to the  right  This releoses the exposure
 button so thot  it cqn oPerote  the shutter
providing the winding lever  is ot  "l-8""
View original page 16
Page 17 · Read text
[{ndakFilnls

                Kodqk Verichrome Film
                 The  film  for  general  outdoor
                     pictures.   It  has wide  latitude
                       to help you get a good negative
                 even though  you  slightly  mis-
                  judge  the  exposure. High   in
                  speed,  it  is also excellent  for
                     night photography  with  Photo-
                     flash Lamps. B exposures,V620.

                Kodqk Plus-X
                 Pqnchromcrtic Film
                Combined  high speed and  fine
                     grain make  this  film  ideal  for
                   outdoor  work  and   for   well-
                       lighteci indoor subjects. 8 expo-
                    sures, PX620.
                                                                                        a
                Kodqk Super-XX
                  Pqnchromcrtic Film
                 Because of  its very high speed,                    f
                        this film  is the logical choice for
                 making snapshots indoors with
                   Photoflood Lamps.  Indoors  or
                      out,   it  is the  film  to use when
                    the  light  is poor. B exposures,
              xx620.
                 1 1
                    www.orphancameras.com
View original page 17Page 18 · Read text
UseKodukFilmNo. 620


Kodqk Infrored Film
The  film  for distant landscape photography  when
detail  ordinarily  obscured by atmospheric  haze  is
d.esired. It  can  also be used to produce  unusual
pictorial  results. The Wratten A  Filter (No . 25)  it
recommended  for use with  this film. The above pic-
tures were made with  this filter. 6 exposures' IR620.

Kodocolor Film
The  film  for full-color  prints-exposed   outdoors  in
 bright sunlight, Kodacolor Film yields negatives from
which Kodacolor  prints  like the one on the inside
 front cover are made. Kodacolor  prints are ordered
 through  your Kodak  dealer. Black-and-white  con-
 tact  prints  or  black-and-white  enlargements can
 also be made from the negatives. 6 exposures, C620.
                                      1 5
View original page 18Page 19 · Read text
; a, @d, c #
il.[,8..     Photoflasharrd
     PhotofloodPlcture


        Sundowr,  clark days, or dark  interiors ne ed not
        mark  the end  of picture  taking.  Lightins  equip-
        ment, simple to operate, brings new and unlimited
         picture  opportunities  into reach  of your camera.

        Photoflosh Pictures
         Pictures with  Photoflash f,arnps can be made  lry
         attachirg  a Kodak  Flasholder to the camera" No
         synchroniryris needecl.The synchronizing mechanism
           is built  into  the shutter and  is connected to the
         Flasholder by  t rubber cord at post A.
            Either  of two types of flash lamps can be used:
        Class F, such as the SM Photoflash Lamp, or Class
            lv{, such as the No. 5 Photoflash Lamp. Synchroniza-
          tion  of the shutter for either type  is accomplished
        by simply  loosenirg  the synchr onizer scale nut C
         with  a screwdriver and  setting the indicator  at:
                ((Ir:'                   for the SM Photoflash Lamp,  or
          "M"   for the No. 5 Photoflash T,amp.
                 t h

                               www.orphancameras.com
View original page 19Page 20 · Read text
Kodak[Vlonltor
                 Kodqk Anqstigmot  Speciol f14.5
                         in Flqsh Supermqtic Shulter

                  Becouseof on improvement in the shut-
                           ter, these instructions supersede those
                  on poges 16 ond 17.

         Pictures wilh  Pholoflosh lomps   cart be made  by   at'
       taching  a Kodak  Flasholder  to  the  camera.   Jt[o
       synchroni7eris needed.The synchronizing  mechanism
                 '          is built  into  the  shutter  and  is connected  to  the
       Flasholder by u rubber  cord at post A.
           Either  of two types of flash lamps can be used:
       Class F, such as the SM Photoflash Lamp,  or Class
       M,  such as the No.  5 Photoflash Lamp.  Synchro-
F*        nization   for  the  No.  5 Photoflash  Lamp   is con-
         trolled  by  the Synchronizer  Lever B.
       For Pholoflnsh  piclures  with  qn SM Photoflqsh
\p      Lomp:
                   l.  Insert the flash lamp  into the reflector.
            2. Cock the shutter as usual.
View original page 20Page 21 · Read text
3. Press the exposure button in the usual way.
      Do not usethe SynchronizerLeuerwith SM (Class
        F) PhotoflashLamps.

  For Photoflqsh piclures with o No. 5 Photoflqsh
  Lomp:
         l.  Insert a flash lamp into the reflector.
      2. Cock the shutter as usual.
      3. Press the Synchronizer Lever B down as far
       as it will go.
      4. Press the exposure button in the usual way.


   The Kodok Flosholder is qt-
   toched to the comero with o
   Stondqrd Brocket ond con
   be instolled or removed in o
   motter of seconds.ComPlete
    instructionso re pocked with
   eqch  Flosholder. Exposure informotion  for  moking
    flosh pictures is olso given on pog e 23 of this mqnuql.

         E A S T M A NK O D A K C O M P A N Y


il-464H-AB


                       www.orphancameras.com
View original page 21Page 22 · Read text
Retighten the scale nut C  secrrrely. It Must Be
 Tight. This  adjustment need not  be repeated
 unless you change from one type of lamp to the
 other.
   Taking a Photoflash picture requires only two
 operations in addition to those you perform  for
 the usual snapshot:
      l-Insert   a flash lamp  into the reflector.
     2-After   cocking  the  shutter, press down
     the Synchronizer  Lever B as far as it  will
     go. The Shutter Must Be CockedFirst.
The picture  is taken by pressing the exposure
 ton as usual.


The Kodok Flosholder is ot-
toched to the comero with o
Stondo rd  Brocket ond con
be instqlled or removed in o
motter of seconds.Complete
instructionsore pocked with
:och Flosholder.Exposure informotion for moking flosh
pictures is olso given on po ge 23 of this monuol.
View original page 22Page 23 · Read text
Time Exposures
When the light  is too poor for a snapshot, and you
are not equipped  to make a flash picture, make a
time exposure.
  To make a time exposure, place the camera on
a tripod  or other  firm  support.  Set the red index
              line  at  the   letter   "8";   press down
             the exposure button  and  hold   it. The
             shutter  will remain open as long as the
           exposure button  is depressed.
            1 8


                     www.orphancameras.com
                                                                                                                                                              l
View original page 23Page 24 · Read text
Photoflood Pictures
d     You can also make indoor pictures with Photoflood
 ,      famps. An  effective lightirg  arrangement  is shown
 ,        in the diagram.
s,        Obtain  a No. 7 and a No. 2 Photoflood Lamp
       and suitable reflectors for them from  your  dealer.
       Both lamps  fit  all regular home sockets. The No. 2
        Iu-p,  which gives twice the light of the No. 1 larrp,
       should be about 2 feet higher as illustrated.
         For best results the subj ect should be near a light-
       colored background.  Exposures for various lamp-
        to-subject distances are given on page 23 as well as
         in the Snapshot Kodaguide.


     The Kodqk T.B.l. Coble ReleoseNo. 2.
          To eliminqte the necessity of holding your finger on
T         fhe exposure button for long  intervols, o Kodok  T.B.l.
  l{{       Coble Releose No. 2 is recommended. Simply screw the
         Coble Releose into the center of the exPosure button
        ond iurn the metol disk until the notch is under the smoll
          button os illustroted. Set the red index on the shutter
           of  " 8." The shutter is opened  by pressing the plunger.
          After  the proper exposure time hos elopsed, close the
          shutter by pressing the smoll button directly obove the
         metql disk, thus releosing the plunger.
View original page 24Related documents and language editions
From the M. Butkus archive. Original publisher and archive notices are retained.
Check the model and edition against your equipment.
PDF verified 2026-10-10.