Film cameras
Kodak No. 1a Autographic User manual
User manual for Kodak No. 1a Autographic. 67 pages in English. Read the original PDF, download or print a copy without registration.
67 pagesEnglish3.3 MB PDF

Loading your manual…Open PDF directly
Document details
- Brand
- Kodak
- Model / document
- Kodak No. 1a Autographic
- Document type
- User manual
- Language
- English
- Pages
- 67
- File size
- 3.3 MB
- Category
- Film cameras
- Document date
- Not specified in catalog
Search available document text
Find a term, then jump to its page in the original PDF. Image-only pages may not be searchable; check the PDF for exact wording and diagrams.
Page 2 · Read text
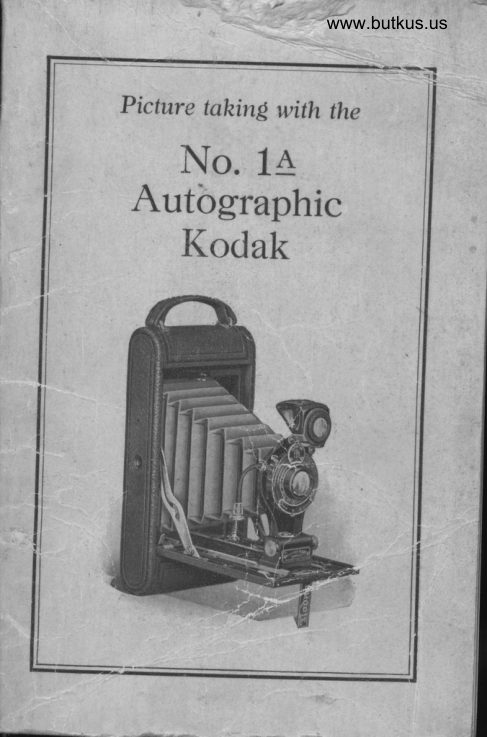
?ICTURE  TAKING  WITH  THE
     NO. 14
AUTOGRAPHIC
   KODAK


                        Published by
EASTMAN KoDAK coMpANy,  RocHESTEn,r\.v.
View original page 2Page 4 · Read text
\

 PICTURE TAKING !rITH  THE


       No. 1A
  AUTOGRAPHIC
    KODAK

( Rapid Rectilinear and F. 7.7 Anastigmat Lens )


      a


                   Publishedby
      EASTMAN  KODAK  COMPANY
                Rochester. New York
View original page 4Page 5 · Read text
ORDER FILM
      BY NUMBER
    All  Eastnran Films  may be  distin_
 guished by the numbers on the encls of
 the cartons :
           A-116
 is the number of  filnr for  this carlrera,
 (No. 1A Autographic Kodak)
  The number appears on the carton, on
 the cartridge, and on the Autographic
 door which is located on back of Kodak.
   Autographic  film can be used in  olcl
 style Kodaks, old style film can be used
in Autographic Kodaks, but to get auto_
graphic reswlts Autographic film must be
used in an Autographic Kodak.
      IMPORTANT.
  When Autographing  film, bear down
with the stylus as heavily as the paper
will  stand without  tearing.


                 www.orphancameras.com
View original page 5Page 6 · Read text
BEFORE LOADING.
   Before  taking  any pictures  with  the No. 1A
Autographic  Kodak  read the following  instruc-
tions  carefully.   Make  yourself  perfectly   fa-
rniliar   u'ith  the  instrument,   taking   especial
care to learn horv to operate the shutter. Work
 it  for  both  time  and instantaneous  exposures
several times before  threading  up the  fihn.
  The  first and most  important  thing  for  the
arnateur to bear in mincl is that the  lisht which
scrves to impress the photographic  i,rrege ,pon
the sensitive film  in a small  fraction  of a sec-
ond when   it comes through  the  lens, can de-
stroy: the  film as quickly  as  it makes the  pic-
ture.  Tl-rroughout  all the operations of loading
and  unloading,  be extremely  careful  to  keep
the  red paper wound  tightly  around  the  film
to prevent the admission  of  light.
    EASTMAN KODAK COMPANY,
                            Rochester. N.  Y.


                                                                                                                       j
View original page 6Page 7 · Read text
I

          CONTENTS.

        Panr  I.
             Loading the Camera.
        Panr II.
                Ilaking the Exposures.
                         Section  1.  Operating  the Shutter.
                         Section 2.  Instantaneous  Exposures.
                         Section 3.  Time  Exposures.
                         Section  4.  Flash  Light  pictures.
       Panr III.
            Removing the Film.


                               www.orphancameras.com
View original page 7Page 8 · Read text
PART T.
                                                t
          LOADING WITH  FILM.

         The   film   for   the  No.  1.A
        Autographic   Kodak    is   fur-
       nished in light proof cartridges
       and  the  instrument  can  there-
         fore be loaded in daylight.  T,he
        operation  should,  however,  be
       performed  in  a subdued  light,        not  in  the  glare  of  the  bright           rffisne  ,r 11n.1
         sunlight.      It  should  also  be   '    A - 1 1 6 .
       borne  in  mind  that  after  the
        seal is broken  care must be taken  to keep the
        red paper taut on the  spool, otherwise   it may
          slip and loosen  sufficiently  to  fog  the  film.
        The  Autographic   Film   Cartridge   is made
        with  a  thin  red  instead  of  the  familiar  thickt
        red and black  (duplex)  paper.  The  thin  red
       paper is not  light  proof  in  itself.  Between  it
       and the  film  is inserted a strip  of  tissue.  This
        tissue serves two purposes: To supplement the
        red paper  in  light  proofing  the  cartridge,  and
         to permit  the recording,  by  light,  of  the  writ-
        ing upon the'fiIm.

                                                                                      ,/.
View original page 8Page 9 · Read text
6-Eastman    Kodak  Company


                      FIG.  1.


    I.   l-o load the Kodak, take a position where
the daylight  is somewhat subdued, aud grasp-
ing the instrument  with  the  left hand press in
with  the thumb  of the right hand on the con-


                    FIG.  2.


                    www.orphancameras.com
View original page 9Page 10 · Read text
No.  1-A  Autographic    Kodak-7

ceaied button  located on the back near the red
 rvindow  and  then  pull  the  lower  section  of
 b:rck dorvnwards, as indicated  in  trig.   l.
   l'unr  Kodaii  over.  Pull out the winding  key
 :rs shown  in  Fig.  2.  Remove  the   f ront  of

  $FIG.    J .
iiotlak  by  first  lifting  up that end opposite the
lr.inrling k.y,  then draw  out and remove en-
tirel5,-that part  of the Kodak.   Fig.  3.
    t I.  The  Kodak   having  been  opened,  zn
cnrpty spool having a  slit in  it  will be seen in
the rvinding end  of  the camera.  This  forms
the reel on which the film  is wound  after ex-
View original page 10Page 11 · Read text
8-Eastman     Iiodak  Company


posure. The  full spool is to be placccl in the
recess :rt thc opposite encl of the Kocl:rk.  To
accomplish this  pull ont spool pins as sholvrr
in  ftig.  1.
   III.   Place the fil'r cartridge irto  this recess"
as shorvn in  trig.  5.


                    www.orphancameras.com
View original page 11Page 12 · Read text
No.  1-A  Autographic    l(odak-9

  Be careful to gct the to\  of  tlte spool at the
top oi thc cotltct'e. The top is the winding side
of the camera.  E,ach cartridge  is marked with
the rn'ord "Top"  on the red paper near the top
of the spool.
   Norr:        If  the  cartridge    is  inserted  wrong  end  np,
the  red  paper  insteacl  of  the  frlm   rvill  be  brought   next
to  the  lens,  resulting,   of  collrse,   in  the  absolute  loss
of  the  pictr-rres.


                                        t r I G . 6 .
   IV.  Push spool pins into place making sure
that the pins are  in the holes at each end of
the spool, so that the spool revolves uporl them.
Fig.  5.
  V.  Renrove the gummed  slip that holds the
encl of the recl paper; pass the paper over the
tr,vo aluminum   rollers  and  thread   into  the
lorrger  slit  in  reel, as shown  in  Fig.  6.  Be
careful  in  so  doing  that  the  paper  draws
straight and true.
  To secure a tight  grip on the red paper, do
not unfold  the end, but thread  it  into the  slit
View original page 12Page 13 · Read text
10-Eastnlan     Iiodak   Conrpany

in  reel  with  the  parper creased.  By  doing   this
the  red  paper  will  not  be  liable  to  slip.

   VI.   Give  the  reel  one  or   tll'o   slight  turns
u'ith   the  thumb   arrd  finger   using   thc   rouglr


                                                                    ,,:',l,,,lrt;


                         F'IG.  7.


edgc of thc slottecl disc into which  tire r,r,'inrling
ke5' fits-just  enough to bincl the pap;  on  tht,
reel-ancl  no lnore .  See lrig.  7.
  T h e  p a p e r
should now be
in position indi-
cated in  trig. 8.              FIG.  8.
  VII.  Replace   Shon'ing position of papcr.


                    www.orphancameras.com
View original page 13Page 14 · Read text
1-A  Autographic    liodak-l         I

thc   f ront  part  of Kodak  into  the ba ck, bcing
c:rreful to insert the er-rclopposite the  full spool
lirst, aucl into  the encl of  b:rck on  u'hich  th,'-
carrying  strap  is  fasterrecl.  Thr:'.r ltush  th,:
ior,ver section of  tire back  ttpu'ards,  fully  intcr
place. until  the  c:rtch is  hc:rrcl to  snap irLtc
position.
   'l'ltroug/tottt
                the    i orcgoittg o ltu'tttiort,  I t't,,r,t,t
tltc  tiutc  tl'tc gLtitt,utt'tlsli1, is  t-Ltt otL tltc frcsh
roll  of  fi,ltn until  tltc frout  uttd bucle (u'c olLCe
lnor(  in, plttcc, licclt tlte re d ltupct' LUoluttl tight-
/1' on  tltc roll.    If   it  is ollowcd  to looser,t, light
zt'ill bt  trdrntttctl artd thc  filnt, foggcd.
                              t
                T
                 1
                      F'IG. 9.
   VIII.   The  roil  of  filnr in the camer;,r is cov-
erecl'uvith red paper and  this must be partly                                                   'furnreelecl off before a picture can be taken.
the k.y  siowly  to the  left and rvatch the  little
red celluloid window  in the back of  the  c:rln-
era.  When  15 to 18 turns have been giverr, a
hand pointing toward the first number  will  ap-
pear, then turn slowll'until  the figure 1is  ex-
actly  in the center of  tl-re red window.    trig. 9.
  The  film  is no\v  ir-r position  for  taking  the
first picture.
View original page 14Page 15 · Read text
\  PART II.
   MAKING THE EXPOSURES.
  Tke  general  instructions   in   this  No  14
Autographic  Kod,ale mamual ap|ly  equally  -rttell
to  the cat71,cra,zuh,etlt,erfrtted with  thc Rapid,
Rcctilinear or the f.7.7  Ano,stigmat Lens.
  Before making an exposure with  the No. 1A
Autographic  Kodak,  either time  or  instautane-
ous, be sure of  four  things:
Finsr-That    the  shutter  is adjusted  properly.
   (tror  instantaneous, time  or bulb exposure.)
SecoNo-That   the  diaphragm   lever. is  placed
   at the proper  stop opening.
Tnrnn-That    the camera  is focused.
F'ounrH-That    an  unexposed  section  of  the
   film  is turned  into  position.
  Nors:  Exposures are made by pressing push-pin
at  end   of  cable  release  D   or  pushing   down   on   re-
lease  C.
  The  shutter  is self-setting.
  Avoid  making  too sharp a bend  in the cable
release as by doing so  it  will  be liable to kink.
              SECTION   I.
   OPERATING THE SHUTTER.
  Perfect  familiarity   with  the  shutter   is  es-
sential  to  successful  picture  taking  with  arty
camera.  The   following    directions   should.
therefore,  be  carefully  read  and  the  shutter
operated  several  times  before  threading  the
film up  for  use.


                   www.orphancameras.com
View original page 15Page 16 · Read text
No.  1-A '\utographic  Kodak-13


1'his  illustratiorr  shorvs the  shntter  olt  the  Korlak
        rvhen  it  is equippecl tvitir  the Rapid
                       llcctilinear   f,ens.

      II\STANTANEOUS EXPOSURES.

Irrnsr-Set  thc lever A  at 25, 50 or 100 (rcpre-
  senting the speedsof the shuttcr), according
  to the timc  of  instant:rrrcorlsexDosrlre de-
  sired.

   Norr:   The  lever A  shoulcl be used  at  100 onlv
u'lren taking moving  objects  in  bright  snnshine, an,t
 lever B  must  al'uvays be  placed  at  No.  4  or   f .  7.7
rvhen taking  this kind  of a picture.
View original page 16Page 17 · Read text
14-Eastman    Kodak  Company

              A


                B
    'l'lris
           iilrrstration  shows  the  shutter   otr thc  I{otlak
         when    it  is ecluipped  rvith  the   l.  7.7
                    Anastigmat    l-eus
Sr,t',-.rND-Setthe  levcrr B  at  \o.8    or   f.  11.
   i,cver B controls the Iris diaphntglrl and No.
     I  ,rr  i  11 is the proper opelrilrg fot- orclitrurl"
   instrrrrt:llrcor-1sexpostlres in  bright  stttriight,
  rusing speed 25.
    \')'r'i- :   l"or  instatrtaner)Lls e\1)ost1[es u'1tett  thc  stl11-
iigirt   is   trntrstt:rll1' strong   zrncl there   arc   lto   lrear'1-
:iru.ti,,rr-.  suclr  ars irr r-ieu-s o1r the  seashore  or  o11 thc
iviit..'r'.  rlse  tli;r1rlu-:rg11.lNo.   16  and  speeci  50.   With
 i i , ; i i 1 c i i - r r r t i s r ) 1 - . i 1 r . g / i f h ' s n r o k - v a t m o s p h e r e     t l s e N o .     I
 , ) r     i " . 7 . i    ; i l r r l   : l ) c c ( l    i 5  .       I I ' i t h      l t e t t ' r ' y c l o u , . i s d o  n o t
 t f i   i   t - ,i i ! h t           l l i . s l , l l l    r  ( t 1 l c ( ) l l s          t : - 1 ' f O S t t l ' c S .
Tnrnr-Pre  ss pr-lsh-pilr or  ptlsh  clorvtr o11 re-


                   www.orphancameras.com
View original page 17Page 18 · Read text
No.  1-A Autographic   Kodak-l5

            lease  C.   This  makes  the  erposure.
             Norr:    Press push-pin  with  a  firm,  quick  move-
          ment.  at  the same time  be sure  to  hold  the Kodak
             rigid,  as a  slight  jarring   will  cause a  blurred  nega-
            tive.
                     TIME  EXPOSURES.
        Frnst-Set  the lever A  at the point T  (time).
             I'his adjusts the shutter for time exposures.
       SBcoNn-Set the lever B at Nd. #  8, 16, 32, 64
           or 128.  If  the Kodak  is eqttipqq,dwith  the
                   f , 7.7 Anastigmat lens, set the lbv6r at f . 7.7,
          71, 16, 22, 32 or 45. See instructi-6nsfor the -
]         use of  the stops for  Interior  Eiposures  rs
           grveniven  inrn tabletable onon pagepage 35,J5, alsoalso t{Stable   for
          Time Exposures  in the Open Ai
       Tnrnp-Press  the push-pin.  Tki
          shwtter. Time  the exDosure t
         Again press the push-pin.  This  cloies  tlt,e
            sh,wtter.  Shutter may. be opened. by'{5essing'
           release C and closed by a second preFsure  if
           desired.
                 BULB EXPOSURES.
        When    it  is desirable  to make  a very  short
         time  exposure  this   is  best  accomplished  by
        making  a "bulb  exposure."                                                                ('B"         Frnsr-Set    the  lever  A   at  the  point
            (bulb).   This  adjusts the shutter for  "bulb"
           exposures.
        SBcoNn-Set  the lever B  controlling  the stops
             at No. 4,8,  t6, 32, 64 or  728.   If  the Kodak
               is equipped with  the   f . 7.7 Anastigmat  lens,
            s e t  t h e   l e v e r a t   f . 7 . 7 ,  1 1 , 1 6 , 2 2 , 3 2 o r  4 5 .
         See instructions   for  the use  of  the  stops
             for  Interior  Exposures  as given  in  table on
          page 35, also the  table  for  Time  Exposures
              in the Operr Air,  page 37.
View original page 18Page 19 · Read text
I6--Iiastman     I{oclak  Companl,
 f-urnn-Press   push-pin  to  opelr the  shutter,
    :rrcl release  it  to  close the  shutter.   Th,ii
   tttnhcs thc erposurc.  The  shutter  lvill  re-
   nrain open as long as the push-pin  is uncler
   prcssrlre.
 Irrponr.rxr-Do   not oil  ort1,por.t of  tttc sltttttcr.
    Irr case of  accidert  retufir  shutter  to  \ror1r
 clcaler or  to  r1s, for  repairs.  ,i\F_    g.ri"ril-r"l."re rulc,  nrake  exposrlres  rvlth  the  chbt."
 irsteacl of  rvith thc  rele:rse c, as tfb.i.".rri"  i.-
 lease is less likel1' to  j:rr the  ."r.r"r".f.
              SECTION  2.        d
  INSTANTANEOUS  EXPOSURDS.            ,.sI{APSHOTS"                                                         i;                                       'l-o
                                    t;rkX iigstarr-
                            llrrreotrspic't\rres
                              the  subject &nust
                          be  in  the  broad,
                        open sunlight, but
                              the czrlnera shorrld
                                               r r o t .   J ' h e   s u t l
                                shor-rlcl be  behincl
                                                        f he  b:rck  or  o\rer
                            the  shoulder   of
                             [he operator.
                          I_F'OCUS ON
          ITIG.  I.           THE SUBJECT.
    C)lrening the   f ront.
                            Press  the  con-
ce:rlcd ltutton  :rs shown  in  trig.  1 and push
clown the bccl of czLltter:rto the limit  of motion.
On  the   cirlltt:r:L becl  rvill  be  forrnd  alr  irrdex


                      www.orphancameras.com
View original page 19Page 20 · Read text
d"


                        trrc. 2.
                 Extending   the  Bellorvs.
plate rvith slots marked  for 6, B. 10, 15, 25 and
100 feet.  This  is for  focttsing the camera.
  Norn:    The  inclex  plate   is scaled  both   for  feet and
for  meters  and  care  shoulcl  be  taken   not  to  confound
them.
  Grasp the bottorn of front board, pressing ir1
the spring plungers on each side and pull out
front  to  the  point  trearest the estimated  dis-
tance of  prittcipul ob ie ct  to be photographecl
View original page 20Page 21 · Read text
l8-Eastman   Kodak  Company

in  feet, where   it  locks  automatically.    Fig.  2.
  Except when working  at distances of 15 feet
or  less, it  is not necessary to estimate the dis-
tance  with  any  more  than  approximate   ac-
curacy;  for  instance,  if  the focus  is set at 25
feet  (the  usual  distance  for  ordinary   street
work),  the sharpest part  of the  birct.ur" will be
the objects  at  that  distance from   tlld camera,
but  everything  from  15 to 35  feet  ,&t    f"    itt
good focus.  For general street work,ihe  focus
may be kept  at 25  feet, but where  theil:S;inciltat
objcct   is  nearer  or  farther  awayt tho  focus
should  be  changed  accordingly.   E$eryhing
beyond 100 feet is in the 100-feet focus.  Noth-
ing nearer than 6 feet can be focused uf,thout
using a portrait  attachment.  See page 36.
2-How   to use the No. 1-A Autographic Kodak
  )         as a fixed focus camera.
  Ssr  rocus  er 25 r'Bnr.
  UsB spero 25.
  SBr nrapHRAGM MrDwAy BETwEEN 8 ern  16,
on /. 11 eNr  16.
  By   following   the  above  suggestions  this
camera  can be used as a  fixed  focus  instru-
ment  with  the  additional  advantage  of  being
instantly   convertible   to  a  focusing  camera
when conditions  call for  it.    It must be remem-
bered, however, that when using this Kodak  as
a fixed focus type,  it  is necessary that the sub-


                     www.orphancameras.com
View original page 21Page 22 · Read text
No.  1-A Autographic  Kodak-19
ject be in brilliant sunlight,'i.n order to obtain
a fully timed exposure.
           EXPLANATION.
  A  lens is often spoken of  eii{cneously as
having a fixed focus.                       {
  There is no such thing as a fixe{"{ocus lens,
but in certain cameras,3fuxa/a'and  smaller
(equipped with short focus lenses) tlQ lens is
                                                                     -immovable, i.  e., set at a distancq that  is a
                                                         '''farcompromise, as to  its focus, between    and
near points. A camera with a lens so focused
used in combination with  a. relativelv small
stop, is designated a fixed focus lnstruf,ieirt.
       3-USE STOP No. 8 or F. 11.   **     '
  For  all ordinary outdoor work, when the
sun is bright, use stop No. 8 or  f . 11 and use
speed 25.   If a smaller stop is used for ordi-
nary snapshots,the light will be so much re-
duced that  it  will  not  sufficiently impress the
imag,eon the film and failure  will  result.
  In views on the water, when the sunlight is
unusually strong, and  there are no  heavy
shadows, diaphragm No; 16 and speed 50 may
be used.
   If  a smaller stop opening than No. 16 is
used for  snapshots, absolute foilure  zuill re-
sult, except that No. 32 or  f . 22 may be used
for extremely distant views, marine or snow
scenesor clouds, in bright sunshine, at speed
25.
View original page 22Related documents and language editions
From the M. Butkus archive. Original publisher and archive notices are retained.
Check the model and edition against your equipment.
PDF verified 2026-10-10.