Lenses & filters
Kodak No. 1A Autographic User manual
User manual for Kodak No. 1A Autographic. 68 pages in English. Read the original PDF, download or print a copy without registration.
68 pagesEnglish8.4 MB PDF
Loading your manual…Open PDF directly
Document details
- Brand
- Kodak
- Model / document
- Kodak No. 1A Autographic
- Document type
- User manual
- Language
- English
- Pages
- 68
- File size
- 8.4 MB
- Category
- Lenses & filters
- Document date
- Not specified in catalog
Search available document text
Find a term, then jump to its page in the original PDF. Image-only pages may not be searchable; check the PDF for exact wording and diagrams.
Page 2 · Read text
.?.           {;
t7


           " Kodak "
            TRADE MARK
                         1888'
                        t                                          l
       EASTMAN KODAK COMPANY,
                   Rocnnsrrn, N. Y.
                      .t'
                Manulacturers of
     Kodak C&meras,          Brownie Cameras,
     Kodak tr'ilm,            Kodak Film Tanks,
      Velox Paper,                Solio Paper,
            Kodak Dry l\{ounting Tissue,
            Eastman Royal Bromide Paper,
          Eastman Standard Bromide Peper,
           Eastman Velvet Bromide Paper,
        Eastman Brilliant Yelvet Bromide Paper,
        Eastman Matte-Enamel Bromide Paper,
          Eastman Enameled Bromide Paper,
             Eastman Tested Chemieals,
              Tripods and Other Specialties.

              Trad,e Marks Reg. U. S. Pat. Ot.

                                   February, 1921.
View original page 2Page 5 · Read text
www.butkus.us
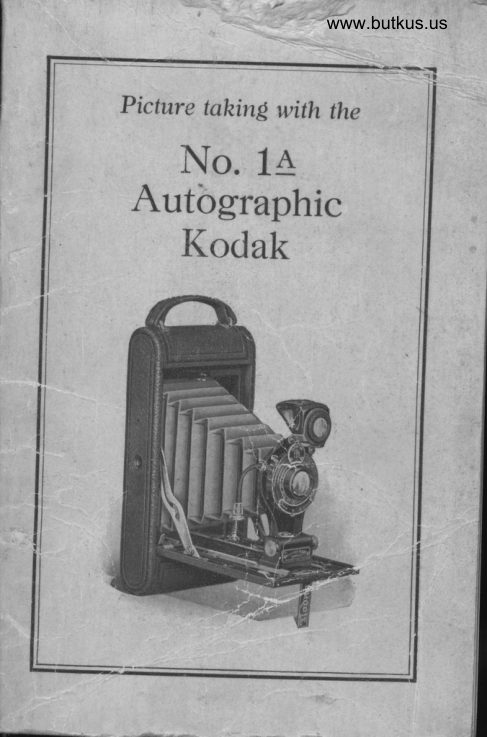
  Picture lahirzg zuitlz the
    No. 1A
   Autographic
    Kodak
   Rapro Recrrr,tr.rEAR oR
    .f.l.Z Axesrrcuer LnNs


                                 i


              Published by
EASTMAN KODAK COMPANY
       Rocunsrxn, Naw yonr


                                                          L'
View original page 5Page 6 · Read text
Order Film
        by Number
  All Kodak Films may be distin-
guished by the numbers on the ends of
the cartons:
  A-116 is the number of film for this
camera, (No. 1A Autographic Kodak).
  The number appears on the carton, on
the cartridge, and on the Autographic
door, which is located on back of Kodak.
  Autographic film can be used in old
style Kodaks, old style film can be used
in Autographic Kodaks, but to get' auto-
graphic results Autographic film must be
used in an Autographic Kodak.
        IMPORTANT
  When Autographing film, bear down with
the stylus as heavily as the paper will stand
without tearin$.
View original page 6Page 7 · Read text
www.butkus.us
i     The even number pages were
.
      printed crooked.

           Before Loading
   REPCRE taking any pictures with the No.        lA Autographic Kodak read the following       :
      instructions carefully. Make yourself perfectly
      familiar with the camera, taking especial eare to
      learn how to operate the shuttlr. Work it for
     both time and instantaneous exposures several
     times before threading up the film.
      The first and most important thing for the
     amateur to bear in mind is that the light which
     serves to impress the photographic imageupon
     the sensitive film in a small lraciion of a second
    when it comes through the lens, ean destroy the
      fiLn al quickly as it makes the picture. Through_
    out all the operations of loading and unloadiig,
     be extremely careful to keep the red paper wouncl
     tightly around the film to prevent tire admission
      of light.
      EASTMAN r{oDAr{Rcon4;fr\]";.
                                             ".
View original page 7Page 9 · Read text
www.butkus.us


          PART  I
              Loading the Kodak
       TIIE   fi.lm for the No. tA          r  Autographic Kodak is
        furnished in  light-proof car-
         tridges and the camera can,
          therefore, be loaded in daylight.
        This should be done, however,
        in a subdued light, rwt in the
        glare of bright sunlight. It
         should also be borne in mind that     The tr'ilm
           after the seal is broken care must        a-116.
            be_ takea to keep the red paper taut on the spool,
         otherwise it may slip and loosen sufficienti, to
          fog the film.
              l.  To load the Kodak, take a position where
         the daylight is somewhat subdued, and grasping
        the camera with the left hand press in with the
                 of the right hand on the concealed button        .thumb
         located on the back near the red window and
        bhen pull the lower section of back downwards,
         as indicated in Fig. l, page 6.
        Turn Kodak over. pull out the winding key
        19         shown in Fig. 2, page 6. Remove the front of
      Kodak by first lifting up that end opposite the


<
View original page 9Page 10 · Read text
6  Picture taking with the


winding key, then draw out and remove entirely
that part of the Kodak. Fig. 3.
  2, The Kodak having been opened an empty
spool having a slit in it will be found in the
View original page 10
Page 11 · Read text
www.butkus.us

                     No. 1A Autographic Kodak ?
 winding end of the camera. This forms the reel
 on which the film is wound after exposure. The
 full spool is to be placed in the ,"".r* at the
 opposite end of the Kodak. To accomplish this
 pull out spool pins as shown in Fig. 4, page g.
  3. Place the film cartridge into this recess, as
shown in Fig. b, page g.
       careful to get the top of the spool at the top -Be
of the canxera. The top is the *irrairrg side of
the camera. Each cartridge is marked with the
word "Top" on the red paper near the top ofthe spool.


                    www.butkus.us


                   FIG. 3.
View original page 11Page 12 · Read text
I  Picture taklng with the


                    FIG. 4.
  Notp: If the cartridse is inserted wrong end up, tl","d ouo"" instead of ttte- film will be brought next to tbtiens,-i&ultine, of course, in the absolute loss of the picturer
  4. Push spool pins into place making sure
 that the pins are in the holes at each end of th''


                     FIG. 5
View original page 12Page 14 · Read text
l0  Picture taking with the


   'Ihe paper should now be in position indicated
 in Fig.8.
  7. Replace the front part of Kodak into the
back, being careful to insert the end opposite
the full spool first,
and into the end
of back on which
the carrying strap
                             FIG. 8. is fastened. Then                        Showing position of paper.push the lower
 section of the back upwards, fully into place,
 until the catch is heard to snap into position.
  Throughout the foregolng operatlon, from the time
 the g,urnmed slip is cut on the fresh roll of fikn un-
View original page 14Page 15 · Read text
www.butkus.us

                     No. lA Autographlc Kodak  II
  til the        front           and                back                             are- once                         more in place, the         paper     red               wound-ttChtit;;-iil"'i"il.                                                                  ts                                                    If keepit allowed         to looserr-                      tigrrt-w'i                           r"                               and                                                  the film       fo€,ged.                              "ailrtld
  8. The roll of film in the camera is covered with      red         paper             and                       this                    must                           be                                 parily                                           reeled                                                       off                                 ^ b_efore          picture      a               can                 be                           taken.                                Tu"r,                                     the key
 slowly to the left and watch the littleied window
 in the back of the camera. When 15 to lg turns
 have been given, a hand pointing toward the
 first number will appear, then turi slowly until
 the figure 1 is exactly in the center of the redwindow.
  The film is now in position for taking the firstpicture.
   Press in the winding kgy slightly when turning
it, so as to make sure that the web on the key
stays within the slotted disc which fits into thetop of spool.
                         i)
                                             1,,]
                                     [:]
View original page 15Page 16 · Read text
t2  plctufe faktng wtth the

       PART  II
       Making the Exposures
     EIF general instructions in this No. lA
       Autographic Kodak manual apply equally                ,
   well to the camera, whether fitted with the Rapid
   Rectilinear or the f .7.7 Anastigmat Lens.
    Before making an exposure with the No. LA
  Autographic Kodak, either time or instantaneous,
   be sure of four things:
  First-That the shutter is adjusted properly.           i
     (For instantaneous, time or t'bulb" exposure.)
  Second-That the diaphragm lever is placed at
    the proper stop opening.
  Third-That the camera is focused.
  Fourth-That an unexposed section of the film
       is turned into position.
    Norr:  Exposures are made by pressing push-pin at
   ond of cable release D or pushing down on release C.
     The shutter is self-setting.
     Avoid making too sharp a bend in the cable release as
   by doing so it will be liable to kink.
           Operating the Shutter
'    Perfeet familiarity with the shutter is essential        l
  to suceessful picture taking with any. camera.
  The following directions should, therefore, be


         t-
View original page 16Page 18 · Read text
14 Picture taking with the


                               www.butkus.us


This illustration shows the shutter on the Kodak
          when it is equipped with the /.7.7
                  Anastigmat Lens.
Second-Set the lever B at No. 8 or/.11. Lever
 B controls the fris diaphragm and No. 8 or
  /.11 is the proper opening for ordinary instan-
  taneous exposures in bright sunlight, using
  speed 25.
  Nors: For instantaneous exposures when the sunlight
 s unusually strong and there are no heavy shadows, sueh
as in views on the seashore or on the water, use diaphragm
No. 16 and speed 50.
  With li,ght clouds or slighta srnoky atmosphere use No. 4
or f.7.7 and speed 25. With heaay clouds do not attempt
in stantaneou s erpo &Lr e s.
View original page 18Page 19 · Read text
www.butkus.us

                            No. lA Auto€,raphtc Kodak ls
        Third-Press push-pin at end of cable release D or
            press down on releaseC . This makes the erposure.
             N,o'rs:                    Press                        push-pin                                 with                                             quick                            a firm,                                                  movement.              a_!.              same                     rrme                         be sure-                                 to h_old                                         the Kodak             lne                                                                   rigid, as a                                                            ---.                  jarring             slight                             cause                              will                               a blurred
                                            ""gaiive.
                Time Exposures
       First-Set the lever A at the point ,,T,, (time).
          This adjusts the shutter fof time exposures.
       Second-Set the lever B controlling the stops at
         No. 4, 8, 16, 82, 64 or l2g. If the Kodak is
          gCuinnedwiththef  .7.7 Anastigmat  lens, set the            lever at f .7.7, Il, LG,22, 82 or 45. See instruc_
            tions for the use of-t-he stops for Interior Expos_
            ures as given in table on page 86, also the table
            for Time Exposures in the Open Air, page Bg.
      Third-Press the push-pin. This opens the
           shutter. Time theexposu_re by a watch. Again
          press the push-pin. This closes the shitter.
          Shutter T?y be opened by pressing release C
         and closed by a second pressure if desired.
                  Bulb Exposures
       When it is desirable to make a very short time
        exposure this is best aecomplished by making a
        "bulb exposure."
       First-Set the lever A at ttre point ,,B,, (bulb).
          This adjusts the shutter for i,bulb,, exposures.
I      Second-Set the lever B cbntrolling the stops at
        No. 4, 8, 16, 82, 64 or l2g. If [he Kodak is
          pguinned with the/.7.7 Anastigmat  lens, set the            lever at f.7.7, ll, 16, 22, 82 or4S. See instruc_
           tions for the use of the stops for fnterior Exnos_
View original page 19Page 20 · Read text
16 Picture taklng with the
   ures as given in table on page 36, also the table
   for Time Exposures in the Open Air, page 38.
Third-Press push-pin or release C to open the
   shutter, and release it to close the shutter. This
  mahes the erposure. The shutter will remain
  open as long as the push-pin or release C is under
   pressure.-            Important
  Do not oil any part of the shutter.
  In case of accident return shutter to your
dealer or to us, for repairs. As a general rule,
make exposures with the cable release instead of
with the release C, as the cable release is less
likely to jar the camera.
     lnstantaneous Exposures

                      When making or-
                         dinary instantan-
                      eous or snapshot
                               pictures the subject
                  must be in the
                        broad, open sun-
                                  light, but the cam-
                              era should not. The
                 sun should be
                         behind the back or
                            over the shoulder of
                       the operator.  If it
                            shines directly into
                           the lens it will blur         FIG. T.     Opening the frout        and fog the picture.
View original page 20Page 22 · Read text
l8  Plcture taking wlth the
  Grasp the bottom of front board, pressing in
the spring plungers on each side and pull out
front to the point nearest the estimated distance
in feet, of. princi,pal object to be photographed,
where it locks automatically.  Fig. 2, page 17.
  Except when working at distances of 15 feet
or less, it is not necessary to estimate the distance
with any more than approximate accuracy; for
instance, if the focus is set at 25 fieet (the usual
distance for ordinary street work), the sharpest
part of the picture will be the objects at that
distance from the c&mera, but everything from
about 16 to 50 feet will be in good focus. For
general street work, the focus may be kept at
25 f.eet, but where the principal object is nearer or
farther away, the focus should be changed
accordingly. Everything beyond 100 feet is in
the 100-feet focus. Nothing nearer than 6 feet
can be focused without using a Kodak Portrait
Attachment, see page 37, or use a small stop
opening, see table on page 19.

      What Depth of Focus Means
  Suppose now that the lens is used at its full
opening, U. S. 4 or !.7.7, and the focus is set at
six feet. An object six feet distant will be
absolutely sharp, but objects five and seven feet
distant will not be. Stop the lens down to No.
16, and those objects each side of the exact point
of focus will increase in sharpness. Go further
and use stop U. S. 128 or f .45, and everything
View original page 22Page 24 · Read text
20 Plcture taklnp with the
 from about four feet to about fourteen feet will
 be sharp.
   It will thus be seen that the smaller the stop
 the greater the depth of focus, i. e., the greatei-ut the power of the lens to sharply define,     th"
same time, objects nearer the camera and further
from the camera than the principal object in
lhu pi_cture, which, of course, i  the objectfocused upon. But it is obvious that with ihe
small stops the exposure must be correspondingly
 lengthened.
  The ta-ble on pa,ge 1g will be a help in deter-
mining the. range of critical definition or depth
of focus with the No. lA Autographic Kodak
(when fitted with the Rapid Rectilinear or f .7.7Anastigmat Lens) when it  is focused witb
different stops.
How to Use the No. lA Autographic Kodak
          as a fixed focus camera
  Snr rocus ,q,r 25 ruur.
  Usn spnnn 25.
  Snr nr.tprrnAcr\r AT No. 8 on/. 11.
 By following the above suggestions this
camera can be used as a fixed focus instrument
with the additional advantage, of being instantly
convertible to a focusing camera when conditions
call for it.  ft must be remembered, however, that
when using- this Kodak as a fixed focus typg it is
necessary that the subject be in brilliant iunlight.
in order to obtain a fully timed exposure.
View original page 24Page 26 · Read text
22 Picture taklng with the


that No. 32 or !.22 nLay be used for extremely
distant views, marine or snow scenes or clouds, in
bright sunshine, using speed 25.
            Locate the Image
  Aim the camera at the object to be photo-
graphed and locate the image in the finder. For
a vertical exposure the Kodak must be held as
shown in Fig. 3. For a horizontal picture hold
View original page 26Page 27 · Read text
www.butkus.us

                     No. lA Autographlc Kodak 2g
  the camera a,s shown in Fig. 4, turning the finder  as indicated.
  . Always look into the finder from directly over   it, not at an angle.
   The finder gjves the scope of view and shows
  a tacsrmrle of the picture as it will appear, but on
  a reduced scale. Any object that does not shou.
  in the finder will not show in the picture.
     It will be noticed that the top of the.finder is
  notched as shown in Fig. 5. This is done so that
 one finder will correcily show the view included
 when the Kodak is heid in either horizontal or
  v_ertical position. As the picture taken with the
 No.,.JA, Autographic Kodak is oblorrg it  will
 readily be seen that unless the finder was made
 in this manner it could not correctly show the
 exact view intended when the Kodaf is held in either position.
  Remember that only the view indicated in the
 dotted lines will showin the picture.


Viewineluded            when                 making    View                                        included_wllen                                          making   a norrzontal                 picture.                                 a                                          vertical pieture.                       FIG.  o.-
View original page 27Page 28 · Read text
I
       24 Plcture tjktn! wlth the


                                                                            -4

            IMPORTANT
       When making instantaneous exposures,
       hold the Kodak firmly against the body as
View original page 28Page 29 · Read text
www.butkus.us

                             No. lA Autographtc Kodak 25


4

 I     :lo*rr_in illustrations, and when operating      jh" cable release o" pr"..irrg the exposure  i
        lever, hold the breatlifor the instant. I
  I
 l
View original page 29Related documents and language editions
From the M. Butkus archive. Original publisher and archive notices are retained.
Check the model and edition against your equipment.
PDF verified 2026-10-10.