Lenses & filters
Kodak Pocket No 1 and 1A User manual
User manual for Kodak Pocket No 1 and 1A. 68 pages in English. Read the original PDF, download or print a copy without registration.
68 pagesEnglish6.8 MB PDF
Loading your manual…Open PDF directly
Document details
- Brand
- Kodak
- Model / document
- Kodak Pocket No 1 and 1A
- Document type
- User manual
- Language
- English
- Pages
- 68
- File size
- 6.8 MB
- Category
- Lenses & filters
- Document date
- Not specified in catalog
Search available document text
Find a term, then jump to its page in the original PDF. Image-only pages may not be searchable; check the PDF for exact wording and diagrams.
Page 1 · Read text
www.butkus.us
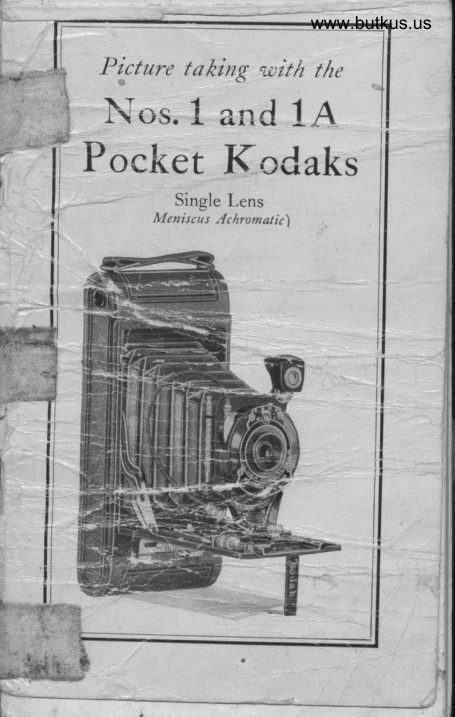
  P'icture tafring  ,-rtitlt the
 Nos. 1 and 1A
Pocket Kcdaks
            Single Lens
          Meniscus ,tchromatic)
View original page 1Page 2 · Read text
.fHADE IIARK
                     1888

EASTMAN KODAK COMPANY
       RocnBsrnn, N. Y.
                                                                         .\
             Jlfanufacturers of                                     /
  Koner< Bnowxra  : - Ari+ ._
  Hewx-EyB  Cg-lar;F.A s --. - CrN6-Kooihs KrcolscopBs
   l(onex Frrnr Vprox Solro
  ErrsrueN BnournE Papnns
  Koper  Frr,lr Tawrs
   Elsruex Tpsrpo Cnplrrcer,s
    Koo,lx Dnv MouurrNc Trssuo
    Tnrpoos AND Orrlpn Pnoro-
         GRaPHIC NI,TTNNTET,S

        Trode lllarks tteg. U. S. Pot. Of  .
View original page 2Page 3 · Read text
:i     ,,KODAKERY" www.butkus.us
   i, A monthly magazine that teaches haw
   i,to make better pictures, will be sent
     i FREE OF CHARGE tp anyone who buys
      i one of our amateur cameras from a dealer
  iin photographic goods, if this btank is
   t.filled out and sent to us within 30 days
' ifrom the date the camera ruas bought.
   i      BASTMAN KoDAK coMpANy.
      i To rur Ee,sruex Koner CoMpANy,
   '             RocHESTER. Nnw yonr.
E i  Accepting your ofrer, please put my flome on
 ftl the mailing  list toT "KODAKERY,' (with the un-                       I
 Ft: derstanding that there is to be no cost to tne),
 tui I haping bought a
 v:
 fr"
 Iri I                (Kind of Camera)t                                                                                                                                                                                                              il      i f"o-.
   :               (Name of Dealer)

     Print your name anti sddress plainly:


      j,....
    ii  Norn-KODAKERY  will be_sent for one year only    i o:r this offer. After that the subsciiptio., rlriie witt Ut     i    sixty         cents                     one.y.ear                for                             or one                                        dollar'for                                        two                                          Veaiibui   you are    i           under               no                      obligation                                 to                                renevr.-E.                                             Co.   '                                        K.
      i FomNo.363-2?.S
View original page 3Page 4 · Read text
Picture tahing with the                                                                         I'
 Nos. 1 and 1,{
Pocket Kodaks

             Single Lens
          (Meniscus Achromatic)


                 Publdshed, bu
EASTMAN KODAK COMPANY
       Rocnosrnn. N. Y.
View original page 4Page 5 · Read text
Venmo @mike-butkus-camera  Ph. 2083
PayPal Name  Lynn@butkus.org      www.PayPal.me/lynnbutkus
View original page 5
Page 6 · Read text
www.butkus.us
   Order Film by Number
         All Kodak Films are distinguished
    by the numbers on the ends of the
      cartons. The number is also on the
      cartridge, and on the back of the
      camera.
     A 120 is the number of the film for
      the No. 1 Pocket Kodak.
     A 116 is the number of the film for
      the No. 1A Pocket Kodak.
           . Autographic Film can be used in the
       earlier models of Kodaks.'Autographicand "N. C."     film can be used in                                                                                                                                                                                                    i
      Kodaks.
        Autographic results can only be ob-
      tained by using Autographic Film in
     an Autographic Kodak.
            IMPORTAI,{T
     When autographing film, bear                    I
                                                          A-    down with the stylus as heavily
    ast"oring'the paper will stand without
      .....                                                                  fl
                  \2
il.\
View original page 6Page 7 · Read text
Before Loading
   The Nos. 1 and 1A pocket Kodaks
 are alike except that the No. iA makes
 ? larger prcture. Throughout this DooK whatever is written applies to eltler camera except i"-tnJlatter
 of film, picture sizei a.rd some acces_
 sones.
   Before taking any pictures with
     Kodak, read the'following in- If_-ii, structtons carefully. Make youlrself
 familiar with the camera, takiig espe-
 cial care to learn how to op.ru'tu tt, shutter (see page tl). W;;k it for rnstantaneous,-time and,,bulb,, expo-
 lgres several times before loading [heKodak with film.
  _ The first thing to remember is thatthe light, whiclii."p..r*^;il^il4;
upon the sensitive hlm in a iractionoJ a     _second when it comes ilro"gnthe     .lens, .can debrroy ;ir; ni*  aE
,qulckly as rt makes the picture. While
loadrng and unloading, be very careful
to keep the red papei *o,r.rd tigfiifv
arqgld the film lo^prevent th;jishlstriking it.
                                                                                                 i;
View original page 7Page 9 · Read text
Loading the Kodak
                      pocket   'f  HE.No:. t.uqd 1A   I  can be loaded or unloaded Kodaksin day_
  light.-.This should be a;;; i;'a sun-
  dued_light, not in direcf .rr"fieiri. IJse  film No. A tzo ro. the rriol^?'port.t


 Kodak. and
 film  No.
A 116 for
 the No. 1A
Pocket
,"iT\r'e#J


                     www.butkus.usf,";il",trf,  F:::
View original page 9Page 10 · Read text
www.butkus.us Picture taking with the
 the edges and lift the end on which
 the lock is fastened, then draw out
 and remove that part of the camera
 entirely, as in Fig. 2, page b.
   In the winding end of the camera is
an empty spool, this is the reel. The
 roll of film is to be placed in the oppo-
site end.
  2. Draw out the windine kev as far
 as it_will come, and removelhe empry
 spool, Fig. 3.


  3. Remove the band that holds the
end of the red paper, unfold the end
and thread the paper as far as it witlgo, into the longer opening of the slit
in the empty spool. Each spool has
                        6
View original page 10Page 11 · Read text
Nos. 1 and 1A Pocket Kodaks
     one end slotted and the red paper
     must be inserted in the empty ipbol
      with the spools in positioo so that the
         slotteiJ ends are on opposite ed,ges of the
.l      red paper. Give the empty sp-ool three
     or four turns, enough to bind the
      paper on the reel. Be careful that the
      paper draws straight, and that it does
     not loosen up on the full spool, see
       Fig. 4.


      4.  Unroll about four inches of the
     red paper and place the two spools
      into the film poikets at each uod of
      the camera. Fig. b, page 8.
      Important: The empty spool or
       reel must be placed in the winding key
     end of the camera with its stotted eid
                                7
View original page 11Page 12 · Read text
www.butkus.us
Picture taking with the


towards the winding keA. The word((TOP"        printed on the red paper must
be next to the winding key.


  Push the full spool into the other
pocket as far as it will go, so that the
tension spring grips it.

                           8
View original page 12Page 13 · Read text
Nos. 1 and lA Pocket Kodaks
  5. Press in and turn the winding
 key until it fits into the slot in th6
 empty spool or reel, Fig. 6, page 8.
  Caution. ff too much of the red
 paper is reeled off before the Kodak is
 closed, some of the film will be un-
 covered, fogged and ruined.
  6. After the Kodak is loaded re-
 place the front, first inserting the end
opposite the lock; the edge oT the box
must fit into the groove on this end
of the front. Press the end on which
the lock is fastened into place and
puFh-over the lock, makingsure thatit is fastened securely.
  From the time the band on the roll
of film is broken until the camera is
ctoge{, keep the red paper wound
           the roll. If it should loosen,llg.ttUy o_nlight will be admitted and the film
ruined.
  7. Turn the key and watch the red
window. After ten or twelve turns. a
warting hand will appear, then turn
slowly until the figure t is in the center
of the window, as shown in the illus-
tration on page 10.
                9_
View original page 13Page 14 · Read text
www.butkus.us
Picture fa,king with the
  Press in the winding key while turn-
ing it, to keep the key in the slot in the
end of the
spool.g@
  The film is now in position for the
first exposure. After each exposure be
sure to wind the film, bringing the
next number into position. This pre-
vents making two pictures on the
same section of film.
View original page 14
Page 15 · Read text
Nos. I and 1A Pocket Kodakc
f
     Making the Exposures
  DEFORE an exposure is made, four
    I-D things must bb done:
     First-The shutter must be ad-
     lgrt-qd--for an instantaneous, time or
     "bulbtt exposure
     Second   The diaphragm lever    placed at ttre-  proper stop op"ening.
     Third-The Kodak focused.
     Fourth-An unexposed section of     film turned into position.
      Ixposures are made by pressing the
    push-pin of the cable release D or
    pressing tbe exposure lever C. See dia-
   gram of shutter on page 12.
     Do not make too sharp a bend in the
    cable release, or it may-kink.
        Operating the Shutter
     Familiarity with the shutter is
    necessary for successful p_icture-taking
    with any camera. The followine direcl
    tions should be carefully read a-nd the
   shutter o_perated serre.al times Lefore
   loadrng the Kodak with film.
View original page 15Page 16 · Read text
www.butkus.us


                                                                                                                                         Digitally signed by Mike Butkus
                                                                                                       DN: cn=Mike Butkus, o=Butkus
                                                                                                      camera manuals, ou=butkus.org,                        Mike Butkus email=mike@butkus.org, c=US
                                                                                                                        Date: 2023.10.31 16:45:04 -04'00'

       B-                                    \.{,
    Instantaneous Expos8i'es",              t'Snapshots"
  Firsl-Move the lever A to 25 or
50 (representing the speeds of the
shutter), according to the time of
instantaneous exposure desired. This
adjusts the shutter for Instantaneous
Exposures.
  Second-Move the lever B to No. 1.
Lever B controls the iris diaphragm
and No. 1 is the proper opening for
ordinary outdoor work, such as street
gcenes, nearby views, etc., when the
subject is in bright sunlight, using
                          I2
View original page 16Page 17 · Read text
Nos. 1 and 1A Pocket Kodaks
 speed_.25. See instructions for using
 the diaphragm or stop openings on
 pages 22,23 and24.
   Third-Press the push-pin of the
 cable release D or press the exposure
 lever C. This matces the erposuit. Be
 sure to hold the camera steadv. as a
 slight jar will blur the negati'le.
       Time Exposures
  Firsf-Move the lever A to  the
 p-oint "T" (time). This adjusts-      the
shutter for Time Exposures.
  Second-Move the lever B to Nos.
 l-, 2, 3 or 4, depending on the time of
the exposure and the nature of the
sybjggt.  See instructions for using         -the diaphragm or stop openings givei
on pages 22,23 and 24, also the table
for making Interior Time Exposures
on pages 39 and 40, and the table for
Time Exposures Outdoors, page 45.
  Third-Press the push-pin of the
cable release D or press the exposure
lever C. This opens-the shutter.- Time
the exposure by a watch. Again press
the push-pin or the exposure lever.
This closes the shutter.
View original page 17Page 18 · Read text
www.butkus.us
Picture taking with the

   For time exposures of ten seconds or
less, "Bulb" Exposures are recom-
mended.
         ttBulbtt               Exposures
  Firsf-Move the lever A to rhe  {point "B" (bulb). This adjusts the             Ishutter for "Bulb" Exposures.
  Second-Move the lever B to Nos.
1,2,3 or 4. See instructions for using
the diaphragm or stop openings given
on pages 22, 23 and 24, also the table
for making Interior Time Exposures
on pages 39 and 40, and the table for
Time Exposures Outdoors, page 45.
  Third-Press the push-pin of the
cable release D or press the exposure
lever C, to open the shutter, and re-
lease it to close the shutter. This
maltes the erposure. The shutter will
remain open as long as the push-pin or
the exposure lever is under pressure.
  Neuer make a Time or a "Bulb"
Erposure with the Kodalt held in the
hands.
  As a general rule, make exposures
with the cable release instead of with
the exposure lever C, as the cable
release is less likely to jar the camera.
View original page 18Page 19 · Read text
Nos. 1 and 1A Pocket Kodaks
  Important-Do not oil any part of
 the shutter.
  In case of accident, return the
Kodak to your dealer or to us for
reparrs.
  Instantaneous Exposures
          t'Snapshots"
  When making ordinary instanta-
neous exposures or snapshots, the sub-
ject should be in the broad, open sun-
light, but the camera must not. The
sun should be behind your back or
over the shoulder. If it shines directlv
into the lens it will blur and fog th"e
picture.
   Special instructions for making por-
traits are given on pages 4L to 44.
  Use Stop No. 1 and Speed 25
for all ordinary outdoor work, such as
nearby landscapes showing little or no
sky, groups and street scenes, when
the subject is in the bright sunlight.
If a smaller stop opening is used for
ordinary snapshots, the light will be
so much reduced that it will not make
a satisfactory picture.
View original page 19Page 20 · Read text
www.butkus.us
Picture taking with the
  For moving objects, the subject
must be in the bright sunlight, use

                                                                                                                                                                                                                                                                                                                                                                                                                                                                             Istop No. l and speed 50. When photo-
graphing moving objects such as a
runner, train or automobile, the sub-
ject should be traveling towards or
away from the camera at an angle of
about 45 degrees.
                                                                                                                                       I{  For views at the seashore and on the
water, when the sunlight on the sub-                                       j
ject is unwsually strong and there are
no heavy shadows, stop No. 2 and
speed 50 should be used.
  For ordinary landscapes, in bright
sunlight with clear sky overhead, use
stop No. 2 and speed 25.
   If a smaller stop opening than No. 2
is used for snapshots, failure w'ill result,
except that No. 3 and speed 25 should
be used for extremely distant views,
marines, snow scenes and clouds only,
in bright sunlight.
     To Focus the Kodak
  Press the spring lock with the
thumb, to open the front of the Kodak,
Fig. 1, page 17, then push down the
bed of the camera.

                          16
View original page 20Page 21 · Read text
Nos. I and 1A Pocket Kodaks


               Fig. 1. Opening the Front.
  On the bed of the camera is a, scale
marked 6, 8, 10, 15, 25 and 100 feet.
This is for focusing the camera.
  Draw out the lens standard bv the
knob on the slide plate, as far" as itwill conle, where it will lock auto-
matically, Fig. 2, page 18. The Kodak
is now in focus for anything 100 feet
or beyond.
  To adjust the focus for subjects at
distances nearer than 100 feet, turn
the knurled screw by pushing ii with
your thumb, until the indicator over
the focusing scale is exactly at the line
marked with the figure corresponding
                          t7
View original page 21Related documents and language editions

From the M. Butkus archive. Original publisher and archive notices are retained.
Check the model and edition against your equipment.
PDF verified 2026-10-10.