Film cameras
Kodak Pocket No. 1 and 1A User manual
User manual for Kodak Pocket No. 1 and 1A. 40 pages in English. Read the original PDF, download or print a copy without registration.
40 pagesEnglish3.4 MB PDF

Loading your manual…Open PDF directly
Document details
- Brand
- Kodak
- Model / document
- Kodak Pocket No. 1 and 1A
- Document type
- User manual
- Language
- English
- Pages
- 40
- File size
- 3.4 MB
- Category
- Film cameras
- Document date
- Not specified in catalog
Search available document text
Find a term, then jump to its page in the original PDF. Image-only pages may not be searchable; check the PDF for exact wording and diagrams.
Page 2 · Read text
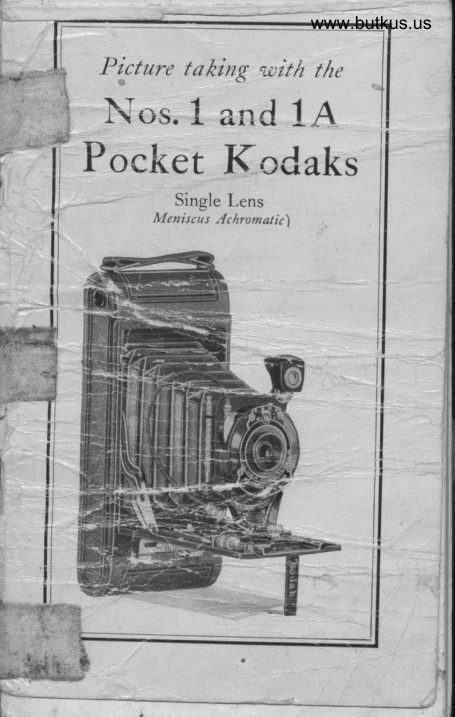
Picture tahing with the
 Nos. 1 and 1,{
Pocket Kodaks
       Kodak Anastigmat      '
           Lens f .6.3
View original page 2Page 3 · Read text
..KODAKERY''                      I                                                           ..   The Kodak  Anastigmat  Lens                                                    Amonthly   magazine  that teaches how
          on this Kodak                                to make   better  pictures,    will  be  sent
                                         FREE OF CHARGD  to anyone who buys
is as fine an anastigmat lens as scientifie          oneolour  amateur  canterasfrom  a d.ealer
research and modern machinery  have              in photographic   goods,   iI  this  blank   is
been able to produce.                                            filled  out and sent to us within   thirty  days
                                                 Jrom  the d.ate the camera was bought.
I   It  is made up  of two  kinds of Jena
  glass, barium crown and flint-each   of             EASTMAN KODAK COMPANY.
  the highest quality obtainable.                                                To rup EesrueN  Koo^r,r Coltr.rNY,
2  It was designed for use in  this par-                           Rocuosrnn, NEw Yonr:
   ticular Kodak by  experts  in  optical                Acceptlng   your  ofier, please put  tny tutme  on the
  mathematics.                                                      malllng     llst foT "KODAKERY"      (wlth   the  under
                                                                           standlng,  that  therc  ls to be no cost tome),1hailng
3  It was fashioned by skilled lens-makers            bought  a
  on machines that  grind and polish to
   within 1-50,000of an inch of perfection.                           (Name  of Camera)
4  It  has passed rigid examinations and
                                                                                     iN;;;   ;i b;;J;i""   optical  tests  required  to  meet the
  Kodak standard of quality.
5  It was carefully fitted and mounted in
   its shutter by experts so that   it  will                   Print  your  name  and address  plainly:
  function at its best.
  By using your Kodak according to the
instructions in this manual, you will make
consistently fine pictures.
                                                            *;;;;;;"d;         ;;ii;;;;;";    .i, -o",o.o" BASTMAN KODAff:                                           this  ofrer. A poet oard  will be enoloeed with  the  fifth
                                                                           copy,   if thir pogt oard is filled out and returned  to ue, it
                                                                                                      will  entitlo  you  to an  additional  dx  monthr,  free of                    """?Y.If\I'"              oharge.  After  that the eubaoription  prioe  will be airty
                                                                        oentg for one yoar or one dollar  for two yeara, but you
                                                                                   a,re under no obligation  to.renew-E.   K. Co.
                           www.orphancameras.comFom   No.  l6t-6.t-28.
View original page 3Page 5 · Read text
_f
 Order Film by Number            Before Loading
   All Kodak Films are distinguished         The Nos. 1 and 1A Pocket Kodaks
by the numbers on the ends of the         are alike exceptthat the No. 1A makes
eartons. The number is alsoon the car-         a larger picture. Throughout this book
tridge and on the back of the camera.         what-everis written applies to either
  A 120 is the number of the film for         camera except in the matter of film,                                              picture sizes,.diaphragm scales andthe No. I Pocket Kodak.                                  some accessorres.
  A 116 is the number of the film for                                               Before  taking  any ,pictures  withthe No. LA Pocket Kodak.                                              your  Kodak,  read the  following  in-
  Autographic Film ean be usedin the             itructions   carefully.  Make  yourself
earlier modelsof Kodaks, and "N.C."              familiar   with   the  camer&'  taking
film  can be used in  Autographic           especial care to learn how to operate
Kodaks.                                            th-e shutter  (see page  I2).  Work   it
                                                         for instantaneous, time and "bulb"  ex-  Autographic results can only be ob-                                             posures several times before loadingtained by using Autographic Film in
an Autographic Kodak.                         the Kodak with  film.
                                           The  first thing to remember is that
        IMPORTANT                       the light, which impresses the image
                                          upon the  sensitive film  in a fraction
  When autographing    film,  bear              oi a second when  it comes through
d.own with  the  stylus as heauily            the lens, can destroy the film as quickly
as the paper  will  stand  without            as it makes the picture. While loading
tearing.                                   and unloading,6e rrery careful to kegP
                                                 the red paperwound tightlyaround  the
                                                           film to prevent the light  striking   it.


                          www.orphancameras.com
View original page 5Page 7 · Read text
Pieture taking  with the                                                 Nos.  I and 1A Pocket l(odaks
   In the winding end of the camera           slottedendsare_gn oppositeedgeso! the
is an empty spool,this is the reel. The         T?d paper-. Give the empty spool
roll  of film  is to be placed in the           three or four turns, enoughio  6ina
oppositeend.                                 the paper on the reel. Be  careful
                                                              tlrat                                                   the paper draws straight, and                                                                                         .   2. Draw out the winding key as far                                                  that it doesnot loosen up on the fullas it will come,and removethe empty                                             spool,seeFig. 4.spool,Fig. 3.


                                                    4. Unroll about four inches of the
                                             p_apgland place the two spools                            Fig. 3                          Iud                                                   into the film pocketsat eachend oi the
   3. Remove the band that holds the          camera,Fig. 5, page8.
end of the red paper, unfold the end                                               Important:   The empty spool orand thread the paper as far as it will                                                 reel must be placed in the windingiJo, into the longer opening of the  slit                                         key end of the camerawith its sZotteitin the empty spool.  Each spool has
one end  slotted, and  the  red paper         end towards the winding keA. The
must be inserted in the empty  spool         word "TOP" printed on the red paper
with the spools in position so that the         must be towards the winding key.
                                                                              7
                          www.orphancameras.com
View original page 7Page 8 · Read text
Picture taking with the                                               Nos.  I and 1A Pocket Kodaks

                                                  Caution:     If  too much  of the red
                                            paper is reeled off before the Kodak
                                                              is closed, some of the film  will be un-
                                             covered, fogged and ruined.
                                                        6. After the Kodak is loaded, replace
                                                 the front,  first inserting the end oppo-
                                                       site the lock; the edge of the box must
                                                                                  fit into the groove on this end of the
                                                        front. Press the end on which the lock
                                                             is fastened into place and push over
  Push the full spool into the other          the lock, making sure that   it  is fast-
pocket as far as it will go, so that the        ened securely.
tension spring grips it.                                         From the time the band on the roll
                                                      of film  is broken until  the camera is
                                               closed, keep the  red paper wound
                                                        tightly on the roll. If  it should loosen,
                                                           light  will be admitted  and the  film
                                                 ruined.


                                                                     l ' g  6    L
  5. Press in and turn the winding            7. Turn the key and watch the red
key until  it  fits into the slot in the        window. After six or seven turns, a
empty spool or reel, Fig. 6.                 warning hand will appear, then turn
View original page 8Page 9 · Read text
Picture taking rvith the                                                                       Nos. I and 1A Pocket Kodaks
        slowly until the figure 1 is in the center          Making the Exposure         of the window, as shown in the illus-
                                    pEFORE  an exposureis made,four         tration on page 9.
                                                     I-D things must be done:         Press in the winding key while turn-
         ing it, to keep the key in the slot in the             First-The   shutter must be ad-
       cnd of the spool.                              justed for an instantaneous,time or
                                                     "bulb" exposure         The film  is now in position for the
           first exposure. After each exposure be          Second-The diaphragm lever
        sure to wind  the  film,  bringing  the         .placedat the correctstop opening.
        next number into position.  This pre-                                           T hird-The  Kodak focused.        vents making  two  pictures on  the
      same section of film.                          Fourth-An  unexposedsection of
                                                           film turned into position.
                                              Exposuresare made by pressingthe
                                                  push-pin of the cable release D  or
                                                 pressingthe exposurelever C, shown
                                                             in diagramof shutter on page13.
                                        Do not make too sharpa bendin the
                                                 cable release,or it may kink.

                                                  Opening the Fronti$u
                                                 Press the  spring lock  with  the
                                              thumb, to openthe front of the Kodak,
                                                        Fig. 1, page t2, then push down the
                                           bed of the camera. Draw out the lens
                                               standard by the knob on the slide
                                                        plate, Fig. 2, page19.
                            10
                               www.orphancameras.com
View original page 9Page 10 · Read text
Piettrre taking lvith the                                                 Nos. 1 ancl 1A Pocket Koclaks


                        ig. 1 .  O;tr:rLirL11tlLe F'rortt.

      Operating  the Shutter                                  B
  F amiliarity with the shutter is neces-           Second-Move   the lever B to f .ll.
sary for successfulpicture-takirg  r,vith          Lever B controls the  iris diaphragm
any camera. Read the followi.g direc-         and  f .lI   is the proper opening for
tions carefully and operate the shutter           ordinary  outdoor  pictures, such as
severaltimes before loading the Kodak             street scenes,nearby views, ete., when
with filrn.                                       the subject is in bright sunlight, using
                                         speed 25. See instructions for using
                                                the diaphragm or stop openings on    Instantaneous  Exposures                                                                                     '                    pages 25, 26 and 27.                         " Snapshots'
                                                 Third-Press   the push-pin of the
  First-Move   the lever A to 25 or 50           cable release D or press the exposure
(representing speeds of the shutter),            lever C.  This malt,esthe erposure. Be
accordingto the time of Instantaneous          sure to hold the camera steady, &s a
fhposure required.                                  slight jar will causea blurred negative.
                            I2                                                                                                                                                                                                                                   l 3
View original page 10Page 11 · Read text
Picture taking with the                                          Nos. 1 and 1A Pocket Kodaks
        Time Exposures                  Second-Move   the lever B to/.6.3,
  Fl'rsf-Move   the lever A  to the           8, 11, 16,22 or 32 (or f .45 with the No.
letter "T"  (time). This adjusts the        1A Pocket Kodak).  See instructions
shutter for Time Exposures.                      for using the diaphr?_gq or stop_open-                                                ings given on pages25,26 and 27, also
  Second-Move the lever B to/.6.3,          the table for making Interior Time Ex-
8, 11, L6,22or 32 (or f .45with the No.         posures on pages 44,45 and 46 and the
1A Pocket Kodak), dependingon the           table  for Time Exposures Outdoors,
time of the exposureand the nature of         page 50.
the subject. Seeinstructionsfor using
the diaphragm or stop openingsgiven            Third-Press    the push-pin  of the
on pages25, 26 and 27, also the table          cable release D or press the exposure
for making Interior Time Exposures,         lever C, to open the shutter, and re-
on pages44,45and 46 and the table for          lease  it  to  close the  shutter.  This
Time ExposuresOutdoors,page50.           malcesthe enposure. The shutter  will                                           remain open as long as the push-pin
  Third-Press  the push-pin of the           or the exposure lever is under pres-
cable releaseD or press the exposure          sure.
lever C. This opensthe shutter. Time
the exposureby a watch. Again press          Time and "BuIb"  Erposures must
the push-pin or the exposurelever.         neaer be made with the Kodak held i,n
This closesthe shutter.                         the hands.
  For time exposuresof ten seconds         As a general rule, make exposures
or less,"Bulb" Exposuresare recom-          with the cable release instead of with
mended.                                      the exposure lever C, as the cable re-
         t'Bulb"                               lease is less likely to jar the camera.              Exposures
  Fdrsf-Move   the lever A  to the             Important:    I{eaer oil the shutter.
letter "B"  (bulb). This adjusts the              In caseof accident, return the Kodak
shutter for "Bulb" Exposures.                   to your dealer or to us for repairs.

                          www.orphancameras.com
View original page 11Page 12 · Read text
Picture taking with the                                         Nos. 1 and 1A Pocket Kodaks
  Instantaneous Exposures          When making  portraits  outdoors,
                      t tSnapshotst'                       with the sun shining brightly,  the sub-
                                                    ject shouldbeintheshadowofabuilding
  When making ordinary instantane-          or a large tree, but with  clear and un-
ous exposures or snapshots, the sub-         obstructed  sky  overhead-use   stop
ject should be in the broad, open          /.6.3 and speed 25. By following this
sunlight,  but  the camera must  not.          rule unpleasant and distorting shadows
The sun should be behind your back        on the face will be avoided.
or over the shoulder.  If  it shines di-
rectly into the lens it will blur and fog         K o d a k  S e l f  T i m e r :
the picture.                               There  are many  occasions
                                w h e n   t h e p h o t o g r a p h e r  Special instructions for making por-                                         would like to be included intraits indoors are given on page 46.                                                the picture. This can easily
                                         be done by using a Kodak   Use Stop  f  .ll  and Speed 25                                                   Self Timer, an accessory that
for all ordinary outdoor pictures, such        can be used with any camera
as nearby landscapes showing little  or           fitted with a cable release.        I{odalc
no sky, groups and street scenes,when                                                                             Sell   Timer.                                                                                     , Attached  to the cable re-the subject is in the bright  sunlight.                                               lease, the Kodak Self Timer can be soIf a smaller stop opening is used for or-                                             adjusted that   it  will "press the but-dinary snapshots, the light  will be so                                                 ton" from half a second to one minutemuch reduced that  it  will not make a                                                    after it has been released. The Kodaksatisfactory picture.                                                 Self Timer is intended for making auto-
  . On cloudy days; during rain in the         matic exposuresonly, that is, exposures
middle of the day; and early or late on       made with  a single pressure on the
clear days (one hour after sunrise or         push-pin of the cable release. Time or
one hour before sunset), use stop/.6.3         "Bulb"  Exposures cannot be made
and speed 25.                                  with  it.
                      16                                                                  t7
View original page 12Page 13 · Read text
Picture taking  with  the                                              Nos. 1 and 1A Pocket Kodaks

  For  moving  objects, the  subject         camera. The scale is also marked for
must be in the bright  sunlight, use         meters and care should be taken not to
stop f .6.3 and speed50. When photo-         confuse the figures.
graphing a moving object sueh as a
runner, train or an automobile, the sub-
ject should be travelirg  towards or
away from the camera at an angle of
about 45 degrees.
   tr'or views at the seashoreand on the
water, when the sunlight on the sub-
ject is unuslrally strong and there are
no heavy shadows,stop f .16 and speed
50 should be used.
   I'or ordinary landscapes,in bright
sunlight with clear sky overhe&d, use                                                ',",.".
stop f .L6 and speed25.                                             +
  Stop f .22 and speed 25 should be
used  for  extremely  distant  views,
rnarines,snow scenesand clouds only,
in bright sunlight.                                           Drawing otrT,7 i,*s  stanctu,rct.
    If a smaller stop opening than f .22          Draw out the lens standard by the
is used for snapshots, fa,ilure uitt  re-        knob on the slide plate, as far os it witt
sult.                                         ?.me,_whe_reit will lock automatically,
                                                  Fig. 2. The Kodak is now in focus for
      To Focus the Kodak                   anythirg 100 feet or beyond.
  On the bed of the camera is a focus-
irg scale marked 6, 8, 10, lb, 2E and          clistances nearer than 100 feet, turn
100 feet.  This  is  for  focusing the          the knurled screw by pushing il with
                        1 8                                                                                                                                       l!l
                         www.orphancameras.com
View original page 13Page 14 · Read text
Picture taking with the                                         Nos. 1 and 1A Pocket Kodaks
the thumb until the indicator over the          What  Depth  of Focus Means
focusing scale is exactly  at the  line
marked with the figure corresponding                    If  the lens is used with  the largest
nearest to  the  distance  in  feet, be-         stop opening, "f.6.3, and the focus is
tween the camera and the principal            at six feet; an object six feet distant
objectto be photographed.                           -will be sharp, but objects five and one-
                                                 quarter feet and seven feet distant will  The distance between the subject
                                               pot b9 sharp. IJse a smaller stop open-and Kodak can be estimated without
                                                    iog,,f.16, and objects each side of themeasuring, when the subject rs beEond                                             exact point  of focus will increase infi,fteenfeet; for instance,  if the focus is                                           sharpness and the area within  whichset at 25 feet (the usual distance for                                                                all objects will be sharp is increased.ordinary  street scenes) the sharpest
                                  Go farther and use ths smallest stoppart of the picture will be the objects
                                             opening, /.32 on the No.  1 Pockelat that distance from the camera, but
                                         Kodak, or f .45 on the No. lA Pocketeverything about 17 to about 50 feet                                           Kodak,  and  everything  from  aboutwill be in good focus.
                                                  four feet to about fourteen feet will be  For ordinary street pictures the fo-                                             sharp.cus may be kept at 25 feet, but where
the princi,pal objecf is nearer or farther                     It  will thus be seen that the smaller
away, the focus should be changed         the stop opening the greater the depth
accordingly.                                       of focus_,that is, the greater the power
  For  distant views set the focus at           of the lens to define sharply,  at the
100 feet. Everything beyond 100 feet       same time, objects nearer the camera
is  in  the  1O0-foot focus.  Nothing         and farther from the camera than the
nearer than  six feet can be focused          principal object in the picture, which,
without  using a Kodak  Portrait  At-           of course, is tle  object focused upon.-stop
tachment, see pages 48 and 49, or a                It  is obvious that  witfr the small
small stop opening, see the tables on         openings the exposure must be corre-
page 22.                                     spondingly increased.
                    20
View original page 14Page 17 · Read text
Picture takiag with the                                         Nos. I and 1A Pocket Kodaks
subject and ca,merais ten feet or less,          J.32 (and 1.45 on No. 1A Pocket
the  distance  must  be  accurately         Kodak)-For    Time Exposures Out-
measured as the  depth  of focus  is         doors on cloudy days, the exposuresfor
limited, see table on page 22.                 which are given in the table on page
                                               50. For Interior Time Exposures, see  /.8-For    instantaneous exposures                                         pages 44, 45 and 46. Neuer for instan-on slightly cloudy  or hazy days, use
                                          taneouserposures.speed 25. For scenes on narrow and
slightly shaded streets, use speed 25.          The smaller the stop the greater the
  /.1l-For     all ordinary outdoor pic-        depth of focus, seepages2L,22 and23.
tures, such as nearby landscapesshow-         F ai,lurewill result, if stopsf .32 or f .4b
ing little or no sky, groups and street         are used f.or instantaneous efrposures.
scenes, when the subject is in bright                                             Throgghout   this manual  all expo-sunlight, use speed 25.                                            sures given for outdoor subjects are
  /.16-For  open views, when the sun-           for the hours between two and a half
light  on  the  subject  is  unusuallE         hours after sunrise and two and a half
strong and there are no heavy shadows,        hours before sunset.  If earlier or later
such as views at the seashore and on         the exposures must be longer.  With
the water, use speed 50; for ordinary          stop /.6.3 satisfactory results can be
landscapes, in  bright  sunlight,  with          obtained  early or late on clear days
clear sky overhead, use speed 25; also         (one hour after sunrise or one hour be-
for Interior Time Exposures, the time          fore sunset), using speed 25. For sub-
for which is given in the table on page          jects in the shadow, under porches or
45.                                       under trees, no definite directions can
  f.22-For   instantaneous .exposures       be given; experience only can teach
of extremely  distant landsc_apes,ma-         the correcf exposure.
rines, snow scenesand clouds only, in
bright sunlight, use speed 25; also for
Time Exposures.

                          www.orphancameras.com
View original page 17Page 18 · Read text
.
           Picture taking with the                                        Nos. 1 and 1A Pocket Kodaks

      How to Use the No.  I or the No. lA                        l    points. A camera with a lens so fo-
            Pocket Kodak  as a Fixed                                       I    cused, and used with a relatively small
                Focus Camera                                                                  ' l  ,l    stop opening, is called a fixed focus
                                                camera.         SBr rnp Focus n  2E FnBr.                          iI
          Snr rup Dr.e,pnnecu er  f.ll.                       -        Using  the Finder        UsB SpBBo 25,                                                                  II     The finder shows what  will appear
                                                                 in the picture, but on a much reduced         By  following  the above directions                                                     scaIe.        your Kodak  can be used as a fixed                                                        Point the lens at the subject to be        focus camera,  with  the  additional                                                photographed and  looking  into  the        advantage of being instantly  converti-                                                          finder from directly over the center of         ble to a focusing camera when condi-                                                                                           it, include what you want and compose         tions call forit.  It must be remembered,                                                      the picture by turning  to the right or       however, that when using the Kodak                                                                          left, see illustration on page 32.       as a fixed focus type, subjects that are                                                                                            It  will be noticed that the top of the         n-earpy,-must be in bright  sunlight,  to                                                          finder  is notched, as shown below.        obtain fully exposed negatives.-
              range of sharpness when your       __lhq
       Kodak  is adjusted as a fixed fbcus
       camera will be found in the table on
       page 22.
           Erplanation:    A  lens  is  often
       spoken of as a  "fixed  focus"  lens.               Yiew included. when       View Included, when,ftfr#
       There is no such thing as a fixed focus                 Makin,g o Verticol        Making  o Horizontal
        lens, but in certain cameras, 3rZ x 4Y+                        Picture.        Fig. 3         Picture.
       and smaller (equipped with lenses of         This enables the one finder to serve
        short focal length), the lens can be set       when the Kodak  is held in either the
         at a distance that is a compromise, as          vertical or the horizontal position.
         to  its  focus, between far and near            Orly what is seen in that part of the
                                                                                                  .
View original page 18Page 21 · Read text
Picture taking  with  the                                              Nos. 1 and 1A Pocket Kodaks
     If the subject is below the normal          takes can be avoided. It is obvious that
 height, like a small child or a dog, the           the best way to make these records is
 I(odak should be held down level with           auto graphi cally-o n thef,lm, at thet,ime. the center of the subject.
                                  Ae                                    t*    Autographic Feature
                                                                                            f f * t  The autographic feature makes  it
 possibleto recordon Autographic F ilm,            frv
 at the time of exposure,any data, such                                                         Ni                              sk&t as the name of placeor subj ect,the date
 or any other memo.  This  is done                          f Fdtf  ed,a**&*peea.fi.C,C.   J.tt tg6on
through a small opening in the back of                                                       W"#{";4  S &o,, #"Y.-f.l*  -?{s6*.Vr"vrlthe l(odak and the record normally
comes just outside the picture area of                                     Autographic  A
the negative.                                        The Aut-ographic Records above,
                                            suggest                                                     few of the many ways in                                                _a  The Autographic  Record as a            which they may be used to add value
             Guide                             to your negatives.
  Many amateurs have improved the
quality of their rvork by making notes,                  The Method
at the time of the exposure,of the pre-              After the exposure has been made,
vailing conditions, as: Bright  light,         remove the stylus from the side of the
speed 25, stop f .1 1, rvhich is easily ab-           shutter. Push back the sliding-door on
breviatedto : B ,25,1 1. By keepingsuch          the back of the Kodak with ine point
records the causesof failure, if &try, are            of the stylus in the hole in the center
quickly found. A comparison of neg-           of the door, Fig. 8, page 30. Hold the
atives and records rvill soon show how           stylus_as upright as possible, Fig. g,
the failures occurred and future mis-         page 36, and write on the strip of, red

                           www.orphancameras.com
View original page 21Page 23 · Read text
Picture taking  with  the                                                 Nos. 1 and 1A Pocket Kodaks
  To  bring the autographic records           The  film  is now ready to send to
 exactly between the  negatives, the           your finisher, and when developed will
 film must be turned  carefully  until          be easily identified by the autographic
the next number is centeredin the red          copy of your name which you wrote
window.                                  on the red paper.
                                         Kodak  Sky  Filter:  This accessory
                                                               is  for  obtainirg  more  detail  in  th;
                                              clouds  when  photographing  land-
                                             scapes. The upper half of the filter is
                                                stained a yellow color which relieves
                                                                          tlrr brightriess of the sky uttd equalizes
                                                the exposure, the colorless lower half
                                                permits  a normal  exposure for  the
                                               foreground. The same exposureshould
                                          be made with  the Kodak Sky  Filter
                                                          in position as would be requirea witn-
                                        Irie. 10                      out it.                           W'intling tlLeFilm.
                                                   IJse Kodalc Ska F.ilter No.6 with the
   ImXtortant.'  When you have ex-          Nos. 1 and 1A Pocket Kodaks, fitted
posed the last section of film and made           with the Kodak Anastigmat Lens/.O.3.
the autographic record of it, turn the
winding key until the letter A ,ppears           Kodak  Color  Filter:  This attach-
in the center of the window.  Open         ment is especially valuable in outdoor
the sliding-door and write your name          photography, and for all subjects con-
on the red paper, exposeit to the light            taining colors that  act slowly on the
as when making the exposure record.,            sensitive film.   ft  is helpful in clearing
then close the door and finish winding          haze when photographing extremelt
the  film and red paper for removal            distant landscapesI also for re c o rdi ng
from the Kodak.                                the correct color ualuesin a black and

                           www.orphancameras.com
View original page 23Page 24 · Read text
Picture taking  with the                                                 Nos. 1 and 1A Pocket Kodaks
 white print, of flowers, fruit and other           be more than two or three inches from
colored objects. When  using  the             the edge,to avoid including part of the
Kodak Color Filter make an exposure           support in the picture.  The Kodak
about seven times longer than would           has tripod sockets for use with a tri-
be required without  it.                      pod or an Optipod.
  LTseKodak Color F'ilter I{o. 6 with
the Nos. 1 and 1A Pocket Kodaks,
fitted  with  the Kodak  Anastigmat
L€rs /.6.3.
  Kodak  Pictorial  Diffusion  Disk:
When this attachment is slipped over
the camera lens it gives the pictures a
pleasing degree of softness without                            Diagram   showing  positions  for  Kodak.
loss of brilliancy.   It does not increase                                          The Kodak should be placed in suchthe exposure nor change the focus, it                                             a position that the finder will includemerely softens the lines of the picture.                                                 the view desired. The diagram aboveIt  is particularly  adapted for  land-                                        shows three positions for the Kodak.scape work.
                                                                                 It should not be pointed directly at a
   fise Kodak Pictorial Diffusion Disk           window, as the glare of light will blur
l/o. 6 with the Nos. 1 and 1A Pocket            the picture.  If all the windows cannot
Kodaks, fitted with the Kodak Anas-           be avoided, draw the shades of those
tigmat Lens /.6.3.                                  within range of the lens.
                                                For  a  vertical  picture  raise the
 Time  Exposures-fnteriors               name-plate on the bed and place the
  Place the Kodak on a table, chair,          Kodak on a table or chair as shown in
tripod, Optipod, or other firm support.             Fig. 11, page 42.
If a support other than a tripod or An            To make a horizontal picture with-
()ptipocl is usecl,the camera must not            out a tripod, turn the support on the
                      40                                                                 4 T
View original page 24Page 27 · Read text
Nos. 1 anrd 1A Pocket KodaksPicture taking with the
                                           background should form  a contrastditions of light, when using stop /.16.                                                   with the subjecl; a light backgroundIf stop /.11 is used, give one-half the                                                  usually gives a better  effect than atime;with  stop/.8 give one-fourth the                                               dark one.time; and with  stop /.6.3 give one-
sixth the time.   If  stop f .22 is used,          When making portraits, more pleas-
give twice the time;  with  stop /.32            ing results are obtained  if the back-
give four  times; and  if  stop /.45  is          ground and the surrounding objects
used, give eight times the exposures           are not quite so sharp and clear as the
given in the table.                                face. This effect is obtained by using
                                                 the largest stop opening,/.6.3. The dis-  The smaller the stop opening the                                              tance between the subject and the lensgreater the depth of focus or range of                                          must be carefully measured, seeDepthsharpness, see pages 21, 22 and 23.                                                        of Focus Tables on page 22.Stop /.16 gives the best average re-                                          To get a good light on the face, fol-sults for Interiors.
                                              low the arrangement shown in the dia-
                                                              gram. A reflector
    To Make a Portrait                                      helps to get detail
                                                                                   in the shaded part  The subject should be seated in a                                                                              of  the  face.  Achair partly  facing the light  with  the                                                w h i t e   t o w e l o rbody turned  slightly awa,y from, and                                                                 sheet held by anthe face turned towards the Kodak                                                               a s s r s t a n t    o rwhich should be a  little  higher than                                                                                                                              t h r o w n  o v e r  aan ordinary table. The subject should                                                                                  =ooz                                                                screen  or  otherlook at an object level with the lens or                       =                                                                     high piece of fur-directly at the lens. Compose the pic-                                                                           niture will make ature in the finder.  For a three-quarter                                                                        suitable reflector;figure the Kodak  should be about                                                                                                                             it should be at aneight feet from the subject, and for a                                                                 angle and in thefull-length  figure about ten feet. The

                            www.orphancameras.com
View original page 27Page 28 · Read text
Picture taki4g with'the                                           Nos. I and 1A Pocket Kodaks

position indicated in the diagram.               The subject must be at one of the
  "How  to Make Good Pictures," a           distances from  the Kodak,  given in
book containing many diagrams and           the table on page 48. Measure the
illustrations  showing various  lighting            distance carefully from the lens to the
effects, can be obtained from a Kodak            face, and place the focusing indicator
dealer.                                    on the scale according to the  table.
   Instructions   for  making  portraits          When making  portraits,  the most
outdoors are given on page 17.                   pleasing results are obtained with the
                                                  subject-four feet two inches from the
   Kodak  Portrait  Attachment         ,           lens and the focusing indicator set at
  The Kodak  Portrait Attachment  is          100 feet. The Attachment can also be
an extra  lens, which, when slipped          used for making pictures of flowers and
over the regular lens makes head and            similar subjects, the shorter distances
shoulder portraits.                                         will then be found more satisfactory.
  Place the Attachment over the lens           The exposure when using the At-
and compose the picture in the finder.          tachment is the same as without  it.
Turn the Kodak just alittle to the left,                                         Use  Kodak   Portrait   Attacltmentas the short distances at which the                                            No. 6 with the Nos. 1 and 1A Pocketsubject must be from the lens, make it                                             Kodaks, when fitted  with  the Kodaknecessaryto center the subject by eye                                            Anastigmat Lens /.6.3.instead of by the finder.
  Drsrencn Bprwnnw  Tnn Focusruo                Kodak  Diffusion   Portrait
  Sus.rocrervnLpns   fr.rorceronMUsr                        Attachment
      MUST BE            BE SET AT
    2 feet 6 inches          6 feet                 The Kodak  Diffusion  Portrait  At-
    2 u   g '               g u                  tachment is a supplementary lens used
    3 '                    1 0 , ,                        in  the same manner as the  regular          4                          1                           5                                            "    3         "                                        Kodak  Portrait Attachment.    It  pro-          8               2                           5                                            "    3      u
    4 u   2                           . 1 0 0 , ,                 duces a true, soft-focus effect free from
                       48                                                             49
View original page 28Page 29 · Read text
Picture taking with the                                          Nos. 1 and 1A Pocket Kodaks
 objectionable "fuzziness"  or  out-of-           These exposures are for hours from
 focus a,ppearance. By using this At-          two and a half hours after sunrise until
 tachment,  portraits  are made more          two and a half hours before sunset,
 artistic, due to the softening effect qf         and for  subjects in  the open.  For
 diffusion.                                       other  hours  or  for  subjects  in  the
  Use Kodalc Diffusion  Portrait  At-          shadow, under porches or under trees,
 tachmentNo.6 with the Nos. 1 and 1A           the lighting  conditions vary so greatly
 Pocket Kodaks, when fitted with the            that  no  definite  instructions  can be
 Kodak Anastigmat Lens f.O.B.                  given; experience only can teach the                                                  correct exposure to give.
 Time Exposures- Outdoors            Neuer make Time or "BuIb"  Erpo-
  Whenthe smallerstopopenings(f .82          sureswith the Kodak held,in the hands.
or f.45) are used, the light fiadsing         Place it upon son'teflm  support, suchthrough the lens is so much r^educed        as a tripod, Kodapod or table.
that time exposuresoutdoorsmay be           Kodapod:  An  ac-
madethe sameas for interiors,bui the          cessory that takes the
exposuresmust be much shorter.               place of a tripod when
                                            a                                                         tree,                                                    fence or simi-  FoT_ygry            short                 time                     exposures                              as                      I -                                                          lar                                                roughobjectisnear                           ,,Bulb,,                                                           Idescribed         below,              use                    the                             Ex-                                                       at hand.                                                                            Its                                                           toothedposure,seepage 14.                                                           grip                                                            the                                                   wood                                                                                                                                                                                 aI     jaws
  With Sunshine-The  shutter can            firmly,  see Fig.  14.
hardly be ope.n_edand closed quickly         By means of a clamp-
enoughto avoid over-exposure.                 ing screw, the Kodak       Fig'1+
  With Light Clouds-From  one to         may be adjusted to the vertical or hor-
three secondswill be sufficient.                    izontal position. The Kodapod can be                                          used with  any camera that  has  a,
  With Heavy Clouds-Four seconds         standard tripod socket. It is small and
to eight secondswill be required.            may be carried easily in the pocket.
                    50
                            www.orphancameras.com
View original page 29Page 30 · Read text
Picture taking  with the                                               Nos. 1 and 1A Pocket l(odaks

    Flash-light Exposures                  "Picture  Taking   at  Night,"   a                                                booklet that gives full information re-
  Eas{man Flash Sheetsmake picture-           garding flash-light photography, and
taking  at night easy. A package of            other ways to make pictures at night,
flash sheets, a piece of cardboard, a                 rvill be sent free upon request to the
pin, a split stick about two feet long           Service Department, Eastman Kodak
and a match complete the list of neces-         Comp&try, Rochester, N. Y.
sary extras, although a Kodak Flash
Sheet Holder  is a great convenience.              Closing the Kodak
  With  flash sheets there  is  little            To close the I(odak,  first see that
smoke. They are safer than other self-           the focus indicator is at the 100-foot
burning flash mediuffis, besidesgiving            rnark on the scale, then release the
a softer light that  is less trying to the
eyes.
  Flash sheets make possiblethe pho-
tographing  of many  interiors   t h a t
could not be taken otherwise, either
for  lack  of  illumination  or because
there are windows in a direct line of
view  which must  have  the shades
drawn to prevent the blurring of the
picture.
  Evening  parties, groups around a
dinner or card table or an individual                                  c I osirL 11,r,)'u*r',,tl, K octatt .
may be easily photographed by using            spring catch on the lower part of the
flash sheets, providing  souvenirs of            lens standard, from the slot on the bed
many occasions, which, but  for the             of the I(odak, and slide back the lens
flash-light, would be impossible.               standard as far as it will go.
View original page 30Related documents and language editions
From the M. Butkus archive. Original publisher and archive notices are retained.
Check the model and edition against your equipment.
PDF verified 2026-10-10.