Film cameras
Kodak single page B&W User manual
User manual for Kodak single page B&W. 33 pages in English. Read the original PDF, download or print a copy without registration.
33 pagesEnglish10.7 MB PDF
Loading your manual…Open PDF directly
Document details
- Brand
- Kodak
- Model / document
- Kodak single page B&W
- Document type
- User manual
- Language
- English
- Pages
- 33
- File size
- 10.7 MB
- Category
- Film cameras
- Document date
- Not specified in catalog
Search available document text
Find a term, then jump to its page in the original PDF. Image-only pages may not be searchable; check the PDF for exact wording and diagrams.
Page 3 · Read text
I:.1
                                                                                                                                                                                                                                                    I:tr
                                                                                                  I
                                                                                                  I
                                                                                           Il


             *importonl: The film odvqnce lever od-
            vonces the film qnd cocks the shuller;
                   it should nof be forced. lt locks when
            the counter is set of l, olso when lhe
                 film hos been odvonced but not exposed.

      NUMBERSERTAL                                                                             in                               j
front of        lhe occessory- forclip;positivekeep oidentificqtionrecor{, of this- isnumber.locotedThe
prefix "EK"  is used lo designcle those Reiino Comeros im-pqted by the Eostmon Kodok Compony. Be sure to fully de-       I
scri!e your comero, including the full seriol number with pre-
fix when corresponding qbout if. Be sure to sqve the Certiffcote
of lmport qnd Ownership included with your comerq.
View original page 3Page 4 · Read text
www.butkus.us

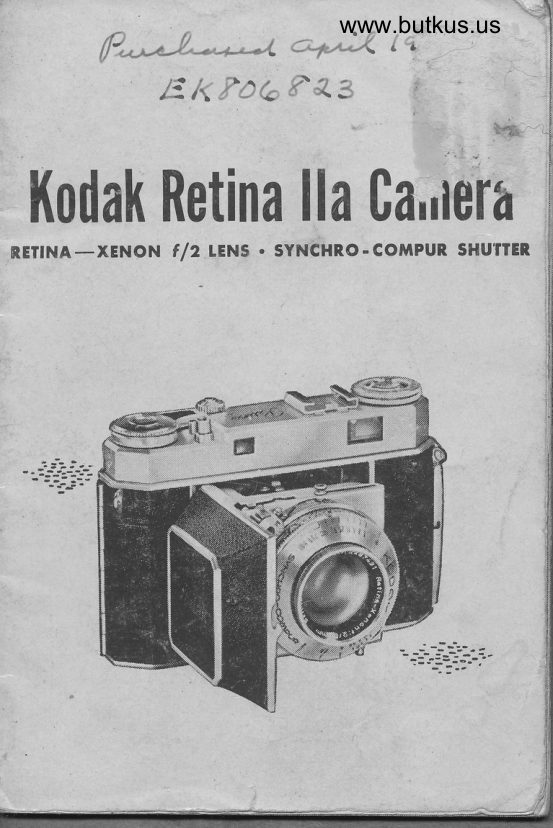
  l(odak Retina Ila Camera
    tqble of confenfs
 2     Introduction
 3    Opening and Closingthe Camera
 4   A B C's and Simplest Settings
 7     Shutter Speed
 7    Lens Opening
 8     Focusing
to     Films
12    Loading
l5    H olding the C amera- V i,ewing
t6    Takingthe Picture
t7    Unloading
TE     Flash
21    Time Exposures
22    Depth of Field
23      Pi,cture Taking Aids
28    Exposure Tables


T. M. REG. U. S. PAT. OFF.
View original page 4Page 6 · Read text
www.butkus.us


 To open the cqmero
 . . . press the OpENING
 BUTTON ond pull down
 lhe front until it locks.


To close the comero
 . . . this comero con-
nol be closed if it is
focused for onyihing
but infinity. Be sure
the focusing knob is
pushed clockwise, os
you foce the lens, os
for os it will go; then
squeeze lhe two CIOS-
ING BUTTONS while
closing the bed.
View original page 6
Page 8 · Read text
www.butkus.us


The tinted oppeoronce of the
lens is due lo o speciol cooling
which improves the brillionce of
blqck-ond-white pictures ond the
color purity of full-color pictures.
View original page 8
Page 9 · Read text
stcrndqrd settings
    Ior simple snqpshots
    For snapshots of average subjects in bright
     sunlight, use the following settings:

Wirh Kodochrome Film Daylighl Type:
                                           second).    Set "a" (shutter speed) on 50 0/50
    Set "b" (lens opening) betweenf/5.6 andf /8.
    Set "c" (focus) to bring the small circle, near
    the l0-foot mark, to the focusing index for
    subjects in the 7- to l5-foot range. For sub-
    jects 13 feet and beyond, bring the small
     circle, near the 25-foot mark, to the focusing
    index.
Wih Kodak Plus-X Film:
    Set "a" (shutter speed) on 50 (L/50 second).
    Set "b" (lens opening) on 11 (f/tt1.
    Set "c" (focus) to bring the small circle, near
    the lO-foot mark, to the focusing index for
    subjects in the 6- to 25-foot range. For sub-
    jects t0 feet and beyond, bring the small
     circle, near the 25-foot mark, to ttre focusing     +
     index.                                                                                                                                               I
    6i                                                                          .$

                                                                                                                                                                              I
View original page 9Page 10 · Read text
www.butkus.us

        q  shuffer speed
              Turn the knurled shutter
                 speed ring to bring the nno
              DoT opposite the required
                   shutter speed. The follow-
               ing speeds are provided:
               1, r/2, L/5, L/r}, L/25,
 l/50, UL00, I/250, and L/500 second. ..8,'
 exposures can also be made; see page 21.
  The shutter is cocked automaticallv when
 the film is advanced.
  Do not change the shutter setting from
 I/250 to l/500 or vice versa when thi shut-
 ter is cocked.
  A tripod or other firm support should be
used for speeds slower than 17ZS second.
   I,{ote: Never oil the shutter or camera
mechanism.
b  lens opening
Move the LENs opENrNG LEVER across the
scale, illustrated on page 8, to regulate the
amount of light reaching the film. tt is lever
click stgps at each opening. By pressing down
on it, the lever is easier to move.
                                  7
View original page 10Page 11 · Read text
Digitally signed by mike butkus
                                   DN: cn=mike butkus, o=orphancameras,
                                            email=mike@butkus.org,                                                         c=USmike butkus ou=29,Date: 2019.08.18                                                         17:01:52 -04'00'


    The opening is largest when the lever is
   set at 2 (ftZ1 and smallest when set at 16
    (f trc\. Each succeeding larger opening lets
  through twice the light of the one before;
   for example,  f /8 lets through twice the light
   of  f /t1, and  f /tt  lets through twice the light
  ot f/rc.
    The shutter speed and lens opening work
   together to give the right exposure. Expo-
  sure tables are on pages 28 and 29.
           c  focusing
                  The range finder of this
                  camera is coupled to
                 the lens. Moving the
                    FocusrNc KNoB until the
                    two images in the range
                      finder coincide focuses
                      the camera.
     Carefully look through the view-and-range
  ftnder opening and you will see that part
  8
View original page 11Page 12 · Read text
www.butkus.us

of the picture is clear and part is tinted.
When the camera is out of focus, the tinted
image is separate from the clear image, form-
ing a double image of the subject. Move the
focusing knob until the two images coincide
to become a single image. The range finder
can be used only on still subjects.
  To focus the camera without using the
range finder, estimate the d.istance by eYe;
then move the focusing knob to bring the
proper distance to the FocusrNc rNDEx. The
numbers on the FocusrNc scALE represent
the camera-to-subject distance in feet. When
using infrared film, use the red dot for'the
index instead of the regular index.
  The two small circles on the focusing scale
are for the two standard settings described
on page 6.
View original page 12
Page 14 · Read text
www.butkus.us

For high-quoliry
enlorgemenls
 . . . use Kodok Plus-X
Pqnchromqtic Film-fine
groin ond high resolv-
 ing power permil high-
quolity enlorgements.
An excellent film for
generol ouldoor ond
well-lighted inlerior
use. 20 or 36 exposures.

For-poor lighr
. . . use Kodok Super-
XX Ponchromqtic Film-
very high speed mokes
this qn ideol film to use
with ortificiol light. 20
or 36 exposures.

For fine-groin
copying
. . . use Kodok Micro-
File Film-on exlremely
fine-groin, slow, pon-
chromotic film for copy-
,"ng printed motter,
mops, documenis, etc.
36 exposures.

                                        11
View original page 14Page 15 · Read text
looding
Load the camera in subdued light, never in
bright light. Kodak 135 Film is contained in
a lighttight mag azine. Rewind the film into
 this magazine after the expo&fies haoe been
made and before the cunera back is opened.
Various Kodak 135 Films are described on
pages l0 and 11.


 | .  lift rhe lock ond oPen
lhe comero bqck.

2.  Turn the knurted edge
of the counter in the direc-
tion of the qrrow to bring the
diqmond'neor 36 to the in-
dex mork for o 36-exposure
mogozine. Bring ihe dio'
mond neor 20 to lhe index
mork for o  2O-exposure
mogozine. The counler will
move o mork every iime the
film is odvonced. It will ol-
woys show lhe number of ex-
t'osures REMA,N,NG on fhe
film.
L2
View original page 15
Page 16 · Read text
www.butkus.us

         3.  Dro* out lhe film ReWtND
        KNOB os for os it will go.
            Inserl the film mogozine  in
          lhe recess under lhe rewind
          knob. The end of the mog-
         ozine contoining the cross-
         piece goes loword the re-
        wind knob. Push in the re-
        wind knob ond turn it  to
        engoge lhe slot with the
           crosspiece in the mogozine.

                 !nsert the end of the filmffi      4.          leoder in the slof of the tqke-
         up reel. Do nol try to remove
          this reel  f rom the comero.
         Give the flonge of the reel
ffi     o iurn with the thumb until
        lhe film is wropped once
ffi       oround the reel.

        5. Continue to turn theffi          flonge of the reel with fhe
         lhumb, until the first or sec-
        ond perfor.otion on fhe edge
          of the film toword ihe fop of
        the comero is engoged by
       one of the sprocket .teeth.
       The teeth of the sprockels
ru      musf fil in ihe holes in the
View original page 16Page 17 · Read text
film. Close ond lock lhe com-
 erq bock.
 tCD. Press qnd releqse the
 film lever bulton (orrow in
  5); then operole the film lever.
 Do this 3 times. Be sure to
 moke o complete stroke with
 the lever; then let it fly bock
 to its originol position. After
 winding lhree limes the firsi
 frome of film is in plcce ond
 36 or 2O on the film counter
 is in position. AdvqncinE the
 film qlso cocks the shulter.
 7.  Rotot" the film-type indi-
 color with the boll of the
 thumb to bring the nome of
 lhe film opposite the index.


 Note: When the figure I on the film counter reoches
 lhe index, moke the lost exposure. The film lever is
 locked qnd the film should be rewound into the mogo-
zine (see pqge 171. ft the film lever locks ot ony time,
.do nof force it but check lhe counler to see if it is set
ot l. Move the co.unfer off I to releose the film winding
 mechonism.
 t4
View original page 17
Page 18 · Read text
www.butkus.us
     holding fhe cqmerq
      Hold the camera as shown below. Either
       position is comfortable and practical; you
       can hold the camera remarkably steady *iril"
      you squeeze the exposure button to take the
        picture.

     using rhe view finder
      Steady the carnera against your face. Focus
      the camera as described on page B. place
       the rear of the finder close         to the eye
      so that the entire front frame"rro',rgf,can be ,""rr.
     Compose the picture, moving the camera
      and your head together.                      l5


'lt
View original page 18Page 19 · Read text
foking rhe picture
               lens and | . Make the
shutter settings.
2. Cock the shutter and
advance the film" with
a single full stroke of
the film advance lever.
    Focus and compose the picture in the3.
finder.

                                 camera4. Make the exposure. Hold the
steridy; it's a good idea to hold your breath
while you s-q-rr-e-e-z-e the exposure button.
  *When          the exposure button is depressed, thg
film lever is releaied. It is necessary to press and
release the film lever button onlq when you wish
to advance film without having pressed the ex.
posure-      button (as in loading).   After the 20th or 36th exposure has been made,
and the counter is at 1, the fflm advance lever
will lock; rewind the film and unload the camera
(page L7). Do nnt open the back of the carnera
                       reusound into the filmintil the fiIm has been
rnagazi,ne, or the film will be fogged.


16
View original page 19Page 20 · Read text
www.butkus.us
 unloqding
 When the last exposure has been made, the
 counter will be at I and the film lever will
 Iock. Pull out the rewind knob halfway,
 pre_ss the newrND BUTToN as far as it wil gL,
 and turn the rewind knob in the directioriof
 the arrow. Continue turning the rewind knob
 until the rewind button ,iop, turning. The
 film (except for an inch or twi of leadei strip)
 is now back in the magazine. Now open tfre
back; pull out the rewind knob as fl, as it
will go; remove the mag azine.
   ft's a good idea to get your exposed film
processed promptly. The Kodacraft Minia_'
ture Roll-Film Tank makes it easy to devel_
op your own black-and-white film.
                                            17

                j
View original page 20Page 21 · Read text
flqsh pictures
         . . . are easy and lots of fun to make with this
     camera. trlashing of the lamp is controlled
    by the synchro feature of the shutter. Class
   F or M flash lamps can be used as well as
     speedlamps. The Kodak B-C or the Kodak
     Standard Flasholder and fresh batteries are
      all the extra equipment you need for flash
18  shots. If photoflaslt, batteries are not avail-
View original page 21Page 22 · Read text
www.butkus.us

       able, flashlight batteries can be used. The
 t      batteries should test at least 5 amperes.
    i       The flasholder is attached by sciewing the
    I
   I     thumbscrew on the standard bracket int6 the
I{+    Tpoa socket of _your camera. Be sure to slip
      the Kodak Single-Post Flasholder ADApr"i,
      supplied with your camera, on the FLASH
      posT before attempting to connect the flash_
      older cord to the flash post.
      Using Closs F Lomps*, such os S/Vl or SF
                                                                      ..X,,,       .    set the synchronizer sELECToR on
       set the shutter speed at any speed up to and
      including I/I00, cock the shutter with the
       film advance lever, and snap the picture.
      Using Closs M Lomps*, such qs No. 5 or No. 25
        . ._. set the synchronizer sELECToR on ..M,,,
            any_shutter speed up to and including         :".l^e9!
      I/250, cock the shutter, and snap the picture.
      Using Speedlomps
            . connect a Kodatron Speedlamp (o,
      similar equipment with no lag in til   trip
       circuit) to the fash post, using the adapter. fg
         iilrr"     the bottom of the lornp bose is cleon ond bright
       before inserring the lomp in the flosholder. If  the .onrl"i        poinf is larnished, rub il on o rough surfoce.
View original page 22Page 23 · Read text
Set the synchronizer selector on "X," select
a shutter speed, cock the shutter, and snap
the picture.
  The light will flash when the shutter
blades are open at all shutter speeds.
nole: Do noi use units floshed by meons of heovy-
duty reloys or solenoids. Such unils moy complelely
destroy fhe shuller contocls.

Supplem eni a ry Flosh-Ouldoors
. . . blue flash bulbs are used with Daylight
Typ" color films to reduce excessive contrast
with back- or side-lighted subjects in bright
sun. With selector on M use No. 58 or No.
25B flash lamps. A lamp-to-subject distance
of 8,5 feet gives good contrast. Use the basic
exposure for subjects in bright sunlight.
  Flash exposure data are given on page 28,
and on the refector of the Kodak Flasholders.
coufion: Since lomps moy shofler when floshed, the
use of o Kodok 2-woy Floshguord or other shield over
the reflector is recommended. Do nol flosh the lomps
in on explosive otmosphere.
  Do not inserl flosh lomps in the refleclor if the
shulter is open-the lomp will flosh ond o serious
burn moy resull.
20
View original page 23
Page 24 · Read text
www.butkus.us
     fime exposures
  Jc        .-. . enable you to take pictures at night out-
        l      doors or indoors of still subiects, using the


      I       existing light. Night pictures Lan add rr*ri"ty
"c,     to your picture collection.
      i      The           "B" setting_ enables you to keep the
       shutter open for as long as required. ph6e the
     camera on a tripod or other firm support.
     Both camera and subiect must be stitt a*hg
      the exposure.
       To make a"B" exposure, the focus and lens
     opening having been set, set the shutter on
                           "8," cock the shutter by
                        operating the film ad-
                     vance lever, press the
                         exposure button, hold it
                   down for the exposure
                      time required, and re-
                            lease the button to close
                        the shutter. The Kodak
                 TBI Metal Cable Re-
                       Iease No. 2, available
                        from your Kodak dealer,
                      can be used to hold the
                          shutter open for as Iong
                         as required.          2l
View original page 24Page 25 · Read text
depth of field
Objects some distance in front of and beyond
the subject focused on will be sharp. This
depth of field varies with the lens opening
used; the smaller the lens opening, the great-
er the range of sharpness.
  Your camera is equipped with a depth-of-
field scale so that you can read this range of
sharpness easily before you take each pic-
ture. The focusing scale combined with the
lens opening numbers engraved on the shut'
ter barrel each side of the focusing index
comprise the depth-of-field scale.
  The following example shows you how to
read this scale: Subject is 12 feet away, ex-
posure calls for a lens opening of  f /8.
   Set the focusing scale with 12 opposite the
focusing index. Look for the number 8 on
each side of the index. The one on the right
is"opposite 25 and the one on the left is near
8. Therefore, all objects between about 8
and 25 feet will be sharp.
22
View original page 25
Related documents and language editions
From the M. Butkus archive. Original publisher and archive notices are retained.
Check the model and edition against your equipment.
PDF verified 2026-10-10.